Seafile è una soluzione di condivisione file gratuita, open source e self-hosted per Linux. È un software di file hosting multipiattaforma che può essere utilizzato per archiviare file su un server centrale e sincronizzarli con il tuo personal computer o dispositivo mobile. Seafile è scritto con il framework Python Django ed è funzionalmente molto simile a Dropbox e Google Drive. Ha molte funzionalità tra cui crittografia dei file, controllo della versione, autenticazione a due fattori, modifica online, blocco dei file e molte altre.
In questo tutorial, ti mostreremo come installare Seafile con Nginx come proxy inverso su CentOS 8.
Prerequisiti
- Un nuovo CentOS 8 VPS sulla piattaforma Atlantic.Net Cloud
- Un nome di dominio valido puntato all'IP del tuo server
- Sul tuo server è configurata una password di root
Fase 1:crea un server cloud Atlantic.Net
Per prima cosa, accedi al tuo server Atlantic.Net Cloud. Crea un nuovo server, scegliendo CentOS 8 come sistema operativo con almeno 2 GB di RAM. Collegati al tuo Cloud Server tramite SSH e accedi utilizzando le credenziali evidenziate in alto nella pagina.
Dopo aver effettuato l'accesso al server CentOS 8, esegui il comando seguente per aggiornare il sistema di base con gli ultimi pacchetti disponibili.
yum update -y
Passaggio 2:installazione delle dipendenze richieste
Innanzitutto, dovrai installare il repository EPEL nel tuo sistema. Puoi installarlo con il seguente comando:
yum install epel-release -y
Una volta installato il repository EPEL, installa altre dipendenze con il seguente comando:
yum install python3 python3-devel python3-setuptools gcc gcc-c++ freetype-devel python3-pip
python3-ldap memcached java-1.8.0-openjdk libmemcached libreoffice-headless libreoffice-pyuno
libffi-devel pwgen curl tar -y
Una volta installate tutte le dipendenze, usa il comando pip per installare altre dipendenze:
pip3 install Pillow pylibmc captcha jinja2 sqlalchemy psd-tools django-pylibmc django-simple-
captcha
Una volta installati tutti i pacchetti, abilita l'avvio del servizio Memcached al riavvio del sistema:
systemctl enable --now memcached
Fase 3 – Installa Nginx e MariaDB
Successivamente, dovrai installare il server Nginx e MariaDB sul tuo sistema. Puoi installare entrambi i pacchetti con il seguente comando:
yum install nginx mariadb-server -y
Una volta installati, avvia i servizi Nginx e MariaDB e abilita l'avvio al riavvio del sistema:
systemctl start nginx
systemctl start mariadb
systemctl enable nginx
systemctl enable mariadb
Fase 4:crea un database per Seafile
Innanzitutto, dovrai impostare la password di root di MariaDB e proteggere l'installazione di MariaDB. Puoi farlo usando il seguente script:
mysql_secure_installation
Rispondi a tutte le domande come mostrato di seguito:
Enter current password for root (enter for none):
Set root password? [Y/n] Y
New password:
Re-enter new password:
Remove anonymous users? [Y/n] Y
Disallow root login remotely? [Y/n] Y
Remove test database and access to it? [Y/n] Y
Reload privilege tables now? [Y/n] Y
Quindi, accedi alla shell MariaDB con il seguente comando:
mysql -u root -p
Una volta effettuato l'accesso, crea un database per Seafile con il seguente comando:
create database `ccnetdb` character set = 'utf8';
create database `seafiledb` character set = 'utf8';
create database `seahubdb` character set = 'utf8';
Quindi, crea un utente per Seafile con il seguente comando:
create user 'seafile'@'localhost' identified by 'yourpassword';
Quindi, concedi tutti i privilegi a ccnetdb, seafiledb e seahubdb con il seguente comando:
GRANT ALL PRIVILEGES ON `ccnetdb`.* to `seafile`@localhost;
GRANT ALL PRIVILEGES ON `seafiledb`.* to `seafile`@localhost;
GRANT ALL PRIVILEGES ON `seahubdb`.* to `seafile`@localhost;
Quindi, svuota i privilegi ed esci dalla shell MariaDB con il seguente comando:
FLUSH PRIVILEGES;
EXIT;
Fase 5 – Installa Seafile
Innanzitutto, scarica l'ultima versione di Seafile con il seguente comando:
wget https://s3.eu-central-1.amazonaws.com/download.seadrive.org/seafile-server_7.1.5_x86-
64.tar.gz
Una volta scaricato, estrai il file scaricato con il seguente comando:
tar -xvzf seafile-server_7.1.5_x86-64.tar.gz
Quindi, sposta la directory estratta in /opt con il seguente comando:
mv seafile-server-* /opt/seafile
cd /opt/seafile
Quindi, cambia la directory in /opt/seafile e configura il server Seafile eseguendo il seguente script:
./setup-seafile-mysql.sh
Ti verrà chiesto di fornire il nome del server, il nome di dominio valido e i dettagli del database come mostrato di seguito.
Checking python on this machine ...

-----------------------------------------------------------------
This script will guide you to setup your seafile server using MySQL.
Make sure you have read seafile server manual at

https://download.seafile.com/published/seafile-manual/home.md

Press ENTER to continue
-----------------------------------------------------------------

What is the name of the server? It will be displayed on the client.
3 - 15 letters or digits
[ server name ] seafile

What is the ip or domain of the server?
For example: www.mycompany.com, 192.168.1.101
[ This server's ip or domain ] seafile.example.com

Which port do you want to use for the seafile fileserver?
[ default "8082" ]

-------------------------------------------------------
Please choose a way to initialize seafile databases:
-------------------------------------------------------

[1] Create new ccnet/seafile/seahub databases
[2] Use existing ccnet/seafile/seahub databases

[ 1 or 2 ] 2

What is the host of mysql server?
[ default "localhost" ]

What is the port of mysql server?
[ default "3306" ]

Which mysql user to use for seafile?
[ mysql user for seafile ] seafile

What is the password for mysql user "seafile"?
[ password for seafile ]

verifying password of user seafile ... done

Enter the existing database name for ccnet:
[ ccnet database ] ccnetdb

verifying user "seafile" access to database ccnetdb ... done

Enter the existing database name for seafile:
[ seafile database ] seafiledb

verifying user "seafile" access to database seafiledb ... done

Enter the existing database name for seahub:
[ seahub database ] seahubdb

verifying user "seafile" access to database seahubdb ... done
Fornisci ogni dettaglio con attenzione. Una volta completata l'installazione, dovresti vedere il seguente output:
---------------------------------
This is your configuration
---------------------------------

server name: seafile
server ip/domain: seafile.example.com

seafile data dir: /opt/seafile-data
fileserver port: 8082

database: use existing
ccnet database: ccnetdb
seafile database: seafiledb
seahub database: seahubdb
database user: seafile

---------------------------------
Press ENTER to continue, or Ctrl-C to abort

-----------------------------------------------------------------
Your seafile server configuration has been finished successfully.
-----------------------------------------------------------------

run seafile server: ./seafile.sh { start | stop | restart }
run seahub server: ./seahub.sh { start <port> | stop | restart <port> }

-----------------------------------------------------------------
If you are behind a firewall, remember to allow input/output of these tcp ports:
-----------------------------------------------------------------

port of seafile fileserver: 8082
port of seahub: 8000

When problems occur, Refer to

https://download.seafile.com/published/seafile-manual/home.md

for information.
Passaggio 6:imposta l'account amministratore
Successivamente, dovrai configurare un account amministratore per accedere a Seafile. Innanzitutto, avvia il servizio Seafile con il seguente comando:
/opt/seafile/seafile.sh start
Quindi, avvia il servizio Seahub per impostare una password amministratore:
/opt/seafile/seahub.sh start
Ti verrà chiesto di impostare un nome utente e una password amministratore come mostrato di seguito.
LC_ALL is not set in ENV, set to en_US.UTF-8
Starting seahub at port 8000 ...

----------------------------------------
It's the first time you start the seafile server. Now let's create the admin account
----------------------------------------

What is the email for the admin account?
[ admin email ] example@unixlinux.online

What is the password for the admin account?
[ admin password ]

Enter the password again:
[ admin password again ]

----------------------------------------
Successfully created seafile admin
----------------------------------------
Quindi, arresta i servizi Seafile e Seahub con il seguente comando:
/opt/seafile/seafile.sh stop
/opt/seafile/seahub.sh stop
Fase 7:crea un file di servizio Systemd per Seafile
Successivamente, dovrai creare file di servizio systemd per Seafile e Seahub per gestire i servizi. Innanzitutto, crea un file di servizio per Seafile utilizzando il seguente comando:
nano /etc/systemd/system/seafile.service
Aggiungi le seguenti righe:
[Unit]
Description=Seafile
After= mysql.service
After=network.target

[Service]
Type=forking
ExecStart=/opt/seafile-server-latest/seafile.sh start
ExecStop=/opt/seafile-server-latest/seafile.sh stop

[Install]
WantedBy=multi-user.target
Salva e chiudi il file, quindi crea un file di servizio per Seahub con il seguente comando:
nano /etc/systemd/system/seahub.service
Aggiungi le seguenti righe:
[Unit]
Description=Seafile
After= mysql.service
After=network.target

[Service]
Type=forking
ExecStart=/opt/seafile-server-latest/seahub.sh start
ExecStop=/opt/seafile-server-latest/seahub.sh stop

[Install]
WantedBy=multi-user.target
Salva e chiudi il file, quindi ricarica il demone systemd con il seguente comando:
systemctl daemon-reload
Quindi, avvia il servizio Seafile e Seahub e abilita l'avvio al riavvio del sistema con il seguente comando:
systemctl start seafile
systemctl enable seafile
systemctl start seahub
systemctl enable seahub
A questo punto, il server Seafile viene avviato ed è in ascolto sulla porta 8000. Puoi verificarlo con il seguente comando:
ss -tunelp | grep 8000
Dovresti ottenere il seguente output:
tcp LISTEN 0 128 127.0.0.1:8000 0.0.0.0:*
users:(("python3",pid=44925,fd=8),("python3",pid=44924,fd=8),("pyt
hon3",pid=44923,fd=8),("python3",pid=44922,fd=8),("python3",pid=44921,fd=8),("python3",pid=44916,fd=8)) ino:77620 sk:9
<->
Fase 8 – Configura Nginx per Seafile
Successivamente, dovrai configurare Nginx come proxy inverso per accedere a Seafile utilizzando la porta 80. Puoi configurarlo con il seguente comando:
nano /etc/nginx/conf.d/seafile.conf
Aggiungi le seguenti righe:
server {
listen 80;
listen [::]:80;
server_name seafile.example.com;
autoindex off;
client_max_body_size 100M;
access_log /var/log/nginx/seafile.com.access.log;
error_log /var/log/nginx/seafile.com.error.log;

location / {
proxy_pass http://127.0.0.1:8000;
proxy_set_header Host $host;
proxy_set_header X-Real-IP $remote_addr;
proxy_set_header X-Forwarded-For $proxy_add_x_forwarded_for;
proxy_set_header X-Forwarded-Host $server_name;
proxy_read_timeout 1200s;
}

location /seafhttp {
rewrite ^/seafhttp(.*)$ $1 break;
proxy_pass http://127.0.0.1:8082;
proxy_set_header X-Forwarded-For $proxy_add_x_forwarded_for;
proxy_connect_timeout 36000s;
proxy_read_timeout 36000s;
proxy_send_timeout 36000s;
send_timeout 36000s;
}

location /media {
root /opt/seafile-server-latest/seahub;
}
}
Salva e chiudi il file, quindi riavvia il servizio Nginx con il seguente comando:
systemctl restart nginx
Se hai degli errori, modifica il file Nginx.conf:
nano /etc/nginx/nginx.conf
Aggiungi la seguente riga sotto http {:
server_names_hash_bucket_size 64;
Salva e chiudi il file, quindi riavvia il servizio Nginx:
systemctl restart nginx
Fase 9 – Accedi all'interfaccia Web di Seafile
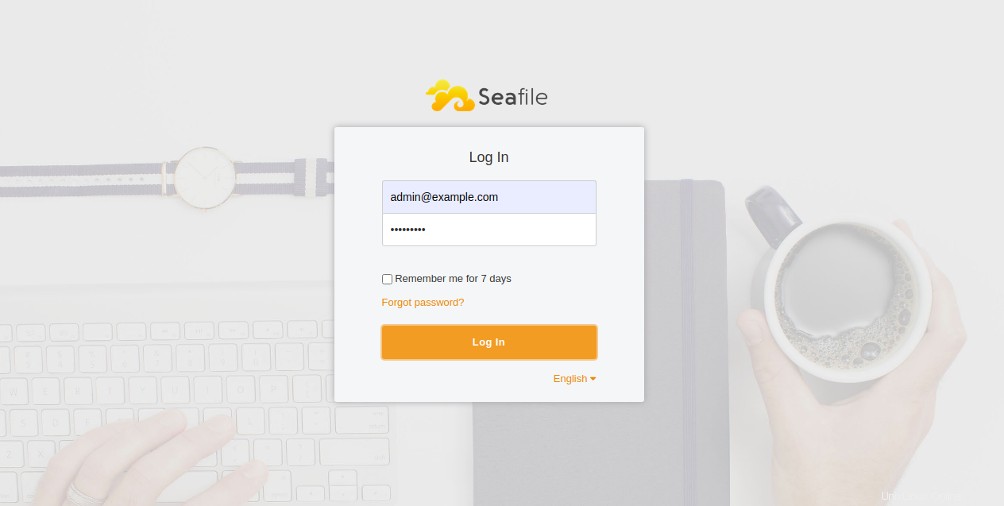
A questo punto, Nginx è configurato per servire Seafile. Ora apri il tuo browser web e accedi all'interfaccia web di Seafile utilizzando l'URL http://seafile.example.com . Verrai reindirizzato alla pagina di accesso di Seafile:

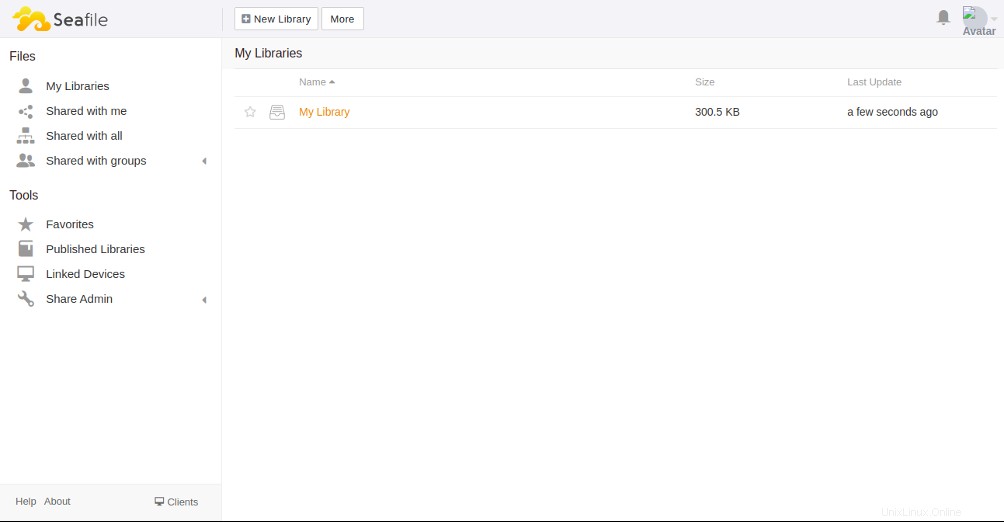
Fornisci il nome utente e la password dell'amministratore e fai clic su Accedi pulsante. Dovresti vedere la dashboard di Seafile nella pagina seguente:

Conclusione
Nel tutorial sopra, hai imparato come installare il server Seafile con Nginx come proxy inverso su CentOS 8. Ora puoi caricare i tuoi file e le tue foto personali sul server Seafile, condividerli con i tuoi amici e accedervi dal tuo computer o dispositivo mobile. Prova Seafile su VPS Hosting da Atlantic.Net usando il tutorial qui sopra!