FreeIPA è una soluzione di identità e autenticazione integrata open source per sistemi basati su Linux e Unix. Fornisce l'autenticazione centralizzata memorizzando dati su utenti, gruppi, host e altri oggetti. Fornisce un servizio di gestione delle identità integrato per Linux, Mac e Windows. FreeIPA si basa su 389 Directory Server, Kerberos, SSSD, Dogtag, NTP e DNS. Fornisce un'interfaccia basata sul Web per gestire utenti e client Linux nel tuo regno dalla posizione centrale.
In questo tutorial, ti mostreremo come installare il server FreeIPA su CentOS 8.
Prerequisiti
- Un server che esegue CentOS 8.
- Una password di root è configurata sul server.
Imposta nome host
Innanzitutto, dovrai configurare il nome host completo nel tuo sistema. Puoi configurarlo con il seguente comando:
hostnamectl set-hostname freeipa.mydomain10.com
Quindi, modifica il file /etc/hosts e aggiungi l'IP del server e il nome host:
nano /etc/hosts
Aggiungi le seguenti righe:
45.58.43.185 freeipa.mydomain10.com
Salva e chiudi il file quando hai finito.
Installa il server FreeIPA
Per impostazione predefinita, il pacchetto FreeIPA non è disponibile nel repository standard di CentOS. Quindi dovrai abilitare il repository idm:DL1 nel tuo sistema.
Puoi abilitarlo con il seguente comando:
dnf module enable idm:DL1
Quindi, sincronizza il repository con il seguente comando:
dnf distro-sync
Quindi, esegui il seguente comando per installare il server FreeIPA nel tuo sistema.
dnf install ipa-server ipa-server-dns -y
Una volta completata l'installazione, puoi procedere al passaggio successivo.
Configura il server FreeIPA
Successivamente, dovrai configurare il server FreeIPA. Puoi configurarlo con il seguente comando:
ipa-server-install
Ti verrà chiesto di configurare il DNS integrato come mostrato di seguito:
The log file for this installation can be found in /var/log/ipaserver-install.log
ipa-server-install

The log file for this installation can be found in /var/log/ipaserver-install.log
==============================================================================
This program will set up the IPA Server.
Version 4.8.4

This includes:
  * Configure a stand-alone CA (dogtag) for certificate management
  * Configure the NTP client (chronyd)
  * Create and configure an instance of Directory Server
  * Create and configure a Kerberos Key Distribution Center (KDC)
  * Configure Apache (httpd)
  * Configure the KDC to enable PKINIT

To accept the default shown in brackets, press the Enter key.

Do you want to configure integrated DNS (BIND)? [no]:
Premere Invio per selezionare n. Ti verrà chiesto di fornire il nome host del tuo server:
Enter the fully qualified domain name of the computer on which you're setting up server software. Using the form. Example: master.example.com. Server host name [freeipa.mydomain10.com]:
Premi Invio per selezionare il nome host predefinito. Ti verrà chiesto di confermare il tuo nome di dominio come mostrato di seguito:
The domain name has been determined based on the host name.

Please confirm the domain name [mydomain10.com]:
Premere Invio per selezionare il nome di dominio predefinito. Ti verrà chiesto di impostare la password del gestore directory come mostrato di seguito:
The kerberos protocol requires a Realm name to be defined.
This is typically the domain name converted to uppercase.

Please provide a realm name [MYDOMAIN10.COM]:
Certain directory server operations require an administrative user.
This user is referred to as the Directory Manager and has full access
to the Directory for system management tasks and will be added to the
instance of directory server created for IPA.
The password must be at least 8 characters long.

Directory Manager password:
Password (confirm):
Fornisci la password desiderata e premi Invio. Ti verrà chiesto di impostare la password amministratore IPA come mostrato di seguito:
The IPA server requires an administrative user, named 'admin'.
This user is a regular system account used for IPA server administration.

IPA admin password:
Password (confirm):
Fornisci la password desiderata e premi Invio. Ti verrà chiesto di configurare il server NTP come mostrato di seguito:
Do you want to configure chrony with NTP server or pool address? [no]:
Premere Invio per selezionare l'opzione predefinita. Dovresti ottenere il seguente output:
The IPA Master Server will be configured with:
Hostname:       freeipa.mydomain10.com
IP address(es): 45.58.43.185
Domain name:    mydomain10.com
Realm name:     MYDOMAIN10.COM

The CA will be configured with:
Subject DN:   CN=Certificate Authority,O=MYDOMAIN10.COM
Subject base: O=MYDOMAIN10.COM
Chaining:     self-signed

Continue to configure the system with these values? [no]: yes
Digita yes e premi Invio per configurare il sistema con i valori sopra. Una volta completata l'installazione, dovresti ottenere il seguente output:
SSSD enabled
Configured /etc/openldap/ldap.conf
Configured /etc/ssh/ssh_config
Configured /etc/ssh/sshd_config
Configuring mydomain10.com as NIS domain.
Client configuration complete.
The ipa-client-install command was successful

unable to resolve host name freeipa.mydomain10.com. to IP address, ipa-ca DNS record will be incomplete
unable to resolve host name freeipa.mydomain10.com. to IP address, ipa-ca DNS record will be incomplete
Please add records in this file to your DNS system: /tmp/ipa.system.records._u0fzahd.db
==============================================================================
Setup complete

Next steps:
	1. You must make sure these network ports are open:
		TCP Ports:
		  * 80, 443: HTTP/HTTPS
		  * 389, 636: LDAP/LDAPS
		  * 88, 464: kerberos
		UDP Ports:
		  * 88, 464: kerberos
		  * 123: ntp

	2. You can now obtain a kerberos ticket using the command: 'kinit admin'
	   This ticket will allow you to use the IPA tools (e.g., ipa user-add)
	   and the web user interface.

Be sure to back up the CA certificates stored in /root/cacert.p12
These files are required to create replicas. The password for these
files is the Directory Manager password
The ipa-server-install command was successful
Una volta terminato, puoi procedere al passaggio successivo.
Configura Firewall e SELinux
Se firewalld è installato nel tuo sistema, dovrai consentire alcune porte utilizzate da FreeIPA. Puoi consentirli con il seguente comando:
firewall-cmd --add-service={http,https,dns,ntp,freeipa-ldap,freeipa-ldaps} --permanent Quindi, ricarica il firewalld con il seguente comando per applicare le modifiche:
firewall-cmd --reload
Successivamente, dovrai anche disabilitare SELinux nel tuo sistema.
Puoi disabilitare SELinux modificando il file /etc/selinux/config:
nano /etc/selinux/config
Trova la riga seguente:
SELINUX=enforcing
E sostituiscilo con la seguente riga:
SELINUX=permissive
Salva e chiudi il file. Quindi, riavvia il sistema per applicare le modifiche:
Accedi all'interfaccia utente Web di FreeIPA
Ora apri il tuo browser web e accedi all'interfaccia web di FreeIPA utilizzando l'URL https://freeipa.mydomain10.com. Verrai reindirizzato alla pagina di accesso di FreeIPA come mostrato di seguito:
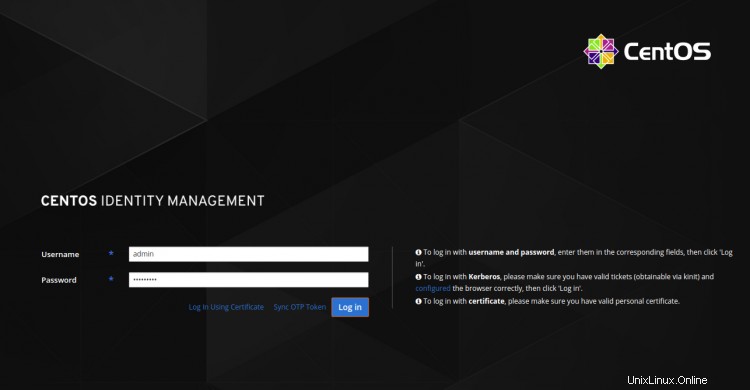
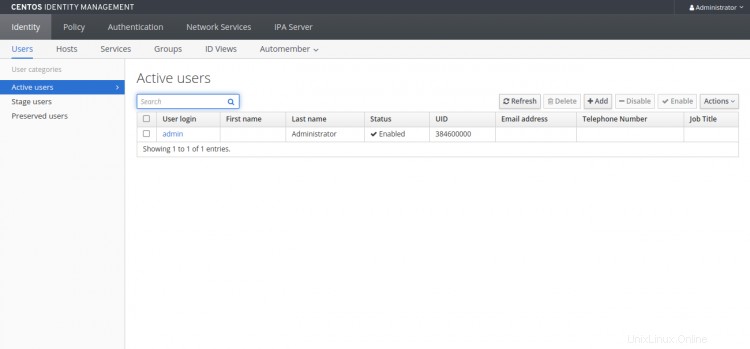
Fornisci il nome utente e la password dell'amministratore e fai clic sul Registro dentro pulsante. Dovresti vedere la dashboard di FreeIPA nella pagina seguente:
Lavorare con FreeIPA CLI
FreeIPA fornisce anche uno strumento da riga di comando per aggiungere nuovi utenti, gruppi, entità servizio e concedere l'accesso in scrittura a determinati attributi da un gruppo all'altro.
Prima di utilizzare lo strumento CLI, dovrai ottenere un ticket Kerberos con il seguente comando:
kinit admin
Ti verrà chiesto di fornire la password come mostrato di seguito:
Password for [email protected]:
Fornisci la tua password di amministratore e premi Invio per ottenere un ticket Kerberos.
Quindi, esegui il seguente comando per verificare la scadenza del biglietto:
klist
Dovresti ottenere il seguente output:
Ticket cache: KCM:0
Default principal: [email protected]

Valid starting       Expires              Service principal
2020-09-28T03:36:54  2020-09-29T03:36:50  krbtgt/[email protected]
Quindi, aggiungi un nuovo account utente con il seguente comando:
ipa user-add user1 --first=hit --last=jethva [email protected] --password
Dovresti ottenere il seguente output:
Password:
Enter Password again to verify:
------------------
Added user "user1"
------------------
  User login: user1
  First name: hit
  Last name: jethva
  Full name: hit jethva
  Display name: hit jethva
  Initials: hj
  Home directory: /home/user1
  GECOS: hit jethva
  Login shell: /bin/sh
  Principal name: [email protected]
  Principal alias: [email protected]
  User password expiration: 20200928073905Z
  Email address: [email protected]
  UID: 384600001
  GID: 384600001
  Password: True
  Member of groups: ipausers
  Kerberos keys available: True
Puoi anche elencare tutti gli account utente nel tuo sistema con il seguente comando:
ipa user-find
Dovresti vedere il seguente output:
---------------
2 users matched
---------------
  User login: admin
  Last name: Administrator
  Home directory: /home/admin
  Login shell: /bin/bash
  Principal alias: [email protected]
  UID: 384600000
  GID: 384600000
  Account disabled: False

  User login: user1
  First name: hit
  Last name: jethva
  Home directory: /home/user1
  Login shell: /bin/sh
  Principal name: [email protected]
  Principal alias: [email protected]
  Email address: [email protected]
  UID: 384600001
  GID: 384600001
  Account disabled: False
----------------------------
Number of entries returned 2
Conclusione
Congratulazioni! hai installato e configurato correttamente il server FreeIPA su CentOS 8. Ora puoi installare il client FreeIPA e aggiungerlo al server FreeIPA per l'autenticazione centralizzata. Sentiti libero di chiedermi se hai domande.