HAProxy o High Availability Proxy è un software open source di bilanciamento del carico TCP e HTTP e server proxy. HAProxy è stato scritto da Willy Tarreau in C, supporta SSL, compressioni, keep-alive, formati di log personalizzati e riscrittura dell'intestazione. HAProxy è un server proxy veloce e leggero e un sistema di bilanciamento del carico con un ingombro di memoria ridotto e un basso utilizzo della CPU. È utilizzato da grandi siti come Github, StackOverflow, Reddit, Tumblr, Twitter e altri. È diventato il più popolare sistema di bilanciamento del carico software e server proxy negli ultimi anni.
In questo tutorial, eseguirai l'installazione e la configurazione di HAProxy su RHEL 8 / CentOS 8. Installeremo HAProxy su un singolo server e quindi installeremo il server Web Nginx sugli altri server. HAProxy fungerà da bilanciamento del carico per i server Web Nginx.
In questo tutorial imparerai:
- Architettura e concetti HAProxy
- Configura il file hosts per la risoluzione dei nomi
- Installa e configura HAProxy
- Installa e configura Nginx
- Test della funzione di bilanciamento del carico
- Accedi all'URL delle statistiche HAProxy
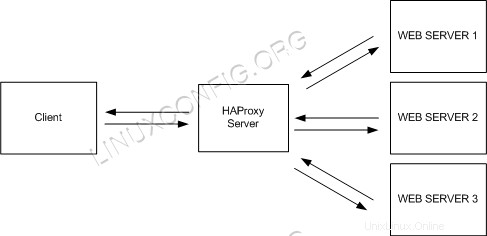 Architettura HAProxy.
Requisiti e convenzioni software utilizzati
| Categoria | Requisiti, convenzioni o versione del software utilizzata |
|---|---|
| Sistema | RHEL 8 / CentOS 8 |
| Software | HAProxy, Nginx |
| Altro | Accesso privilegiato al tuo sistema Linux come root o tramite sudo comando. |
| Convenzioni | # – richiede che i comandi linux dati vengano eseguiti con i privilegi di root direttamente come utente root o usando sudo comando$ – richiede che i comandi linux dati vengano eseguiti come un normale utente non privilegiato |
Architettura e concetti HAProxy
HAProxy può essere eseguito in due modalità:modalità TCP Layer 4 e modalità HTTP Layer 7. Nella modalità TCP Layer 4, HAProxy inoltra i pacchetti RAW TCP dal client ai server delle applicazioni. Nella modalità HTTP di livello 7, HAProxy analizza l'intestazione HTTP prima di inoltrarla ai server delle applicazioni. In questo tutorial, useremo Nginx come server web che supporta la modalità HTTP Layer 7.
 Livello 4 Bilanciamento del carico.
 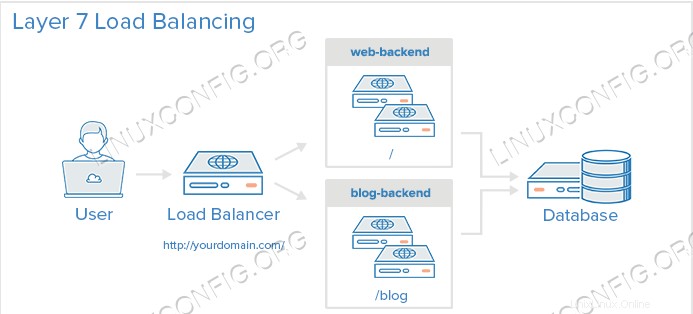 Livello 7 Bilanciamento del carico.
Balance Algorithm è l'algoritmo utilizzato da HAProxy per selezionare il server durante il bilanciamento del carico. Sono disponibili le seguenti modalità:
Robin
Questo è l'algoritmo di bilanciamento più semplice. Per ogni nuova connessione, verrà gestita dal server di backend successivo. Se viene raggiunto l'ultimo server di backend nell'elenco, ricomincerà dall'inizio dell'elenco di backend.
Leastconn
La nuova connessione verrà gestita dal server back-end con il minor numero di connessioni. Questo è utile quando il tempo e il carico delle richieste variano molto.
Fonte
Questo è per le sessioni permanenti, l'IP del client verrà sottoposto a hash per determinare il server back-end che ha ricevuto l'ultima richiesta da questo IP. Quindi un IP A sarà sempre gestito da backend1 e un IP B sarà sempre gestito da bankend2 per non interrompere le sessioni.
Configura il file hosts per la risoluzione dei nomi
Accedi al server di bilanciamento del carico e modifica il /etc/hosts file e bilanciatore di carico HAProxy, nomi host nginx1, nginx2. Copia lo stesso file su altri due nodi nginx e controlla la connettività di rete tramite il comando ping.
# vim /etc/hosts
192.168.1.108 loadbalancer.example.com
192.168.1.104 nginx1.example.com
192.168.1.105 nginx2.example.com
Installa e configura HAProxy
HAProxy è disponibile nel repository RHEL 8 / CentOS 8, quindi accedi al server loadbalancer e installa il pacchetto HAProxy con questo comando yum.
# yum install haproxy
Una volta installato correttamente, puoi utilizzare il comando seguente per verificare l'installazione.
# yum info haproxy
# yum info haproxy
Updating Subscription Management repositories.
Updating Subscription Management repositories.
Last metadata expiration check: 0:06:03 ago on Sat 16 Mar 2019 11:40:24 PM +04.
Installed Packages
Name         : haproxy
Version      : 1.8.14
Release      : 1.el8
Arch         : x86_64
Size         : 4.1 M
Source       : haproxy-1.8.14-1.el8.src.rpm
Repo         : @System
From repo    : rhel-8-for-x86_64-appstream-beta-rpms
Summary      : HAProxy reverse proxy for high availability environments
URL          : http://www.haproxy.org/
License      : GPLv2+
Description  : HAProxy is a TCP/HTTP reverse proxy which is particularly suited for high
             : availability environments. Indeed, it can:
             :  - route HTTP requests depending on statically assigned cookies
             :  - spread load among several servers while assuring server persistence
             :    through the use of HTTP cookies
             :  - switch to backup servers in the event a main one fails
             :  - accept connections to special ports dedicated to service monitoring
             :  - stop accepting connections without breaking existing ones
             :  - add, modify, and delete HTTP headers in both directions
             :  - block requests matching particular patterns
             :  - report detailed status to authenticated users from a URI
             :    intercepted from the application
Al termine dell'installazione, vai su /etc/haproxy/ directory ed eseguire il backup del file di configurazione originale.
# cd /etc/haproxy/
# cp haproxy.cfg haproxy.cfg.orig
Quindi, apporta le seguenti modifiche nel file di configurazione HAProxy haproxy.cfg con qualsiasi editor.
#---------------------------------------------------------------------
# Example configuration for a possible web application.  See the
# full configuration options online.
#
#   https://www.haproxy.org/download/1.8/doc/configuration.txt
#
#---------------------------------------------------------------------

#---------------------------------------------------------------------
# Global settings
#---------------------------------------------------------------------
global
    # to have these messages end up in /var/log/haproxy.log you will
    # need to:
    #
    # 1) configure syslog to accept network log events.  This is done
    #    by adding the '-r' option to the SYSLOGD_OPTIONS in
    #    /etc/sysconfig/syslog
    #
    # 2) configure local2 events to go to the /var/log/haproxy.log
    #   file. A line like the following can be added to
    #   /etc/sysconfig/syslog
    #
    #    local2.*                       /var/log/haproxy.log
    #
    log         127.0.0.1 local2

    chroot      /var/lib/haproxy
    pidfile     /var/run/haproxy.pid
    maxconn     4000
    user        haproxy
    group       haproxy
    daemon

    # turn on stats unix socket
    stats socket /var/lib/haproxy/stats

    # utilize system-wide crypto-policies
    ssl-default-bind-ciphers PROFILE=SYSTEM
    ssl-default-server-ciphers PROFILE=SYSTEM

#---------------------------------------------------------------------
# common defaults that all the 'listen' and 'backend' sections will
# use if not designated in their block
#---------------------------------------------------------------------
defaults
    mode                    http
    log                     global
    option                  httplog
    option                  dontlognull
    option http-server-close
    option forwardfor       except 127.0.0.0/8
    option                  redispatch
    retries                 3
    timeout http-request    10s
    timeout queue           1m
    timeout connect         10s
    timeout client          1m
    timeout server          1m
    timeout http-keep-alive 10s
    timeout check           10s
    maxconn                 3000
#---------------------------------------------------------------------
# HAProxy Monitoring Config
#---------------------------------------------------------------------
listen stats
    bind loadbalancer.example.com:8080            # HAProxy Monitoring run on port 8080
    mode http
    option forwardfor
    option httpclose
    stats enable
    stats show-legends
    stats refresh 5s
    stats uri /stats                         # URL for HAProxy monitoring
    stats realm Haproxy\ Statistics
    stats auth admin:admin                   # User and Password for login to the monitoring dashboard
    #stats admin if TRUE
    default_backend loadbalancer                 # This is optionally for monitoring backend
#---------------------------------------------------------------------
# main frontend which proxys to the backends
#---------------------------------------------------------------------
frontend loadbalancer
    bind loadbalancer.example.com:80
    #acl url_static       path_beg       -i /static /images /javascript /stylesheets
    #acl url_static       path_end       -i .jpg .gif .png .css .js

    #use_backend static          if url_static
    option http-server-close
    option forwardfor
    default_backend       loadbalancer

#---------------------------------------------------------------------
# static backend for serving up images, stylesheets and such
#---------------------------------------------------------------------
#backend static
#    balance     roundrobin
#    server      static 127.0.0.1:4331 check

#---------------------------------------------------------------------
# round robin balancing between the various backends
#---------------------------------------------------------------------
backend loadbalancer
    balance     roundrobin                                    # Balance algorithm
    option httpchk HEAD / HTTP/1.1\r\nHost:\ localhost        # Check the server application is up and healty - 200 status code
    server  nginx1.example.com 192.168.1.104:80 check         # NGINX Server1
    server  nginx2.example.com 192.168.1.105:80 check         # NGNIX Server2
Salva questo file di configurazione ed esci.
Ora configureremo il demone rsyslog per registrare le statistiche HAProxy. Modifica il rsyslog.conf per consentire alla porta UDP 514 di essere utilizzata da rsyslog. Apri il file di configurazione rsyslog e decommenta le righe per abilitare la connessione UDP.
# vim /etc/rsyslog.conf
module(load="imudp") # needs to be done just once
input(type="imudp" port="514")
Salva il file con le modifiche precedenti ed esci. Quindi crea un nuovo file di configurazione HAProxy per rsyslog e aggiungi le voci seguenti in quel file.
# cd /etc/rsyslog.d/
# vi haproxy.conf
local2.=info     /var/log/haproxy-access.log    # For Access Log
local2.notice    /var/log/haproxy-info.log      # For Service Info - Backend, loadbalancer
Ora riavvia rsyslog, quindi avvia il servizio HAProxy e aggiungi HAProxy da avviare all'avvio.
# systemctl restart rsyslog
# systemctl start haproxy
# systemctl enable haproxy
Installa e configura Nginx
Nginx fa già parte del repository RHEL 8 / CentOS 8 esistente e può essere installato con il seguente comando.
# yum install nginx
Una volta installato puoi verificare l'installazione con l'aiuto di questo comando.
# yum info nginx
# yum info nginx
Updating Subscription Management repositories.
Updating Subscription Management repositories.
Last metadata expiration check: 0:06:14 ago on Sat 16 Mar 2019 11:40:24 PM +04.
Installed Packages
Name         : nginx
Epoch        : 1
Version      : 1.14.0
Release      : 3.el8+1631+ba902cf0
Arch         : x86_64
Size         : 568 k
Source       : nginx-1.14.0-3.el8+1631+ba902cf0.src.rpm
Repo         : rhel-8-for-x86_64-appstream-beta-rpms
Summary      : A high performance web server and reverse proxy server
URL          : http://nginx.org/
License      : BSD
Description  : Nginx is a web server and a reverse proxy server for HTTP, SMTP, POP3 and
             : IMAP protocols, with a strong focus on high concurrency, performance and low
             : memory usage.
Una volta installato Nginx, vai alla directory web e cambia il index.html archiviare di conseguenza. Assicurati di eseguire i passaggi seguenti sul server nginx1 e nginx2.
# cd /usr/share/nginx/html
# ls -lrth
total 20K
-rw-r--r--. 1 root root 2.8K Oct 31  2016 poweredby.png
-rw-r--r--. 1 root root  368 Oct 31  2016 nginx-logo.png
-rw-r--r--. 1 root root 3.7K Mar 16 20:39 50x.html
-rw-r--r--. 1 root root 3.6K Mar 16 20:39 404.html
-rw-r--r--. 1 root root 3.7K Mar 16 20:42 index.html
Quindi, aggiungi Nginx per iniziare all'avvio e quindi avvia il demone con i comandi seguenti.
# systemctl enable nginx
# systemctl start nginx
Test della funzione di bilanciamento del carico
Il test può essere eseguito navigando e accedendo all'IP del loadbalancer 192.168.1.108 (per il mio caso) e vedrai una volta che va a Nginx Node1 e la seconda volta che va a Nginx Node2 in modo round robin.
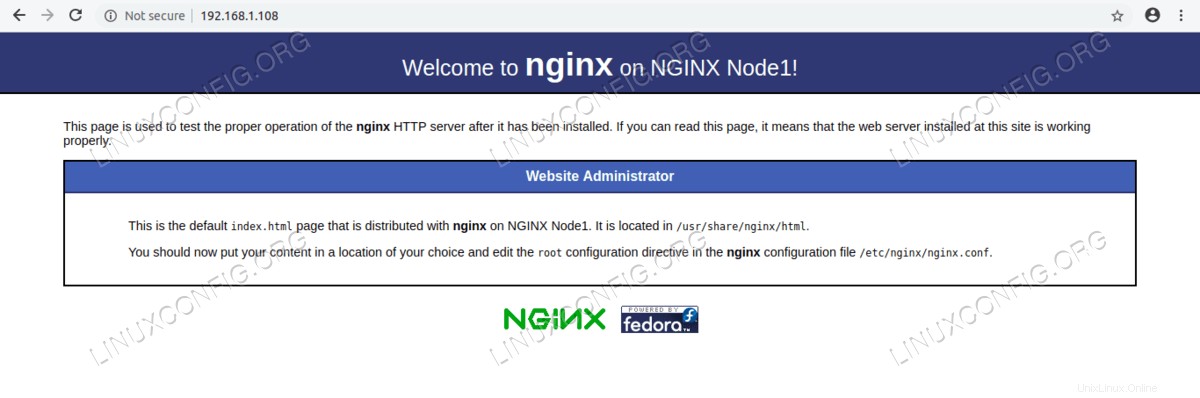 Pagina Web su NGINX Node1.
 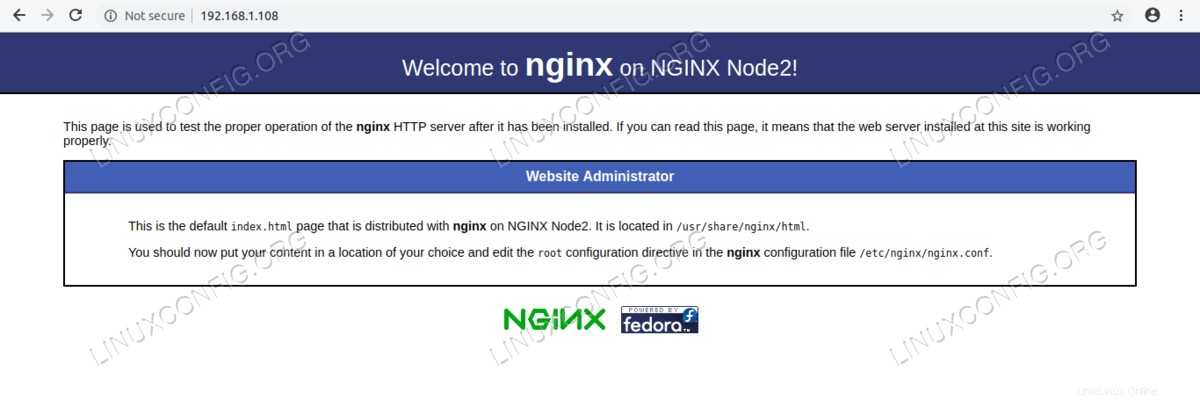 Pagina web su NGINX Node2.
Puoi anche controllare il /var/log/haproxy-access.log per ottenere le informazioni dettagliate sul bilanciamento del carico.
Accedi all'URL delle statistiche HAProxy
Accedi alla dashboard per HAProxy Statistical Report in esecuzione sulla porta 8080 con nome utente e password definiti in haproxy.cfg file.
http://192.168.1.108:8080/stats
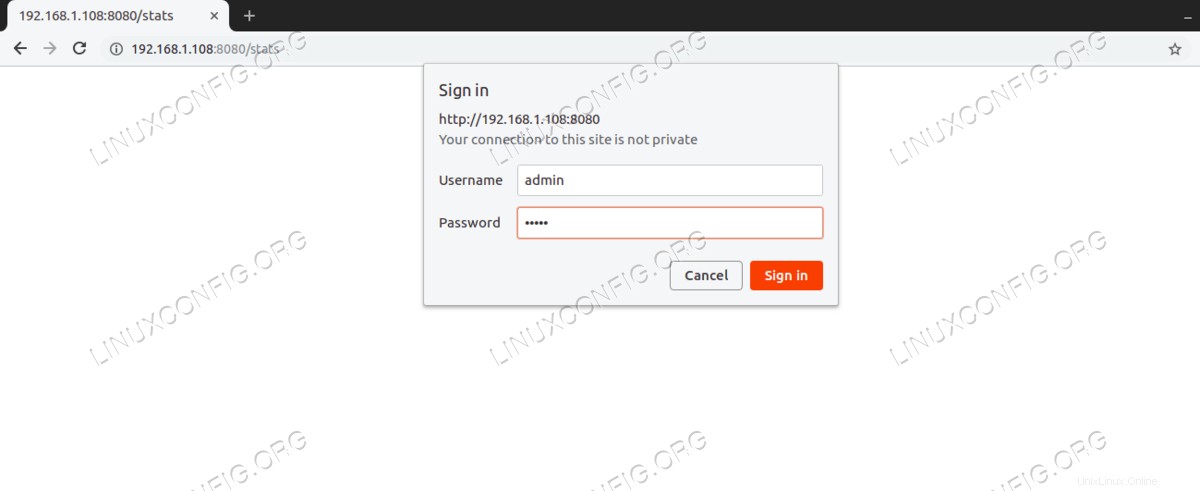 Accedi all'URL delle statistiche HAProxy.
 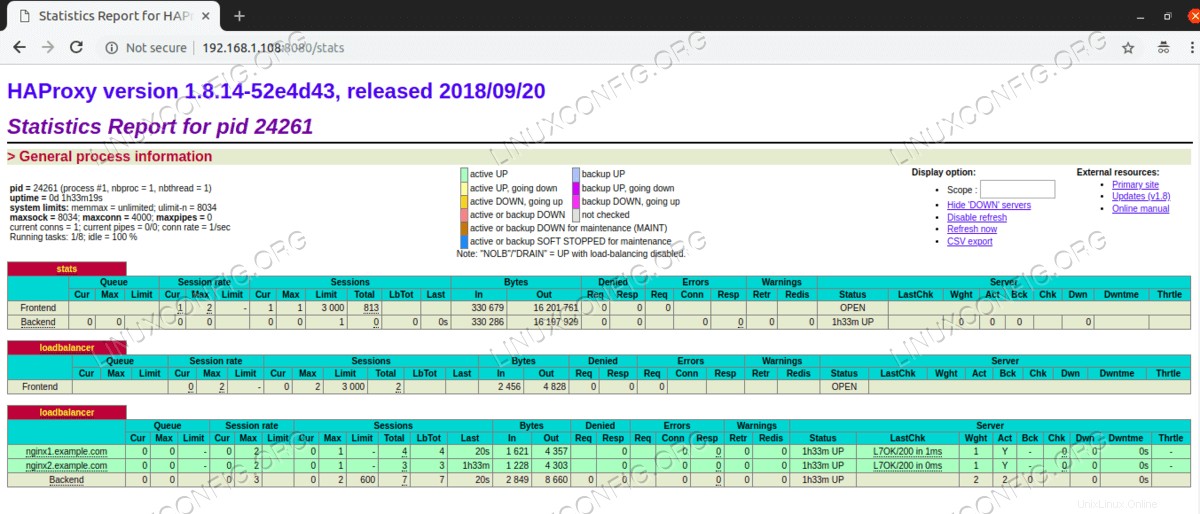 Dashboard delle statistiche HAProxy.
 HAProxy funziona correttamente e funge da bilanciamento del carico per i due server Web Nginx.
Conclusione
HAProxy o High Availability proxy è un software open source che fornisce alta disponibilità per servizi basati su TCP, funziona come bilanciatore di carico HTTP e server proxy. Il software è scritto in C e supporta SSL, keep-alive e compressione. HAProxy è la scelta giusta per tutti coloro che necessitano di un sistema di bilanciamento del carico e di un server proxy che sia veloce e leggero con un footprint di memoria ridotto e un utilizzo ridotto della CPU. Haproxy può essere eseguito in modalità Layer 4 TCP e Layer 7 HTTP. Nginx supporta solo la modalità HTTP Layer 7 con HAProxy. Se desideri utilizzare la modalità TCP Layer 4, puoi utilizzare altri server Web come Apache. Su RHEL 8 / CentOS 8 Linux, HAProxy è disponibile nel repository predefinito. È facile da installare e configurare.