YOURLS è un abbreviatore di URL gratuito, open source e self-hosted scritto in PHP. È molto simile a TinyURL o Bitly e ti consente di eseguire il tuo servizio di abbreviazione degli URL. Ti consente anche di aggiungere il marchio ai tuoi URL brevi. Offre un ricco set di funzionalità tra cui link privato e pubblico, parole chiave URL personalizzate, rapporti sui clic storici, interfaccia Ajaxed, supporto Jsonp e molto altro.
In questo tutorial, ti mostreremo come installare YOURLS su CentOS 8 con Let's Encrypt SSL.
Prerequisiti
- Un server che esegue CentOS 8.
- Un nome di dominio valido puntato all'IP del tuo server.
- Una password di root è configurata sul server.
Installa il server LEMP
Innanzitutto, dovrai installare Nginx, MariaDB, PHP e le estensioni PHP richieste nel tuo server. Puoi installarli tutti con il seguente comando:
dnf install nginx mariadb-server php php-fpm php-json php-common php-mysqlnd php-zip php-gd php-mbstring php-curl php-xml php-pear php-bcmath git unzip wget -y
Una volta installati tutti i pacchetti, modifica il file di configurazione PHP-FPM /etc/php-fpm.d/www.conf e cambia l'utente da apache a nginx:
nano /etc/php-fpm.d/www.conf
Modifica le seguenti righe:
user = nginx
group = nginx
Salva e chiudi il file, quindi avvia il servizio Nginx, MariaDB, PHP-FPM e abilita l'avvio al riavvio del sistema con il seguente comando:
systemctl start nginx
systemctl enable nginx
systemctl start mariadb
systemctl enable mariadb
systemctl start php-fpm
systemctl enable php-fpm
Una volta terminato, puoi procedere al passaggio successivo.
Crea un database per i TUOI
Successivamente, dovrai creare un database e un utente per YOURLS. Innanzitutto, accedi a MariaDB con il seguente comando:
mysql
Una volta effettuato l'accesso, crea un database e un utente con il seguente comando:
MariaDB [(none)]> CREATE DATABASE yourlsdb;
MariaDB [(none)]> GRANT ALL PRIVILEGES ON yourlsdb.* TO 'yourlsuser'@'localhost' IDENTIFIED BY 'password';
Quindi, svuota i privilegi ed esci da MariaDB con il seguente comando:
MariaDB [(none)]> FLUSH PRIVILEGES;
MariaDB [(none)]> \q
A questo punto MariaDB è installato e configurato.
Installa YOURLS
Innanzitutto, cambia la directory in Nginx web root e scarica l'ultima versione di YOURLS con il seguente comando:
cd /var/www/html
git clone https://github.com/YOURLS/YOURLS.git
Quindi, rinomina il file di configurazione di esempio con il seguente comando:
cd YOURLS/user/
cp config-sample.php config.php
Quindi, modifica il file config.php e definisci le impostazioni del database:
nano config.php
Modifica le seguenti righe:
/** MySQL database username */
define( 'YOURLS_DB_USER', 'yourlsuser' );

/** MySQL database password */
define( 'YOURLS_DB_PASS', 'password' );

/** The name of the database for YOURLS
 ** Use lower case letters [a-z], digits [0-9] and underscores [_] only */
define( 'YOURLS_DB_NAME', 'yourlsdb' );

/** MySQL hostname.
 ** If using a non standard port, specify it like 'hostname:port', eg. 'localhost:9999' or '127.0.0.1:666' */
define( 'YOURLS_DB_HOST', 'localhost' );

/** MySQL tables prefix
 ** YOURLS will create tables using this prefix (eg `yourls_url`, `yourls_options`, ...)
 ** Use lower case letters [a-z], digits [0-9] and underscores [_] only */
define( 'YOURLS_DB_PREFIX', 'yourls_' );

define( 'YOURLS_SITE', 'http://yourls.example.com' );
$yourls_user_passwords = array(
        'admin' => 'yourpassword',
Salva e chiudi il file quando hai finito. Quindi, crea un file .htaccess con il seguente comando:
nano /var/www/html/YOURLS/.htaccess
Aggiungi le seguenti righe:
<IfModule mod_rewrite.c>
RewriteEngine On
RewriteBase /
RewriteCond %{REQUEST_FILENAME} !-f
RewriteCond %{REQUEST_FILENAME} !-d
RewriteRule ^.*$ /yourls-loader.php [L]
</IfModule>
Salva e chiudi il file, quindi concedi le autorizzazioni e la proprietà appropriate con il seguente comando:
chown -R nginx:nginx /var/www/html/YOURLS
chmod -R 775 /var/www/html/YOURLS
Una volta terminato, puoi procedere al passaggio successivo.
Configura Nginx per YOURLS
Quindi, crea un nuovo file di configurazione dell'host virtuale Nginx per YOURLS:
nano /etc/nginx/conf.d/yourls.conf
Aggiungi le seguenti righe:
server {
  listen 80;
  server_name yourls.example.com;
  root /var/www/html/YOURLS;
  index index.php index.html index.htm;
  location / {
    try_files $uri $uri/ /yourls-loader.php$is_args$args;
  }

  location ~ \.php$ {
    include fastcgi.conf;

    fastcgi_index index.php;
    fastcgi_pass unix:/run/php-fpm/www.sock;
  }
}
Salva e chiudi il file, quindi riavvia il servizio Nginx e PHP-FPM con il seguente comando:
systemctl restart nginx
systemctl restart php-fpm
Puoi anche verificare lo stato di Nginx con il seguente comando:
systemctl status nginx
Dovresti ottenere il seguente output:
? nginx.service - The nginx HTTP and reverse proxy server
   Loaded: loaded (/usr/lib/systemd/system/nginx.service; disabled; vendor preset: disabled)
  Drop-In: /usr/lib/systemd/system/nginx.service.d
           ??php-fpm.conf
   Active: active (running) since Tue 2020-10-20 09:37:40 EDT; 5min ago
  Process: 12864 ExecStart=/usr/sbin/nginx (code=exited, status=0/SUCCESS)
  Process: 12862 ExecStartPre=/usr/sbin/nginx -t (code=exited, status=0/SUCCESS)
  Process: 12860 ExecStartPre=/usr/bin/rm -f /run/nginx.pid (code=exited, status=0/SUCCESS)
 Main PID: 12871 (nginx)
    Tasks: 3 (limit: 12523)
   Memory: 5.5M
   CGroup: /system.slice/nginx.service
           ??12871 nginx: master process /usr/sbin/nginx
           ??12872 nginx: worker process
           ??12873 nginx: worker process

Oct 20 09:37:40 centos systemd[1]: Stopped The nginx HTTP and reverse proxy server.
Oct 20 09:37:40 centos systemd[1]: Starting The nginx HTTP and reverse proxy server...
Oct 20 09:37:40 centos nginx[12862]: nginx: the configuration file /etc/nginx/nginx.conf syntax is ok
Oct 20 09:37:40 centos nginx[12862]: nginx: configuration file /etc/nginx/nginx.conf test is successful
Oct 20 09:37:40 centos systemd[1]: Started The nginx HTTP and reverse proxy server.
Configura SELinux e Firewall
Per impostazione predefinita, SELinux è abilitato in CentOS 8. Quindi dovrai configurarlo per il tuo sito web YOURLS.
Puoi configurare SELinux con il seguente comando:
setsebool httpd_can_network_connect on -P
chcon -R -u system_u -t httpd_sys_rw_content_t -r object_r /var/www/html/YOURLS
Quindi, consenti la porta 80 e 443 attraverso il firewall con il seguente comando:
firewall-cmd --permanent --add-service=http
firewall-cmd --permanent --add-service=https
firewall-cmd --reload
Una volta terminato, puoi procedere al passaggio successivo.
Accedi ai TUOI
Ora apri il tuo browser web e accedi a YOURLS utilizzando l'URL http://yourls.example.com/admin. Dovresti vedere la seguente pagina:

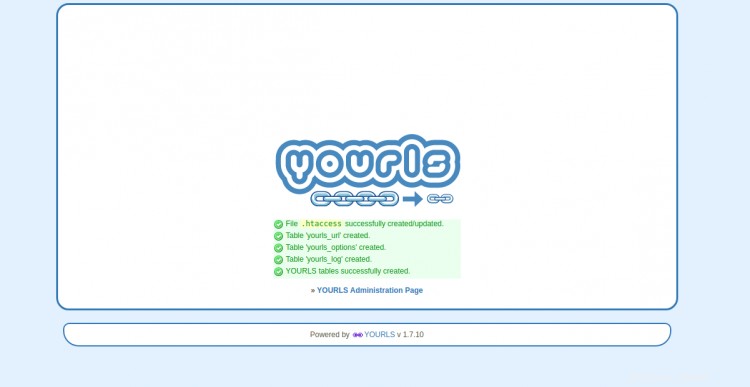
Fai clic su Installa IL TUO pulsante. Dovresti vedere la seguente pagina:

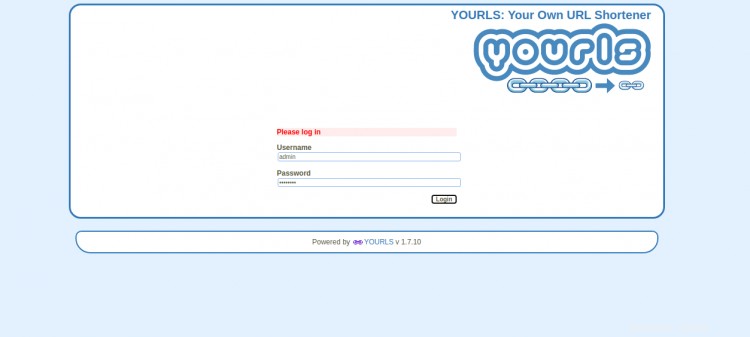
fare clic sulla "Pagina di amministrazione di YOULS ”. Dovresti vedere la pagina di accesso di YOURLS:

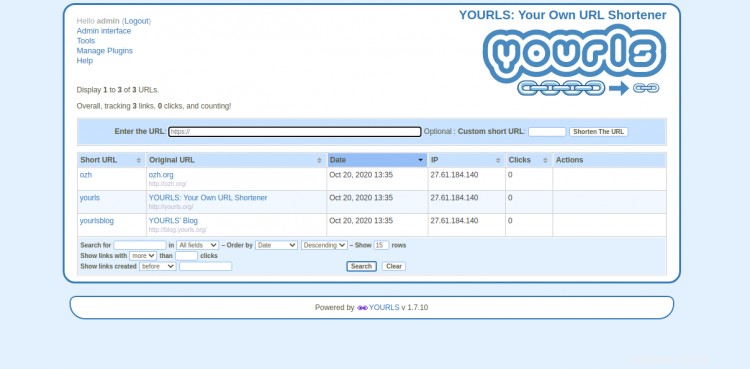
Fornisci il nome utente e la password dell'amministratore che hai definito in config.php, quindi fai clic su Accedi pulsante. Dovresti vedere la dashboard di YOURLS nella pagina seguente:

Proteggi i TUOI con Let's Encrypt SSL
Successivamente, dovrai installare l'utilità Certbot nel tuo sistema per scaricare e installare Let's Encrypt SSL per il tuo sito web YOURLS.
Puoi installare il client Certbot con il seguente comando:
wget https://dl.eff.org/certbot-auto
mv certbot-auto /usr/local/bin/certbot-auto
chown root /usr/local/bin/certbot-auto
chmod 0755 /usr/local/bin/certbot-auto
Successivamente, ottieni e installa un certificato SSL per il tuo sito web YOURLS con il seguente comando:
certbot-auto --nginx -d yourls.example.com
Il comando precedente installerà prima tutte le dipendenze richieste sul tuo server. Una volta installato, ti verrà chiesto di fornire un indirizzo email e di accettare i termini del servizio come mostrato di seguito:
Saving debug log to /var/log/letsencrypt/letsencrypt.log
Plugins selected: Authenticator nginx, Installer nginx
Enter email address (used for urgent renewal and security notices) (Enter 'c' to

cancel): [email protected]

- - - - - - - - - - - - - - - - - - - - - - - - - - - - - - - - - - - - - - - -
Please read the Terms of Service at
https://letsencrypt.org/documents/LE-SA-v1.2-November-15-2017.pdf. You must
agree in order to register with the ACME server at
https://acme-v02.api.letsencrypt.org/directory
- - - - - - - - - - - - - - - - - - - - - - - - - - - - - - - - - - - - - - - -
(A)gree/(C)ancel: A

- - - - - - - - - - - - - - - - - - - - - - - - - - - - - - - - - - - - - - - -
Would you be willing to share your email address with the Electronic Frontier
Foundation, a founding partner of the Let's Encrypt project and the non-profit
organization that develops Certbot? We'd like to send you email about our work
encrypting the web, EFF news, campaigns, and ways to support digital freedom.
- - - - - - - - - - - - - - - - - - - - - - - - - - - - - - - - - - - - - - - -
(Y)es/(N)o: Y

Obtaining a new certificate
Performing the following challenges:
http-01 challenge for yourls.example.com
Waiting for verification...
Cleaning up challenges
Deploying Certificate to VirtualHost /etc/nginx/conf.d/yourls.conf
Seleziona se vuoi reindirizzare il traffico HTTP a HTTPS o meno come mostrato di seguito:
Please choose whether or not to redirect HTTP traffic to HTTPS, removing HTTP access.
- - - - - - - - - - - - - - - - - - - - - - - - - - - - - - - - - - - - - - - -
1: No redirect - Make no further changes to the webserver configuration.
2: Redirect - Make all requests redirect to secure HTTPS access. Choose this for

new sites, or if you're confident your site works on HTTPS. You can undo this
change by editing your web server's configuration.
- - - - - - - - - - - - - - - - - - - - - - - - - - - - - - - - - - - - - - - -
Select the appropriate number [1-2] then [enter] (press 'c' to cancel): 2
Digita 2 e premi Invio per continuare. Una volta completata l'installazione, dovresti ottenere il seguente output:
Redirecting all traffic on port 80 to ssl in /etc/nginx/conf.d/yourls.conf

- - - - - - - - - - - - - - - - - - - - - - - - - - - - - - - - - - - - - - - -
Congratulations! You have successfully enabled https://yourls.example.com

You should test your configuration at:
https://www.ssllabs.com/ssltest/analyze.html?d=yourls.example.com
- - - - - - - - - - - - - - - - - - - - - - - - - - - - - - - - - - - - - - - -

IMPORTANT NOTES:
 - Congratulations! Your certificate and chain have been saved at:
   /etc/letsencrypt/live/yourls.example.com/fullchain.pem
   Your key file has been saved at:
   /etc/letsencrypt/live/yourls.example.com/privkey.pem
   Your cert will expire on 2020-06-11. To obtain a new or tweaked
   version of this certificate in the future, simply run certbot-auto
   again with the "certonly" option. To non-interactively renew *all*
   of your certificates, run "certbot-auto renew"
 - If you like Certbot, please consider supporting our work by:

   Donating to ISRG / Let's Encrypt:   https://letsencrypt.org/donate
   Donating to EFF:                    https://eff.org/donate-le
Ora puoi accedere al sito web YOURLS in modo sicuro utilizzando l'URL https://yourls.example.com.
Conclusione
Congratulazioni! hai installato correttamente YOURLS con Nginx e Let's Encrypt SSL su CentOS 8. Ora puoi ospitare facilmente il tuo abbreviatore di URL con YOURLS. Sentiti libero di chiedermi se hai domande.