Nmap, noto anche come Mapper di rete , è uno strumento gratuito e open source utilizzato dagli amministratori di rete per cercare le vulnerabilità all'interno della propria rete e per il rilevamento della rete.
Nmap consente di trovare dispositivi in esecuzione sulla loro rete e scoprire porte e servizi aperti che, se non protetti o rinforzati, possono portare potenziali hacker a sfruttare vulnerabilità note rischi per la sicurezza.
Nel seguente tutorial imparerai come installare e utilizzare Nmap di base su Debian 11 Bullseye.
Installa Nmap
Per impostazione predefinita, NMAP è disponibile nel repository di Debian 11. Per iniziare l'installazione, eseguire il comando seguente.
sudo apt install nmapEsempio di output:
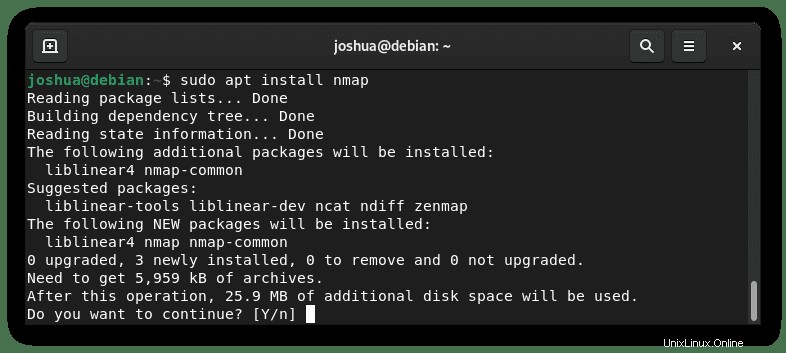
Digita Y , quindi premi il TASTO INVIO per procedere con l'installazione.
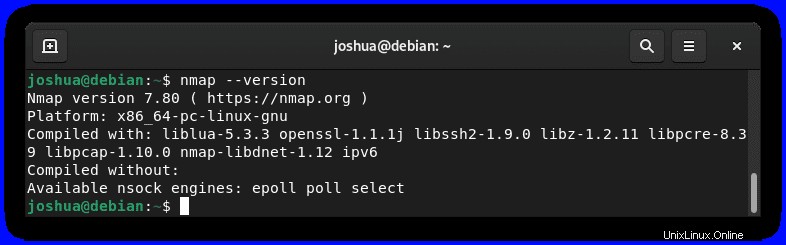
Successivamente, verifica l'installazione controllando la versione e la build.
nmap --versionEsempio di output:
Come utilizzare lo scanner Nmap
Un'introduzione all'uso dello scanner Nmap esaminerà alcune delle azioni più comunemente utilizzate. Il funzionamento di Nmap utilizza nmap e l'indirizzo IP o l'indirizzo di dominio di destinazione insieme a vari flag aggiuntivi.
Attenzione! Non avviare le scansioni senza il permesso dell'host, se non ti interessa, va bene, ma potresti dover affrontare conseguenze a seconda delle leggi del tuo paese e forse, in misura minore, il tuo ISP potrebbe cancellare il tuo account per attività dannosa o avere il tuo indirizzo IP nella lista nera che può causare ulteriori problemi.
Questo è progettato per testare la sicurezza delle tue proprietà e dei tuoi servizi, non per l'hacking.
Definizioni degli stati portuali di Nmap
Innanzitutto, prima di iniziare dovresti sapere cosa indica il terminale della porta quando usi lo scanner delle porte Nmap.
- chiuso – la porta di destinazione è raggiungibile, ma nessuna applicazione è in ascolto o in accettazione.
- aperto – la porta di destinazione accetta TCP, UDP o SCTP.
- filtrato – la porta di destinazione non può essere determinata con successo da nmap come aperta o chiusa a causa del filtraggio dei pacchetti.
- non filtrato – la porta è raggiungibile, ma non può essere definita se aperta o chiusa da nmap.
- chiuso|filtrato – nmap raggiunge target e nmap non può determinare se la porta è aperta o chiusa.
- aperto|filtrato – nmap non può determinare se una porta è aperta o filtrata.
Scansione host
Per scansionare un host. Questo può essere interno o esterno, questa è una buona opzione da installare sul tuo server per controllare tutte le porte locali aperte che devono essere bloccate per aumentare ulteriormente la sicurezza del tuo sistema.
Il primo esempio, utilizzando un indirizzo IP.
Esempio:
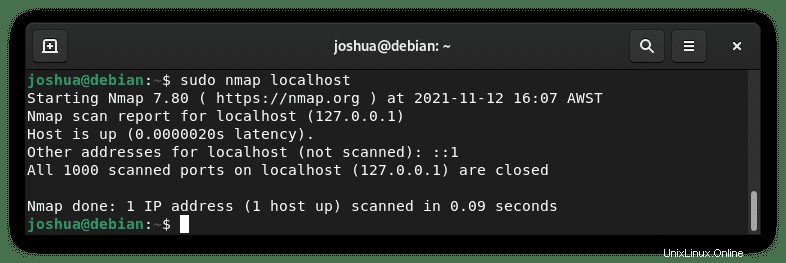
sudo nmap [IP address] or [website address]Oppure, per eseguire la scansione interna, utilizzare quanto segue.
Esempio:
sudo nmap localhostEsempio di output:
Per eseguire rapidamente una scansione, puoi utilizzare -F bandiera.
Esempio:
sudo nmap -F [IP address] or [website address]Durante la scansione, se vuoi scansionare host specifici puoi specificare.
Esempio:
sudo nmap [IP address],[IP address],[IP address]In alternativa, puoi scansionare l'intera sottorete, se nota.
Esempio:
sudo nmap [IP address]/24Scansione del sistema operativo
Avvia una scansione del sistema operativo che indichi a Nmap di provare a capire quale sistema operativo è in esecuzione sul sistema di destinazione. Se l'indirizzo di destinazione è bloccato e le porte vengono filtrate o chiuse, i risultati saranno meno che affidabili o addirittura inutili (buon risultato).
Esempio:
sudo nmap -O --osscan-guess [IP address] or [website address]Specifiche della porta e ordine di scansione
Avvia una scansione delle porte personalizzata e può essere utile per controllare porte specifiche che non sono incluse nelle prime 1000 porte comuni per ciascun protocollo. Questo viene fatto aggiungendo il -p bandiera.
Esempio:
sudo nmap –p 80,443,8080,9090 [IP address] or [website address]Scansione servizi
Avvia una scansione dei servizi che istruisce Nmap a verificare quali servizi sono in esecuzione sulla destinazione esaminando le porte aperte. Alcune porte comunemente utilizzate non riceveranno molte informazioni, ma altre note per utilizzare specifiche porte non comunemente condivise mostreranno risultati di gran lunga migliori se sono aperte.
Esempio:
sudo nmap -sV [IP address] or [website address]Scansione SYN TCP
Avvia scansione SYN TCP (SYN/Connect()/ACK/Window/Maimon) . Questo tipo di scansione viene spesso definito scansione delle connessioni semiaperte e non viene mai completata completamente. Questo metodo viene utilizzato per DDoS ma su larga scala con botnet.
Esempio:
sudo nmap -sS [IP address] or [website address]Aiuto Nmap
Nel complesso, Nmap ha molte caratteristiche e combinazioni. Idealmente, per saperne di più su questi, usa il comando seguente per visualizzare l'elenco dei comandi e dei flag opzionali che possono essere usati con le tue scansioni.
sudo nmap --helpEsempio di output:
Nmap 7.80 ( https://nmap.org )
Usage: nmap [Scan Type(s)] [Options] {target specification}
TARGET SPECIFICATION:
  Can pass hostnames, IP addresses, networks, etc.
  Ex: scanme.nmap.org, microsoft.com/24, 192.168.0.1; 10.0.0-255.1-254
  -iL <inputfilename>: Input from list of hosts/networks
  -iR <num hosts>: Choose random targets
  --exclude <host1[,host2][,host3],...>: Exclude hosts/networks
  --excludefile <exclude_file>: Exclude list from file
HOST DISCOVERY:
  -sL: List Scan - simply list targets to scan
  -sn: Ping Scan - disable port scan
  -Pn: Treat all hosts as online -- skip host discovery
  -PS/PA/PU/PY[portlist]: TCP SYN/ACK, UDP or SCTP discovery to given ports
  -PE/PP/PM: ICMP echo, timestamp, and netmask request discovery probes
  -PO[protocol list]: IP Protocol Ping
  -n/-R: Never do DNS resolution/Always resolve [default: sometimes]
  --dns-servers <serv1[,serv2],...>: Specify custom DNS servers
  --system-dns: Use OS's DNS resolver
  --traceroute: Trace hop path to each host
SCAN TECHNIQUES:
  -sS/sT/sA/sW/sM: TCP SYN/Connect()/ACK/Window/Maimon scans
  -sU: UDP Scan
  -sN/sF/sX: TCP Null, FIN, and Xmas scans
  --scanflags <flags>: Customize TCP scan flags
  -sI <zombie host[:probeport]>: Idle scan
  -sY/sZ: SCTP INIT/COOKIE-ECHO scans
  -sO: IP protocol scan
  -b <FTP relay host>: FTP bounce scan
PORT SPECIFICATION AND SCAN ORDER:
  -p <port ranges>: Only scan specified ports
    Ex: -p22; -p1-65535; -p U:53,111,137,T:21-25,80,139,8080,S:9
  --exclude-ports <port ranges>: Exclude the specified ports from scanning
  -F: Fast mode - Scan fewer ports than the default scan
  -r: Scan ports consecutively - don't randomize
  --top-ports <number>: Scan <number> most common ports
  --port-ratio <ratio>: Scan ports more common than <ratio>
SERVICE/VERSION DETECTION:
  -sV: Probe open ports to determine service/version info
  --version-intensity <level>: Set from 0 (light) to 9 (try all probes)
  --version-light: Limit to most likely probes (intensity 2)
  --version-all: Try every single probe (intensity 9)
  --version-trace: Show detailed version scan activity (for debugging)
SCRIPT SCAN:
  -sC: equivalent to --script=default
  --script=<Lua scripts>: <Lua scripts> is a comma separated list of
           directories, script-files or script-categories
  --script-args=<n1=v1,[n2=v2,...]>: provide arguments to scripts
  --script-args-file=filename: provide NSE script args in a file
  --script-trace: Show all data sent and received
  --script-updatedb: Update the script database.
  --script-help=<Lua scripts>: Show help about scripts.
           <Lua scripts> is a comma-separated list of script-files or
           script-categories.
OS DETECTION:
  -O: Enable OS detection
  --osscan-limit: Limit OS detection to promising targets
  --osscan-guess: Guess OS more aggressively
TIMING AND PERFORMANCE:
  Options which take <time> are in seconds, or append 'ms' (milliseconds),
  's' (seconds), 'm' (minutes), or 'h' (hours) to the value (e.g. 30m).
  -T<0-5>: Set timing template (higher is faster)
  --min-hostgroup/max-hostgroup <size>: Parallel host scan group sizes
  --min-parallelism/max-parallelism <numprobes>: Probe parallelization
  --min-rtt-timeout/max-rtt-timeout/initial-rtt-timeout <time>: Specifies
      probe round trip time.
  --max-retries <tries>: Caps number of port scan probe retransmissions.
  --host-timeout <time>: Give up on target after this long
  --scan-delay/--max-scan-delay <time>: Adjust delay between probes
  --min-rate <number>: Send packets no slower than <number> per second
  --max-rate <number>: Send packets no faster than <number> per second
FIREWALL/IDS EVASION AND SPOOFING:
  -f; --mtu <val>: fragment packets (optionally w/given MTU)
  -D <decoy1,decoy2[,ME],...>: Cloak a scan with decoys
  -S <IP_Address>: Spoof source address
  -e <iface>: Use specified interface
  -g/--source-port <portnum>: Use given port number
  --proxies <url1,[url2],...>: Relay connections through HTTP/SOCKS4 proxies
  --data <hex string>: Append a custom payload to sent packets
  --data-string <string>: Append a custom ASCII string to sent packets
  --data-length <num>: Append random data to sent packets
  --ip-options <options>: Send packets with specified ip options
  --ttl <val>: Set IP time-to-live field
  --spoof-mac <mac address/prefix/vendor name>: Spoof your MAC address
  --badsum: Send packets with a bogus TCP/UDP/SCTP checksum
OUTPUT:
  -oN/-oX/-oS/-oG <file>: Output scan in normal, XML, s|<rIpt kIddi3,
     and Grepable format, respectively, to the given filename.
  -oA <basename>: Output in the three major formats at once
  -v: Increase verbosity level (use -vv or more for greater effect)
  -d: Increase debugging level (use -dd or more for greater effect)
  --reason: Display the reason a port is in a particular state
  --open: Only show open (or possibly open) ports
  --packet-trace: Show all packets sent and received
  --iflist: Print host interfaces and routes (for debugging)
  --append-output: Append to rather than clobber specified output files
  --resume <filename>: Resume an aborted scan
  --stylesheet <path/URL>: XSL stylesheet to transform XML output to HTML
  --webxml: Reference stylesheet from Nmap.Org for more portable XML
  --no-stylesheet: Prevent associating of XSL stylesheet w/XML output
MISC:
  -6: Enable IPv6 scanning
  -A: Enable OS detection, version detection, script scanning, and traceroute
  --datadir <dirname>: Specify custom Nmap data file location
  --send-eth/--send-ip: Send using raw ethernet frames or IP packets
  --privileged: Assume that the user is fully privileged
  --unprivileged: Assume the user lacks raw socket privileges
  -V: Print version number
  -h: Print this help summary page.
EXAMPLES:
  nmap -v -A scanme.nmap.org
  nmap -v -sn 192.168.0.0/16 10.0.0.0/8
  nmap -v -iR 10000 -Pn -p 80
SEE THE MAN PAGE (https://nmap.org/book/man.html) FOR MORE OPTIONS AND EXAMPLES
Come rimuovere (disinstallare) Nmap
Per rimuovere Nmap dal tuo sistema Debian 11, usa il seguente comando per rimuovere l'applicazione.
sudo apt autoremove nmap --purgeEsempio di output:
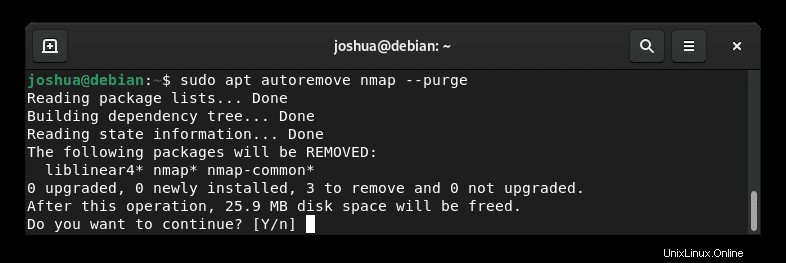
Digita Y , quindi premi il TASTO INVIO per procedere con la rimozione di Nmap.
Nota, questo rimuoverà le dipendenze inutilizzate che sono state installate anche durante l'installazione iniziale di Nmap.