
Il sogno di ogni sviluppatore è avere un codice pulito e privo di problemi che possa essere prontamente distribuito negli ambienti di staging e produzione. Uno strumento che può aiutarti a raggiungere questo obiettivo è nella tua pipeline CI/CD è SonarQube. SonarQube è uno strumento multipiattaforma e basato sul Web utilizzato per l'ispezione continua del codice sorgente. È scritto in Java. SonarQube ti consente di scrivere codice più pulito e sicuro ispezionando il codice e rilevando bug e altre incongruenze.
SonarQube può essere integrato in piattaforme come GitHub, Gitlab, BitBucket e Azure DevOps per citare alcune piattaforme. È disponibile in varie edizioni, comprese le edizioni Community, Developer, Enterprise e Datacenter.
In questo tutorial impariamo come installare SonarQube su Ubuntu 20.04 . Installeremo l'edizione Community poiché è gratuita da scaricare e abilitare il certificato SSL (https) con Let's Encrypt impostando Nginx come proxy inverso.
Prerequisiti
Prima di iniziare, assicurati di soddisfare i seguenti requisiti:
- Ubuntu 20.04 LTS con un utente sudo configurato.
- Assicurati che il tuo sistema abbia almeno 4 GB di RAM e 2vCPU core
Dovrai installare alcuni strumenti
$ sudo apt update
$ sudo apt install net-tools unzip vim curl
Inoltre, devi aumentare il kernel della memoria virtuale
$ sudo sysctl -w vm.max_map_count=262144con il numero massimo di file aperti
$ sudo sysctl -w fs.file-max=65536e i limiti delle risorse
$ ulimit -n 65536$ ulimit -u 4096
Puoi rendere persistenti le modifiche modificando i parametri di sistema in /etc/sysctl.conf file di configurazione
$ sudo vim /etc/sysctl.confAggiungi le seguenti righe.
vm.max_map_count=262144
fs.file-max=65536
ulimit -n 65536
ulimit -u 4096
Salva ed esci. Successivamente, apri limits.conf file
$ sudo vim /etc/security/limits.confIn fondo, aggiungi le seguenti righe
sonarqube - nofile 65536
sonarqube - nproc 4096
Salva ed esci. Per rendere effettive le modifiche, riavvia il server.
Passaggio 1:installa OpenJDK
Poiché è scritto in Java, SonarQube dipende da Java per funzionare. Installeremo OpenJDK 11 che fornisce java.
$ sudo apt install openjdk-11-jdkUna volta installato, puoi verificare la versione di Java.
$ java -versionFase 2:installa il database PostgreSQL
Dal 2016, SonarQube ha abbandonato il supporto per MySQL e ora supporta solo PostgreSQL. Pertanto, dobbiamo installare il database PostgreSQL.
Per iniziare, scarica e aggiungi la chiave GPG di PostgreSQL.
$ wget -q https://www.postgresql.org/media/keys/ACCC4CF8.asc -O - | sudo apt-key add -Successivamente, aggiungi il repository PostgreSQL.
$ sudo sh -c 'echo "deb http://apt.postgresql.org/pub/repos/apt/ `lsb_release -cs`-pgdg main" >> /etc/apt/sources.list.d/pgdg.list'Quindi aggiorna l'indice del pacchetto per sincronizzare il nuovo repository.
$ sudo apt updateUna volta terminato l'aggiornamento degli elenchi dei pacchetti, installa il database PostgreSQL e le sue dipendenze.
$ sudo apt install postgresql postgresql-contribPer impostazione predefinita, il servizio PostgreSQL viene avviato dopo l'installazione, se non avviato eseguire il comando seguente.
$ sudo systemctl start postgresqlSolo per confermare che tutto funzioni come previsto, verifica il suo stato di esecuzione.
$ sudo systemctl status postgresql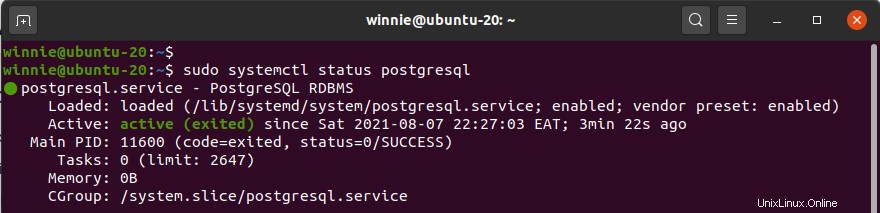
Puoi anche confermare la porta su cui è in ascolto:
$ sudo netstat -pnltu | grep 5432tcp 0 0 127.0.0.1:5432 0.0.0.0:* LISTEN 7768/postgres
tcp6 0 0 ::1:5432 :::* LISTEN 7768/postgres Abilita PostgreSQL per l'avvio automatico all'avvio:
$ sudo systemctl enable postgresqlFinora, il nostro PostgreSQL è attivo e funzionante senza intoppi.
Fase 3:Configura PostgreSQL
Andando avanti, imposteremo la password per l'utente Postgres che di solito viene fornita per impostazione predefinita quando PostgreSQL è installato. Per farlo, esegui il comando:
$ sudo passwd postgresDigita la password e confermala. Quindi, passa all'utente Postgres.
$ su - postgresQuindi, procedi e crea un nuovo utente del database.
$ createuser sonarUna volta terminato, passa al prompt di PostgreSQL usando il comando:
$ psqlCon l'accesso alla shell di PostgreSQL, crea una password per l'utente che hai appena creato.
ALTER USER sonar WITH ENCRYPTED PASSWORD 'strong_password';Quindi, crea un database SonarQube con l'utente che hai creato come proprietario
CREATE DATABASE sonarqube OWNER sonar;Quindi, assegna o concedi tutti i privilegi per l'utilizzo del database in modo che dispongano di tutti i privilegi per modificare il database.
GRANT ALL PRIVILEGES ON DATABASE sonarqube to sonar;Ora esci dal database.
\qFase 4:scarica e configura SonarQube
Andando avanti, scaricheremo l'ultimo file zip binario SonarQube. Al momento, l'ultima versione della Community Edition, che è una versione Long Term Service (LTS), è SonarQube versione 9.0.1. Puoi andare alla pagina di download di SonarQube per gli ultimi download.
Per scaricare il file zip, immetti il comando:
$ wget https://binaries.sonarsource.com/Distribution/sonarqube/sonarqube-9.0.1.46107.zip Quindi, decomprimi il file zippato.
$ unzip sonarqube-9.0.1.46107.zipE spostalo nel percorso /opt/.
$ sudo mv sonarqube-9.0.1.46107 /opt/sonarqubeFase 5:crea un nuovo utente e gruppo
Andando avanti, creeremo un nuovo utente e gruppo che eseguirà il servizio SonarQube. Quindi, crea il gruppo.
$ sudo groupadd sonarQuindi, crea l'utente con la directory home impostata su /opt/sonarqube mentre aggiungi l'utente al gruppo appena creato.
$ sudo useradd -c "SonarQube - User" -d /opt/sonarqube/ -g sonar sonarQuindi imposta la proprietà sulla directory /opt/sonarqube.
$ sudo chown -R sonar:sonar /opt/sonarqube/Fase 6:Configura SonarQube
Ora configuriamo SonarQube. Apri il file di configurazione SonarQube.
$ sudo vim /opt/sonarqube/conf/sonar.properties
Individua e decommenta le seguenti righe
sonar.jdbc.username=
sonar.jdbc.password=
Questi rappresentano l'utente e la password del database SonarQube che abbiamo creato nel server del database PostgreSQL. Pertanto, compila i valori di conseguenza.
sonar.jdbc.username=sonar_user
sonar.jdbc.password=strong_password
Quindi, modifica queste righe in modo che assomiglino a ciò che viene fornito
sonar.jdbc.url=jdbc:postgresql://localhost:5432/sonarqubesonar.search.javaOpts=-Xmx512m -Xms512m -XX:MaxDirectMemorySize=256m -XX:+HeapDumpOnOutOfMemoryErrorSuccessivamente, modifica le seguenti righe in modo che appaiano come appaiono.
sonar.web.host=0.0.0.0sonar.web.port=9000sonar.web.javaAdditionalOpts=-serversonar.log.level=INFOsonar.path.logs=logsSuccessivamente, modifica l'utente che eseguirà il servizio SonarQube modificando il file mostrato.
$ sudo vim /opt/sonarqube/bin/linux-x86-64/sonar.shScorri verso il basso e assicurati che la riga sottostante appaia come mostrato.
RUN_AS_USER=sonarFase 7:crea un file di servizio Systemd per SonarQube
Al momento, il nostro sistema non ha modo di avviare il servizio SonarQube. Pertanto, abbiamo bisogno di creare un servizio systemd. Per farlo, esegui il comando:
$ sudo vim /etc/systemd/system/sonarqube.serviceAggiungi le seguenti righe.
[Unit]
Description=SonarQube service
After=syslog.target network.target

[Service]
Type=forking
ExecStart=/opt/sonarqube/bin/linux-x86-64/sonar.sh start
ExecStop=/opt/sonarqube/bin/linux-x86-64/sonar.sh stop
User=sonar
Group=sonar
Restart=always
LimitNOFILE=65536
LimitNPROC=4096

[Install]
WantedBy=multi-user.target
Salva le modifiche ed esci dal file.
Abilita l'avvio del servizio SonarQube all'avvio
$ sudo systemctl enable sonarqubeE avvia il servizio SonarQube.
$ sudo systemctl start sonarqubePer assicurarti che il servizio SonarQube sia in esecuzione, esegui il comando:
$ sudo systemctl status sonarqube
Inoltre, assicurati che la porta 9000 sia aperta
$ sudo ufw allow '9000'Rules updated
Rules updated (v6)Verifica se il servizio è in ascolto sulla porta 9000
$ sudo netstat -pnltu | grep 9000tcp6 0 0 :::9000 :::* LISTEN 65140/java
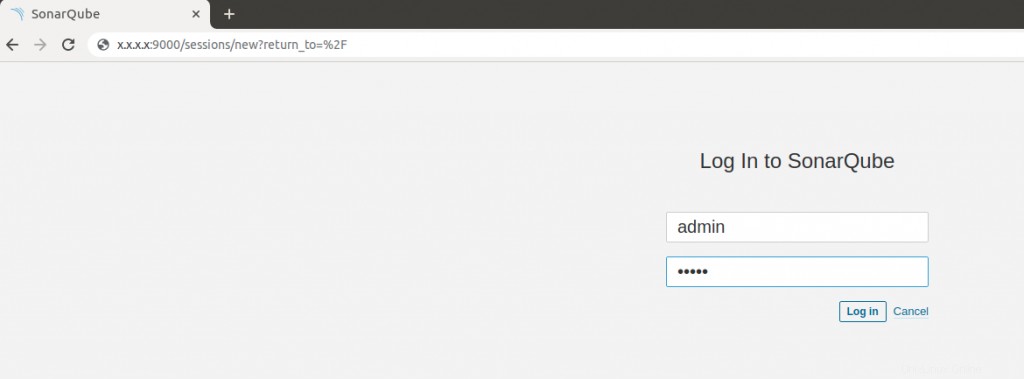
Ora puoi provare a verificare se puoi accedere alla pagina di accesso inserendo l'IP pubblico del tuo server e il numero di porta dal tuo browser es http://<server-ip>:9000/ . Il nome utente dell'amministratore predefinito è 'admin' e la password è 'admin'.
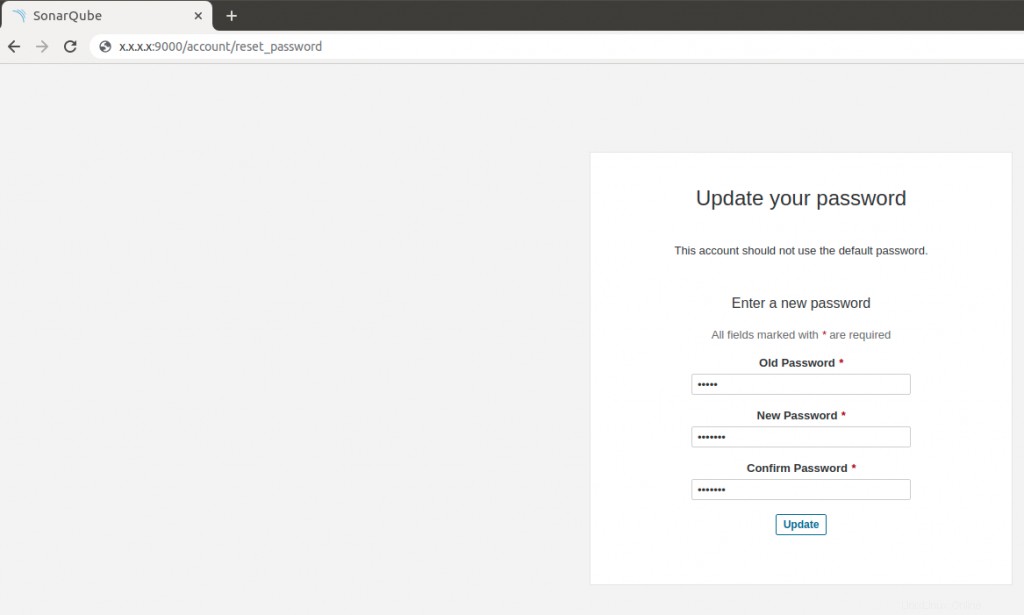
Sonarqube ti chiederà di aggiornare la password per cambiare quella di default.
Fase 8:installa e configura Nginx con SSL (opzionale)
Per accedere al tuo Sonarqube con un nome di dominio abilitato SSL, dovrai installare un proxy inverso come Nginx. Il server web indirizzerà le connessioni a SonarQube in modo che gli sviluppatori possano accedervi da un nome di dominio protetto.
L'installazione di Nginx è semplice e diretta e può essere eseguita con un solo comando.
$ sudo apt install nginxDopo l'installazione, abilita l'avvio del server web Nginx all'avvio.
$ sudo systemctl enable nginxE avvia il servizio
$ sudo systemctl start nginxAffinché il server web sia a conoscenza di SonarQube, creeremo un file di configurazione mostrato.
$ sudo vim /etc/nginx/sites-available/sonarqube.confQuindi incolla il contenuto fornito.
server {

listen 80;
server_name example.com or SERVER-IP;
access_log /var/log/nginx/sonar.access.log;
error_log /var/log/nginx/sonar.error.log;
proxy_buffers 16 64k;
proxy_buffer_size 128k;

location / {
proxy_pass http://127.0.0.1:9000;
proxy_next_upstream error timeout invalid_header http_500 http_502 http_503 http_504;
proxy_redirect off;
proxy_set_header Host $host;
proxy_set_header X-Real-IP $remote_addr;
proxy_set_header X-Forwarded-For $proxy_add_x_forwarded_for;
proxy_set_header X-Forwarded-Proto http;
}
}
Salva ed esci. Quindi abilita il sito Sonarqube:
$ sudo ln -s /etc/nginx/sites-available/sonarqube.conf /etc/nginx/sites-enabled/sonarqube.confVerifica se la configurazione è corretta
$ sudo nginx -tnginx: the configuration file /etc/nginx/nginx.conf syntax is ok
nginx: configuration file /etc/nginx/nginx.conf test is successfulQuindi riavvia il server web Nginx per applicare le modifiche.
$ sudo systemctl restart nginxOra dobbiamo configurare il firewall UFW per consentire nginx. Per fare ciò, esegui i comandi
$ sudo ufw allow 'Nginx Full'Quindi ricarica il firewall per apportare le modifiche.
$ sudo ufw --reloadOra puoi accedere al tuo SonarQube tramite il suo nome di dominio
Qui utilizzeremo il certificato gratuito let's encrypt. Per configurarlo dobbiamo eseguire cerbot per Nginx:
$ sudo certbot --nginxSaving debug log to /var/log/letsencrypt/letsencrypt.log Plugins selected: Authenticator nginx, Installer nginx Enter email address (used for urgent renewal and security notices) (Enter 'c' to cancel): alain@websitefortesting.com Please read the Terms of Service at https://letsencrypt.org/documents/LE-SA-v1.2-November-15-2017.pdf. You must agree in order to register with the ACME server at https://acme-v02.api.letsencrypt.org/directory (A)gree/(C)ancel: A Would you be willing to share your email address with the Electronic Frontier Foundation, a founding partner of the Let's Encrypt project and the non-profit organization that develops Certbot? We'd like to send you email about our work encrypting the web, EFF news, campaigns, and ways to support digital freedom. (Y)es/(N)o: NSaving debug log to /var/log/letsencrypt/letsencrypt.log Plugins selected: Authenticator nginx, Installer nginx Which names would you like to activate HTTPS for? 1: websitefortesting.com Select the appropriate numbers separated by commas and/or spaces, or leave input blank to select all options shown (Enter 'c' to cancel): 1 Obtaining a new certificate Performing the following challenges: http-01 challenge for websitefortesting.com Waiting for verification… Cleaning up challenges Deploying Certificate to VirtualHost /etc/nginx/sites-enabled/sonarqube.conf Please choose whether or not to redirect HTTP traffic to HTTPS, removing HTTP access. 1: No redirect - Make no further changes to the webserver configuration. 2: Redirect - Make all requests redirect to secure HTTPS access. Choose this for new sites, or if you're confident your site works on HTTPS. You can undo this change by editing your web server's configuration. Select the appropriate number [1-2] then [enter] (press 'c' to cancel): 2 Redirecting all traffic on port 80 to ssl in /etc/nginx/sites-enabled/sonarqube.conf Congratulations! You have successfully enabled https://websitefortesting.com You should test your configuration at: https://www.ssllabs.com/ssltest/analyze.html?d=websitefortesting.com IMPORTANT NOTES: Congratulations! Your certificate and chain have been saved at: /etc/letsencrypt/live/websitefortesting.com/fullchain.pem Your key file has been saved at: /etc/letsencrypt/live/websitefortesting.com/privkey.pem Your cert will expire on 2021-11-27. To obtain a new or tweaked version of this certificate in the future, simply run certbot again with the "certonly" option. To non-interactively renew all of your certificates, run "certbot renew" If you like Certbot, please consider supporting our work by: Donating to ISRG / Let's Encrypt: https://letsencrypt.org/donate Donating to EFF: https://eff.org/donate-le
Per impostazione predefinita, crittografiamo aggiungerà alcune righe nel file di blocco del server Nginx.
Dovresti avere qualcosa del genere
server { server_name websitefortesting.com; add_header Strict-Transport-Security max-age=2592000; #rewrite ^ https://$server_name$request_uri? permanent; access_log /var/log/nginx/sonarqube.access.log; error_log /var/log/nginx/sonarqube.error.log; proxy_buffers 16 64k; proxy_buffer_size 128k; location / { proxy_pass http://127.0.0.1:9000; proxy_set_header Host $host; proxy_set_header X-Real-IP $remote_addr; proxy_set_header X-Forwarded-For $proxy_add_x_forwarded_for; proxy_set_header X-Forwarded-Proto http; } listen 443 ssl; # managed by Certbot ssl_certificate /etc/letsencrypt/live/websitefortesting.com/fullchain.pem; # managed by Certbot ssl_certificate_key /etc/letsencrypt/live/websitefortesting.com/privkey.pem; # managed by Certbot include /etc/letsencrypt/options-ssl-nginx.conf; # managed by Certbot ssl_dhparam /etc/letsencrypt/ssl-dhparams.pem; # managed by Certbot } server { if ($host = websitefortesting.com) { return 301 https://$host$request_uri; } # managed by Certbotlisten 80;server_name websitefortesting.com; return 404; # managed by Certbot }
Fase 10:accedi a SonarQube con HTTPS
Ora puoi accedere a SonarQube in modo sicuro con l'URL HTTPS configurato con Let's encrypt.
https://domain-name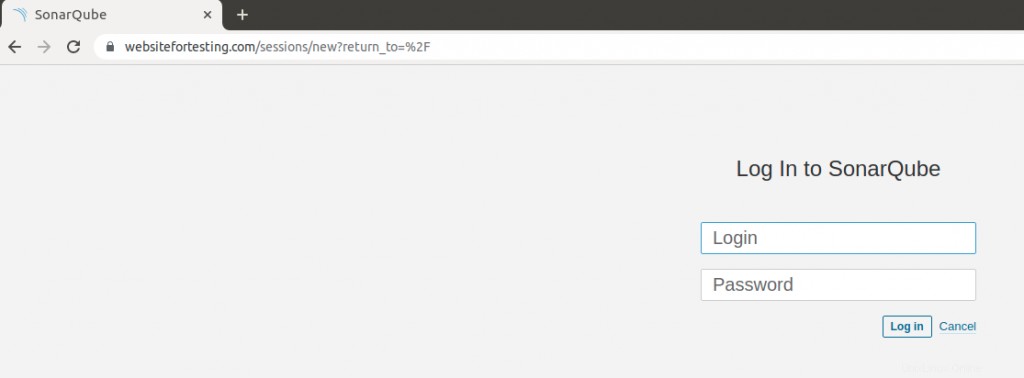
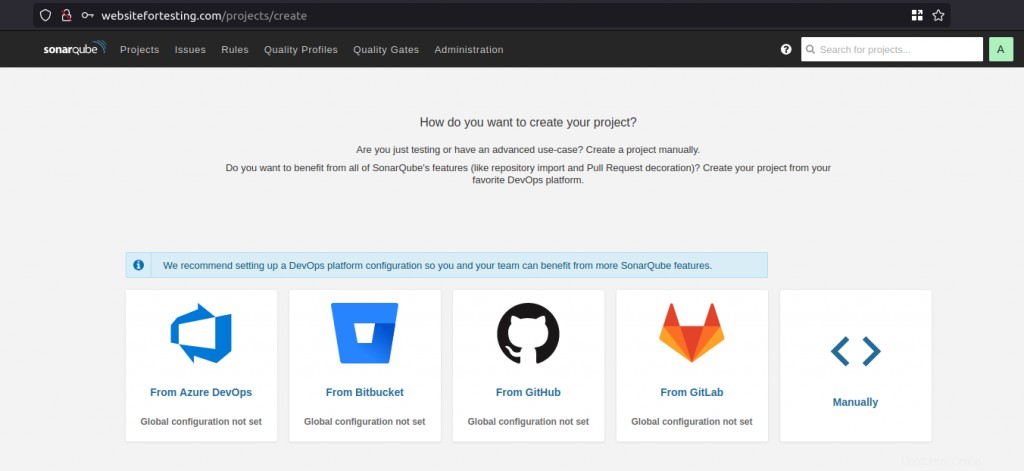
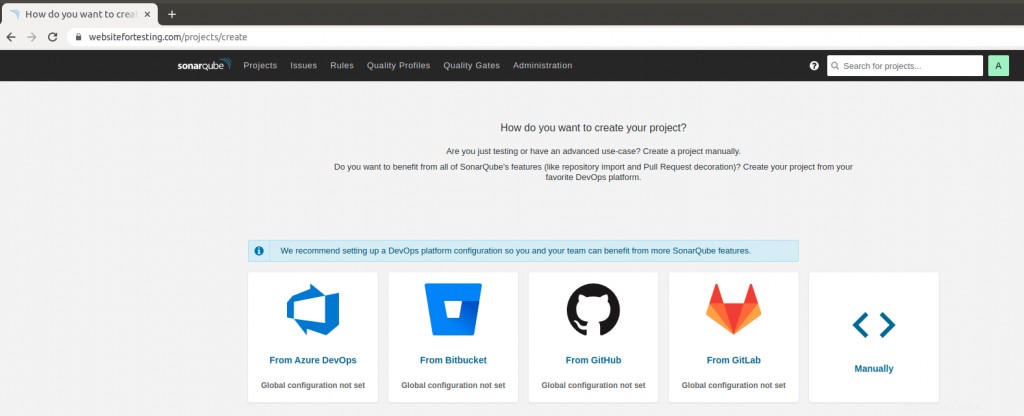
Dopo il login, ti verrà mostrata la pagina di destinazione.
Conclusione
In questo tutorial, abbiamo imparato come installare SonarQube su Ubuntu 20.04. Abbiamo abilitato Sonarqube con SSL utilizzando il certificato Let's Encrypt utilizzando Nginx come proxy inverso.