Jenkins è un server di automazione gratuito e open source che aiuta gli sviluppatori a creare, testare e distribuire il loro software. Si basa su Java e fornisce oltre 1700 plugin che aiutano ad automatizzare le attività ripetitive coinvolte nel processo di sviluppo del software. Supporta più sistemi operativi come Windows, Mac OS X e Linux e può essere facilmente distribuito su più macchine.
In questo tutorial, ti mostreremo come installare Jenkins con Apache come proxy inverso su Ubuntu 20.04.
Prerequisiti
- Un server che esegue Ubuntu 20.04.
- Una password di root è configurata sul server.
Per iniziare
Prima di iniziare, è una buona idea aggiornare il sistema con l'ultima versione. Puoi aggiornare il tuo sistema con il seguente comando:
apt-get update -y
apt-get upgrade -y
Dopo aver aggiornato il sistema, riavvialo per implementare le modifiche.
Installa Java
Jenkins è basato su Java, quindi Java deve essere installato nel tuo sistema. Se non è installato, puoi installarlo eseguendo il seguente comando:
apt-get install openjdk-11-jdk gnupg2 -y
Una volta installato, controlla la versione installata di Java con il seguente comando:
java -version
Dovresti ottenere il seguente output:
openjdk version "11.0.8" 2020-07-14
OpenJDK Runtime Environment (build 11.0.8+10-post-Ubuntu-0ubuntu120.04)
OpenJDK 64-Bit Server VM (build 11.0.8+10-post-Ubuntu-0ubuntu120.04, mixed mode, sharing)
Una volta terminato, puoi procedere al passaggio successivo.
Installa Jenkins
Per impostazione predefinita, l'ultima versione di Jenkins non è disponibile nel repository predefinito di Ubuntu 20.04. Quindi dovrai aggiungere il repository Jenkins al tuo sistema.
Innanzitutto, scarica e aggiungi la chiave GPG con il seguente comando:
wget -q -O - https://pkg.jenkins.io/debian/jenkins.io.key | apt-key add -
Quindi, aggiungi il repository Jenkins all'APT con il seguente comando:
sh -c 'echo deb http://pkg.jenkins.io/debian-stable binary/ > /etc/apt/sources.list.d/jenkins.list'
Quindi, aggiorna il repository e installa l'ultima versione di Jenkins con il comando seguente:
apt-get update -y
apt-get install jenkins -y
Dopo la corretta installazione, controlla lo stato di Jenkins con il seguente comando:
systemctl status jenkins
Dovresti vedere il seguente output:
? jenkins.service - LSB: Start Jenkins at boot time
     Loaded: loaded (/etc/init.d/jenkins; generated)
     Active: active (exited) since Sun 2020-08-09 12:50:35 UTC; 44s ago
       Docs: man:systemd-sysv-generator(8)
      Tasks: 0 (limit: 2353)
     Memory: 0B
     CGroup: /system.slice/jenkins.service

Aug 09 12:50:34 ubuntu2004 systemd[1]: Starting LSB: Start Jenkins at boot time...
Aug 09 12:50:34 ubuntu2004 jenkins[6134]: Correct java version found
Aug 09 12:50:34 ubuntu2004 jenkins[6134]:  * Starting Jenkins Automation Server jenkins
Aug 09 12:50:34 ubuntu2004 su[6180]: (to jenkins) root on none
Aug 09 12:50:34 ubuntu2004 su[6180]: pam_unix(su-l:session): session opened for user jenkins by (uid=0)
Aug 09 12:50:34 ubuntu2004 su[6180]: pam_unix(su-l:session): session closed for user jenkins
Aug 09 12:50:35 ubuntu2004 jenkins[6134]:    ...done.
Aug 09 12:50:35 ubuntu2004 systemd[1]: Started LSB: Start Jenkins at boot time.
A questo punto Jenkins è in esecuzione e in ascolto sulla porta 8080. Puoi verificarlo con il seguente comando:
netstat -plntu | grep 8080
Dovresti vedere il seguente output:
tcp6 0 0 :::8080 :::* LISTEN 6192/java
Una volta terminato, puoi procedere al passaggio successivo.
Configura Apache come proxy inverso
Successivamente, dovrai installare e configurare Apache come proxy inverso per Jenkins. Quindi puoi accedere al Jenkins attraverso la porta 80.
Innanzitutto, installa il server web Apache con il seguente comando:
apt-get install apache2 -y
Dopo aver installato il web server Apache, abilita i moduli richiesti con il seguente comando:
a2enmod proxy
a2enmod proxy_http
Quindi, crea un file di configurazione dell'host virtuale Apache per Jenkins con il seguente comando:
nano /etc/apache2/sites-available/jenkins.conf
Aggiungi le seguenti righe:
<Virtualhost *:80>
    ServerName        jenkins.example.com
    ProxyRequests     Off
    ProxyPreserveHost On
    AllowEncodedSlashes NoDecode

    <Proxy http://localhost:8080/>
      Order deny,allow
      Allow from all
    </Proxy>

    ProxyPass         /  http://localhost:8080/ nocanon
    ProxyPassReverse  /  http://localhost:8080/
    ProxyPassReverse  /  http://jenkins.hakase-labs.io/
</Virtualhost>
Salva e chiudi il file quando hai finito. Quindi, abilita il file di configurazione dell'host virtuale Apache con il seguente comando:
a2ensite jenkins
Quindi, riavvia il servizio Apache e Jenkins per applicare le modifiche:
systemctl reload apache2
systemctl restart jenkins
Ora puoi controllare lo stato del servizio Apache con il seguente comando:
systemctl status apache2
Dovresti ottenere il seguente output:
? apache2.service - The Apache HTTP Server
   Loaded: loaded (/lib/systemd/system/apache2.service; enabled; vendor preset: enabled)
  Drop-In: /lib/systemd/system/apache2.service.d
           ??apache2-systemd.conf
   Active: active (running) since Sun 2020-08-10 12:41:30 UTC; 22min ago
  Process: 15407 ExecReload=/usr/sbin/apachectl graceful (code=exited, status=0/SUCCESS)
 Main PID: 14417 (apache2)
    Tasks: 11 (limit: 1114)
   CGroup: /system.slice/apache2.service
           ??14417 /usr/sbin/apache2 -k start
           ??15412 /usr/sbin/apache2 -k start
           ??15413 /usr/sbin/apache2 -k start
           ??15414 /usr/sbin/apache2 -k start
           ??15416 /usr/sbin/apache2 -k start
           ??15417 /usr/sbin/apache2 -k start
           ??15418 /usr/sbin/apache2 -k start
           ??15419 /usr/sbin/apache2 -k start
           ??15420 /usr/sbin/apache2 -k start
           ??15422 /usr/sbin/apache2 -k start
           ??15429 /usr/sbin/apache2 -k start

Aug 10 12:41:29 ubuntu20.04 systemd[1]: Starting The Apache HTTP Server...
A questo punto, il server Web Apache è configurato per servire Jenkins. Ora puoi procedere al passaggio successivo.
Nota:se ti connetti a Jenkins tramite Internet, ti consigliamo di proteggere le connessioni con SSL/TLS. Per abilitare SSL tramite Let's Encrypt usando certbot per l'interfaccia web Jenkins, dai un'occhiata qui:
https://www.howtoforge.com/how-to-manage-lets-encrypt-ssl-tls-certificates-with-certbot/
Accedi all'interfaccia Web Jenkins
Ora apri il tuo browser web e digita l'URL http://jenkins.example.com. Ti verrà chiesto di inserire la password amministratore iniziale come mostrato di seguito:
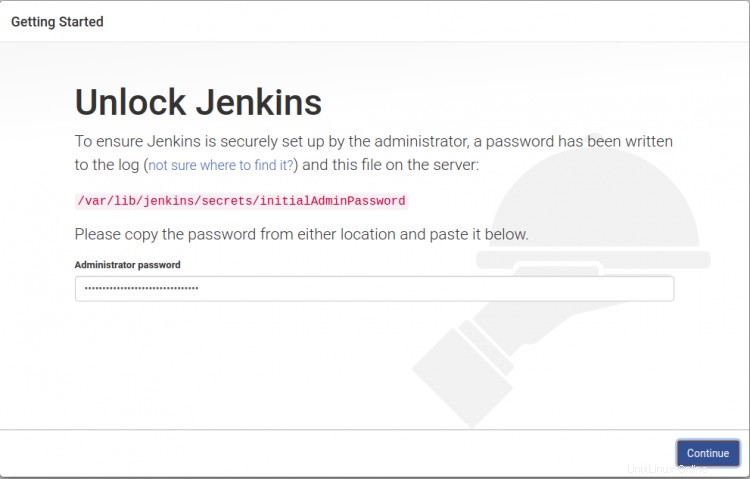
Puoi vedere la password amministratore iniziale di Jenkins con il seguente comando:
cat /var/lib/jenkins/secrets/initialAdminPassword
Dovresti vedere la password Jenkins nel seguente output:
78d6b10330434b27a09590fc781c9e6d
Digita la password dall'output sopra nella schermata di accesso e fai clic su Continua pulsante. Verrai reindirizzato alla schermata di personalizzazione di Jenkins:

Seleziona l'opzione desiderata e fai clic su di essa. Dovresti vedere la schermata di installazione dei plug-in Jenkins in corso:
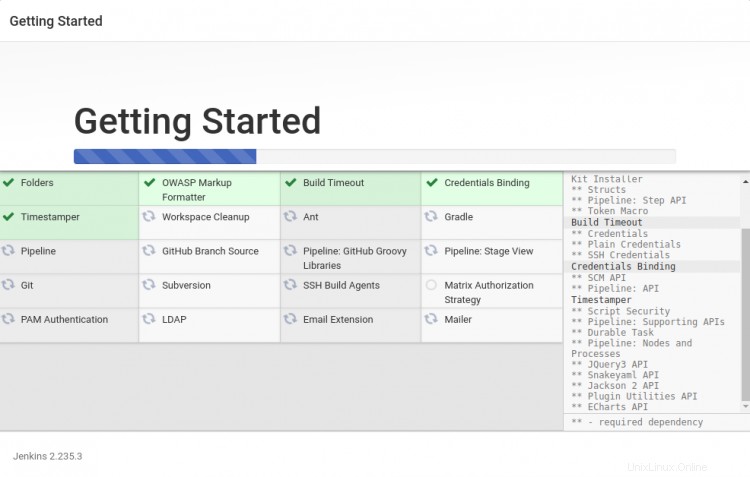
Una volta che tutti i plugin sono stati installati correttamente, dovresti vedere la seguente schermata:
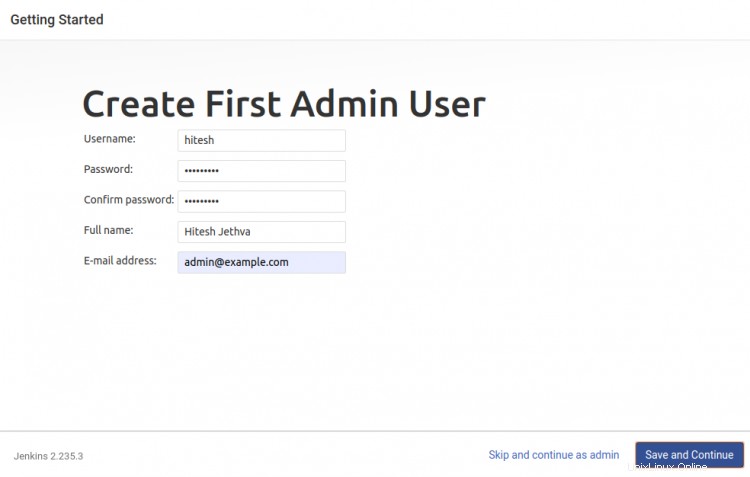
Fornisci il tuo nome utente amministratore, password, e-mail e fai clic su Salva e continua pulsante. Dovresti vedere la seguente schermata:
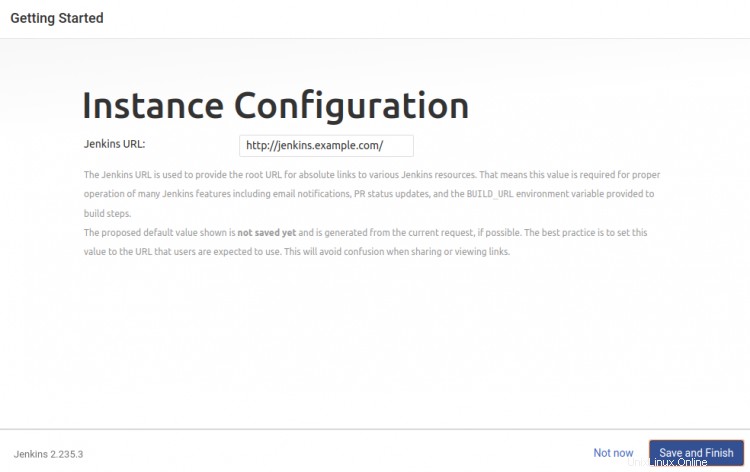
Digita il tuo URL Jenkins e fai clic su Salva e termina pulsante. Dovresti vedere la seguente schermata:
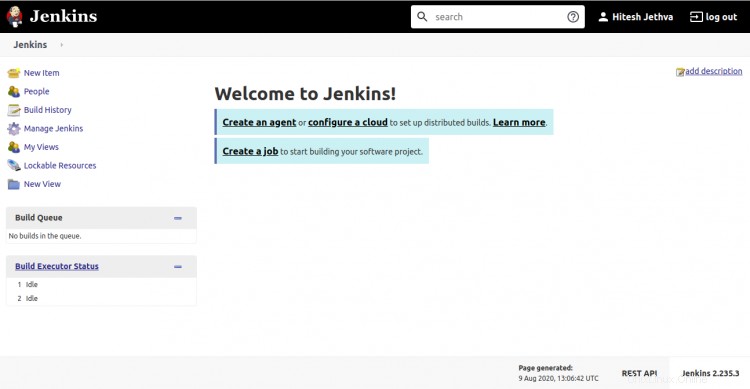
Fai clic su "Inizia a utilizzare Jenkins ". Dovresti vedere la dashboard Jenkins nella schermata seguente:
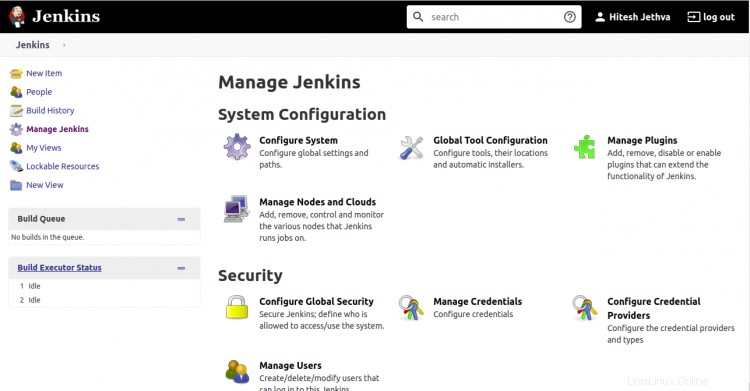
Successivamente, dovrai configurare le impostazioni di sicurezza standard per Jenkins.
Nel riquadro di sinistra, fai clic su Gestisci Jenkins => Configura sicurezza globale . Dovresti vedere la seguente schermata:
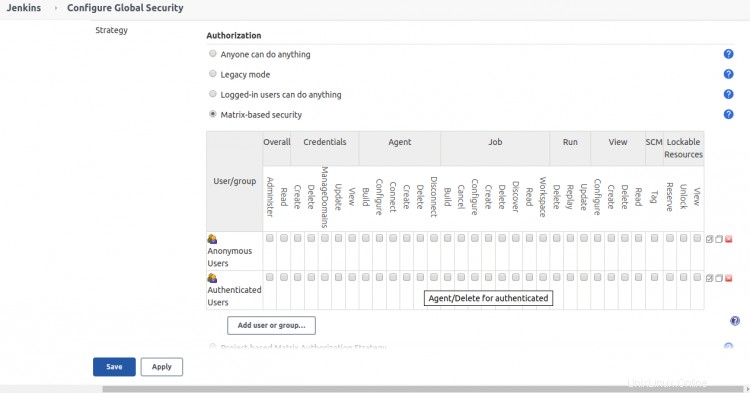
Ora seleziona Sicurezza basata su matrice , aggiungi il tuo utente, concedi i privilegi completi e fai clic su Salva pulsante.
Test Jenkins
A questo punto, Jenkins è installato e configurato. è ora di creare un lavoro di esempio e testare la funzionalità Jenkins.
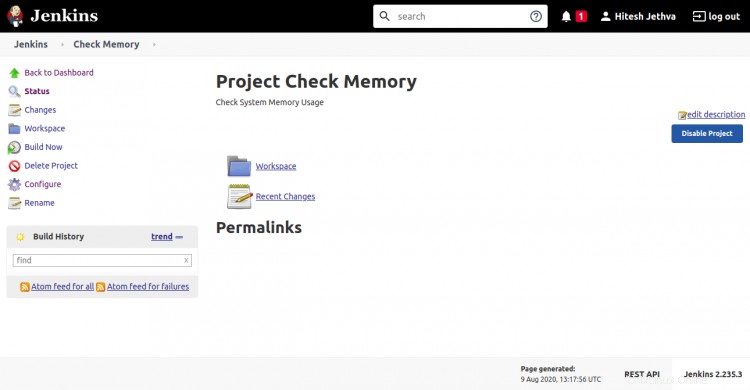
Nella dashboard Jenkins, fai clic su Crea nuovo lavoro pulsante. Dovresti vedere la seguente schermata:

Fornisci il nome del tuo lavoro, seleziona Progetto Freestyle e fai clic su OK pulsante. Dovresti vedere la seguente schermata:
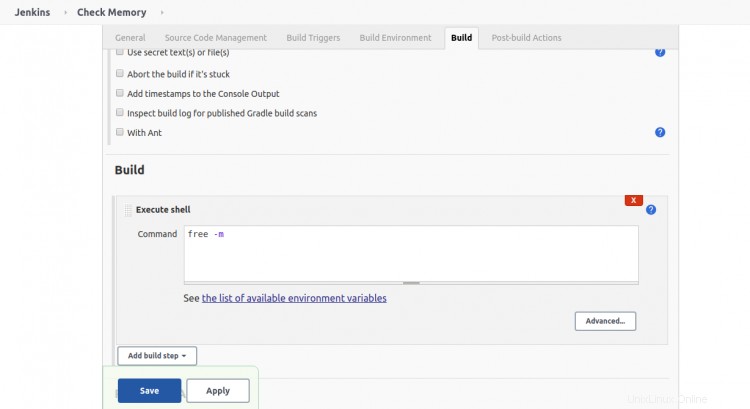
Ora, fai clic su Crea scheda. Nel "passaggio Aggiungi build ", seleziona l'opzione "Esegui shel l" e digita"free -m " nella casella di comando. Quindi, fai clic su Salva pulsante. Dovresti vedere la seguente schermata:
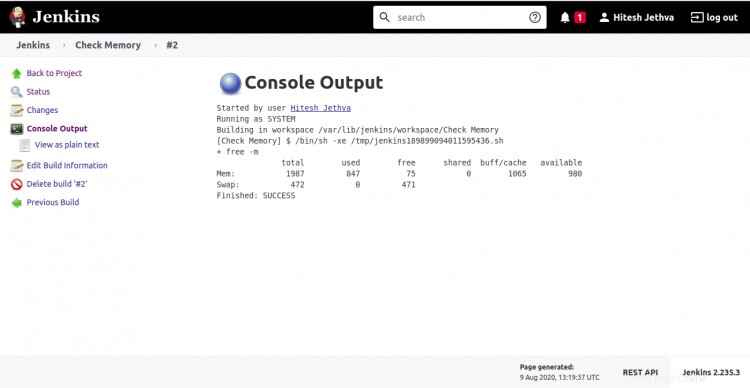
Ora, fai clic su "Crea ora " nel riquadro di sinistra per eseguire il lavoro. Una volta che il lavoro è stato eseguito, dovresti vedere l'output della console dal lavoro eseguito da Jenkins nella schermata seguente:
Conclusione
Congratulazioni! hai installato con successo Jenkins con Apache sul server Ubuntu 20.04. È ora possibile utilizzare Jenkins nell'ambiente di sviluppo per accelerare il processo di sviluppo. Sentiti libero di chiedermi se hai domande.