OrangeScrum è un'applicazione di collaborazione e gestione dei progetti gratuita e open source. È ideale per le piccole e medie imprese e ti aiuta a creare e gestire i tuoi progetti, team, documenti e attività e a comunicare con gli altri membri del team. È un'applicazione di gestione dei progetti molto utile con un'interfaccia semplice che ti aiuta a pianificare, organizzare e gestire le tue attività per qualsiasi progetto. Viene fornito con molte funzionalità tra cui Scrum Board, Sprint Planning e Report, Story Point, Project Backlog e molti altri.
In questo tutorial, ti mostreremo come installare lo strumento di gestione dei progetti OrangeScrum sul server Ubuntu 20.04.
Prerequisiti
- Un server che esegue Ubuntu 20.04.
- Un nome di dominio valido puntato all'IP del tuo server.
- Sul server è configurata una password di root.
Installa Apache, MariaDB e PHP
Innanzitutto, installa il server Web Apache e il server del database MariaDB con il seguente comando:
apt-get install apache2 mariadb-server -y
Dopo aver installato i pacchetti di cui sopra, dovrai installare PHP versione 7.2 e altre estensioni richieste nel tuo sistema. Per impostazione predefinita, Ubuntu 20.04 viene fornito con la versione PHP 7.4, quindi dovrai aggiungere il repository Ondrej nel tuo sistema.
Innanzitutto, installa i pacchetti richiesti con il seguente comando:
apt-get install software-properties-common gnupg2 -y
Quindi, aggiungi il repository Ondrej con il seguente comando:
add-apt-repository ppa:ondrej/php
Quindi, aggiorna il repository e installa PHP insieme agli altri pacchetti richiesti con il seguente comando:
apt-get install php7.2 php7.2-bcmath php7.2-cgi php7.2-cli php7.2-common php7.2-curl php7.2-dba php7.2-enchant php7.2-fpm php7.2-gd php7.2-imap php7.2-intl php7.2-ldap php7.2-mbstring php7.2-mysql php7.2-opcache php7.2-imagick php7.2-memcache php7.2-soap php7.2-tidy php7.2-xml php7.2-zip libapache2-mod-php7.2 xvfb libfontconfig wkhtmltopdf unzip wget -y
Una volta installati tutti i pacchetti, modifica il file php.ini e cambia alcune impostazioni richieste:
nano /etc/php/7.2/apache2/php.ini
Modifica i seguenti valori:
post_max_size = 200M
upload_max_filesize = 200M
max_execution_time = 300
memory_limit = 512M
max_input_vars = 5000
date.timezone = Asia/Kolkata
Salva e chiudi il file, quindi riavvia il servizio Apache per applicare le modifiche:
systemctl restart apache2
Una volta terminato, puoi procedere al passaggio successivo.
Crea un database per OrangeScrum
Successivamente, dovrai creare un database e un utente per OrangeScrum. Innanzitutto, accedi alla shell MariaDB con il seguente comando:
mysql
Una volta effettuato l'accesso, crea un database e un utente con il seguente comando:
MariaDB [(none)]> CREATE DATABASE orangescrumdb;
MariaDB [(none)]> GRANT ALL PRIVILEGES ON orangescrumdb.* TO 'orangescrumuser'@'localhost' IDENTIFIED BY 'password';
Quindi, svuota i privilegi ed esci dalla shell MariaDB con il seguente comando:
MariaDB [(none)]> FLUSH PRIVILEGES;
MariaDB [(none)]> exit;
Successivamente, dovrai disabilitare la modalità rigorosa per MariaDB. Puoi farlo creando il file disable_strict_mode.cnf:
nano /etc/mysql/conf.d/disable_strict_mode.cnf
Aggiungi le seguenti righe:
[mysqld]
sql_mode="IGNORE_SPACE,NO_ZERO_IN_DATE,NO_ZERO_DATE,ERROR_FOR_DIVISION_BY_ZERO,NO_AUTO_CREATE_USER,NO_ENGINE_SUBSTITUTION"
Salva e chiudi il file. Quindi, riavvia MariaDB per applicare tutte le modifiche:
systemctl restart mariadb
Installa OrangeScrum
Innanzitutto, dovrai scaricare l'ultima versione di OrangeScrum dal loro sito Web ufficiale. Dopo averlo scaricato, decomprimi il file scaricato con il seguente comando:
unzip orangescrum-master.zip
Quindi, sposta la directory estratta nella directory radice di Apache con il seguente comando:
mv orangescrum-master /var/www/html/orangescrum
Quindi, cambia la directory in OrangeScrum e importa il database OrangeScrum nel tuo database:
cd /var/www/html/orangescrum
mysql -u orangescrumuser -p orangescrumdb < database.sql
Inserisci la password che hai scelto per l'utente MySQL 'orangescrumuser' quando richiesto dal comando mysql.
Quindi, modifica il file database.php e definisci le impostazioni del database:
nano app/Config/database.php
Modifica le seguenti righe:
class DATABASE_CONFIG {

        public $default = array(
                'datasource' => 'Database/Mysql',
                'persistent' => false,
                'host' => 'localhost',
                'login' => 'orangescrumuser',
                'password' => 'password',
                'database' => 'orangescrumdb',
                'prefix' => '',
                'encoding' => 'utf8',
        );
}
Salva e chiudi il file quando hai finito.
Quindi, dai le autorizzazioni appropriate alla directory di orangescrum:
chown -R www-data:www-data /var/www/html/orangescrum
chmod -R 775 /var/www/html/orangescrum
Configura Apache per OrangeScrum
Successivamente, dovrai creare un nuovo file di configurazione dell'host virtuale Apache per OrangeScrum. Puoi crearlo con il seguente comando:
nano /etc/apache2/sites-available/orangescrum.conf
Aggiungi le seguenti righe:
<VirtualHost *:80>
        ServerAdmin [email protected]
        DocumentRoot /var/www/html/orangescrum/
        ServerName orangescrum.example.com
    <Directory /var/www/html/orangescrum/>
             DirectoryIndex index.php index.html
             AllowOverride All
             Allow from all
             Order allow,deny
             Options Indexes FollowSymlinks
    </Directory>
</VirtualHost>
Salva e chiudi il file, quindi abilita il file dell'host virtuale Apache con il seguente comando:
a2ensite orangescrum.conf
Quindi, abilita i moduli richiesti con il seguente comando:
phpenmod mbstring
a2enmod rewrite
a2enmod headers
Quindi, riavvia il servizio Apache per applicare le modifiche:
systemctl restart apache2
Ora puoi verificare lo stato di Apache con il seguente comando:
systemctl status apache2
Dovresti ottenere il seguente output:
? apache2.service - The Apache HTTP Server
     Loaded: loaded (/lib/systemd/system/apache2.service; enabled; vendor preset: enabled)
     Active: active (running) since Thu 2020-09-17 15:36:20 UTC; 5min ago
       Docs: https://httpd.apache.org/docs/2.4/
    Process: 40670 ExecStart=/usr/sbin/apachectl start (code=exited, status=0/SUCCESS)
   Main PID: 40689 (apache2)
      Tasks: 11 (limit: 2353)
     Memory: 47.1M
     CGroup: /system.slice/apache2.service
             ??40689 /usr/sbin/apache2 -k start
             ??40690 /usr/sbin/apache2 -k start
             ??40692 /usr/sbin/apache2 -k start
             ??40694 /usr/sbin/apache2 -k start
             ??40698 /usr/sbin/apache2 -k start
             ??40699 /usr/sbin/apache2 -k start
             ??40700 /usr/sbin/apache2 -k start
             ??40706 /usr/sbin/apache2 -k start
             ??40808 /usr/sbin/apache2 -k start
             ??40809 /usr/sbin/apache2 -k start
             ??40810 /usr/sbin/apache2 -k start

Sep 17 15:36:20 ubuntu2004 systemd[1]: Starting The Apache HTTP Server...
Proteggi OrangeScrum con Let's Encrypt SSL
Successivamente, si consiglia di proteggere OrangeScrum con Let's Encrypt SSL. Innanzitutto, installa il client Certbot per gestire l'SSL.
apt-get install python3-certbot-apache -y
Dopo aver installato il client Certbot, esegui il seguente comando per installare Let's Encrypt SSL per il tuo dominio:
certbot --apache -d orangescrum.example.com
Ti verrà chiesto di fornire la tua email e di accettare i termini del servizio come mostrato di seguito:
Saving debug log to /var/log/letsencrypt/letsencrypt.log
Plugins selected: Authenticator apache, Installer apache
Enter email address (used for urgent renewal and security notices) (Enter 'c' to
cancel): [email protected]

- - - - - - - - - - - - - - - - - - - - - - - - - - - - - - - - - - - - - - - -
Please read the Terms of Service at
https://letsencrypt.org/documents/LE-SA-v1.2-November-15-2017.pdf. You must
agree in order to register with the ACME server at
https://acme-v02.api.letsencrypt.org/directory
- - - - - - - - - - - - - - - - - - - - - - - - - - - - - - - - - - - - - - - -
(A)gree/(C)ancel: A

- - - - - - - - - - - - - - - - - - - - - - - - - - - - - - - - - - - - - - - -
Would you be willing to share your email address with the Electronic Frontier
Foundation, a founding partner of the Let's Encrypt project and the non-profit
organization that develops Certbot? We'd like to send you email about our work
encrypting the web, EFF news, campaigns, and ways to support digital freedom.
- - - - - - - - - - - - - - - - - - - - - - - - - - - - - - - - - - - - - - - -
(Y)es/(N)o: Y
Obtaining a new certificate
Performing the following challenges:
http-01 challenge for orangescrum.example.com
Enabled Apache rewrite module
Waiting for verification...
Cleaning up challenges
Created an SSL vhost at /etc/apache2/sites-available/orangescrum-le-ssl.conf
Enabled Apache socache_shmcb module
Enabled Apache ssl module
Deploying Certificate to VirtualHost /etc/apache2/sites-available/orangescrum-le-ssl.conf
Enabling available site: /etc/apache2/sites-available/orangescrum-le-ssl.conf
Quindi, scegli se reindirizzare o meno il traffico HTTP su HTTPS come mostrato di seguito:
Please choose whether or not to redirect HTTP traffic to HTTPS, removing HTTP access.
- - - - - - - - - - - - - - - - - - - - - - - - - - - - - - - - - - - - - - - -
1: No redirect - Make no further changes to the webserver configuration.
2: Redirect - Make all requests redirect to secure HTTPS access. Choose this for
new sites, or if you're confident your site works on HTTPS. You can undo this
change by editing your web server's configuration.
- - - - - - - - - - - - - - - - - - - - - - - - - - - - - - - - - - - - - - - -
Select the appropriate number [1-2] then [enter] (press 'c' to cancel): 2
Digita 2 e premi Invio per continuare. Al termine dell'installazione, dovresti vedere il seguente output:
Enabled Apache rewrite module
Redirecting vhost in /etc/apache2/sites-enabled/orangescrum.conf to ssl vhost in /etc/apache2/sites-available/orangescrum-le-ssl.conf

- - - - - - - - - - - - - - - - - - - - - - - - - - - - - - - - - - - - - - - -
Congratulations! You have successfully enabled https://orangescrum.example.com

You should test your configuration at:
https://www.ssllabs.com/ssltest/analyze.html?d=orangescrum.example.com
- - - - - - - - - - - - - - - - - - - - - - - - - - - - - - - - - - - - - - - -

IMPORTANT NOTES:
 - Congratulations! Your certificate and chain have been saved at:
   /etc/letsencrypt/live/orangescrum.example.com/fullchain.pem
   Your key file has been saved at:
   /etc/letsencrypt/live/orangescrum.example.com/privkey.pem
   Your cert will expire on 2020-11-11. To obtain a new or tweaked
   version of this certificate in the future, simply run certbot again
   with the "certonly" option. To non-interactively renew *all* of
   your certificates, run "certbot renew"
 - If you like Certbot, please consider supporting our work by:

   Donating to ISRG / Let's Encrypt:   https://letsencrypt.org/donate
   Donating to EFF:                    https://eff.org/donate-le
Ora puoi accedere al tuo sito Web di annunci aperti in modo sicuro utilizzando l'URL https://orangescrum.example.com.
Accedi a OrangeScrum
Ora apri il tuo browser web e digita l'URL https://orangescrum.example.com. Dovresti vedere la schermata di registrazione a OrangeScrum:
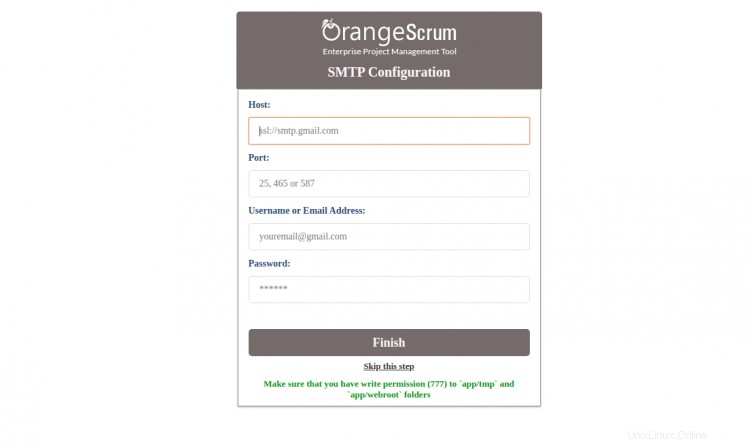
Fornisci i tuoi dettagli SMTP o fai clic su Salta questo passaggio pulsante. Dovresti vedere la seguente schermata:
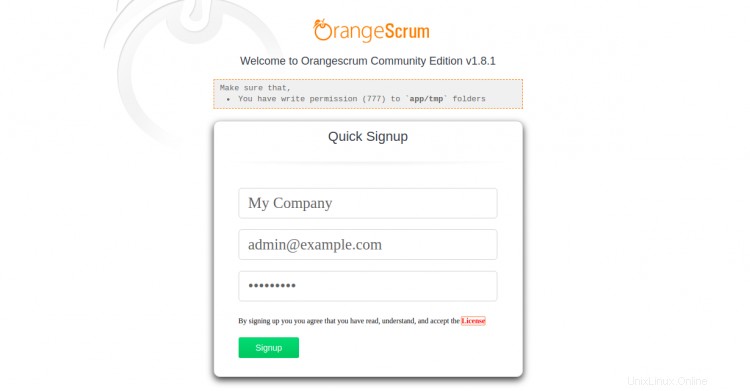
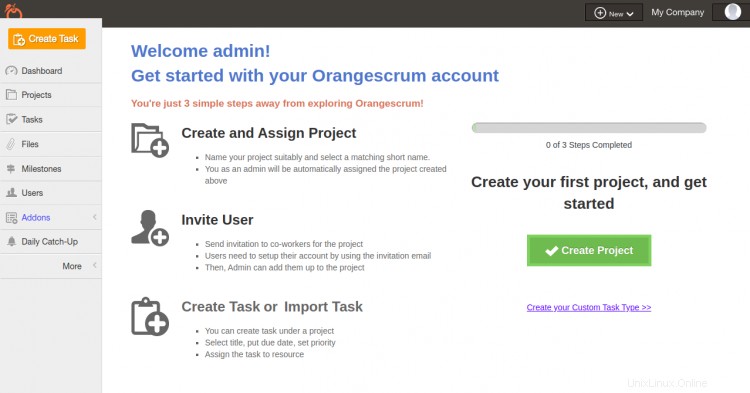
Fornisci il nome del sito, l'e-mail, la password e fai clic su Registrati pulsante. Verrai reindirizzato alla dashboard di OrangeScrum nella pagina seguente:
Conclusione
Congratulazioni! hai installato correttamente OrangeScrum con Let's Encrypt SSL sul server Ubuntu 20.04. Ora puoi creare il tuo primo progetto, invitare utenti e creare e assegnare loro un'attività. Sentiti libero di chiedermi se hai domande.