Mailtrain è un'applicazione di newsletter gratuita, open source e self-hosted creata da Node.js che supporta i backend di database MySQL/MariaDB. Mailtrain ti consente di aggiungere abbonati manualmente, tramite l'API, o importare da un file CSV. Mailtrain viene fornito con un ricco set di funzionalità tra cui editor di modelli, automazione, campi personalizzati, campagna RSS, editor di codice HTML e molto altro. Se hai una lunga lista di iscritti e vuoi gestirla facilmente, Mailtrain è la scelta migliore per te.
In questo tutorial, ti mostreremo come installare l'applicazione newsletter Mailtrain con Docker sul server Ubuntu 18.04.
Requisiti
- Un server che esegue Ubuntu 18.04.
- Un nome di dominio valido puntato all'IP del tuo server.
- Sul tuo server è configurata una password di root.
Per iniziare
Prima di iniziare, dovrai aggiornare il tuo sistema con l'ultima versione. Puoi farlo eseguendo il seguente comando:
apt-get update -y
apt-get upgrade -y
Quindi, riavvia il sistema per applicare le modifiche.
Installa Docker e Docker Compose
Per impostazione predefinita, l'ultima versione di Docker non è disponibile nel repository predefinito di Ubuntu 18.04. Quindi, dovrai aggiungere il repository Docker al tuo sistema.
Innanzitutto, installa i pacchetti richiesti con il seguente comando:
apt-get install curl git apt-transport-https ca-certificates -y
Quindi, scarica e aggiungi la chiave PGP di Docker con il seguente comando:
curl -fsSL https://download.docker.com/linux/ubuntu/gpg | apt-key add -
Quindi, aggiungi il repository Docker CE modificando il file /etc/apt/sources.list:
nano /etc/apt/sources.list
Aggiungi la seguente riga alla fine del file:
deb [arch=amd64] https://download.docker.com/linux/ubuntu bionic stable
Salva e chiudi il file quando hai finito. Quindi, aggiorna il repository e installa Docker CE con i seguenti comandi:
apt-get update -y
apt-get install docker-ce -y
Una volta completata l'installazione, puoi controllare lo stato del servizio Docker con il seguente comando:
systemctl status docker
Dovresti vedere il seguente output:
Docker Application Container Engine
   Loaded: loaded (/lib/systemd/system/docker.service; enabled; vendor preset: enabled)
   Active: active (running) since Thu 2019-10-24 16:15:25 UTC; 21min ago
     Docs: https://docs.docker.com
 Main PID: 1402 (dockerd)
    Tasks: 45
   CGroup: /system.slice/docker.service
           ?? 1402 /usr/bin/dockerd -H fd:// --containerd=/run/containerd/containerd.sock
           ??10312 /usr/bin/docker-proxy -proto tcp -host-ip 0.0.0.0 -host-port 3000 -container-ip 172.18.0.4 -container-port 3000

Oct 24 16:23:04 ubuntu1804 dockerd[1402]: time="2019-10-24T16:23:04.817021656Z" level=info msg="Layer sha256:b875b006eb8ffb0434ce3a26cb04c9017c
Oct 24 16:24:09 ubuntu1804 dockerd[1402]: time="2019-10-24T16:24:09.879265134Z" level=info msg="ignoring event" module=libcontainerd namespace=
Oct 24 16:24:10 ubuntu1804 dockerd[1402]: time="2019-10-24T16:24:10.065610315Z" level=warning msg="20676b10252b4a484e32a7d7534b3b386cc2a1e5efd1
Oct 24 16:25:52 ubuntu1804 dockerd[1402]: time="2019-10-24T16:25:52.649551513Z" level=info msg="Layer sha256:903ab9000f0a93e49537d5d00c5c8a8cab
Oct 24 16:26:47 ubuntu1804 dockerd[1402]: time="2019-10-24T16:26:47.428865652Z" level=info msg="Layer sha256:903ab9000f0a93e49537d5d00c5c8a8cab
Oct 24 16:27:41 ubuntu1804 dockerd[1402]: time="2019-10-24T16:27:41.603287585Z" level=info msg="Layer sha256:903ab9000f0a93e49537d5d00c5c8a8cab
Quindi, installa l'ultima versione di docker compose con il comando pip come mostrato di seguito:
apt-get install python-pip
apt-get install docker-compose
Una volta completata l'installazione, puoi procedere al passaggio successivo.
Installa Mailtrain con Docker
Innanzitutto, scarica l'ultima versione di Mailtrain dal repository Git con il seguente comando:
git clone git://github.com/Mailtrain-org/mailtrain.git
Quindi, cambia la directory in mailtrain e rinomina il file di composizione docker predefinito:
cd mailtrain
mv docker-compose.override.yml.tmpl docker-compose.override.yml
Quindi, avvia i contenitori Docker Mailtrain con il seguente comando:
docker-compose up -d
Questo comando scaricherà e avvierà i container mailtrain, mysql e redis come mostrato di seguito:
Creating network "mailtrain_default" with the default driver
Creating volume "mailtrain_mailtrain-node-config" with default driver
Creating volume "mailtrain_mailtrain-node-data" with default driver
Creating volume "mailtrain_mailtrain-redis-data" with default driver
Creating volume "mailtrain_mailtrain-node-reports" with default driver
Creating volume "mailtrain_mailtrain-mysq-data" with default driver
Pulling redis (redis:3.0)...
3.0: Pulling from library/redis
f5cc0ee7a6f6: Pull complete
5fc25ed18e87: Pull complete
e025bc8872f6: Pull complete
77c68b51b836: Pull complete
7c403ece3755: Pull complete
0a653bd338f4: Pull complete
31531fd948c6: Pull complete
Digest: sha256:730b765df9fe96af414da64a2b67f3a5f70b8fd13a31e5096fee4807ed802e20
Status: Downloaded newer image for redis:3.0
Pulling mysql (mysql:5.7)...
5.7: Pulling from library/mysql
80369df48736: Pull complete
e8f52315cb10: Pull complete
cf2189b391fc: Pull complete
cc98f645c682: Pull complete
27a27ac83f74: Pull complete
fa1f04453414: Pull complete
d45bf7d22d33: Pull complete
c7d49ffebc56: Pull complete
511a8052b204: Pull complete
5d5df4c12444: Pull complete
d482603a2922: Pull complete
Digest: sha256:44b33224e3c406bf50b5a2ee4286ed0d7f2c5aec1f7fdb70291f7f7c570284dd
Status: Downloaded newer image for mysql:5.7
Building mailtrain
:
:
Removing intermediate container 20676b10252b
 ---> 0abdb4121f54
Step 6/9 : COPY . /app
 ---> c8af7560e844
Step 7/9 : EXPOSE 3000
 ---> Running in 3ff55179a229
Removing intermediate container 3ff55179a229
 ---> d83b49d4b24b
Step 8/9 : ENTRYPOINT ["bash", "/app/docker-entrypoint.sh"]
 ---> Running in e5baf6a1ea2e
Removing intermediate container e5baf6a1ea2e
 ---> c4f899a0f8f9
Step 9/9 : CMD ["node", "index.js"]
 ---> Running in fe94519d2bd3
Removing intermediate container fe94519d2bd3
 ---> 2808c2972f20
Successfully built 2808c2972f20
Successfully tagged mailtrain:latest
WARNING: Image for service mailtrain was built because it did not already exist. To rebuild this image you must use `docker-compose build` or `docker-compose up --build`.
Creating mailtrain_redis_1 ... done
Creating mailtrain_mysql_1 ... done
Creating mailtrain_mailtrain_1 ... done
Ora puoi controllare tutti i container in esecuzione con il seguente comando:
docker ps
Dovresti vedere il seguente output:
CONTAINER ID        IMAGE               COMMAND                  CREATED              STATUS              PORTS                    NAMES
0e837c586c39        mailtrain:latest    "bash /app/docker-en…"   About a minute ago   Up 55 seconds       0.0.0.0:3000->3000/tcp   mailtrain_mailtrain_1
49a4e69a09c6        mysql:5.7           "docker-entrypoint.s…"   About a minute ago   Up About a minute   3306/tcp, 33060/tcp      mailtrain_mysql_1
a1449b64a196        redis:3.0           "docker-entrypoint.s…"   About a minute ago   Up About a minute   6379/tcp                 mailtrain_redis_1
Accedi all'interfaccia web di Mailtrain
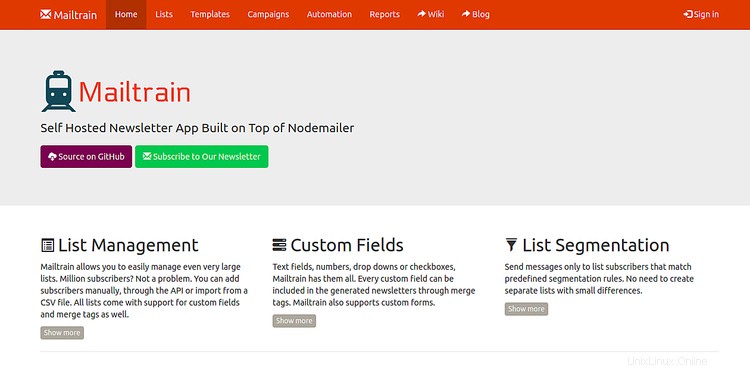
Il container Mailtrain è ora avviato e in ascolto sulla porta 3000. Quindi, apri il tuo browser web e digita l'URL http://your-server-ip:3000 . Dovresti vedere la dashboard predefinita di Mailtrain nella pagina seguente:
Ora, fai clic su Accedi pulsante. Dovresti vedere la seguente pagina:
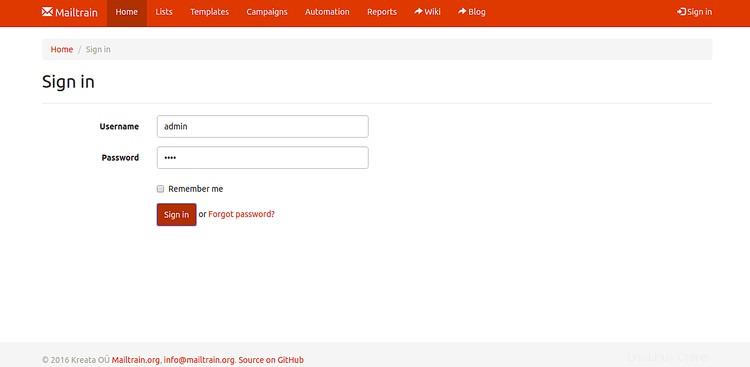
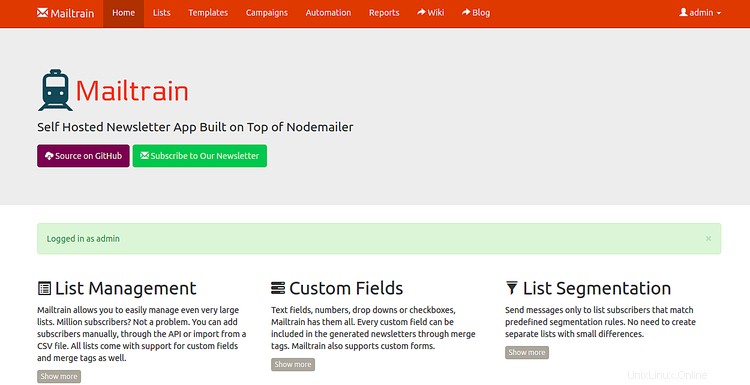
Fornisci nome utente e password predefiniti come amministratore/amministratore e fai clic su Accedi pulsante. Dovresti vedere la dashboard predefinita di Mailtrain nella pagina seguente:
Configura Nginx come proxy inverso per Mailtrain
Successivamente, dovrai creare un Nginx come proxy inverso per Mailtrain sulla porta 3000. Per farlo, installa prima il server web Nginx eseguendo il comando seguente:
apt-get install nginx -y
Quindi, crea un file di configurazione dell'host virtuale Nginx con il seguente comando:
nano /etc/nginx/sites-available/mailtrain.conf
Aggiungi le seguenti righe:
upstream mailtrain {
  server 127.0.0.1:3000 weight=100 max_fails=5 fail_timeout=5;
}

server {
  listen          80;
  server_name     example.com;

  location / {
        proxy_set_header X-Forwarded-Host $host;
        proxy_set_header X-Forwarded-Server $host;
        proxy_set_header X-Forwarded-For $proxy_add_x_forwarded_for;
        proxy_pass http://mailtrain/;
  }
}
Salva e chiudi il file quando hai finito. Quindi, controlla Nginx per eventuali errori di sintassi con il seguente comando:
nginx -t
Dovresti vedere il seguente output:
nginx: the configuration file /etc/nginx/nginx.conf syntax is ok
nginx: configuration file /etc/nginx/nginx.conf test is successful
Quindi, abilita il file host virtuale Nginx con il seguente comando:
ln -s /etc/nginx/sites-available/mailtrain.conf /etc/nginx/sites-enabled/
Infine, riavvia il server web Nginx per applicare la configurazione:
systemctl restart nginx
Sicurezza Mailtrain con Let's Encrypt
Successivamente, dovrai installare il client Certbot per proteggere Mailtrain con Let's Encrypt SSL gratuito. Per impostazione predefinita, l'ultima versione di Certbot non è disponibile nel repository predefinito di Ubuntu 18.04. Quindi aggiungi il repository Certbot eseguendo il seguente comando:
add-apt-repository ppa:certbot/certbot
Quindi, aggiorna il repository e installa Certbot con il seguente comando:
apt-get update -y
apt-get install certbot python-certbot-nginx -y
Una volta installato, esegui il comando seguente per scaricare Let's Encrypt SSL gratuito per il tuo dominio example.com e configura Nginx per utilizzare questo certificato.
certbot --nginx -d example.com
Fornisci il tuo indirizzo email e accetta i Termini di servizio. Una volta che il certificato è stato installato correttamente, dovresti vedere il seguente output:
- - - - - - - - - - - - - - - - - - - - - - - - - - - - - - - - - - - - - - - -
Congratulations! You have successfully enabled https://example.com

You should test your configuration at:
https://www.ssllabs.com/ssltest/analyze.html?d=example.com
- - - - - - - - - - - - - - - - - - - - - - - - - - - - - - - - - - - - - - - -

IMPORTANT NOTES:
 - Congratulations! Your certificate and chain have been saved at:
   /etc/letsencrypt/live/example.com/fullchain.pem
   Your key file has been saved at:
   /etc/letsencrypt/live/example.com/privkey.pem
   Your cert will expire on 2020-01-22. To obtain a new or tweaked
   version of this certificate in the future, simply run certbot again
   with the "certonly" option. To non-interactively renew *all* of
   your certificates, run "certbot renew"
 - Your account credentials have been saved in your Certbot
   configuration directory at /etc/letsencrypt. You should make a
   secure backup of this folder now. This configuration directory will
   also contain certificates and private keys obtained by Certbot so
   making regular backups of this folder is ideal.
 - If you like Certbot, please consider supporting our work by:

   Donating to ISRG / Let's Encrypt:   https://letsencrypt.org/donate
   Donating to EFF:                    https://eff.org/donate-le
Ora puoi accedere alla tua applicazione Mailtrain in modo sicuro utilizzando l'URL https://example.com .
Conclusione
Nel tutorial sopra, abbiamo imparato come installare Mailtrain con docker sul server Ubuntu 18.04. Abbiamo anche imparato come configurare Nginx come proxy inverso per Mailtrain e proteggere Mailtrain con Let's Encrypt SSL gratuito. Sentiti libero di chiedermi se hai domande.