La velocità della connessione a Internet è qualcosa che controlliamo sempre a casa e negli uffici. Il metodo più comune che utilizziamo è visitare un sito Web di test di velocità come speedtest.net. Su quel sito, un'applicazione javascript viene caricata nel browser web che seleziona il miglior server (nelle vicinanze) in base al tempo di ping e quindi vengono mostrati i risultati del test di velocità per quel server. Speedtest.net utilizza anche un flash player per produrre il risultato graficamente.
Il problema dell'utilizzo di questi test di velocità basati sul Web è che non consente di programmare il test di velocità a intervalli regolari, ad es. come cronjob e non puoi utilizzarli su server headless. Un'applicazione in grado di risolvere questo problema è "speedtest-cli". Questa applicazione ti consente di controllare la velocità di Internet utilizzando la riga di comando.
Cos'è speedtest-cli?
Speedtest-cli è uno script scritto nel linguaggio di programmazione Python che misura la velocità di Internet in modo bidirezionale. Questa applicazione ti consente di controllare la velocità di Internet in base alla distanza in km, può testare server specifici e fornisce anche un URL in modo da poter condividere il risultato su Internet.
Come installare speedtest-cli su Linux?
Per installare l'applicazione speedtest-cli, devi avere un Python 2.4-3.4 o una versione aggiornata installata nel tuo sistema.
Puoi installare gli strumenti speedtest-cli utilizzando due metodi. Il primo metodo include l'uso del gestore di pacchetti python-pip, il secondo metodo consiste nel scaricare manualmente lo script Python, renderlo eseguibile e quindi eseguire l'applicazione.
Metodo 1:installazione di speedtest-cli usando python-pip
Il passaggio successivo deve essere eseguito come utente root, poiché non voglio anteporre sudo per ogni comando, eseguire prima il comando seguente su Ubuntu per diventare utente root:
sudo su
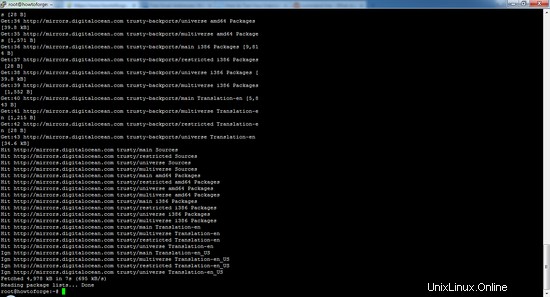
1. Il primo passaggio consiste nell'assicurarsi che l'elenco dei pacchetti da tutti i repository Ubuntu e PPA sia aggiornato eseguendo il comando seguente:
apt-get update
Esempio di output:
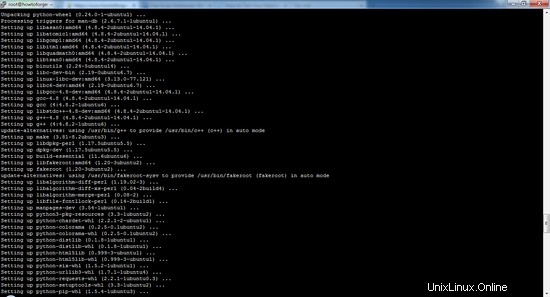
2. Il passaggio successivo consiste nell'installare il gestore di pacchetti pip sul tuo sistema. Come puoi vedere, il comando installerà anche molte dipendenze.
apt-get install python-pip
[email protected]:/# apt-get install python-pip
Reading package lists... Done
Building dependency tree
Reading state information... Done
The following additional packages will be installed:
 libexpat1-dev libpython-all-dev libpython-dev libpython2.7-dev python-all python-all-dev python-asn1crypto python-cffi-backend python-crypto python-cryptography python-dbus python-dev
 python-enum34 python-gi python-idna python-ipaddress python-keyring python-keyrings.alt python-pip-whl python-pkg-resources python-secretstorage python-setuptools python-six
 python-wheel python-xdg python2.7-dev
Suggested packages:
 python-crypto-doc python-cryptography-doc python-cryptography-vectors python-dbus-dbg python-dbus-doc python-enum34-doc python-gi-cairo gnome-keyring libkf5wallet-bin
 gir1.2-gnomekeyring-1.0 python-fs python-gdata python-keyczar python-secretstorage-doc python-setuptools-doc
The following NEW packages will be installed:
 libexpat1-dev libpython-all-dev libpython-dev libpython2.7-dev python-all python-all-dev python-asn1crypto python-cffi-backend python-crypto python-cryptography python-dbus python-dev
 python-enum34 python-gi python-idna python-ipaddress python-keyring python-keyrings.alt python-pip python-pip-whl python-pkg-resources python-secretstorage python-setuptools python-six
 python-wheel python-xdg python2.7-dev
0 upgraded, 27 newly installed, 0 to remove and 60 not upgraded.
Need to get 32.1 MB of archives.
After this operation, 53.6 MB of additional disk space will be used.
Do you want to continue? [Y/n] y
Premi Y per continuare
Esempio di output:
3. Dopo aver installato il pacchetto, puoi installare l'applicazione utilizzando questo comando pip:
pip install speedtest-cli
Collecting speedtest-cli
 Downloading https://files.pythonhosted.org/packages/61/8b/58d1de9a7fff3e91c5ab956ab4ba72b49f42d9f73d5f3e248c740dfcc816/speedtest_cli-2.1.1-py2.py3-none-any.whl
Installing collected packages: speedtest-cli
Successfully installed speedtest-cli-2.1.1
4. Se desideri aggiornare l'applicazione speedtest-cli in futuro, puoi utilizzare questo comando:
pip install speedtest-cli –-upgrade
Requirement already up-to-date: speedtest-cli in /usr/local/lib/python2.7/dist-packages
Cleaning up...
Metodo 2:installazione dell'ultimo speedtest-cli manualmente da GitHub
1. Per prima cosa devi scaricare lo script python da GitHub usando il comando
cd /tmp
wget https://github.com/sivel/speedtest-cli/archive/master.zip
--2019-04-25 19:24:47-- https://github.com/sivel/speedtest-cli/archive/master.zip
Resolving github.com (github.com)... 140.82.118.4, 140.82.118.3
Connecting to github.com (github.com)|140.82.118.4|:443... connected.
HTTP request sent, awaiting response... 302 Found
Location: https://codeload.github.com/sivel/speedtest-cli/zip/master [following]
--2019-04-25 19:24:47-- https://codeload.github.com/sivel/speedtest-cli/zip/master
Resolving codeload.github.com (codeload.github.com)... 192.30.253.121, 192.30.253.120
Connecting to codeload.github.com (codeload.github.com)|192.30.253.121|:443... connected.
HTTP request sent, awaiting response... 200 OK
Length: unspecified [application/zip]
Saving to: ‘master.zip’

master.zip [ <=> ] 27.55K 103KB/s in 0.3s

2019-04-25 19:24:48 (103 KB/s) - ‘master.zip’ saved [28215]
2. Il secondo passaggio consiste nel decomprimere il file che hai scaricato (master.zip) ed estrarlo utilizzando il comando unzip:
unzip master.zip
Archive: master.zip
681cdf20a5fe774ba3aefedd0cd88cbff5384439
 creating: speedtest-cli-master/
 inflating: speedtest-cli-master/.gitignore
 inflating: speedtest-cli-master/.travis.yml
 inflating: speedtest-cli-master/CONTRIBUTING.md
 inflating: speedtest-cli-master/LICENSE
 inflating: speedtest-cli-master/MANIFEST.in
 inflating: speedtest-cli-master/README.rst
 extracting: speedtest-cli-master/setup.cfg
 inflating: speedtest-cli-master/setup.py
 inflating: speedtest-cli-master/speedtest-cli.1
 inflating: speedtest-cli-master/speedtest.py
 creating: speedtest-cli-master/tests/
 creating: speedtest-cli-master/tests/scripts/
 inflating: speedtest-cli-master/tests/scripts/source.py
 inflating: speedtest-cli-master/tox.ini
3. Dopo aver estratto il file, rendi eseguibile lo script estratto andando nella directory estratta e usando il comando chown.
cd speedtest-cli-master/
chmod 755 speedtest.py
4. Per evitare di digitare ogni volta il percorso completo, sposta il file eseguibile in /usr/local/bin utilizzando il comando seguente:
sudo mv speedtest.py /usr/local/bin/speedtest-cli
Come testare la velocità della connessione Internet con speedtest-cli?
Esegui il comando speedtest-cli per testare la velocità di download e upload della tua connessione Internet senza alcun argomento:
speedtest-cli
Testing download speed........................................
Download: 916.39 Mbit/s
Testing upload speed..................................................
Upload: 489.57 Mbit/s
Se vuoi controllare il risultato della velocità in byte anziché in bit, usa questo comando:
speedtest-cli --bytes
Testing download speed........................................
Download: 114.15 Mbyte/s
Testing upload speed..................................................
Upload: 49.61 Mbyte/s
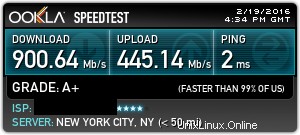
Se vuoi condividere il risultato della velocità con i tuoi amici, puoi scaricare l'immagine del risultato con l'URL fornito dopo il risultato.
speedtest-cli --share
Retrieving speedtest.net configuration...
Testing from Hetzner Online GmbH (..........)...
Retrieving speedtest.net server list...
Selecting best server based on ping...
Hosted by avrx (Limburg an der Lahn) [140.88 km]: 14.379 ms
Testing download speed................................................................................
Download: 309.68 Mbit/s
Testing upload speed................................................................................................
Upload: 316.33 Mbit/s
Share results: http://www.speedtest.net/result/xxxxxxxxxxx.png
Di seguito è riportata l'immagine del mio risultato del test di velocità dal test sopra.
Se desideri informazioni solo su ping, download e caricamento, utilizza:
speedtest-cli --simple
Ping: 5.23 ms
Download: 877.56 Mbit/s
Upload: 162.21 Mbit/s
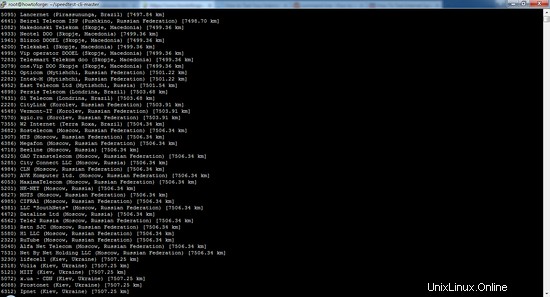
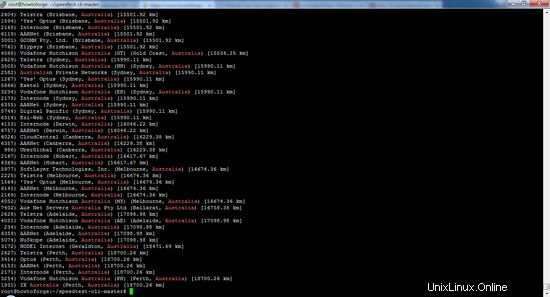
Puoi anche controllare l'elenco dei server in base alla distanza in km utilizzando:
speedtest-cli --list
2628) Telstra (Adelaide, Australia) [17098.98 km]
4051) Vodafone Hutchison Australia (AE) (Adelaide, Australia) [17098.98 km]
...........................................................................
3254) Vodafone Hutchison Australia (PH) (Perth, Australia) [18700.26 km]
1931) IX Australia (Perth, Australia) [18700.26 km]
Cercando nell'elenco in termini di distanza, potresti aver generato un grande elenco di server. Se vuoi controllare il risultato per i server di un'area specifica, puoi verificarlo collegando il risultato al comando grep (l'Australia è un esempio dell'area):
speedtest-cli --list | grep –i Australia
2604) Telstra (Brisbane, Australia) [15501.92 km]
1594) 'Yes' Optus (Brisbane, Australia) [15501.92 km]
...............................................................................................
3254) Vodafone Hutchison Australia (PH) (Perth, Australia) [18700.26 km]
1931) IX Australia (Perth, Australia) [18700.26 km]
Per testare la velocità di connessione contro un server specifico, devi utilizzare l'ID server generato nei passaggi 5 e 6.
speedtest-cli --server [server ID]
speedtest-cli --server 2604
Qui viene utilizzato l'ID server 2604 come esempio:
Hosted by Telstra (Brisbane) [15501.92 km]: 452.614 ms
Testing download speed........................................
Download: 28.79 Mbit/s
Testing upload speed..................................................
Upload: 11.71 Mbit/s
Se vuoi controllare la guida e il numero di versione dello strumento speedtest-cli, usa questi comandi:
speedtest-cli --version
0.3.4
speedtest-cli --help
usage: speedtest_cli [-h] [--bytes] [--share] [--simple] [--list]
 [--server SERVER] [--mini MINI] [--source SOURCE]
 [--timeout TIMEOUT] [--secure] [--version]
Command line interface for testing internet bandwidth using speedtest.net.
--------------------------------------------------------------------------
https://github.com/sivel/speedtest-cli
optional arguments:
 -h, --help show this help message and exit
 --bytes Display values in bytes instead of bits. Does not affect
 the image generated by --share
 --share Generate and provide a URL to the speedtest.net share
 results image
 --simple Suppress verbose output, only show basic information
 --list Display a list of speedtest.net servers sorted by
 distance
 --server SERVER Specify a server ID to test against
 --mini MINI URL of the Speedtest Mini server
 --source SOURCE Source IP address to bind to
 --timeout TIMEOUT HTTP timeout in seconds. Default 10
 --secure Use HTTPS instead of HTTP when communicating with
 speedtest.net operated servers
 --version Show the version number and exit
Creazione di un registro della velocità di Internet con speedtest-cli
Speedtest-cli può essere eseguito come cronjob per ottenere un registro del test della velocità di Internet. Apri crontab con questo comando:
crontab -e
E aggiungi questa riga (suppongo che speedtest_cli.py sia installato in /usr/local/bin) al crontab:
30 00 * * * /usr/local/bin/speedtest-cli >> /tmp/speedlog.txt
Salva le modifiche ed esci dall'editor crontab. Questo eseguirà un test di velocità alle 0:30 ogni giorno e aggiungerà il risultato al file /tmp/speedlog.txt.
Conclusione
Questa applicazione è leggera, facile da usare e funziona senza problemi, il che la rende uno strumento indispensabile per sviluppatori e amministratori di sistema.