Nginx (pronunciato "engine x") è un server HTTP gratuito, open source e ad alte prestazioni. Nginx è noto per la sua stabilità, il ricco set di funzionalità, la configurazione semplice e il basso consumo di risorse. Questo tutorial mostra come installare Nginx su un server CentOS 7 con supporto PHP (tramite PHP-FPM) e supporto MySQL (Mariadb).
1 Nota preliminare
In questo tutorial utilizzo l'hostname server1.example.com con l'indirizzo IP 192.168.1.105. Queste impostazioni potrebbero differire per te, quindi devi sostituirle dove appropriato.
2 Abilitazione di repository aggiuntivi
Nginx non è disponibile dai repository CentOS ufficiali, quindi includiamo il repository del progetto Nginx per installarlo:
vi /etc/yum.repos.d/nginx.repo
 [nginx]
     name=nginx repo
     baseurl=http://nginx.org/packages/centos/$releasever/$basearch/
     gpgcheck=0
     enabled=1
3 Installazione di MySQL
Per prima cosa installiamo Mariadb. Mariadb è un fork gratuito di MySQL. Esegui questo comando sulla shell:
yum install mariadb mariadb-server net-tools
Quindi creiamo i collegamenti di avvio del sistema per MySQL (in modo che MySQL si avvii automaticamente ogni volta che il sistema si avvia) e avviamo il server MySQL:
systemctl enable mariadb.service
systemctl start mariadb.service
Ora controlla che la rete sia abilitata. Corri
netstat -tap | grep mysql
Dovrebbe mostrare qualcosa del genere:
[[email protected] ~]# netstat -tap | grep mysql
tcp 0 0 0.0.0.0:mysql 0.0.0.0:* LISTEN 10623/mysqld
Corri
mysql_secure_installation
per impostare una password per l'utente root (altrimenti chiunque può accedere al tuo database MySQL!):
[[email protected] ~]# mysql_secure_installation
/usr/bin/mysql_secure_installation: line 379: find_mysql_client: command not found
NOTE: RUNNING ALL PARTS OF THIS SCRIPT IS RECOMMENDED FOR ALL MariaDB
SERVERS IN PRODUCTION USE! PLEASE READ EACH STEP CAREFULLY!
In order to log into MariaDB to secure it, we'll need the current
password for the root user. If you've just installed MariaDB, and
you haven't set the root password yet, the password will be blank,
so you should just press enter here.
Enter current password for root (enter for none):
OK, successfully used password, moving on...
Setting the root password ensures that nobody can log into the MariaDB
root user without the proper authorisation.
Set root password? [Y/n] <-- ENTER
New password: <-- yourrootsqlpassword
Re-enter new password: <-- yourrootsqlpassword
Password updated successfully!
Reloading privilege tables..
... Success!
By default, a MariaDB installation has an anonymous user, allowing anyone
to log into MariaDB without having to have a user account created for
them. This is intended only for testing, and to make the installation
go a bit smoother. You should remove them before moving into a
production environment.
Remove anonymous users? [Y/n] <-- ENTER
... Success!
Normally, root should only be allowed to connect from 'localhost'. This
ensures that someone cannot guess at the root password from the network.
Disallow root login remotely? [Y/n] <-- ENTER
... Success!
By default, MariaDB comes with a database named 'test' that anyone can
access. This is also intended only for testing, and should be removed
before moving into a production environment.
Remove test database and access to it? [Y/n] <-- ENTER
- Dropping test database...
... Success!
- Removing privileges on test database...
... Success!
Reloading the privilege tables will ensure that all changes made so far
will take effect immediately.
Reload privilege tables now? [Y/n] <-- ENTER
... Success!
Cleaning up...
All done! If you've completed all of the above steps, your MariaDB
installation should now be secure.
Thanks for using MariaDB!
[[email protected] ~]#
[[email protetta] ~]# mysql_secure_installation
4 Installazione di Nginx
Nginx è disponibile come pacchetto da nginx.org che possiamo installare come segue:
yum install nginx
Quindi creiamo i collegamenti di avvio del sistema per nginx e lo avviamo:
systemctl enable nginx.service
systemctl start nginx.service
Ci sono possibilità che tu riceva un errore come la porta 80 già in uso, il messaggio di errore sarà come questo
[[email protected] ~]# service nginx start
Starting nginx: nginx: [emerg] bind() to 0.0.0.0:80 failed (98: Address already in use)
nginx: [emerg] bind() to 0.0.0.0:80 failed (98: Address already in use)
nginx: [emerg] bind() to 0.0.0.0:80 failed (98: Address already in use)
nginx: [emerg] bind() to 0.0.0.0:80 failed (98: Address already in use)
nginx: [emerg] bind() to 0.0.0.0:80 failed (98: Address already in use)
nginx: [emerg] still could not bind()
                                                           [FAILED]
[[email protected] ~]#
Quindi significa che ci sono possibilità che il servizio Apache sia in esecuzione lì. Interrompi il servizio e avvia ulteriormente il servizio per NGINX come segue
systemctl stop httpd.service
yum remove httpd
systemctl disable httpd.service
systemctl enable nginx.service
systemctl start nginx.service
E apri le porte http e https nel firewall
firewall-cmd --permanent --zone=public --add-service=http
firewall-cmd --permanent --zone=public --add-service=https
firewall-cmd --reload
L'output risultante sulla shell sarà simile al seguente:
[[email protected] ~]# firewall-cmd --permanent --zone=public --add-service=http
success
[[email protected] ~]# firewall-cmd --permanent --zone=public --add-service=https
success
[[email protected] ~]# firewall-cmd --reload
success
[[email protected] ~]#
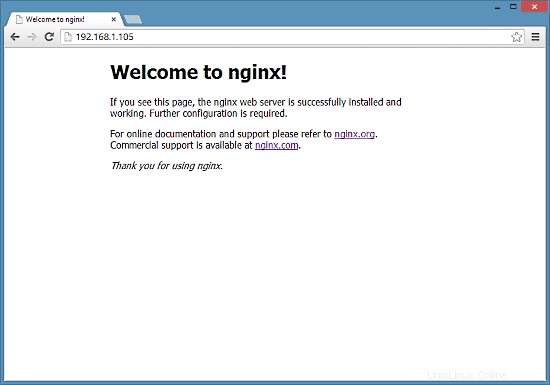
Digita l'indirizzo IP o il nome host del tuo server web in un browser (ad es. http://192.168.1.105) e dovresti vedere la pagina di benvenuto di nginx: