Ghost è una piattaforma di blogging gratuita, open source e leggera basata su Node.js. È semplice, personalizzabile e ti consente di creare e pubblicare i tuoi contenuti su Internet. È appositamente progettato per i blog, quindi è molto più veloce di altre piattaforme di blog. Offre un ricco set di funzionalità, alcune delle quali sono elencate di seguito:
- Editor markdown
- Pubblicazione programmata
- Fornire un'applicazione per Linux, Mac e Windows
- Fornisce centinaia di temi gratuiti e premium
- Analisi integrata
- Fornire plug-in di migrazione per migrare da WordPress a Ghost
Questo tutorial spiegherà come installare Ghost con Nginx e Let's Encrypt SSL su Ubuntu 20.04.
Prerequisiti
- Un server che esegue Ubuntu 20.04.
- Un nome di dominio valido puntato all'IP del tuo server.
- Sul tuo server è configurata una password di root.
Per iniziare
Innanzitutto, si consiglia di aggiornare la cache del pacchetto APT all'ultima versione. Puoi aggiornarlo con il seguente comando:
apt-get update -y
Una volta aggiornata la cache APT, installa le altre dipendenze richieste utilizzando il comando seguente:
apt-get install gnupg2 curl unzip git acl -y
Successivamente, dovrai anche installare Node.js sul tuo sistema.
Innanzitutto, aggiungi il repository Node.js con il seguente comando:
curl -sL https://deb.nodesource.com/setup_12.x | bash -
Una volta installato il repository, esegui il comando seguente per installare Node.js sul tuo sistema.
apt-get install nodejs -y
Al termine dell'installazione, verifica la versione di Node.js utilizzando il seguente comando:
node -v
Dovresti ottenere il seguente output:
v12.22.1
Successivamente, verifica la versione NPM con il comando seguente:
npm -v
Dovresti ottenere il seguente output:
6.14.12
Installa Nginx e MariaDB
Successivamente, dovrai installare il server web Nginx e il server del database MariaDB sul tuo sistema. Puoi installare entrambi i pacchetti con il seguente comando:
apt-get install mariadb-server nginx -y
Al termine dell'installazione, proteggere l'installazione di MariaDB e impostare la password di root di MariaDB con il seguente comando:
mysql_secure_installation
Rispondi a tutte le domande per proteggere l'installazione di MariaDB:
Enter current password for root (enter for none):
Set root password? [Y/n] Y
New password:
Re-enter new password:
Remove anonymous users? [Y/n] Y
Disallow root login remotely? [Y/n] Y
Remove test database and access to it? [Y/n] Y
Reload privilege tables now? [Y/n] Y
Quindi, accedi a MariaDB con il seguente comando:
mysql -u root -p
Una volta effettuato l'accesso, crea un database e un utente per Ghost con il seguente comando:
MariaDB [(none)]> CREATE DATABASE ghostdb;
MariaDB [(none)]> CREATE USER 'ghostuser'@'localhost' IDENTIFIED BY 'password';
Quindi, concedi tutti i privilegi al database Ghost con il seguente comando:
MariaDB [(none)]> GRANT ALL ON ghostdb.* TO 'ghostuser'@'localhost';
Quindi, svuota i privilegi ed esci da MariaDB con il seguente comando:
MariaDB [(none)]> FLUSH PRIVILEGES;
MariaDB [(none)]> EXIT;
Una volta terminato, puoi procedere al passaggio successivo.
Installa Ghost Cli
Successivamente, dovrai installare Ghost Cli per installare e gestire Ghost. Puoi installarlo utilizzando l'NPM come mostrato di seguito:
npm install -g [email protected]
Una volta installato, verifica la versione installata di Ghost Cli con il seguente comando:
ghost version
Dovresti vedere il seguente output:
Ghost-CLI version: 1.16.3
Installa Ghost
Innanzitutto, crea un utente separato per Ghost con il seguente comando:
adduser user1
Quindi, aggiungi user1 a sudo e www-data group con il comando seguente:
adduser user1 sudo
adduser user1 www-data
Quindi, accedi con user1 e crea una directory per Ghost con il seguente comando:
su - user1
sudo mkdir /var/www/ghost
Quindi, imposta l'autorizzazione e la proprietà appropriate con il seguente comando:
sudo chown -R www-data:www-data /var/www/ghost
sudo chown -R www-data:www-data /var/www/
sudo chmod 775 /var/www/ghost
sudo setfacl -R -m u:user1:rwx /var/www/ghost/
Quindi, cambia la directory in ghost e installa la piattaforma di blogging Ghost con il seguente comando:
cd /var/www/ghost
ghost install
Ti verrà chiesto di fornire l'URL del tuo blog, il nome del database, il nome utente, la password e altre informazioni come mostrato di seguito:
? Enter your blog URL: https://ghost.linuxbuz.com
? Enter your MySQL hostname: localhost
? Enter your MySQL username: ghostuser
? Enter your MySQL password: [hidden]
? Enter your Ghost database name: ghostdb
? Configuring Ghost
? Setting up instance
+ sudo useradd --system --user-group ghost
+ sudo chown -R ghost:ghost /var/www/ghost/content
? Setting up "ghost" system user
? Setting up "ghost" mysql user [skipped]
? Do you wish to set up Nginx? Yes
+ sudo mv /tmp/ghost-linuxbuz-com/ghost.linuxbuz.com.conf /etc/nginx/sites-available/ghost.linuxbuz.com.conf
+ sudo ln -sf /etc/nginx/sites-available/ghost.linuxbuz.com.conf /etc/nginx/sites-enabled/ghost.linuxbuz.com.conf
+ sudo nginx -s reload
? Setting up SSL [skipped]
? Do you wish to set up Systemd? Yes
+ sudo mv /tmp/ghost-linuxbuz-com/ghost_ghost-linuxbuz-com.service /lib/systemd/system/ghost_ghost-linuxbuz-com.service
+ sudo systemctl daemon-reload
? Setting up Systemd
+ sudo systemctl is-active ghost_ghost-linuxbuz-com
? Do you want to start Ghost? (Y/n)
A questo punto Ghost è installato e avviato.
Proteggi Ghost con Let's Encrypt SSL
Successivamente, dovrai proteggere Ghost con Let's Encrypt SSL.
Innanzitutto, installa il client Certbot con il seguente comando:
sudo apt-get install certbot python3-certbot-nginx -y
Una volta installato, esegui il seguente comando per scaricare Let's Encrypt SSL e configurare Nginx per utilizzare quei certificati:
sudo certbot --nginx -d ghost.linuxbuz.com
Ti verrà chiesto di fornire il tuo indirizzo email e di accettare i termini del servizio come mostrato di seguito:
Saving debug log to /var/log/letsencrypt/letsencrypt.log
Plugins selected: Authenticator nginx, Installer nginx
Enter email address (used for urgent renewal and security notices) (Enter 'c' to
cancel): [email protected]

- - - - - - - - - - - - - - - - - - - - - - - - - - - - - - - - - - - - - - - -
Please read the Terms of Service at
https://letsencrypt.org/documents/LE-SA-v1.2-November-15-2017.pdf. You must
agree in order to register with the ACME server at
https://acme-v02.api.letsencrypt.org/directory
- - - - - - - - - - - - - - - - - - - - - - - - - - - - - - - - - - - - - - - -
(A)gree/(C)ancel: A

- - - - - - - - - - - - - - - - - - - - - - - - - - - - - - - - - - - - - - - -
Would you be willing to share your email address with the Electronic Frontier
Foundation, a founding partner of the Let's Encrypt project and the non-profit
organization that develops Certbot? We'd like to send you email about our work
encrypting the web, EFF news, campaigns, and ways to support digital freedom.
- - - - - - - - - - - - - - - - - - - - - - - - - - - - - - - - - - - - - - - -
(Y)es/(N)o: Y
Obtaining a new certificate
Performing the following challenges:
http-01 challenge for ghost.linuxbuz.com
Waiting for verification...
Cleaning up challenges
Deploying Certificate to VirtualHost /etc/nginx/sites-enabled/ghost.linuxbuz.com.conf
Quindi, scegli se reindirizzare o meno il traffico HTTP su HTTPS:
Please choose whether or not to redirect HTTP traffic to HTTPS, removing HTTP access.
- - - - - - - - - - - - - - - - - - - - - - - - - - - - - - - - - - - - - - - -
1: No redirect - Make no further changes to the webserver configuration.
2: Redirect - Make all requests redirect to secure HTTPS access. Choose this for
new sites, or if you're confident your site works on HTTPS. You can undo this
change by editing your web server's configuration.
- - - - - - - - - - - - - - - - - - - - - - - - - - - - - - - - - - - - - - - -
Select the appropriate number [1-2] then [enter] (press 'c' to cancel): 2
Digita 2 e premi Invio per completare l'installazione.
Redirecting all traffic on port 80 to ssl in /etc/nginx/sites-enabled/ghost.linuxbuz.com.conf

- - - - - - - - - - - - - - - - - - - - - - - - - - - - - - - - - - - - - - - -
Congratulations! You have successfully enabled https://ghost.linuxbuz.com

You should test your configuration at:
https://www.ssllabs.com/ssltest/analyze.html?d=ghost.linuxbuz.com
- - - - - - - - - - - - - - - - - - - - - - - - - - - - - - - - - - - - - - - -

IMPORTANT NOTES:
 - Congratulations! Your certificate and chain have been saved at:
   /etc/letsencrypt/live/ghost.linuxbuz.com/fullchain.pem
   Your key file has been saved at:
   /etc/letsencrypt/live/ghost.linuxbuz.com/privkey.pem
   Your cert will expire on 2021-07-13. To obtain a new or tweaked
   version of this certificate in the future, simply run certbot again
   with the "certonly" option. To non-interactively renew *all* of
   your certificates, run "certbot renew"
 - Your account credentials have been saved in your Certbot
   configuration directory at /etc/letsencrypt. You should make a
   secure backup of this folder now. This configuration directory will
   also contain certificates and private keys obtained by Certbot so
   making regular backups of this folder is ideal.
 - If you like Certbot, please consider supporting our work by:

   Donating to ISRG / Let's Encrypt:   https://letsencrypt.org/donate
   Donating to EFF:                    https://eff.org/donate-le
Ora puoi verificare il sito Web di Ghost con il seguente comando;
ghost ls
Dovresti vedere il seguente output:
+ sudo systemctl is-active ghost_ghost-linuxbuz-com
??????????????????????????????????????????????????????????????????????????????????????????????????????????????????????????????
? Name               ? Location       ? Version ? Status               ? URL                        ? Port ? Process Manager ?
??????????????????????????????????????????????????????????????????????????????????????????????????????????????????????????????
? ghost-linuxbuz-com ? /var/www/ghost ? 4.2.1   ? running (production) ? https://ghost.linuxbuz.com ? 2368 ? systemd         ?
??????????????????????????????????????????????????????????????????????????????????????????????????????????????????????????????
Puoi anche verificare il servizio Ghost con il seguente comando:
sudo systemctl status ghost_ghost-linuxbuz-com
Dovresti vedere il seguente output:
? ghost_ghost-linuxbuz-com.service - Ghost systemd service for blog: ghost-linuxbuz-com
     Loaded: loaded (/lib/systemd/system/ghost_ghost-linuxbuz-com.service; enabled; vendor preset: enabled)
     Active: active (running) since Wed 2021-04-14 07:05:33 UTC; 9min ago
       Docs: https://ghost.org/docs/
   Main PID: 7546 (node)
      Tasks: 22 (limit: 2353)
     Memory: 134.3M
     CGroup: /system.slice/ghost_ghost-linuxbuz-com.service
             ??7546 ghost run
             ??7590 /usr/bin/node current/index.js

Apr 14 07:13:44 ubuntu node[7590]: [2021-04-14 07:13:44] INFO "GET /ghost/assets/img/dashboard/start-membership-baafa2c6558d118ae59cb1fddab045>
Apr 14 07:13:44 ubuntu node[7590]: [2021-04-14 07:13:44] INFO "GET /ghost/assets/img/dashboard/the-browser-f5e7e199fe82d8435913e84d022fa7e1.pn>
Apr 14 07:13:44 ubuntu node[7590]: [2021-04-14 07:13:44] INFO "GET /ghost/assets/img/dashboard/join-community-bb5478f7dca6c04a2d0baf2b02f880fb>
Apr 14 07:13:44 ubuntu node[7590]: [2021-04-14 07:13:44] INFO "GET /ghost/api/canary/admin/members/?filter=status%3Apaid&order=created_at%20as>
Apr 14 07:14:11 ubuntu node[7590]: [2021-04-14 07:14:11] INFO "GET /" 200 475ms
Apr 14 07:14:11 ubuntu node[7590]: [2021-04-14 07:14:11] INFO "GET /" 200 480ms
Apr 14 07:14:15 ubuntu node[7590]: [2021-04-14 07:14:15] INFO "GET /members/api/site/" 200 12ms
Apr 14 07:14:18 ubuntu node[7590]: [2021-04-14 07:14:18] INFO "GET /" 304 142ms
Apr 14 07:14:25 ubuntu node[7590]: [2021-04-14 07:14:25] INFO "GET /members/api/site/" 304 4ms
Apr 14 07:14:26 ubuntu node[7590]: [2021-04-14 07:14:26] INFO "GET /members/api/member/" 401 4ms
Accedi all'interfaccia di amministrazione di Ghost
Ora apri il tuo browser web e accedi all'interfaccia di amministrazione di Ghost usando l'URL https://ghost.linuxbuz.com/ghost/ . Dovresti vedere la seguente pagina:
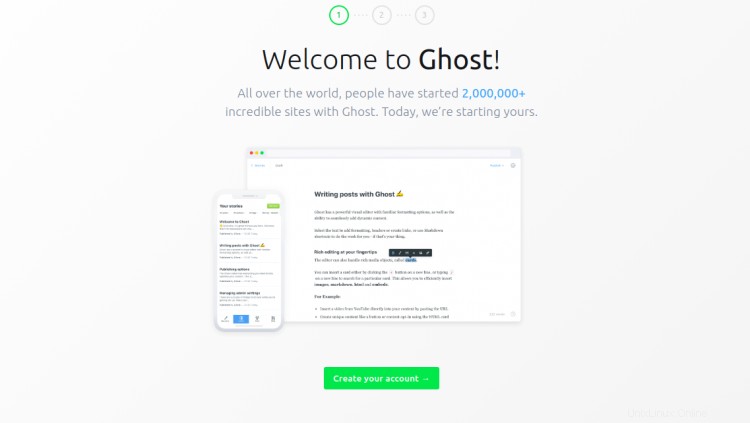
Fai clic su Crea il tuo account pulsante per creare il tuo primo account:
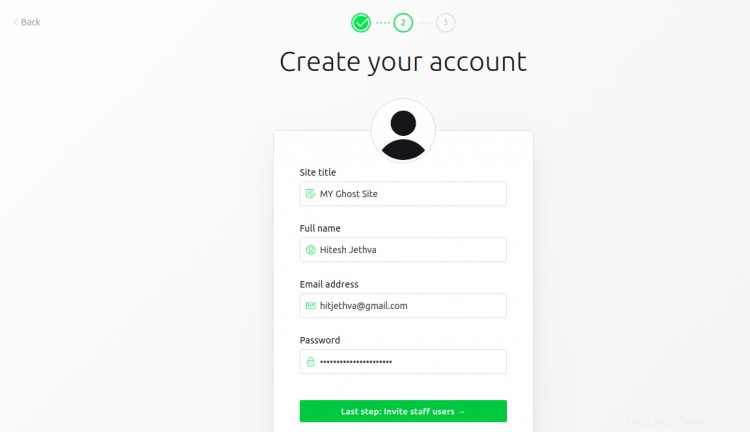
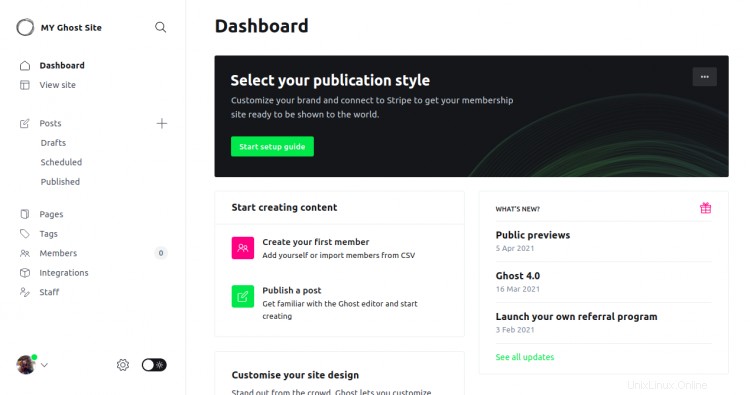
Fornisci i dettagli del tuo account e fai clic su Lo farò più tardi nella parte inferiore dello schermo. Dovresti vedere l'interfaccia di amministrazione di Ghost nella pagina seguente:
Puoi anche accedere al tuo sito Web Ghost utilizzando l'URL https://ghost.linuxbuz.com/. Dovresti vedere la seguente pagina:

Conclusione
Congratulazioni! hai installato con successo la piattaforma di blogging Ghost su Ubuntu 20.04. Ora puoi creare e pubblicare i tuoi contenuti dall'interfaccia di Ghost.