Hugo è un framework gratuito e open source scritto in linguaggio Go che può essere utilizzato per creare siti Web con facilità. È un generatore di siti statici semplice, veloce e sicuro, non è necessario alcun database per eseguirlo. Hugo supporta illimitati tipi di contenuto, tassonomie, menu, contenuti dinamici basati su API e altro, il tutto senza plug-in. Hugo viene fornito con un ricco set di funzionalità tra cui robusta gestione dei contenuti, modelli integrati, codici brevi, output personalizzati, multilingue e molti altri.
In questo tutorial impareremo come installare Hugo sul server Ubuntu 18.04 LTS.
Requisiti
- Un server che esegue Ubuntu 18.04.
- Un indirizzo IP statico 136.243.240.39 è configurato sul tuo server.
- È stata impostata una password di root sul tuo server.
Per iniziare
Prima di iniziare, dovrai aggiornare il tuo sistema con l'ultima versione. Puoi farlo eseguendo il seguente comando:
apt-get update -y
 apt-get upgrade -y
Una volta aggiornato il server, riavvia il server per applicare le modifiche.
Installa Hugo
Per impostazione predefinita, l'ultima versione di Hugo non è disponibile nel repository predefinito di Ubuntu 18.04. Quindi, dovrai scaricarlo dal repository Git. Puoi scaricarlo con il seguente comando:
wget https://github.com/gohugoio/hugo/releases/download/v0.58.2/hugo_0.58.2_Linux-64bit.deb
Una volta completato il download, installa Hugo con il seguente comando:
dpkg -i hugo_0.58.2_Linux-64bit.deb
Se ricevi un errore di dipendenza, esegui il comando seguente per risolvere la dipendenza:
apt-get install -f
Successivamente, puoi controllare la versione di Hugo con il seguente comando:
hugo version
Dovresti ottenere il seguente output:
Hugo Static Site Generator v0.58.2-253E5FDC linux/amd64 BuildDate: 2019-09-13T08:05:59Z
Puoi anche vedere un elenco di opzioni disponibili con Hugo eseguendo il comando seguente:
hugo --help
Dovresti ottenere il seguente output:
hugo is the main command, used to build your Hugo site.

Hugo is a Fast and Flexible Static Site Generator
built with love by spf13 and friends in Go.

Complete documentation is available at http://gohugo.io/.

Usage:
  hugo [flags]
  hugo [command]

Available Commands:
  config      Print the site configuration
  convert     Convert your content to different formats
  deploy      Deploy your site to a Cloud provider.
  env         Print Hugo version and environment info
  gen         A collection of several useful generators.
  help        Help about any command
  import      Import your site from others.
  list        Listing out various types of content
  mod         Various Hugo Modules helpers.
  new         Create new content for your site
  server      A high performance webserver
  version     Print the version number of Hugo

Flags:
  -b, --baseURL string         hostname (and path) to the root, e.g. http://spf13.com/
  -D, --buildDrafts            include content marked as draft
  -E, --buildExpired           include expired content
  -F, --buildFuture            include content with publishdate in the future
      --cacheDir string        filesystem path to cache directory. Defaults: $TMPDIR/hugo_cache/
      --cleanDestinationDir    remove files from destination not found in static directories
      --config string          config file (default is path/config.yaml|json|toml)
      --configDir string       config dir (default "config")
  -c, --contentDir string      filesystem path to content directory
      --debug                  debug output
  -d, --destination string     filesystem path to write files to
      --disableKinds strings   disable different kind of pages (home, RSS etc.)
      --enableGitInfo          add Git revision, date and author info to the pages
  -e, --environment string     build environment
      --forceSyncStatic        copy all files when static is changed.
      --gc                     enable to run some cleanup tasks (remove unused cache files) after the build
  -h, --help                   help for hugo
      --i18n-warnings          print missing translations
      --ignoreCache            ignores the cache directory
      --ignoreVendor           ignores any _vendor directory
  -l, --layoutDir string       filesystem path to layout directory
      --log                    enable Logging
      --logFile string         log File path (if set, logging enabled automatically)
      --minify                 minify any supported output format (HTML, XML etc.)
      --noChmod                don't sync permission mode of files
      --noTimes                don't sync modification time of files
      --path-warnings          print warnings on duplicate target paths etc.
      --quiet                  build in quiet mode
      --renderToMemory         render to memory (only useful for benchmark testing)
  -s, --source string          filesystem path to read files relative from
      --templateMetrics        display metrics about template executions
      --templateMetricsHints   calculate some improvement hints when combined with --templateMetrics
  -t, --theme strings          themes to use (located in /themes/THEMENAME/)
      --themesDir string       filesystem path to themes directory
      --trace file             write trace to file (not useful in general)
  -v, --verbose                verbose output
      --verboseLog             verbose logging
  -w, --watch                  watch filesystem for changes and recreate as needed
Una volta terminato, puoi procedere al passaggio successivo.
Crea un sito web con Hugo
Hugo è ora installato, è ora di creare un sito Web e contenuti con Hugo.
Puoi creare un nuovo sito Web denominato test.example.com eseguendo il comando seguente:
hugo new site test.example.com
Una volta che il sito Web è stato creato correttamente, dovresti ottenere il seguente output:
Congratulations! Your new Hugo site is created in /root/test.example.com. Just a few more steps and you're ready to go: 1. Download a theme into the same-named folder. Choose a theme from https://themes.gohugo.io/, or create your own with the "hugo new theme" command. 2. Perhaps you want to add some content. You can add single files with "hugo new / . ". 3. Start the built-in live server via "hugo server". Visit https://gohugo.io/ for quickstart guide and full documentation.
Puoi anche elencare tutti i file creati sotto il tuo sito web con il seguente comando:
ls test.example.com/
Dovresti vedere il seguente output:
archetypes config.toml content data layouts static themes
Crea una pagina Informazioni e un post sul blog
Ora cambia la directory del tuo sito web e crea una pagina about.md con il seguente comando:
cd test.example.com
 hugo new about.md
Dovresti vedere il seguente output:
/root/test.example.com/content/about.md created
Quindi, apri un file about.md e aggiungi del contenuto:
nano content/about.md
Apporta le seguenti modifiche:
---
title: "About"
date: 2019-09-10T06:57:08Z
draft: false
---

I am hitesh jethva working as a technical writer.
Salva e chiudi il file quando hai finito. Quindi, crea il tuo primo post con il seguente comando:
hugo new post/first.md
Dovresti vedere il seguente output:
/root/test.example.com/content/post/first.md created
Quindi, apri il file first.md e aggiungi del contenuto:
nano content/post/first.md
Apporta le seguenti modifiche:
---
title: "First"
date: 2019-09-10T06:58:51Z
draft: false
---

## This is my first blog post

Hi How are you!
Imposta il tuo primo tema
La tua pagina sulle informazioni e il post del blog sono ora creati, è ora di impostare il tuo primo tema.
Per prima cosa, cambia la directory in temi e scarica il tema-hugo-strata con il seguente comando:
cd themes
 wget https://github.com/digitalcraftsman/hugo-strata-theme/archive/master.zip
Una volta scaricato, estrai il tema scaricato con il seguente comando:
unzip master.zip
Quindi, rinomina il tema estratto come mostrato di seguito:
mv hugo-strata-theme-master hugo-strata-theme
Successivamente, dovrai copiare il contenuto del file config.toml di esempio da temi/hugo-strata-theme al file config.toml del tuo sito che si trova in /root/test.example.com/config.toml.
Puoi farlo con il seguente comando:
cat hugo-strata-theme/exampleSite/config.toml > ../config.toml
Quindi, aggiorna la variabile baseurl e includi anche la tua nuova pagina about nella navigazione di questo tema nel file config.toml come mostrato di seguito:
nano ../config.toml
Aggiorna l'URL di base come mostrato di seguito:
baseurl = "/"
Aggiungi anche le seguenti righe per includere la tua nuova pagina Informazioni:
 [[menu.main]]
  name = "About"
  url  = "about"
  weight = 5
Salva e chiudi il file quando hai finito.
Successivamente, dovrai anche aggiornare il layout della pagina di destinazione con il layout del modello del tema che si trova in themes/hugo-strata-theme/layouts/index.html a test.example.com/layouts/index.html :
nano /root/test.example.com/layouts/index.html
Aggiungi il seguente contenuto:
{{ define "main" }}
        {{ if not .Site.Params.about.hide }}
                {{ partial "about" . }}
        {{ end }}

        {{ if not .Site.Params.portfolio.hide }}
                {{ partial "portfolio" . }}
        {{ end }}

        {{ if not .Site.Params.recentposts.hide }}
                {{ partial "recent-posts" . }}
        {{ end }}

        {{ if not .Site.Params.contact.hide }}
                {{ partial "contact" . }}
        {{ end }}
{{ end }}
Salva e chiudi il file quando hai finito.
Una volta terminato, puoi procedere al passaggio successivo.
Costruisci il tuo sito web
Il tuo tema è ora configurato per il tuo sito web. È tempo di costruire il tuo sito web. Per farlo, cambia la directory del tuo sito web e costruisci il sito con il seguente comando:
cd /root/test.example.com
 hugo
Dovresti vedere il seguente output:
                   | EN
+------------------+----+
  Pages            | 17
  Paginator pages  |  0
  Non-page files   |  0
  Static files     | 26
  Processed images |  0
  Aliases          |  5
  Sitemaps         |  1
  Cleaned          |  0

Total in 18 ms
Ora avvia il tuo server Hugo e associalo all'indirizzo IP del tuo server eseguendo il seguente comando:
hugo server --bind=0.0.0.0 --baseUrl=http://136.243.240.39 -D -F
Una volta che il server è stato avviato correttamente, dovresti vedere il seguente output:
                   | EN
+------------------+----+
  Pages            | 17
  Paginator pages  |  0
  Non-page files   |  0
  Static files     | 26
  Processed images |  0
  Aliases          |  5
  Sitemaps         |  1
  Cleaned          |  0

Total in 28 ms
Watching for changes in /root/test.example.com/{content,data,layouts,static,themes}
Watching for config changes in /root/test.example.com/config.toml
Serving pages from memory
Running in Fast Render Mode. For full rebuilds on change: hugo server --disableFastRender
Web Server is available at http://136.243.240.39:1313/ (bind address 0.0.0.0)
Press Ctrl+C to stop
Una volta terminato, puoi procedere con l'accesso all'interfaccia web di Hugo.
Accedi al server Hugo
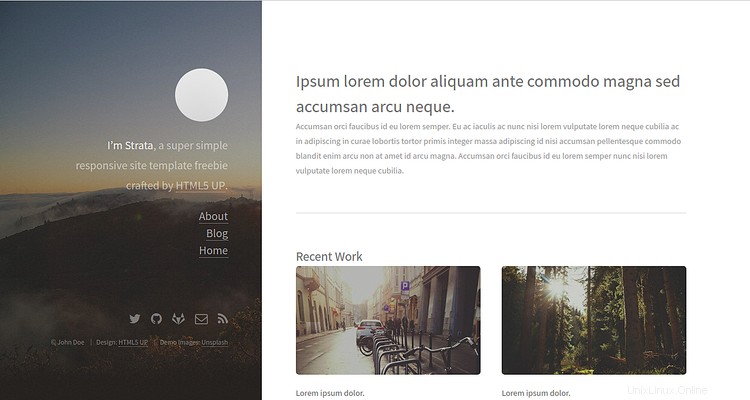
Il tuo server Hugo è ora avviato e in ascolto sulla porta 1313. Quindi, apri il tuo browser web e digita l'URL http://136.243.240.39:1313. Verrai reindirizzato alla dashboard del tuo server Hugo come mostrato di seguito:
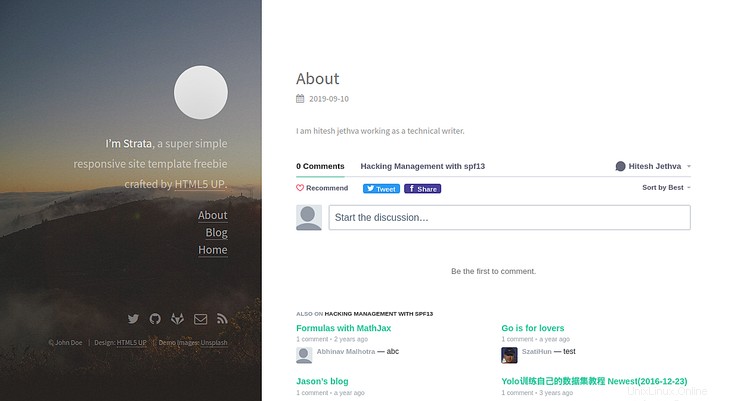
Ora, fai clic su Informazioni su nel riquadro di sinistra. Dovresti vedere la tua pagina Informazioni nell'immagine seguente:
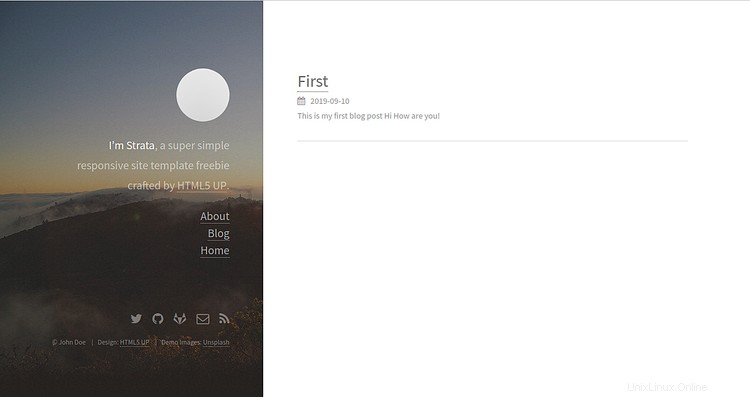
Ora, fai clic sul Blog pulsante nel riquadro di sinistra. Dovresti vedere il tuo post sul blog nella seguente immagine:
Conclusione
Nel tutorial sopra, abbiamo imparato come installare il server Hugo sul server Ubuntu 18.04. Abbiamo anche imparato come creare un sito con pagina e tema con Hugo. Per ulteriori informazioni su Hugo, puoi visitare la documentazione ufficiale di Hugo su Hugo Doc. Sentiti libero di chiedermi se hai domande.