Askbot è un software per forum di domande e risposte gratuito, open source e altamente personalizzabile scritto in Python e Django. È semplice, leggero e molto simile ad altri software per forum StackOverflow e YahooAnswers. Askbot offre un sacco di funzionalità tra cui tag e categorie, notifiche e-mail, sistema basato sul karma, votazione, moderazione dei contenuti e molto altro.
In questo tutorial, ti mostreremo come installare il software del forum Askbot su CentOS 8 con Let's Encrypt SSL.
Prerequisiti
- Un server che esegue CentOS 8.
- Una password di root è impostata sul tuo server.
Installa le dipendenze richieste
Prima di iniziare, dovrai installare alcune dipendenze richieste nel tuo sistema.
Innanzitutto, installa gli "Strumenti di sviluppo" con il seguente comando:
dnf group install 'Development Tools'
Quindi, installa il repository EPEL e altre dipendenze Python con il seguente comando:
dnf install epel-release -y
dnf install python2-pip python2-devel python2-six -y
Una volta installati tutti i pacchetti richiesti, puoi procedere al passaggio successivo.
Installa e configura PostgreSQL
Askbot utilizza PostgreSQL per archiviare i propri dati. Quindi dovrai installarlo nel tuo sistema. Puoi installarlo con il seguente comando:
dnf install postgresql-server postgresql-devel postgresql-contrib -y
Una volta installato, inizializzare il database con il seguente comando:
postgresql-setup initdb
Dovresti ottenere il seguente output:
WARNING: using obsoleted argument syntax, try --help
WARNING: arguments transformed to: postgresql-setup --initdb --unit postgresql
 * Initializing database in '/var/lib/pgsql/data'
 * Initialized, logs are in /var/lib/pgsql/initdb_postgresql.log
Quindi, avvia il servizio PostgreSQL e abilitalo all'avvio dopo il riavvio del sistema con il seguente comando:
systemctl start postgresql
systemctl enable postgresql
Quindi, accedi alla shell di PostgreSQL con il seguente comando:
su - postgres
[[email protected] ~]$ psql
Uscita:
psql (10.6)
Type "help" for help.
postgres=#
Quindi, crea un database e un utente per Askbot con il seguente comando:
postgres=# create database askbot;
postgres=# create user askbot with password 'password';
Quindi, concedi tutti i privilegi all'askbot con il seguente comando:
postgres=# grant all privileges on database askbot to askbot;
Infine, esci dalla shell di PostgreSQL con il seguente comando:
postgres=# \q
Successivamente, dovrai configurare l'autenticazione utente locale per PostgreSQL. Puoi farlo modificando il file pg_hba.conf:
nano /var/lib/pgsql/data/pg_hba.conf
Sostituisci peer con md5 nelle seguenti righe:
local   all             all                                    md5
host    all             all             127.0.0.1/32           md5
host    all             all             ::1/128                md5
Salva e chiudi il file quando hai finito. Quindi, riavvia il servizio PostgreSQL per applicare le modifiche:
systemctl restart postgresql
Installa e configura Askbot
Prima di installare Askbot, dovrai creare un utente per Askbot. Puoi creare un nuovo utente Askbot e impostare una password con il seguente comando:
useradd -m -s /bin/bash askbot
passwd askbot
Quindi, aggiungi l'utente Askbot al gruppo di ruote per l'accesso al comando sudo:
usermod -a -G wheel askbot
Quindi, installa il pacchetto virtualenv python con il seguente comando:
pip2 install virtualenv six
Una volta installato, cambia l'utente in askbot e crea un nuovo ambiente virtuale per Askbot con il seguente comando:
su - askbot
virtualenv askbot
Dovresti vedere il seguente output:
created virtual environment CPython2.7.16.final.0-64 in 663ms
  creator CPython2Posix(dest=/home/askbot/askbot, clear=False, global=False)
  seeder FromAppData(download=False, pip=latest, setuptools=latest, wheel=latest, via=copy, app_data_dir=/tmp/tmp9YFr7B/seed-app-data/v1)
  activators PythonActivator,CShellActivator,FishActivator,PowerShellActivator,BashActivator
Quindi, cambia la directory in askbot e attiva l'ambiente virtuale con il seguente comando:
cd askbot
source bin/activate
Uscita:
(askbot) [[email protected] askbot]$
Quindi, installa Askbot e le altre dipendenze richieste con il seguente comando:
pip2 install six==1.10.0
pip2 install askbot psycopg2
Quindi, crea una nuova directory per la tua applicazione, cambia la directory nella tua applicazione e configura Askbot con il seguente comando:
mkdir myapp
cd myapp
askbot-setup
Dovresti vedere il seguente output:
Deploying Askbot - Django Q&A forum application
Problems installing? -> please email [email protected]

To CANCEL - hit Ctr-C at any time

Enter directory path (absolute or relative) to deploy
askbot. To choose current directory - enter "."
> .
Tipo "." e premi Invio continuare. Dovresti vedere il seguente output:
Please select database engine:
1 - for postgresql, 2 - for sqlite, 3 - for mysql, 4 - oracle
type 1/2/3/4: 1
Digita 1 per selezionare un motore di database postgresql e premi Invio per continuare. Dovresti vedere il seguente output:
Please enter database name (required)
> askbot

Please enter database user (required)
> askbot

Please enter database password (required)
> password
Fornisci i dettagli del tuo database Askbot e premi Invio . Al termine dell'installazione, dovresti vedere il seguente output:
Copying files:
* __init__.py
* manage.py
* urls.py
* django.wsgi
Creating settings file
settings file created

copying directories:  * doc
* cron
* upfiles

Done. Please find further instructions at http://askbot.org/doc/
Quindi, genera file statici e database Askbot Django con il seguente comando:
python manage.py collectstatic
python manage.py syncdb
Fornisci il nome utente, l'e-mail e la password dell'amministratore desiderati come mostrato di seguito:
You have installed Django's auth system, and don't have any superusers defined.
Would you like to create one now? (yes/no): yes
Username (leave blank to use 'askbot'): askbotadmin
Email address: [email protected]
Password:
Password (again):
Superuser created successfully.
Installa e configura uWSGI
Successivamente, dovrai installare uWSGI sul tuo sistema. uWSGI è uno strumento software utilizzato per eseguire applicazioni Web basate su Python. Puoi installarlo con il seguente comando:
pip2 install uwsgi
Dopo aver installato uWSGI, crea una nuova directory per uWSGI con il seguente comando:
mkdir -p /etc/uwsgi/sites
Quindi, crea un nuovo file di configurazione uWSGI come mostrato di seguito:
nano /etc/uwsgi/sites/askbot.ini
Aggiungi le seguenti righe:
[uwsgi]

chdir = /home/askbot/askbot/myapp
home = /home/askbot/askbot
static-map = /m=/home/askbot/askbot/myapp/static
wsgi-file = /home/askbot/askbot/myapp/django.wsgi
master = true
processes = 5
# Askbot will running under the sock file
socket = /run/uwsgi/askbot.sock
chmod-socket = 664
uid = askbot
gid = nginx
vacuum = true
# uWSGI Log file
ogto = /var/log/uwsgi.log
Crea un file di servizio Systemd per uWSGI
Successivamente, dovrai creare un file di servizio systemd per gestire il servizio uWSGI. Puoi crearlo con il seguente comando:
nano /etc/systemd/system/uwsgi.service
Aggiungi le seguenti righe:
[Unit]
Description=uWSGI service

[Service]
ExecStartPre=/bin/bash -c 'mkdir -p /run/uwsgi; chown askbot:nginx /run/uwsgi'
ExecStart=/bin/uwsgi --emperor /etc/uwsgi/sites
Restart=always
KillSignal=SIGQUIT
Type=notify
NotifyAccess=all

[Install]
WantedBy=multi-user.target
Salva e chiudi il file quando hai finito. Quindi, ricarica il demone systemd con il seguente comando:
systemctl daemon-reload
Installa e configura Nginx
Successivamente, dovrai installare e configurare Nginx per servire la tua applicazione Askbot.
Innanzitutto, installa il server web Nginx con il seguente comando:
dnf install nginx -y
Una volta installato, crea un nuovo file di configurazione dell'host virtuale per Askbot:
nano /etc/nginx/conf.d/askbot.conf
Aggiungi le seguenti righe:
server {
         listen 80;
         server_name askbot.linuxbuz.com;
         location / {
         include         uwsgi_params;
         uwsgi_pass	 unix:/run/uwsgi/askbot.sock;
    }
 }
Salva e chiudi il file. Quindi, avvia il servizio Nginx e uWSGI e abilita l'avvio dopo il riavvio del sistema con il seguente comando:
systemctl start nginx
systemctl enable nginx
systemctl start uwsgi
systemctl enable uwsgi
Proteggi Askbot con Let's Encrypt SSL
Successivamente, dovrai installare l'utilità Certbot nel tuo sistema per scaricare e installare Let's Encrypt SSL per il dominio Askbot.
Puoi installare il client Certbot con il seguente comando:
wget https://dl.eff.org/certbot-auto
mv certbot-auto /usr/local/bin/certbot-auto
chown root /usr/local/bin/certbot-auto
chmod 0755 /usr/local/bin/certbot-auto
Successivamente, ottieni e installa un certificato SSL per il tuo dominio Askbot con il seguente comando:
certbot-auto --nginx -d askbot.linuxbuz.com
Il comando precedente installerà prima tutte le dipendenze richieste sul tuo server. Una volta installato, ti verrà chiesto di fornire un indirizzo email e di accettare i termini del servizio come mostrato di seguito:
Saving debug log to /var/log/letsencrypt/letsencrypt.log
Plugins selected: Authenticator nginx, Installer nginx
Enter email address (used for urgent renewal and security notices) (Enter 'c' to
cancel): [email protected]

- - - - - - - - - - - - - - - - - - - - - - - - - - - - - - - - - - - - - - - -
Please read the Terms of Service at
https://letsencrypt.org/documents/LE-SA-v1.2-November-15-2017.pdf. You must
agree in order to register with the ACME server at
https://acme-v02.api.letsencrypt.org/directory
- - - - - - - - - - - - - - - - - - - - - - - - - - - - - - - - - - - - - - - -
(A)gree/(C)ancel: A

- - - - - - - - - - - - - - - - - - - - - - - - - - - - - - - - - - - - - - - -
Would you be willing to share your email address with the Electronic Frontier
Foundation, a founding partner of the Let's Encrypt project and the non-profit
organization that develops Certbot? We'd like to send you email about our work
encrypting the web, EFF news, campaigns, and ways to support digital freedom.
- - - - - - - - - - - - - - - - - - - - - - - - - - - - - - - - - - - - - - - -
(Y)es/(N)o: Y

Obtaining a new certificate
Performing the following challenges:
http-01 challenge for askbot.linuxbuz.com
Waiting for verification...
Cleaning up challenges
Deploying Certificate to VirtualHost /etc/nginx/conf.d/askbot.conf
Quindi, seleziona se reindirizzare o meno il traffico HTTP su HTTPS come mostrato di seguito:
Please choose whether or not to redirect HTTP traffic to HTTPS, removing HTTP access.
- - - - - - - - - - - - - - - - - - - - - - - - - - - - - - - - - - - - - - - -
1: No redirect - Make no further changes to the webserver configuration.
2: Redirect - Make all requests redirect to secure HTTPS access. Choose this for
new sites, or if you're confident your site works on HTTPS. You can undo this
change by editing your web server's configuration.
- - - - - - - - - - - - - - - - - - - - - - - - - - - - - - - - - - - - - - - -
Select the appropriate number [1-2] then [enter] (press 'c' to cancel): 2
Digita 2 e premi Invio continuare. Al termine dell'installazione, dovresti vedere il seguente output:
Redirecting all traffic on port 80 to ssl in /etc/nginx/conf.d/askbot.conf

- - - - - - - - - - - - - - - - - - - - - - - - - - - - - - - - - - - - - - - -
Congratulations! You have successfully enabled https://askbot.linuxbuz.com

You should test your configuration at:
https://www.ssllabs.com/ssltest/analyze.html?d=askbot.linuxbuz.com
- - - - - - - - - - - - - - - - - - - - - - - - - - - - - - - - - - - - - - - -

IMPORTANT NOTES:
 - Congratulations! Your certificate and chain have been saved at:
   /etc/letsencrypt/live/askbot.linuxbuz.com/fullchain.pem
   Your key file has been saved at:
   /etc/letsencrypt/live/askbot.linuxbuz.com/privkey.pem
   Your cert will expire on 2020-06-11. To obtain a new or tweaked
   version of this certificate in the future, simply run certbot-auto
   again with the "certonly" option. To non-interactively renew *all*
   of your certificates, run "certbot-auto renew"
 - If you like Certbot, please consider supporting our work by:

   Donating to ISRG / Let's Encrypt:   https://letsencrypt.org/donate
   Donating to EFF:                    https://eff.org/donate-le
Configura Firewall e SELinux
Successivamente, dovrai creare una regola firewall per consentire il servizio HTTP e HTTPS da reti esterne. Puoi consentirlo con il seguente comando:
firewall-cmd --permanent --add-service=http
firewall-cmd --permanent --add-service=https
firewall-cmd --reload
Per impostazione predefinita, SELinux è abilitato in CentOS 8. Si consiglia di disabilitarlo per far funzionare correttamente Askbot. Puoi disabilitarlo modificando il file /etc/selinux/config:
nano /etc/selinux/config
Trova la riga seguente:
SELINUX=enforcing
E sostituiscilo con la seguente riga:
SELINUX=disabled
Salva e chiudi il file. Quindi, riavvia il sistema per applicare le modifiche:
Accedi ad Askbot
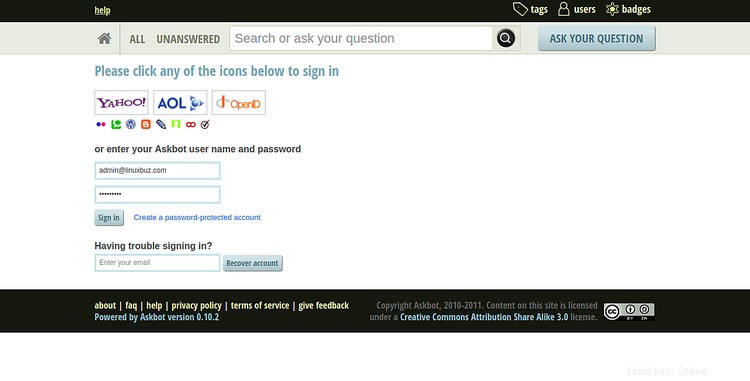
Ora apri il tuo browser web e digita l'URL https://askbot.linuxbuz.com. Verrai reindirizzato alla seguente schermata:

Fai clic sul segno dentro pulsante. Dovresti vedere la pagina di accesso di Askbot nella schermata seguente:
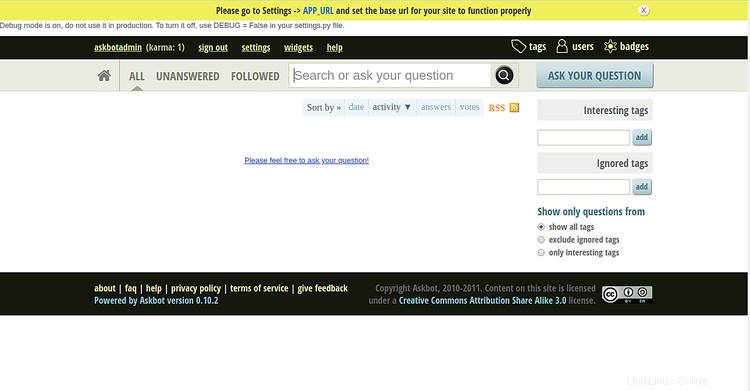
Fornisci il nome utente e la password dell'amministratore Askbot e fai clic su Firma dentro pulsante. Dovresti vedere la dashboard di Askbot nella schermata seguente:
Conclusione
Congratulazioni! hai installato e configurato correttamente il forum Askbot su CentOS 8 e lo hai protetto con Let's Encrypt SSL. Ora puoi iniziare a creare una domanda e una risposta con Askbot.