Nell'ultimo tutorial, ti ho mostrato come configurare Samba su Centos 7 compilando Samba dal sorgente poiché il pacchetto fornito da RedHat non supporta Active Directory. Ho notato che esiste un repository chiamato Wing che fornisce a samba4 rpm il supporto per AD. In questo tutorial, userò questo repository per l'installazione di Samba. Mostrerò anche come creare una condivisione samba.
In questo tutorial, utilizzerò un server CentOS 7 con un'installazione minima come base con SELinux abilitato.
Prepara il server CentOS 7
Controlla lo stato di SELinux.
[[email protected] ~]# sestatus
SELinux status:                 enabled
SELinuxfs mount:                /sys/fs/selinux
SELinux root directory:         /etc/selinux
Loaded policy name:             targeted
Current mode:                   enforcing
Mode from config file:          enforcing
Policy MLS status:              enabled
Policy deny_unknown status:     allowed
Max kernel policy version:      28
[[email protected] ~]#
Immettere una voce nel file host con l'indirizzo IP del server seguito dal nome host completo (fqdn) e quindi dalla parte locale del nome host.
[[email protected] ~]# cat /etc/hosts
127.0.0.1   localhost localhost.localdomain localhost4 localhost4.localdomain4
::1         localhost localhost.localdomain localhost6 localhost6.localdomain6
192.168.1.190   samba4.sunil.cc samba4
[[email protected] ~]#
Installa il repository Epel CentOS.
[[email protected] ~]# yum install epel-release -y
Installa i pacchetti di base.
[[email protected] ~]# yum install vim wget authconfig krb5-workstation -y
Ora installa il repository ala.
[[email protected] ~]# cd /etc/yum.repos.d/
[[email protected] yum.repos.d]# wget http://wing-net.ddo.jp/wing/7/EL7.wing.repo
[[email protected] yum.repos.d]# sed -i '[email protected][email protected][email protected]' /etc/yum.repos.d/EL7.wing.repo
[[email protected] yum.repos.d]# yum clean all
Loaded plugins: fastestmirror
Cleaning repos: base extras updates wing wing-source
Cleaning up everything
Cleaning up list of fastest mirrors
[[email protected] yum.repos.d]#
Installa Samba 4 su CentOS 7
Installazione dei pacchetti Samba4 dal repository wing con yum.
[[email protected] yum.repos.d]# yum install -y samba45 samba45-winbind-clients samba45-winbind samba45-client\
samba45-dc samba45-pidl samba45-python samba45-winbind-krb5-locator perl-Parse-Yapp\
perl-Test-Base python2-crypto samba45-common-tools
Rimuovi questi file.
[[email protected] ~]# rm -rf /etc/krb5.conf
[[email protected] ~]# rm -rf /etc/samba/smb.conf
Configurazione di Samba 4
Ora faremo il provisioning del dominio.
[[email protected] ~]# samba-tool domain provision --use-rfc2307 --interactive
 Realm [SUNIL.CC]:
 Domain [SUNIL]:
 Server Role (dc, member, standalone) [dc]:
 DNS backend (SAMBA_INTERNAL, BIND9_FLATFILE, BIND9_DLZ, NONE) [SAMBA_INTERNAL]:
 DNS forwarder IP address (write 'none' to disable forwarding) [4.2.2.1]:
Administrator password:
Retype password:
Looking up IPv4 addresses
Looking up IPv6 addresses
No IPv6 address will be assigned
Setting up secrets.ldb
Setting up the registry
Setting up the privileges database
Setting up idmap db
Setting up SAM db
Setting up sam.ldb partitions and settings
Setting up sam.ldb rootDSE
Pre-loading the Samba 4 and AD schema
Adding DomainDN: DC=sunil,DC=cc
Adding configuration container
Setting up sam.ldb schema
Setting up sam.ldb configuration data
Setting up display specifiers
Modifying display specifiers
Adding users container
Modifying users container
Adding computers container
Modifying computers container
Setting up sam.ldb data
Setting up well known security principals
Setting up sam.ldb users and groups
Setting up self join
Adding DNS accounts
Creating CN=MicrosoftDNS,CN=System,DC=sunil,DC=cc
Creating DomainDnsZones and ForestDnsZones partitions
Populating DomainDnsZones and ForestDnsZones partitions
Setting up sam.ldb rootDSE marking as synchronized
Fixing provision GUIDs
A Kerberos configuration suitable for Samba 4 has been generated at /var/lib/samba/private/krb5.conf
Setting up fake yp server settings
Once the above files are installed, your Samba4 server will be ready to use
Server Role:           active directory domain controller
Hostname:              samba4
NetBIOS Domain:        SUNIL
DNS Domain:            sunil.cc
DOMAIN SID:            S-1-5-21-1578983437-3114190590-2362936743
[[email protected] etc]#
Assicurati che le porte siano aperte nel firewall.
[[email protected] etc]#firewall-cmd --add-port=53/tcp --permanent;firewall-cmd --add-port=53/udp --permanent;firewall-cmd --add-port=88/tcp --permanent;firewall-cmd --add-port=88/udp --permanent; \
firewall-cmd --add-port=135/tcp --permanent;firewall-cmd --add-port=137-138/udp --permanent;firewall-cmd --add-port=139/tcp --permanent; \
firewall-cmd --add-port=389/tcp --permanent;firewall-cmd --add-port=389/udp --permanent;firewall-cmd --add-port=445/tcp --permanent; \
firewall-cmd --add-port=464/tcp --permanent;firewall-cmd --add-port=464/udp --permanent;firewall-cmd --add-port=636/tcp --permanent; \
firewall-cmd --add-port=1024-3500/tcp --permanent;firewall-cmd --add-port=3268-3269/tcp --permanent
[[email protected] ~]# firewall-cmd --reload
Il pacchetto non fornisce lo script init, lo aggiungeremo ora.
[[email protected] ~]# cat  /etc/systemd/system/samba.service
[Unit]
Description= Samba 4 Active Directory
After=syslog.target
After=network.target

[Service]
Type=forking
PIDFile=/var/run/samba.pid
ExecStart=/usr/sbin/samba

[Install]
WantedBy=multi-user.target
[[email protected] ~]#
[[email protected] ~]# systemctl enable samba
Created symlink from /etc/systemd/system/multi-user.target.wants/samba.service to /etc/systemd/system/samba.service.
[[email protected] ~]# systemctl restart samba
Tutti gli altri passaggi sono simili al mio articolo precedente
per configurare host Windows e Linux, fare riferimento ad esso
Installazione del controller di dominio Samba4 dal sorgente
Creazione della condivisione Samba con il supporto di Windows ACL
Abbiamo bisogno di configurare l'ACL estesa per samba4. Aggiungi quanto segue nel file smb.conf in globale.
[[email protected] ~]# cat /etc/samba/smb.conf
# Global parameters
[global]
        ------------
		-------------
        vfs objects = acl_xattr
        map acl inherit = yes
        store dos attributes = yes
		------------
		-------------

[[email protected] ~]#
Ora riavvia il servizio Samba.
[[email protected] ~]# systemctl restart samba
Solo gli utenti e i gruppi a cui è stato concesso il privilegio SeDiskOperatorPrivilege possono configurare le autorizzazioni di condivisione.
[[email protected] ~]# net rpc rights grant "SUNIL\Domain Admins" SeDiskOperatorPrivilege -U "USER\administrator"
Enter USER\administrator's password:
Successfully granted rights.
[[email protected] ~]#
Prima di creare la condivisione, dobbiamo assicurarci che il server samba4 si autentichi con se stesso.
Non possiamo eseguire il solito metodo poiché non funziona poiché il pacchetto esistente da wing entrerà in conflitto con i pacchetti forniti da RedHat, non possiamo usare sssd qui. Useremo winbind per farlo funzionare.
Si prega di utilizzare il metodo seguente. Questo è necessario per creare la condivisione samba con autorizzazioni specifiche
Installa il pacchetto sottostante.
[[email protected] ~]#yum -y install authconfig-gtk*
Esegui il comando.
[[email protected] yum.repos.d]# authconfig-tui
seleziona il winbind, segui i passaggi successivi.
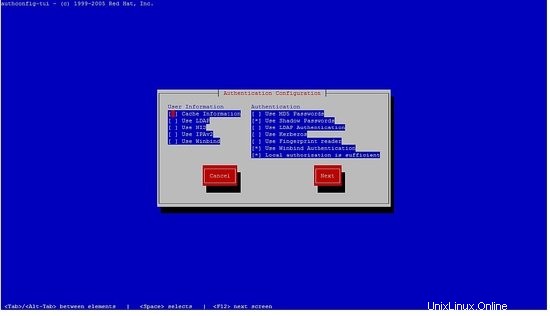
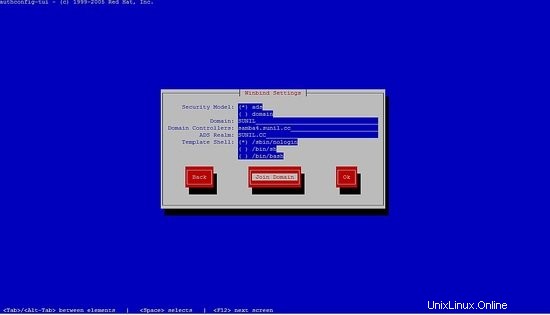
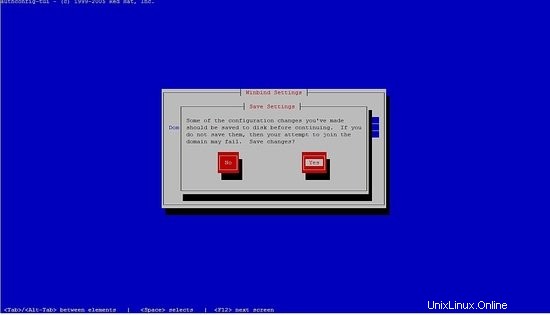
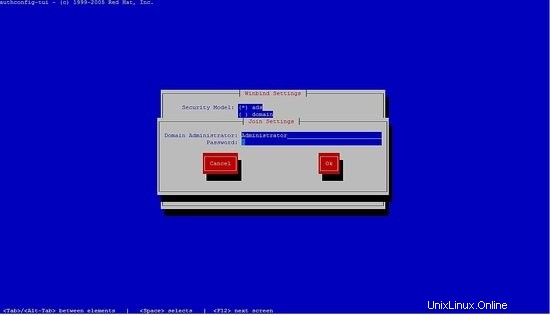
Non potrai inserire la password, basta premere ok.
Quindi commenta le righe in /etc/samba/smb.conf e riavvia il servizio samba.
La tua configurazione dovrebbe assomigliare a questa:
[[email protected] ~]# cat /etc/samba/smb.conf
# Global parameters
[global]
#--authconfig--start-line--

# Generated by authconfig on 2017/05/26 17:23:04
# DO NOT EDIT THIS SECTION (delimited by --start-line--/--end-line--)
# Any modification may be deleted or altered by authconfig in future

#   workgroup = SUNIL
#   password server = samba4.sunil.cc
#   realm = SUNIL.CC
#   security = ads
#   idmap config * : range = 16777216-33554431
#   template shell = /sbin/nologin
#  kerberos method = secrets only
#   winbind use default domain = false
#   winbind offline logon = false

#--authconfig--end-line--
        netbios name = SAMBA4
        realm = SUNIL.CC
        workgroup = SUNIL
        dns forwarder = 4.2.2.1
        server role = active directory domain controller
        idmap_ldb:use rfc2307 = yes
        vfs objects = acl_xattr
        map acl inherit = yes
        store dos attributes = yes

[netlogon]
        path = /var/lib/samba/sysvol/sunil.cc/scripts
        read only = No

[sysvol]
        path = /var/lib/samba/sysvol
        read only = No
[[email protected] ~]#
[[email protected] ~]# systemctl restart samba
Verifica se siamo in grado di popolare utenti e gruppi:
[[email protected] ~]# wbinfo -u
SUNIL\administrator
SUNIL\sambauser
SUNIL\testuser
SUNIL\krbtgt
SUNIL\guest
[[email protected] ~]# wbinfo -g
SUNIL\cert publishers
SUNIL\ras and ias servers
SUNIL\allowed rodc password replication group
SUNIL\denied rodc password replication group
SUNIL\dnsadmins
SUNIL\enterprise read-only domain controllers
SUNIL\domain admins
SUNIL\domain users
SUNIL\domain guests
SUNIL\domain computers
SUNIL\domain controllers
SUNIL\schema admins
SUNIL\enterprise admins
SUNIL\group policy creator owners
SUNIL\read-only domain controllers
SUNIL\dnsupdateproxy
[[email protected] ~]#
Modifica le righe in nsswitch.conf:
[[email protected] ~]# cat /etc/nsswitch.conf
----------
---------
passwd:     files winbind
shadow:     files winbind
group:      files winbind
hosts:      files dns wins
services:   files winbind
netgroup:   files winbind

---------
----------
Ora controlla se siamo in grado di ottenere il nome utente usando il comando id:
[[email protected] ~]# id testuser
uid=3000019(SUNIL\testuser) gid=100(users) groups=100(users),3000019(SUNIL\testuser),3000009(BUILTIN\users)
[[email protected] ~]#
Creazione di una condivisione Samba
Creerò due condivisioni, una accessibile solo da testuser e l'altra accessibile da tutti gli utenti nel gruppo utenti di dominio.
La condivisione accessibile da testuser sarà chiamata testshare.
La condivisione accessibile da tutti gli utenti si chiamerà commonshare.
[[email protected] ~]# mkdir /testshare
[[email protected] ~]# mkdir /commonshare
[[email protected] ~]# chmod 770 /testshare
[[email protected] ~]# chmod 770 /commonshare
[[email protected] ~]# chown -R root:testuser /testshare
[[email protected] ~]# chown -R root:"Domain Users" /commonshare
Ora aggiungi le voci in smb.conf
[[email protected] ~]# cat /etc/samba/smb.conf
# Global parameters
[global]
        netbios name = SAMBA4
        realm = SUNIL.CC
        workgroup = SUNIL
        dns forwarder = 4.2.2.1
        server role = active directory domain controller
        idmap_ldb:use rfc2307 = yes
        vfs objects = acl_xattr
        map acl inherit = yes
        store dos attributes = yes

[netlogon]
        path = /var/lib/samba/sysvol/sunil.cc/scripts
        read only = No

[sysvol]
        path = /var/lib/samba/sysvol
        read only = No
[TestShare]
        comment = Test share accessible by testuser
        path = /testshare
        valid users = SUNIL\testuser
        writable = yes
        read only = no
        force create mode = 0660
        create mask = 0770
        directory mask = 0770
        force directory mode = 0770
        access based share enum = yes
        hide unreadable = yes
[CommonShare]
         comment = Accessible by all the users
          path = /commonshare
          valid users = "@SUNIL\Domain Users"
          writable = yes
        read only = no
        force create mode = 0660
        create mask = 0777
        directory mask = 0777
        force directory mode = 0770
        access based share enum = yes
        hide unreadable = yes
[[email protected] ~]#
Riavvia il servizio samba.
[[email protected] ~]# systemctl restart samba
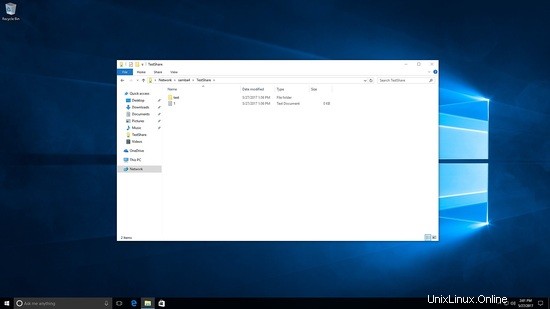
Accedi alla condivisione samba come utente di prova.

Qui vedrai sia testshare che commonshare sono visibili.
Testato la creazione di file e cartelle in testshare.
[[email protected] /]# cd /testshare/
[[email protected] testshare]# ls -l
total 8
-rwxrwx---+ 1 SUNIL\testuser users 0 May 27 22:56 1.txt
drwxrwx---+ 2 SUNIL\testuser users 6 May 27 22:56 test
[[email protected] testshare]#
Ora sto effettuando l'accesso come utente diverso, è visibile solo la condivisione comune:
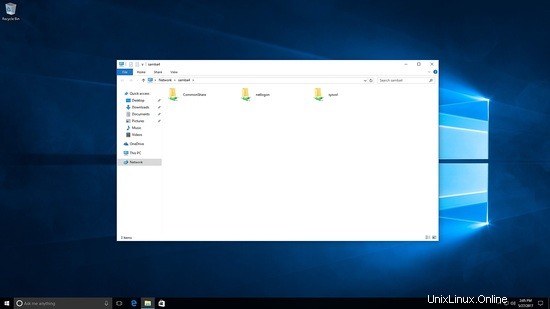
Creazione di file in condivisione comune.
[[email protected] commonshare]# ls -l
total 8
drwxrwxrwx+ 2 SUNIL\testuser  users 6 May 27 23:02 test
drwxrwxrwx+ 2 SUNIL\sambauser users 6 May 27 23:07 test2
[[email protected] commonshare]#
È così che creiamo condivisioni in Samba 4.