Mattermost è una piattaforma gratuita, open source e sicura per la comunicazione, la collaborazione e l'orchestrazione del flusso di lavoro tra strumenti e team. È un servizio di chat self-hosted progettato per organizzazioni e aziende per implementare un servizio di chat interno. Offre diverse funzioni utili tra cui messaggistica uno-a-uno, cronologia di ricerca illimitata, condivisione di file, autenticazione a due fattori, notifiche e altro ancora. Se stai cercando una soluzione alternativa per Slack, Mattermost è la scelta migliore per te.
In questo tutorial, ti mostreremo come installare Mattermost con Nginx su Alma Linux 8.
Prerequisiti
- Un server che esegue Alma Linux 8.
- Un nome di dominio valido puntato all'IP del tuo server.
- Sul server è configurata una password di root.
Installa il server MySQL
Mattermost utilizza MySQL come backend di database. Quindi MySQL deve essere installato sul tuo server. Puoi installarlo eseguendo il seguente comando:
dnf install mysql-server -y
Una volta installato il server MySQL, avvia e abilita il servizio MySQL con il seguente comando:
systemctl start mysqld
systemctl enable mysqld
Ora puoi proteggere l'installazione di MySQL eseguendo il seguente script:
mysql_secure_installation
Rispondi a tutte le domande come mostrato di seguito per impostare la password di root MySQL e proteggere l'installazione:
Press y|Y for Yes, any other key for No: N
Please set the password for root here.
New password:
Re-enter new password:
Remove anonymous users? (Press y|Y for Yes, any other key for No) : Y
Disallow root login remotely? (Press y|Y for Yes, any other key for No) : Y
Remove test database and access to it? (Press y|Y for Yes, any other key for No) : Y
Reload privilege tables now? (Press y|Y for Yes, any other key for No) : Y
Crea un database per Mattermost
Successivamente, dovrai creare un database e un utente per Mattermost. Innanzitutto, accedi a MySQL con il seguente comando:
mysql -u root -p
Una volta effettuato l'accesso, crea un database e un utente con il seguente comando:
mysql> CREATE DATABASE matterdb;
mysql> CREATE USER 'matteruser'@'localhost' IDENTIFIED BY 'password';
Quindi, concedi tutti i privilegi al database Mattermost:
mysql> GRANT ALL PRIVILEGES ON matterdb.* TO [email protected];
Quindi, svuota i privilegi ed esci da MySQL con il seguente comando:
mysql> FLUSH PRIVILEGES;
mysql> EXIT;
Una volta terminato, puoi procedere al passaggio successivo.
Installa Mattermost su Alma Linux 8
Innanzitutto, crea un utente dedicato per eseguire Mattermost utilizzando il seguente comando:
useradd --system --user-group mattermost
Quindi, scarica l'ultima versione di Mattermost usando il seguente comando:
wget https://releases.mattermost.com/6.0.2/mattermost-6.0.2-linux-amd64.tar.gz
Una volta completato il download, estrai il file scaricato con il seguente comando:
tar -xf mattermost-6.0.2-linux-amd64.tar.gz
Quindi, sposta la directory estratta in /opt:
mv mattermost /opt
Quindi, crea una directory di dati per Mattermost e modifica la proprietà e l'autorizzazione di Mattermost:
mkdir /opt/mattermost/data
chown -R mattermost:mattermost /opt/mattermost
chmod -R g+w /opt/mattermost
Quindi, modifica il file di configurazione Mattermost:
nano /opt/mattermost/config/config.json
Definisci l'URL del tuo sito Web più importante come mostrato di seguito:
"SiteURL": "http://mattermost.example.com",
Quindi, trova le seguenti righe:
    "DriverName": "postgres",
    "DataSource": "postgres://mmuser:[email protected]/mattermost_test?sslmode=disable\u0026connect_timeout=10",
E, sostituiscili con le seguenti righe:
    "DriverName": "mysql",
    "DataSource": "matteruser:[email protected](localhost:3306)/matterdb?charset=utf8mb4,utf8\u0026readTimeout=30s\u0026writeTimeout=30s",
Salva e chiudi il file quando hai finito.
Crea un file di servizio Systemd per Mattermost
Successivamente, dovrai creare un file di servizio systemd per gestire il servizio Mattermost. Puoi crearlo eseguendo il seguente comando:
nano /etc/systemd/system/mattermost.service
Aggiungi le seguenti righe:
[Unit]
Description=Mattermost
After=syslog.target network.target mysqld.service

[Service]
Type=notify
WorkingDirectory=/opt/mattermost
User=mattermost
ExecStart=/opt/mattermost/bin/mattermost
PIDFile=/var/spool/mattermost/pid/master.pid
TimeoutStartSec=3600
LimitNOFILE=49152

[Install]
WantedBy=multi-user.target
Salva e chiudi il file, quindi ricarica il demone systemd con il seguente comando:
systemctl daemon-reload
Quindi, avvia il servizio Mattermost e abilitalo per l'avvio al riavvio del sistema:
systemctl start mattermost
systemctl enable mattermost
Ora puoi controllare lo stato del servizio Mattermost con il seguente comando:
systemctl status mattermost
Otterrai il seguente output:
? mattermost.service - Mattermost
   Loaded: loaded (/etc/systemd/system/mattermost.service; disabled; vendor preset: disabled)
   Active: active (running) since Sat 2022-01-15 14:12:29 UTC; 7s ago
 Main PID: 15201 (mattermost)
    Tasks: 32 (limit: 11411)
   Memory: 265.2M
   CGroup: /system.slice/mattermost.service
           ??15201 /opt/mattermost/bin/mattermost
           ??15298 plugins/com.mattermost.plugin-channel-export/server/dist/plugin-linux-amd64
           ??15299 plugins/com.mattermost.nps/server/dist/plugin-linux-amd64
           ??15308 plugins/playbooks/server/dist/plugin-linux-amd64
           ??15313 plugins/focalboard/server/dist/plugin-linux-amd64

Jan 15 14:12:26 almalinux8 mattermost[15201]: {"timestamp":"2022-01-15 14:12:26.344 Z","level":"info","msg":"Sent notification of next survey>
Jan 15 14:12:26 almalinux8 mattermost[15201]: {"timestamp":"2022-01-15 14:12:26.402 Z","level":"info","msg":"Post.Message has size restrictio>
Jan 15 14:12:26 almalinux8 mattermost[15201]: {"timestamp":"2022-01-15 14:12:26.499 Z","level":"info","msg":"info [2022-01-15 14:12:26.497 Z]>
Jan 15 14:12:26 almalinux8 mattermost[15201]: {"timestamp":"2022-01-15 14:12:26.537 Z","level":"info","msg":"\n    -- collation of mattermost>
Jan 15 14:12:28 almalinux8 mattermost[15201]: {"timestamp":"2022-01-15 14:12:28.297 Z","level":"info","msg":"debug [2022-01-15 14:12:28.295 Z>
Jan 15 14:12:28 almalinux8 mattermost[15201]: {"timestamp":"2022-01-15 14:12:28.804 Z","level":"info","msg":"info [2022-01-15 14:12:28.803 Z]>
Jan 15 14:12:29 almalinux8 systemd[1]: Started Mattermost.
Jan 15 14:12:29 almalinux8 mattermost[15201]: {"timestamp":"2022-01-15 14:12:29.149 Z","level":"info","msg":"Starting Server...","caller":"ap>
Jan 15 14:12:29 almalinux8 mattermost[15201]: {"timestamp":"2022-01-15 14:12:29.150 Z","level":"info","msg":"Server is listening on [::]:8065>
Jan 15 14:12:29 almalinux8 mattermost[15201]: {"timestamp":"2022-01-15 14:12:29.150 Z","level":"info","msg":"Sending systemd READY notificati>
A questo punto Mattermost è avviato ed è in esecuzione sulla porta 8065. Puoi verificarlo con il seguente comando:
ss -antpl | grep 8065
Otterrai il seguente output:
LISTEN 0 128 *:8065 *:* users:(("mattermost",pid=15201,fd=35))
Una volta terminato, puoi procedere al passaggio successivo.
Configura Nginx come proxy inverso per Mattermost
Si consiglia di installare e configurare Nginx come proxy inverso per Mattermost. Per fare ciò, dovrai installare il server Nginx sul tuo server. Puoi installarlo eseguendo il seguente comando:
dnf install nginx -y
Una volta installato Nginx, crea un file di configurazione dell'host virtuale Nginx con il seguente comando:
nano /etc/nginx/conf.d/mattermost.conf
Aggiungi le seguenti righe:
 server {
        listen       80;
        server_name  mattermost.example.com;

        # Load configuration files for the default server block.
        include /etc/nginx/default.d/*.conf;

        location / {
	proxy_pass http://localhost:8065/;
            index  index.html index.htm;
        }

        error_page 404 /404.html;
            location = /40x.html {
        }

        error_page 500 502 503 504 /50x.html;
            location = /50x.html {
        }
    }
Salva e chiudi il file, quindi verifica Nginx per eventuali errori di configurazione:
nginx -t
Se tutto va bene, otterrai il seguente output:
nginx: the configuration file /etc/nginx/nginx.conf syntax is ok
nginx: configuration file /etc/nginx/nginx.conf test is successful
Ora avvia e abilita l'avvio del servizio Nginx al riavvio del sistema:
systemctl start nginx
systemctl enable nginx
Puoi controllare lo stato di Nginx usando il seguente comando:
systemctl status nginx
Otterrai il seguente output:
? nginx.service - The nginx HTTP and reverse proxy server
   Loaded: loaded (/usr/lib/systemd/system/nginx.service; disabled; vendor preset: disabled)
   Active: active (running) since Sat 2022-01-15 14:14:05 UTC; 7s ago
  Process: 15356 ExecStart=/usr/sbin/nginx (code=exited, status=0/SUCCESS)
  Process: 15354 ExecStartPre=/usr/sbin/nginx -t (code=exited, status=0/SUCCESS)
  Process: 15351 ExecStartPre=/usr/bin/rm -f /run/nginx.pid (code=exited, status=0/SUCCESS)
 Main PID: 15358 (nginx)
    Tasks: 2 (limit: 11411)
   Memory: 3.8M
   CGroup: /system.slice/nginx.service
           ??15358 nginx: master process /usr/sbin/nginx
           ??15359 nginx: worker process

Jan 15 14:14:05 almalinux8 systemd[1]: nginx.service: Succeeded.
Jan 15 14:14:05 almalinux8 systemd[1]: Stopped The nginx HTTP and reverse proxy server.
Jan 15 14:14:05 almalinux8 systemd[1]: Starting The nginx HTTP and reverse proxy server...
Jan 15 14:14:05 almalinux8 nginx[15354]: nginx: the configuration file /etc/nginx/nginx.conf syntax is ok
Jan 15 14:14:05 almalinux8 nginx[15354]: nginx: configuration file /etc/nginx/nginx.conf test is successful
Jan 15 14:14:05 almalinux8 systemd[1]: nginx.service: Failed to parse PID from file /run/nginx.pid: Invalid argument
Jan 15 14:14:05 almalinux8 systemd[1]: Started The nginx HTTP and reverse proxy server.
A questo punto, Nginx è installato e configurato per servire Mattermost. Ora puoi procedere al passaggio successivo.
Configura Firewall
Successivamente, dovrai consentire la porta 80 attraverso il firewall. Puoi consentirlo eseguendo il seguente comando:
firewall-cmd --add-service=http --permanent
Quindi, ricarica il firewall per applicare le modifiche:
firewall-cmd --reload
Una volta terminato, puoi procedere al passaggio successivo.
Accedi all'interfaccia utente Web di Mattermost
Ora apri il tuo browser web e accedi all'interfaccia web di Mattermost utilizzando l'URL http://mattermost.example.com . Verrai reindirizzato alla seguente schermata:
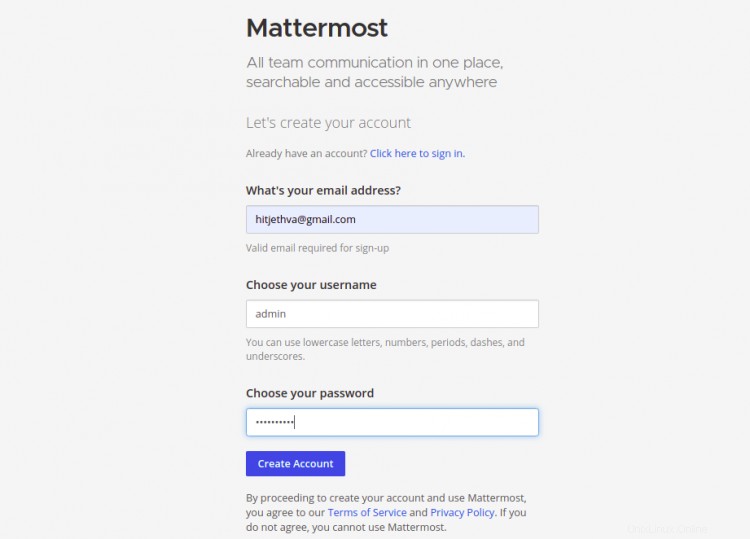
Fornisci il tuo indirizzo e-mail, nome utente amministratore, password e fai clic su Crea Account pulsante. Otterrai la seguente schermata:
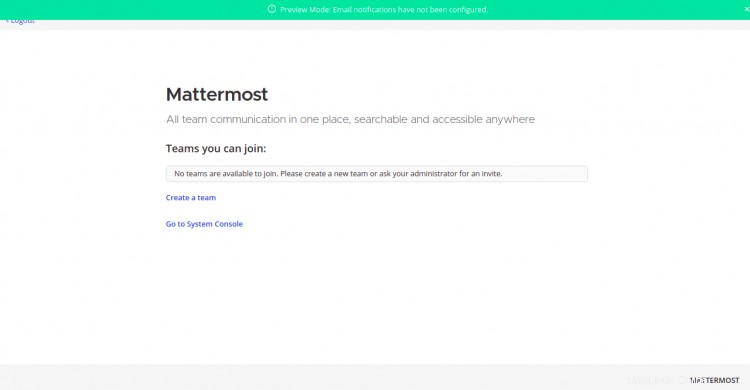
Fai clic su Crea un squadra . Otterrai la seguente schermata:

Fornisci il nome della tua squadra e fai clic su Avanti pulsante. Otterrai la seguente schermata:
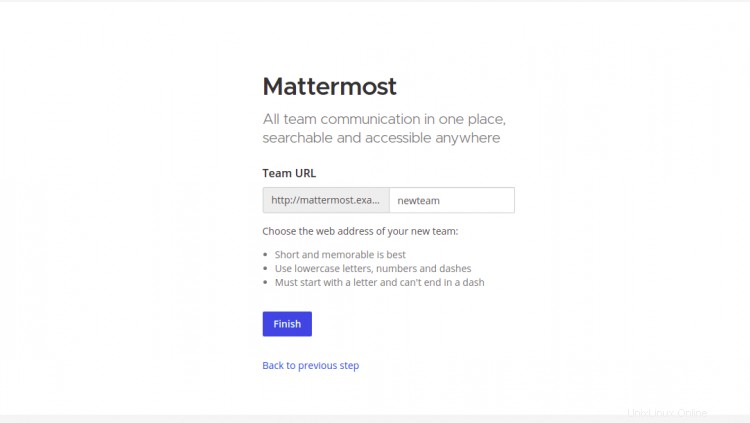
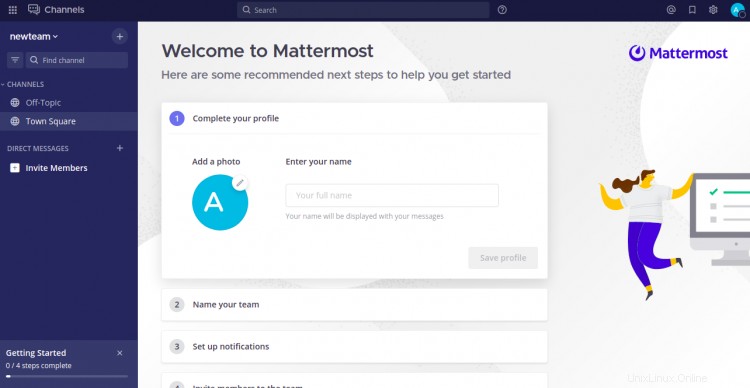
Fornisci l'URL al tuo team Mattermost e fai clic su Fine pulsante. Otterrai la dashboard Mattermost nella schermata seguente:
Conclusione
Nella guida sopra, hai imparato come installare il servizio di chat Mattermost con Nginx su Alma Linux 8. Ora puoi implementare Mattermost nella tua organizzazione e iniziare a usarlo come chat interna. Sentiti libero di chiedermi se hai domande.