Il server perfetto - Ubuntu 11.10 con Nginx [ISPConfig 3]
Questo tutorial mostra come preparare un server Ubuntu 11.10 (Oneiric Ocelot) con nginx per l'installazione di ISPConfig 3 e come installare ISPConfig 3. Dalla versione 3.0.4, ISPConfig viene fornito con il supporto completo per il server web nginx oltre ad Apache e questo tutorial copre la configurazione di un server che utilizza nginx invece di Apache. ISPConfig 3 è un pannello di controllo di webhosting che consente di configurare i seguenti servizi tramite un browser web:server web nginx e Apache, server di posta Postfix, server dei nomi MySQL, BIND o MyDNS, PureFTPd, SpamAssassin, ClamAV e molti altri.
Se vuoi usare nginx invece di Apache con ISPConfig, tieni presente che la tua versione di nginx deve essere almeno 0.8.21 e devi anche installare PHP-FPM. Per il supporto CGI/Perl, devi usare fcgiwrap. Questo è tutto coperto da questo tutorial.
Tieni presente che non puoi utilizzare questo tutorial per Debian Squeeze perché Squeeze viene fornito con una versione precedente di nginx (0.7.67.) e non ha un pacchetto PHP-FPM!
Tieni presente che questa configurazione non funziona per ISPConfig 2 ! È valido solo per ISPConfig 3!
Non garantisco che questo funzionerà per te!
Manuale ISPConfig 3
Per imparare a usare ISPConfig 3, consiglio vivamente di scaricare il manuale ISPConfig 3.
Su circa 300 pagine, copre il concetto alla base di ISPConfig (amministratore, rivenditori, clienti), spiega come installare e aggiornare ISPConfig 3, include un riferimento per tutti i moduli e i campi dei moduli in ISPConfig insieme a esempi di input validi e fornisce tutorial per le attività più comuni in ISPConfig 3. Descrive anche come rendere più sicuro il tuo server e include una sezione per la risoluzione dei problemi alla fine.
App ISPConfig Monitor per Android
Con l'app ISPConfig Monitor, puoi controllare lo stato del tuo server e scoprire se tutti i servizi funzionano come previsto. Puoi controllare le porte TCP e UDP ed eseguire il ping dei tuoi server. Inoltre, puoi utilizzare questa app per richiedere dettagli dai server su cui è installato ISPConfig (tieni presente che la versione minima di ISPConfig 3 installata con supporto per l'app ISPConfig Monitor è 3.0.3.3! ); questi dettagli includono tutto ciò che sai dal modulo Monitor nel pannello di controllo di ISPConfig (ad es. servizi, posta e registri di sistema, coda di posta, informazioni su CPU e memoria, utilizzo del disco, quota, dettagli del sistema operativo, registro RKHunter, ecc.) e ovviamente , poiché ISPConfig è compatibile con più server, puoi controllare tutti i server controllati dal tuo server master ISPConfig.
Per le istruzioni di download e utilizzo, visitare http://www.ispconfig.org/ispconfig-3/ispconfig-monitor-app-for-android/.
1 Requisiti
Per installare un tale sistema avrai bisogno di quanto segue:
- il CD del server Ubuntu 11.10, disponibile qui:http://releases.ubuntu.com/releases/11.10/ubuntu-11.10-server-i386.iso (i386) o http://releases.ubuntu.com/releases /11.10/ubuntu-11.10-server-amd64.iso (x86_64)
- una connessione Internet veloce.
2 Nota preliminare
In questo tutorial utilizzo l'hostname server1.example.com con l'indirizzo IP 192.168.0.100 e il gateway 192.168.0.1. Queste impostazioni potrebbero differire per te, quindi devi sostituirle dove appropriato.
3 Il sistema base
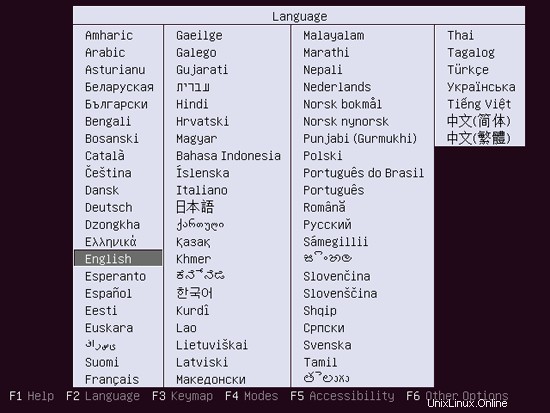
Inserisci il tuo CD di installazione di Ubuntu nel tuo sistema e avvia da esso. Seleziona la tua lingua:
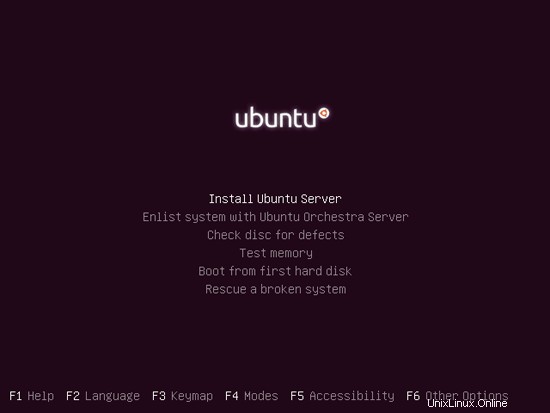
Quindi seleziona Installa Ubuntu Server:
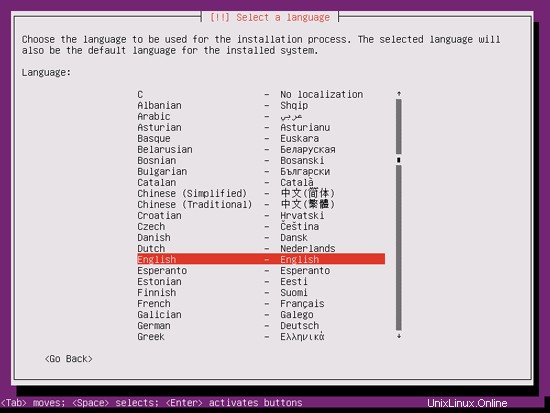
Scegli di nuovo la tua lingua (?):
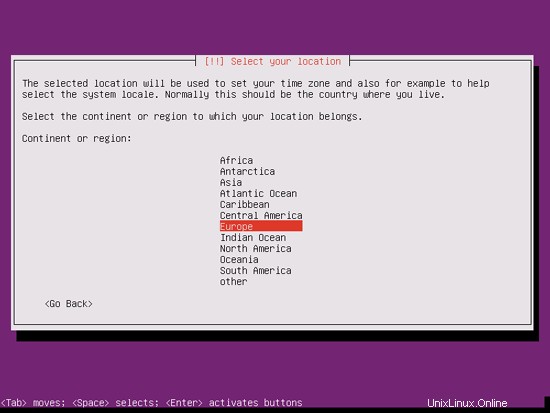
Quindi seleziona la tua posizione:
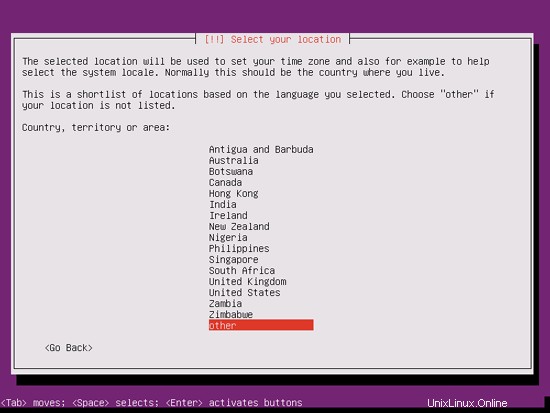
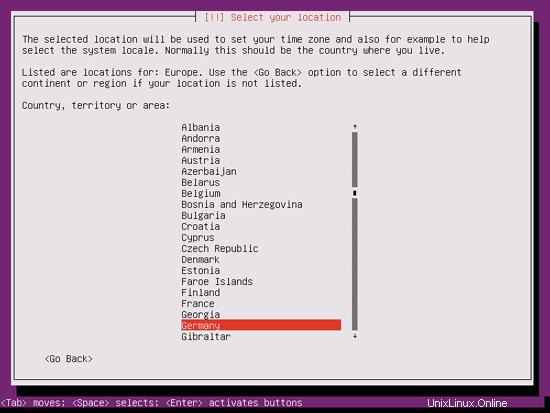
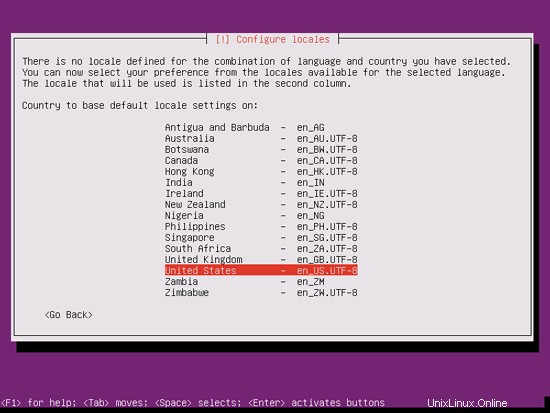
Se hai selezionato una combinazione insolita di lingua e posizione (come l'inglese come lingua e la Germania come posizione, come nel mio caso), il programma di installazione potrebbe dirti che non esiste una locale definita per questa combinazione; in questo caso devi selezionare la locale manualmente. Seleziono en_US.UTF-8 qui:
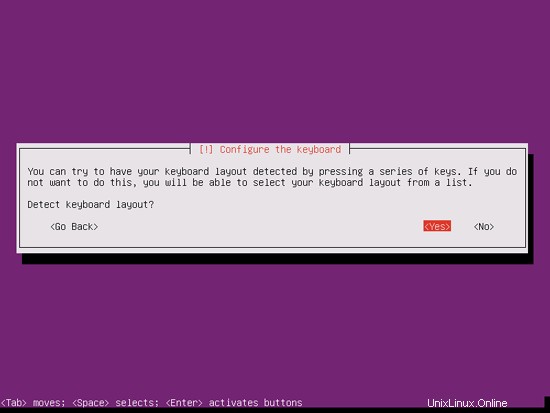
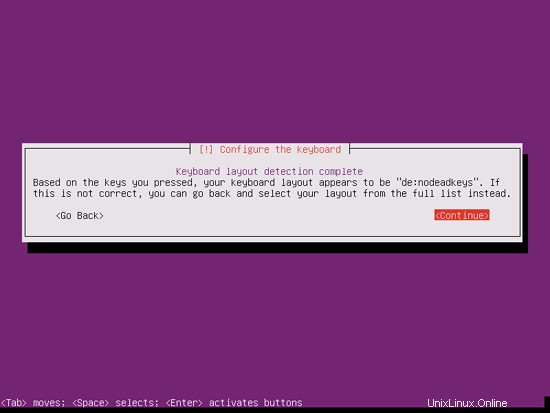
Scegli un layout di tastiera (ti verrà chiesto di premere alcuni tasti e il programma di installazione proverà a rilevare il layout di tastiera in base ai tasti premuti):
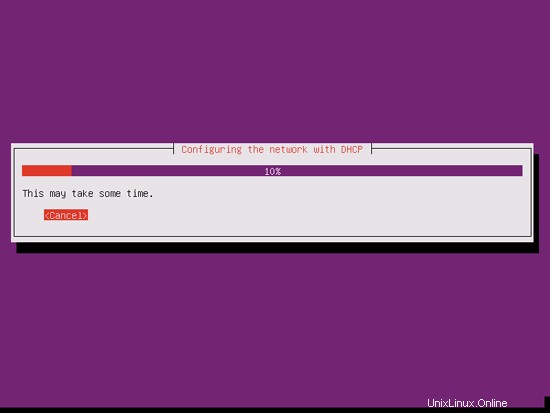
Il programma di installazione controlla il CD di installazione, l'hardware e configura la rete con DHCP se è presente un server DHCP nella rete:
Il server perfetto - Ubuntu 11.10 con Nginx [ISPConfig 3] - Pagina 2
4 Ottieni privilegi di root
Dopo il riavvio è possibile effettuare il login con il nome utente creato in precedenza (es. amministratore). Poiché dobbiamo eseguire tutti i passaggi di questo tutorial con i privilegi di root, possiamo anteporre tutti i comandi in questo tutorial con la stringa sudo, oppure diventare root in questo momento digitando
sudo su
(Puoi anche abilitare il login di root eseguendo
sudo passwd root
e dando una password a root. Puoi quindi accedere direttamente come root, ma questo è disapprovato dagli sviluppatori e dalla comunità di Ubuntu per vari motivi. Vedi http://ubuntuforums.org/showthread.php?t=765414.)
5 Installare il server SSH (opzionale)
Se non hai installato il server OpenSSH durante l'installazione del sistema, puoi farlo ora:
apt-get install ssh openssh-server
D'ora in poi puoi utilizzare un client SSH come PuTTY e connetterti dalla tua workstation al tuo server Ubuntu 11.10 e seguire i passaggi rimanenti di questo tutorial.
6 Installa vim-nox (opzionale)
Userò vi come editor di testo in questo tutorial. Il programma vi predefinito ha uno strano comportamento su Ubuntu e Debian; per risolvere questo problema, installiamo vim-nox:
apt-get install vim-nox
(Non devi farlo se usi un editor di testo diverso come joe o nano.)
7 Configura la rete
Poiché il programma di installazione di Ubuntu ha configurato il nostro sistema per ottenere le sue impostazioni di rete tramite DHCP, dobbiamo cambiarlo ora perché un server dovrebbe avere un indirizzo IP statico. Modifica /etc/network/interfaces e adattarlo alle tue esigenze (in questa configurazione di esempio userò l'indirizzo IP 192.168.0.100 ):
vi /etc/network/interfaces
# This file describes the network interfaces available on your system
# and how to activate them. For more information, see interfaces(5).

# The loopback network interface
auto lo
iface lo inet loopback

# The primary network interface
auto eth0
iface eth0 inet static
        address 192.168.0.100
        netmask 255.255.255.0
        network 192.168.0.0
        broadcast 192.168.0.255
gateway 192.168.0.1 |
Quindi riavvia la rete:
/etc/init.d/networking restart
Quindi modifica /etc/hosts. Rendilo simile a questo:
vi /etc/hosts
127.0.0.1 localhost.localdomain localhost 192.168.0.100 server1.example.com server1 # The following lines are desirable for IPv6 capable hosts ::1 ip6-localhost ip6-loopback fe00::0 ip6-localnet ff00::0 ip6-mcastprefix ff02::1 ip6-allnodes ff02::2 ip6-allrouters |
Ora corri
echo server1.example.com> /etc/hostname
/etc/init.d/hostname riavvia
Successivamente, corri
hostname
hostname -f
Entrambi dovrebbero mostrare server1.example.com ora.
8 Modifica /etc/apt/sources.list e aggiorna la tua installazione Linux
Modifica /etc/apt/sources.list. Commenta o rimuovi il CD di installazione dal file e assicurati che i repository Universe e Multiverse siano abilitati. Dovrebbe assomigliare a questo:
vi /etc/apt/sources.list
# # deb cdrom:[Ubuntu-Server 11.10 _Oneiric Ocelot_ - Release amd64 (20111011)]/ dists/oneiric/main/binary-i386/ # deb cdrom:[Ubuntu-Server 11.10 _Oneiric Ocelot_ - Release amd64 (20111011)]/ dists/oneiric/restricted/binary-i386/ # deb cdrom:[Ubuntu-Server 11.10 _Oneiric Ocelot_ - Release amd64 (20111011)]/ oneiric main restricted #deb cdrom:[Ubuntu-Server 11.10 _Oneiric Ocelot_ - Release amd64 (20111011)]/ dists/oneiric/main/binary-i386/ #deb cdrom:[Ubuntu-Server 11.10 _Oneiric Ocelot_ - Release amd64 (20111011)]/ dists/oneiric/restricted/binary-i386/ #deb cdrom:[Ubuntu-Server 11.10 _Oneiric Ocelot_ - Release amd64 (20111011)]/ oneiric main restricted # See http://help.ubuntu.com/community/UpgradeNotes for how to upgrade to # newer versions of the distribution. deb http://de.archive.ubuntu.com/ubuntu/ oneiric main restricted deb-src http://de.archive.ubuntu.com/ubuntu/ oneiric main restricted ## Major bug fix updates produced after the final release of the ## distribution. deb http://de.archive.ubuntu.com/ubuntu/ oneiric-updates main restricted deb-src http://de.archive.ubuntu.com/ubuntu/ oneiric-updates main restricted ## N.B. software from this repository is ENTIRELY UNSUPPORTED by the Ubuntu ## team. Also, please note that software in universe WILL NOT receive any ## review or updates from the Ubuntu security team. deb http://de.archive.ubuntu.com/ubuntu/ oneiric universe deb-src http://de.archive.ubuntu.com/ubuntu/ oneiric universe deb http://de.archive.ubuntu.com/ubuntu/ oneiric-updates universe deb-src http://de.archive.ubuntu.com/ubuntu/ oneiric-updates universe ## N.B. software from this repository is ENTIRELY UNSUPPORTED by the Ubuntu ## team, and may not be under a free licence. Please satisfy yourself as to ## your rights to use the software. Also, please note that software in ## multiverse WILL NOT receive any review or updates from the Ubuntu ## security team. deb http://de.archive.ubuntu.com/ubuntu/ oneiric multiverse deb-src http://de.archive.ubuntu.com/ubuntu/ oneiric multiverse deb http://de.archive.ubuntu.com/ubuntu/ oneiric-updates multiverse deb-src http://de.archive.ubuntu.com/ubuntu/ oneiric-updates multiverse ## N.B. software from this repository may not have been tested as ## extensively as that contained in the main release, although it includes ## newer versions of some applications which may provide useful features. ## Also, please note that software in backports WILL NOT receive any review ## or updates from the Ubuntu security team. deb http://de.archive.ubuntu.com/ubuntu/ oneiric-backports main restricted universe multiverse deb-src http://de.archive.ubuntu.com/ubuntu/ oneiric-backports main restricted universe multiverse deb http://security.ubuntu.com/ubuntu oneiric-security main restricted deb-src http://security.ubuntu.com/ubuntu oneiric-security main restricted deb http://security.ubuntu.com/ubuntu oneiric-security universe deb-src http://security.ubuntu.com/ubuntu oneiric-security universe deb http://security.ubuntu.com/ubuntu oneiric-security multiverse deb-src http://security.ubuntu.com/ubuntu oneiric-security multiverse ## Uncomment the following two lines to add software from Canonical's ## 'partner' repository. ## This software is not part of Ubuntu, but is offered by Canonical and the ## respective vendors as a service to Ubuntu users. # deb http://archive.canonical.com/ubuntu oneiric partner # deb-src http://archive.canonical.com/ubuntu oneiric partner ## Uncomment the following two lines to add software from Ubuntu's ## 'extras' repository. ## This software is not part of Ubuntu, but is offered by third-party ## developers who want to ship their latest software. # deb http://extras.ubuntu.com/ubuntu oneiric main # deb-src http://extras.ubuntu.com/ubuntu oneiric main |
Quindi esegui
apt-get update
per aggiornare il database del pacchetto apt e
apt-get upgrade
per installare gli ultimi aggiornamenti (se presenti). Se vedi che un nuovo kernel viene installato come parte degli aggiornamenti, dovresti riavviare il sistema in seguito:
reboot
9 Modifica la shell predefinita
/bin/sh è un collegamento simbolico a /bin/dash, tuttavia abbiamo bisogno di /bin/bash, non di /bin/dash. Pertanto facciamo questo:
dpkg-reconfigure dash
Utilizzare dash come shell di sistema predefinita (/bin/sh)? <-- No
In caso contrario, l'installazione di ISPConfig avrà esito negativo.
10 Disattiva AppArmor
AppArmor è un'estensione di sicurezza (simile a SELinux) che dovrebbe fornire una sicurezza estesa. Secondo me non è necessario per configurare un sistema sicuro e di solito causa più problemi che vantaggi (pensaci dopo aver fatto una settimana di risoluzione dei problemi perché alcuni servizi non funzionavano come previsto, e quindi scopri che era tutto ok, solo AppArmor stava causando il problema). Pertanto lo disabilito (questo è un must se vuoi installare ISPConfig in un secondo momento).
Possiamo disabilitarlo in questo modo:
/etc/init.d/apparmor stop
update-rc.d -f apparmor remove
apt-get remove apparmor apparmor-utils
11 Sincronizzare l'orologio di sistema
È una buona idea sincronizzare l'orologio di sistema con un NTP (n rete t ora p rotocol) server su Internet. Esegui semplicemente
apt-get install ntp ntpdate
e l'ora del tuo sistema sarà sempre sincronizzata.
Il server perfetto - Ubuntu 11.10 con Nginx [ISPConfig 3] - Pagina 4
12 Installa Postfix, Courier, Saslauthd, MySQL, rkhunter, binutils
Possiamo installare Postfix, Courier, Saslauthd, MySQL, rkhunter e binutils con un solo comando:
apt-get install postfix postfix-mysql postfix-doc mysql-client mysql-server courier-authdaemon courier-authlib-mysql courier-pop courier-pop-ssl courier-imap courier-imap-ssl libsasl2-2 libsasl2-modules libsasl2-modules-sql sasl2-bin libpam-mysql openssl getmail4 rkhunter binutils maildrop
Ti verranno poste le seguenti domande:
Nuova password per l'utente "root" di MySQL:<-- yourrootsqlpassword
Ripetere la password per l'utente "root" di MySQL:<-- yourrootsqlpassword
Creare directory per l'amministrazione basata sul Web? <-- No
Tipo generale di configurazione della posta:<-- Sito Internet
Nome della posta di sistema:<-- server1.example.com
Certificato SSL richiesto <-- Ok
Se scopri (più tardi dopo aver configurato il tuo primo account e-mail in ISPConfig) che non puoi inviare e-mail e ottieni il seguente errore in /var/log/mail.log...
SASL LOGIN authentication failed: no mechanism available
... vai su Ubuntu 11.10 + saslauthd:autenticazione SASL PLAIN non riuscita:nessun meccanismo disponibile per imparare a risolvere il problema.
Vogliamo che MySQL ascolti su tutte le interfacce, non solo su localhost, quindi modifichiamo /etc/mysql/my.cnf e commentiamo la riga bind-address =127.0.0.1:
vi /etc/mysql/my.cnf
[...] # Instead of skip-networking the default is now to listen only on # localhost which is more compatible and is not less secure. #bind-address = 127.0.0.1 [...] |
Quindi riavviamo MySQL:
/etc/init.d/mysql restart
Ora controlla che la rete sia abilitata. Corri
netstat -tap | grep mysql
L'output dovrebbe essere simile a questo:
[email protected]:~# netstat -tap | grep mysql
tcp 0 0 *:mysql *:* ASCOLTA 22355/mysqld
[email protected]:~#
Durante l'installazione, i certificati SSL per IMAP-SSL e POP3-SSL vengono creati con il nome host localhost. Per cambiarlo nel nome host corretto (server1.example.com in questo tutorial), elimina i certificati...
cd /etc/courier
rm -f /etc/courier/imapd.pem
rm -f /etc/courier/pop3d.pem
... e modificare i due file seguenti; sostituisci CN=localhost con CN=server1.example.com (puoi anche modificare gli altri valori, se necessario):
vi /etc/courier/imapd.cnf
[...] CN=server1.example.com [...] |
vi /etc/courier/pop3d.cnf
[...] CN=server1.example.com [...] |
Quindi ricrea i certificati...
mkimapdcert
mkpop3dcert
... e riavvia Courier-IMAP-SSL e Courier-POP3-SSL:
/etc/init.d/courier-imap-ssl restart
/etc/init.d/courier-pop-ssl restart
13 Installa Amavisd-new, SpamAssassin e Clamav
Per installare amavisd-new, SpamAssassin e ClamAV, eseguiamo
apt-get install amavisd-new spamassassin clamav clamav-daemon zoo unzip bzip2 arj nomarch lzop cabextract apt-listchanges libnet-ldap-perl libauthen-sasl-perl clamav-docs daemon libio-string-perl libio-socket-ssl-perl libnet-ident-perl zip libnet-dns-perl
La configurazione di ISPConfig 3 utilizza amavisd che carica internamente la libreria dei filtri SpamAssassin, quindi possiamo fermare SpamAssassin per liberare un po' di RAM:
/etc/init.d/spamassassin ferma
update-rc.d -f spamassassin rimuovi
14 Installa Nginx, PHP5 (PHP-FPM) e Fcgiwrap
Nginx è disponibile come pacchetto per Ubuntu che possiamo installare come segue:
apt-get install nginx
Se Apache2 è già installato sul sistema, interrompilo ora...
/etc/init.d/apache2 stop
... e rimuovi i collegamenti di avvio del sistema di Apache:
insserv -r apache2
Avvia nginx in seguito:
/etc/init.d/nginx start
(Se sono installati sia Apache2 che nginx, il programma di installazione di ISPConfig 3 ti chiederà quale vuoi usare - rispondi a nginx in questo caso. Se è installato solo uno di entrambi, ISPConfig eseguirà automaticamente la configurazione necessaria.)
Possiamo far funzionare PHP5 in nginx tramite PHP-FPM (PHP-FPM (FastCGI Process Manager) è un'implementazione PHP FastCGI alternativa con alcune funzionalità aggiuntive utili per siti di qualsiasi dimensione, soprattutto quelli più frequentati) che installiamo come segue:
apt-get install php5-fpm
PHP-FPM è un processo demone (con lo script init /etc/init.d/php5-fpm) che esegue un server FastCGI sulla porta 9000.
Per ottenere il supporto MySQL in PHP, possiamo installare il pacchetto php5-mysql. È una buona idea installare alcuni altri moduli PHP5 e potresti averne bisogno per le tue applicazioni. Puoi cercare i moduli PHP5 disponibili in questo modo:
apt-cache search php5
Scegli quelli che ti servono e installali in questo modo:
apt-get install php5-mysql php5-curl php5-gd php5-intl php-pear php5-imagick php5-imap php5-mcrypt php5-memcache php5-ming php5-ps php5-pspell php5-recode php5-snmp php5-sqlite php5-tidy php5-xmlrpc php5-xsl
APC è un cacher di codice operativo PHP gratuito e aperto per la memorizzazione nella cache e l'ottimizzazione del codice intermedio PHP. È simile ad altri cacher di codice operativo PHP, come eAccelerator e XCache. Si consiglia vivamente di averne uno installato per velocizzare la tua pagina PHP.
APC può essere installato come segue:
apt-get install php-apc
Ora riavvia PHP-FPM:
/etc/init.d/php5-fpm restart
Per ottenere il supporto CGI in nginx, installiamo Fcgiwrap.
Fcgiwrap è un wrapper CGI che dovrebbe funzionare anche per script CGI complessi e può essere utilizzato per ambienti di hosting condiviso perché consente a ciascun vhost di utilizzare la propria directory cgi-bin.
Installa il pacchetto fcgiwrap:
apt-get install fcgiwrap
Dopo l'installazione, il demone fcgiwrap dovrebbe essere già avviato; il suo socket è /var/run/fcgiwrap.socket. Se non è in esecuzione, puoi utilizzare lo script /etc/init.d/fcgiwrap per avviarlo.
Questo è tutto! Ora, quando crei un vhost nginx, ISPConfig si occuperà della corretta configurazione del vhost.
14.1 Installa phpMyAdmin
Installa phpMyAdmin come segue:
apt-get install phpmyadmin
Vedrai le seguenti domande:
Server Web da riconfigurare automaticamente:<-- select none (perché solo apache2 e lighttpd sono disponibili come opzioni)
Configurare il database per phpmyadmin con dbconfig-common? <-- No
Ora puoi trovare phpMyAdmin nella directory /usr/share/phpmyadmin/.
Dopo aver installato ISPConfig 3, puoi accedere a phpMyAdmin come segue:
L'app ISPConfig vhost sulla porta 8081 per nginx viene fornita con una configurazione phpMyAdmin, quindi puoi utilizzare http://server1.example.com:8081/phpmyadmin o http://server1.example.com:8081/phpMyAdmin per accedere a phpMyAdmin.
Se vuoi usare un alias /phpmyadmin o /phpMyAdmin che puoi usare dai tuoi siti web, questo è un po' più complicato rispetto ad Apache perché nginx non ha alias globali (cioè, alias che possono essere definiti per tutti i vhost). Pertanto devi definire questi alias per ciascuno vhost da cui vuoi accedere a phpMyAdmin.
Per fare ciò, incolla quanto segue nel campo Direttive nginx nella scheda Opzioni del sito Web in ISPConfig:
        location /phpmyadmin {
               root /usr/share/;
               index index.php index.html index.htm;
               location ~ ^/phpmyadmin/(.+\.php)$ {
                       try_files $uri =404;
                       root /usr/share/;
                       fastcgi_pass 127.0.0.1:9000;
                       fastcgi_index index.php;
                       fastcgi_param SCRIPT_FILENAME $document_root$fastcgi_script_name;
                       include /etc/nginx/fastcgi_params;
                       fastcgi_buffer_size 128k;
                       fastcgi_buffers 256 4k;
                       fastcgi_busy_buffers_size 256k;
                       fastcgi_temp_file_write_size 256k;
                       fastcgi_intercept_errors on;
               }
               location ~* ^/phpmyadmin/(.+\.(jpg|jpeg|gif|css|png|js|ico|html|xml|txt))$ {
                       root /usr/share/;
               }
        }
        location /phpMyAdmin {
               rewrite ^/* /phpmyadmin last;
} |
Se utilizzi https invece di http per il tuo vhost, dovresti aggiungere la riga fastcgi_param HTTPS su; alla tua configurazione di phpMyAdmin in questo modo:
        location /phpmyadmin {
               root /usr/share/;
               index index.php index.html index.htm;
               location ~ ^/phpmyadmin/(.+\.php)$ {
                       try_files $uri =404;
                       root /usr/share/;
                       fastcgi_pass 127.0.0.1:9000;
                       fastcgi_param HTTPS on; # <-- add this line
                       fastcgi_index index.php;
                       fastcgi_param SCRIPT_FILENAME $document_root$fastcgi_script_name;
                       include /etc/nginx/fastcgi_params;
                       fastcgi_buffer_size 128k;
                       fastcgi_buffers 256 4k;
                       fastcgi_busy_buffers_size 256k;
                       fastcgi_temp_file_write_size 256k;
                       fastcgi_intercept_errors on;
               }
               location ~* ^/phpmyadmin/(.+\.(jpg|jpeg|gif|css|png|js|ico|html|xml|txt))$ {
                       root /usr/share/;
               }
        }
        location /phpMyAdmin {
               rewrite ^/* /phpmyadmin last;
} |
Se utilizzi sia http che https per il tuo vhost, devi aggiungere la seguente sezione alla sezione http {} in /etc/nginx/nginx.conf (prima di qualsiasi riga di inclusione) che determina se il visitatore usa http o https e imposta la variabile $fastcgi_https (che useremo nella nostra configurazione phpMyAdmin) di conseguenza:
vi /etc/nginx/nginx.conf
[...]
http {
[...]
        ## Detect when HTTPS is used
        map $scheme $fastcgi_https {
          default off;
          https on;
        }
[...]
}
[...] |
Non dimenticare di ricaricare nginx in seguito:
/etc/init.d/nginx reload
Quindi vai di nuovo nel campo Direttive nginx e invece di fastcgi_param HTTPS su; aggiungi la riga fastcgi_param HTTPS $fastcgi_https; in modo da poter utilizzare phpMyAdmin sia per le richieste http che per https:
        location /phpmyadmin {
               root /usr/share/;
               index index.php index.html index.htm;
               location ~ ^/phpmyadmin/(.+\.php)$ {
                       try_files $uri =404;
                       root /usr/share/;
                       fastcgi_pass 127.0.0.1:9000;
                       fastcgi_param HTTPS $fastcgi_https; # <-- add this line
                       fastcgi_index index.php;
                       fastcgi_param SCRIPT_FILENAME $document_root$fastcgi_script_name;
                       include /etc/nginx/fastcgi_params;
                       fastcgi_buffer_size 128k;
                       fastcgi_buffers 256 4k;
                       fastcgi_busy_buffers_size 256k;
                       fastcgi_temp_file_write_size 256k;
                       fastcgi_intercept_errors on;
               }
               location ~* ^/phpmyadmin/(.+\.(jpg|jpeg|gif|css|png|js|ico|html|xml|txt))$ {
                       root /usr/share/;
               }
        }
        location /phpMyAdmin {
               rewrite ^/* /phpmyadmin last;
} |
15 Installa Mailman
Dalla versione 3.0.4, ISPConfig permette anche di gestire (creare/modificare/cancellare) le mailing list di Mailman. Se vuoi utilizzare questa funzione, installa Mailman come segue:
apt-get install mailman
Prima di poter avviare Mailman, è necessario creare una prima mailing list chiamata mailman:
newlist mailman
[email protected]:~# newlist mailman
Inserisci l'e-mail della persona che esegue l'elenco: <-- indirizzo e-mail admin, ad es. [email protected]
Password del postino iniziale: <--password amministratore per la lista del postino
Per terminare la creazione della propria mailing list, è necessario modificare il proprio file/etc/alias (o
equivalente) aggiungendo le righe seguenti ed eventualmente eseguendo il programma di post mailman"
mailman-admin: "|/var/lib/mailman/mail/mailman admin mailman"
mailman-bounces: "|/var/lib/mailman/mail/mailman bounces mailman"
mailman-confirm: "|/var/lib/mailman/mail/mailman confirm mailman"
mailman-join: "|/var/lib/mailman/mail/mailman join mailman"
mailman -leave: "|/var/lib/mailman/mail/mailman leave mailman"
mailman-owner: "|/var/lib/mailman/mail/mailman owner mailman"
mailman-request: " |/var/lib/mailman/mail/mailman request mailman"
mailman-subscribe: "|/var/lib/mailman/mail/mailman subscribe mailman"
mailma n-unsubscribe: "|/var/lib/mailman/mail/mailman unsubscribe mailman"
Premi invio per notificare il proprietario del postino... <-- ENTER
example@ unixlinux.online:~#
Apri /etc/alias in seguito...
vi /etc/aliases
... e aggiungi le seguenti righe:
[...] mailman: "|/var/lib/mailman/mail/mailman post mailman" mailman-admin: "|/var/lib/mailman/mail/mailman admin mailman" mailman-bounces: "|/var/lib/mailman/mail/mailman bounces mailman" mailman-confirm: "|/var/lib/mailman/mail/mailman confirm mailman" mailman-join: "|/var/lib/mailman/mail/mailman join mailman" mailman-leave: "|/var/lib/mailman/mail/mailman leave mailman" mailman-owner: "|/var/lib/mailman/mail/mailman owner mailman" mailman-request: "|/var/lib/mailman/mail/mailman request mailman" mailman-subscribe: "|/var/lib/mailman/mail/mailman subscribe mailman" mailman-unsubscribe: "|/var/lib/mailman/mail/mailman unsubscribe mailman" |
Corri
newaliases
in seguito e riavvia Postfix:
/etc/init.d/postfix restart
Quindi avvia il demone Mailman:
/etc/init.d/mailman start
Dopo aver installato ISPConfig 3, puoi accedere a Mailman come segue:
L'app ISPConfig vhost sulla porta 8081 per nginx viene fornita con una configurazione Mailman, quindi puoi utilizzare http://server1.example.com:8081/cgi-bin/mailman/admin/
Se vuoi usare Mailman dai tuoi siti web, questo è un po' più complicato rispetto ad Apache perché nginx non ha alias globali (cioè, alias che possono essere definiti per tutti i vhost). Pertanto devi definire questi alias per ciascuno vhost da cui vuoi accedere a Mailman.
Per fare ciò, incolla quanto segue nel campo Direttive nginx nella scheda Opzioni del sito Web in ISPConfig:
        location /cgi-bin/mailman {
               root /usr/lib/;
               fastcgi_split_path_info (^/cgi-bin/mailman/[^/]*)(.*)$;
               include /etc/nginx/fastcgi_params;
               fastcgi_param SCRIPT_FILENAME $document_root$fastcgi_script_name;
               fastcgi_param PATH_INFO $fastcgi_path_info;
               fastcgi_param PATH_TRANSLATED $document_root$fastcgi_path_info;
               fastcgi_intercept_errors on;
               fastcgi_pass unix:/var/run/fcgiwrap.socket;
        }
        location /images/mailman {
               alias /usr/share/images/mailman;
        }
        location /pipermail {
               alias /var/lib/mailman/archives/public;
               autoindex on;
} |
Questo definisce l'alias /cgi-bin/mailman/ per il tuo vhost, il che significa che puoi accedere all'interfaccia di amministrazione di Mailman per un elenco su http://
Sotto http://
Il server perfetto - Ubuntu 11.10 con Nginx [ISPConfig 3] - Pagina 5
16 Installa PureFTPd e Quota
PureFTPd e quota possono essere installati con il seguente comando:
apt-get install pure-ftpd-common pure-ftpd-mysql quota quotatool
Modifica il file /etc/default/pure-ftpd-common...
vi /etc/default/pure-ftpd-common
... e assicurati che la modalità di avvio sia impostata su standalone e imposta VIRTUALCHROOT=true:
[...] STANDALONE_OR_INETD=standalone [...] VIRTUALCHROOT=true [...] |
Ora configuriamo PureFTPd per consentire sessioni FTP e TLS. FTP è un protocollo molto insicuro perché tutte le password e tutti i dati vengono trasferiti in chiaro. Utilizzando TLS, l'intera comunicazione può essere crittografata, rendendo così l'FTP molto più sicuro.
Se vuoi consentire sessioni FTP e TLS, esegui
echo 1 > /etc/pure-ftpd/conf/TLS
Per utilizzare TLS, dobbiamo creare un certificato SSL. Lo creo in /etc/ssl/private/, quindi creo prima quella directory:
mkdir -p /etc/ssl/private/
Afterwards, we can generate the SSL certificate as follows:
openssl req -x509 -nodes -days 7300 -newkey rsa:2048 -keyout /etc/ssl/private/pure-ftpd.pem -out /etc/ssl/private/pure-ftpd.pem
Country Name (2 letter code) [AU]:<-- Enter your Country Name (e.g., "DE").
State or Province Name (full name) [Some-State]:<-- Enter your State or Province Name.
Locality Name (eg, city) []:<-- Enter your City.
Organization Name (eg, company) [Internet Widgits Pty Ltd]:<-- Enter your Organization Name (e.g., the name of your company).
Organizational Unit Name (eg, section) []:<-- Enter your Organizational Unit Name (e.g. "IT Department").
Common Name (eg, YOUR name) []:<-- Enter the Fully Qualified Domain Name of the system (e.g. "server1.example.com").
Email Address []:<-- Enter your Email Address.
Change the permissions of the SSL certificate:
chmod 600 /etc/ssl/private/pure-ftpd.pem
Then restart PureFTPd:
/etc/init.d/pure-ftpd-mysql restart
Edit /etc/fstab. Mine looks like this (I added ,usrjquota=quota.user,grpjquota=quota.group,jqfmt=vfsv0 to the partition with the mount point /):
vi /etc/fstab
# /etc/fstab: static file system information. # # Use 'blkid' to print the universally unique identifier for a # device; this may be used with UUID= as a more robust way to name devices # that works even if disks are added and removed. See fstab(5). # # <file system> <mount point> <type> <options> <dump> <pass> proc /proc proc nodev,noexec,nosuid 0 0 /dev/mapper/server1-root / ext4 errors=remount-ro,usrjquota=quota.user,grpjquota=quota.group,jqfmt=vfsv0 0 1 # /boot was on /dev/sda1 during installation UUID=6fbce377-c3d6-4eb3-8299-88797d4ad18d /boot ext2 defaults 0 2 /dev/mapper/server1-swap_1 none swap sw 0 0 /dev/fd0 /media/floppy0 auto rw,user,noauto,exec,utf8 0 0 |
To enable quota, run these commands:
mount -o remount /
quotacheck -avugm
quotaon -avug
17 Install BIND DNS Server
BIND can be installed as follows:
apt-get install bind9 dnsutils
18 Install Vlogger, Webalizer, And AWstats
Vlogger, webalizer, and AWstats can be installed as follows:
apt-get install vlogger webalizer awstats geoip-database
Open /etc/cron.d/awstats afterwards...
vi /etc/cron.d/awstats
... and comment out both cron jobs in that file:
#*/10 * * * * www-data [ -x /usr/share/awstats/tools/update.sh ] && /usr/share/awstats/tools/update.sh # Generate static reports: #10 03 * * * www-data [ -x /usr/share/awstats/tools/buildstatic.sh ] && /usr/share/awstats/tools/buildstatic.sh |
19 Install Jailkit
Jailkit is needed only if you want to chroot SSH users. It can be installed as follows (important:Jailkit must be installed before ISPConfig - it cannot be installed afterwards!):
apt-get install build-essential autoconf automake1.9 libtool flex bison debhelper binutils-gold
cd /tmp
wget http://olivier.sessink.nl/jailkit/jailkit-2.14.tar.gz
tar xvfz jailkit-2.14.tar.gz
cd jailkit-2.14
./debian/rules binary
You can now install the Jailkit .deb package as follows:
cd ..
dpkg -i jailkit_2.14-1_*.deb
rm -rf jailkit-2.14*
20 Install fail2ban
This is optional but recommended, because the ISPConfig monitor tries to show the fail2ban log:
apt-get install fail2ban
To make fail2ban monitor PureFTPd, SASL, and Courier, create the file /etc/fail2ban/jail.local:
vi /etc/fail2ban/jail.local
[pureftpd] enabled = true port = ftp filter = pureftpd logpath = /var/log/syslog maxretry = 3 [sasl] enabled = true port = smtp filter = sasl logpath = /var/log/mail.log maxretry = 5 [courierpop3] enabled = true port = pop3 filter = courierpop3 logpath = /var/log/mail.log maxretry = 5 [courierpop3s] enabled = true port = pop3s filter = courierpop3s logpath = /var/log/mail.log maxretry = 5 [courierimap] enabled = true port = imap2 filter = courierimap logpath = /var/log/mail.log maxretry = 5 [courierimaps] enabled = true port = imaps filter = courierimaps logpath = /var/log/mail.log maxretry = 5 |
Then create the following five filter files:
vi /etc/fail2ban/filter.d/pureftpd.conf
[Definition] failregex = .*pure-ftpd: \(.*@<HOST>\) \[WARNING\] Authentication failed for user.* ignoreregex = |
vi /etc/fail2ban/filter.d/courierpop3.conf
# Fail2Ban configuration file
#
# $Revision: 100 $
#

[Definition]

# Option:  failregex
# Notes.:  regex to match the password failures messages in the logfile. The
#          host must be matched by a group named "host". The tag "<HOST>" can
#          be used for standard IP/hostname matching and is only an alias for
#          (?:::f{4,6}:)?(?P<host>\S+)
# Values:  TEXT
#
failregex = pop3d: LOGIN FAILED.*ip=\[.*:<HOST>\]

# Option:  ignoreregex
# Notes.:  regex to ignore. If this regex matches, the line is ignored.
# Values:  TEXT
#
ignoreregex = |
vi /etc/fail2ban/filter.d/courierpop3s.conf
# Fail2Ban configuration file
#
# $Revision: 100 $
#

[Definition]

# Option:  failregex
# Notes.:  regex to match the password failures messages in the logfile. The
#          host must be matched by a group named "host". The tag "<HOST>" can
#          be used for standard IP/hostname matching and is only an alias for
#          (?:::f{4,6}:)?(?P<host>\S+)
# Values:  TEXT
#
failregex = pop3d-ssl: LOGIN FAILED.*ip=\[.*:<HOST>\]

# Option:  ignoreregex
# Notes.:  regex to ignore. If this regex matches, the line is ignored.
# Values:  TEXT
#
ignoreregex = |
vi /etc/fail2ban/filter.d/courierimap.conf
# Fail2Ban configuration file
#
# $Revision: 100 $
#

[Definition]

# Option:  failregex
# Notes.:  regex to match the password failures messages in the logfile. The
#          host must be matched by a group named "host". The tag "<HOST>" can
#          be used for standard IP/hostname matching and is only an alias for
#          (?:::f{4,6}:)?(?P<host>\S+)
# Values:  TEXT
#
failregex = imapd: LOGIN FAILED.*ip=\[.*:<HOST>\]

# Option:  ignoreregex
# Notes.:  regex to ignore. If this regex matches, the line is ignored.
# Values:  TEXT
#
ignoreregex = |
vi /etc/fail2ban/filter.d/courierimaps.conf
# Fail2Ban configuration file
#
# $Revision: 100 $
#

[Definition]

# Option:  failregex
# Notes.:  regex to match the password failures messages in the logfile. The
#          host must be matched by a group named "host". The tag "<HOST>" can
#          be used for standard IP/hostname matching and is only an alias for
#          (?:::f{4,6}:)?(?P<host>\S+)
# Values:  TEXT
#
failregex = imapd-ssl: LOGIN FAILED.*ip=\[.*:<HOST>\]

# Option:  ignoreregex
# Notes.:  regex to ignore. If this regex matches, the line is ignored.
# Values:  TEXT
#
ignoreregex = |
Restart fail2ban afterwards:
/etc/init.d/fail2ban restart
The Perfect Server - Ubuntu 11.10 With Nginx [ISPConfig 3] - Page 6
21 Install SquirrelMail
To install the SquirrelMail webmail client, run
apt-get install squirrelmail
Then configure SquirrelMail:
squirrelmail-configure
We must tell SquirrelMail that we are using Courier-IMAP/-POP3:
SquirrelMail Configuration : Read: config.php (1.4.0)
---------------------------------------------------------
Main Menu --
1. Organization Preferences
2. Server Settings
3. Folder Defaults
4. General Options
5. Themes
6. Address Books
7. Message of the Day (MOTD)
8. Plugins
9. Database
10. Languages
D. Set pre-defined settings for specific IMAP servers
C Turn color on
S Save data
Q Quit
Command >> <-- D
SquirrelMail Configuration : Read: config.php
---------------------------------------------------------
While we have been building SquirrelMail, we have discovered some
preferences that work better with some servers that don't work so
well with others. If you select your IMAP server, this option will
set some pre-defined settings for that server.
Please note that you will still need to go through and make sure
everything is correct. This does not change everything. There are
only a few settings that this will change.
Please select your IMAP server:
bincimap = Binc IMAP server
courier = Courier IMAP server
cyrus = Cyrus IMAP server
dovecot = Dovecot Secure IMAP server
exchange = Microsoft Exchange IMAP server
hmailserver = hMailServer
macosx = Mac OS X Mailserver
mercury32 = Mercury/32
uw = University of Washington's IMAP server
gmail = IMAP access to Google mail (Gmail) accounts
quit = Do not change anything
Command >> <-- courier
SquirrelMail Configuration : Read: config.php
---------------------------------------------------------
While we have been building SquirrelMail, we have discovered some
preferences that work better with some servers that don't work so
well with others. If you select your IMAP server, this option will
set some pre-defined settings for that server.
Please note that you will still need to go through and make sure
everything is correct. This does not change everything. There are
only a few settings that this will change.
Please select your IMAP server:
bincimap = Binc IMAP server
courier = Courier IMAP server
cyrus = Cyrus IMAP server
dovecot = Dovecot Secure IMAP server
exchange = Microsoft Exchange IMAP server
hmailserver = hMailServer
macosx = Mac OS X Mailserver
mercury32 = Mercury/32
uw = University of Washington's IMAP server
quit = Do not change anything
Command >> courier
imap_server_type = courier
default_folder_prefix = INBOX.
trash_folder = Trash
sent_folder = Sent
draft_folder = Drafts
show_prefix_option = false
default_sub_of_inbox = false
show_contain_subfolders_option = false
optional_delimiter = .
delete_folder = true
Press enter to continue... <-- ENTER
SquirrelMail Configuration : Read: config.php (1.4.0)
---------------------------------------------------------
Main Menu --
1. Organization Preferences
2. Server Settings
3. Folder Defaults
4. General Options
5. Themes
6. Address Books
7. Message of the Day (MOTD)
8. Plugins
9. Database
10. Languages
D. Set pre-defined settings for specific IMAP servers
C Turn color on
S Save data
Q Quit
Command >> <-- S
SquirrelMail Configuration : Read: config.php (1.4.0)
---------------------------------------------------------
Main Menu --
1. Organization Preferences
2. Server Settings
3. Folder Defaults
4. General Options
5. Themes
6. Address Books
7. Message of the Day (MOTD)
8. Plugins
9. Database
10. Languages
D. Set pre-defined settings for specific IMAP servers
C Turn color on
S Save data
Q Quit
Command >> S
Data saved in config.php
Press enter to continue... <-- ENTER
SquirrelMail Configuration : Read: config.php (1.4.0)
---------------------------------------------------------
Main Menu --
1. Organization Preferences
2. Server Settings
3. Folder Defaults
4. General Options
5. Themes
6. Address Books
7. Message of the Day (MOTD)
8. Plugins
9. Database
10. Languages
D. Set pre-defined settings for specific IMAP servers
C Turn color on
S Save data
Q Quit
Command >> <-- Q
You can now find SquirrelMail in the /usr/share/squirrelmail/ directory.
After you have installed ISPConfig 3, you can access SquirrelMail as follows:
The ISPConfig apps vhost on port 8081 for nginx comes with a SquirrelMail configuration, so you can use http://server1.example.com:8081/squirrelmail or http://server1.example.com:8081/webmail to access SquirrelMail.
If you want to use a /webmail or /squirrelmail alias that you can use from your web sites, this is a bit more complicated than for Apache because nginx does not have global aliases (i.e., aliases that can be defined for all vhosts). Therefore you have to define these aliases for each vhost from which you want to access SquirrelMail.
To do this, paste the following into the nginx Directives field on the Options tab of the web site in ISPConfig:
        location /squirrelmail {
               root /usr/share/;
               index index.php index.html index.htm;
               location ~ ^/squirrelmail/(.+\.php)$ {
                       try_files $uri =404;
                       root /usr/share/;
                       fastcgi_pass 127.0.0.1:9000;
                       fastcgi_index index.php;
                       fastcgi_param SCRIPT_FILENAME $document_root$fastcgi_script_name;
                       include /etc/nginx/fastcgi_params;
                       fastcgi_buffer_size 128k;
                       fastcgi_buffers 256 4k;
                       fastcgi_busy_buffers_size 256k;
                       fastcgi_temp_file_write_size 256k;
                       fastcgi_intercept_errors on;
               }
               location ~* ^/squirrelmail/(.+\.(jpg|jpeg|gif|css|png|js|ico|html|xml|txt))$ {
                       root /usr/share/;
               }
        }
        location /webmail {
               rewrite ^/* /squirrelmail last;
} |
If you use https instead of http for your vhost, you should add the line fastcgi_param HTTPS on; to your SquirrelMail configuration like this:
        location /squirrelmail {
               root /usr/share/;
               index index.php index.html index.htm;
               location ~ ^/squirrelmail/(.+\.php)$ {
                       try_files $uri =404;
                       root /usr/share/;
                       fastcgi_pass 127.0.0.1:9000;
                       fastcgi_param HTTPS on; # <-- add this line
                       fastcgi_index index.php;
                       fastcgi_param SCRIPT_FILENAME $document_root$fastcgi_script_name;
                       include /etc/nginx/fastcgi_params;
                       fastcgi_buffer_size 128k;
                       fastcgi_buffers 256 4k;
                       fastcgi_busy_buffers_size 256k;
                       fastcgi_temp_file_write_size 256k;
                       fastcgi_intercept_errors on;
               }
               location ~* ^/squirrelmail/(.+\.(jpg|jpeg|gif|css|png|js|ico|html|xml|txt))$ {
                       root /usr/share/;
               }
        }
        location /webmail {
               rewrite ^/* /squirrelmail last;
} |
If you use both http and https for your vhost, you need to add the following section to the http {} section in /etc/nginx/nginx.conf (before any include lines) which determines if the visitor uses http or https and sets the $fastcgi_https variable (which we will use in our SquirrelMail configuration) accordingly:
vi /etc/nginx/nginx.conf
[...]
http {
[...]
        ## Detect when HTTPS is used
        map $scheme $fastcgi_https {
          default off;
          https on;
        }
[...]
}
[...] |
Don't forget to reload nginx afterwards:
/etc/init.d/nginx reload
Then go to the nginx Directives field again, and instead of fastcgi_param HTTPS on; you add the line fastcgi_param HTTPS $fastcgi_https; so that you can use SquirrelMail for both http and https requests:
        location /squirrelmail {
               root /usr/share/;
               index index.php index.html index.htm;
               location ~ ^/squirrelmail/(.+\.php)$ {
                       try_files $uri =404;
                       root /usr/share/;
                       fastcgi_pass 127.0.0.1:9000;
                       fastcgi_param HTTPS $fastcgi_https; # <-- add this line
                       fastcgi_index index.php;
                       fastcgi_param SCRIPT_FILENAME $document_root$fastcgi_script_name;
                       include /etc/nginx/fastcgi_params;
                       fastcgi_buffer_size 128k;
                       fastcgi_buffers 256 4k;
                       fastcgi_busy_buffers_size 256k;
                       fastcgi_temp_file_write_size 256k;
                       fastcgi_intercept_errors on;
               }
               location ~* ^/squirrelmail/(.+\.(jpg|jpeg|gif|css|png|js|ico|html|xml|txt))$ {
                       root /usr/share/;
               }
        }
        location /webmail {
               rewrite ^/* /squirrelmail last;
} |
The Perfect Server - Ubuntu 11.10 With Nginx [ISPConfig 3] - Page 7
22 Install ISPConfig 3
Before you start the ISPConfig installation, make sure that Apache is stopped (if it is installed - it is possible that some of your installed packages have installed Apache as a dependency without you knowing). If Apache2 is already installed on the system, stop it now...
/etc/init.d/apache2 stop
... and remove Apache's system startup links:
insserv -r apache2
Make sure that nginx is running:
/etc/init.d/nginx restart
(If you have both Apache and nginx installed, the installer asks you which one you want to use:Apache and nginx detected. Select server to use for ISPConfig:(apache,nginx) [apache]:
Type nginx. If only Apache or nginx are installed, this is automatically detected by the installer, and no question is asked.)
To install ISPConfig 3 from the latest released version, do this:
cd /tmp
wget http://www.ispconfig.org/downloads/ISPConfig-3-stable.tar.gz
tar xfz ISPConfig-3-stable.tar.gz
cd ispconfig3_install/install/
The next step is to run
php -q install.php
This will start the ISPConfig 3 installer. The installer will configure all services like Postfix, SASL, Courier, etc. for you. A manual setup as required for ISPConfig 2 (perfect setup guides) is not necessary.
[email protected]:/tmp/ispconfig3_install/install# php -q install.php
--------------------------------------------------------------------------------
_____ ___________ _____ __ _ ____
|_ _/ ___| ___ \ / __ \ / _(_) /__ \
| | \ `--.| |_/ / | / \/ ___ _ __ | |_ _ __ _ _/ /
| | `--. \ __/ | | / _ \| '_ \| _| |/ _` | |_ |
_| |_/\__/ / | | \__/\ (_) | | | | | | | (_| | ___\ \
\___/\____/\_| \____/\___/|_| |_|_| |_|\__, | \____/
__/ |
|___/
--------------------------------------------------------------------------------
>> Initial configuration
Operating System: Debian or compatible, unknown version.
Following will be a few questions for primary configuration so be careful.
Default values are in [brackets] and can be accepted with
Tap in "quit" (without the quotes) to stop the installer.
Select language (en,de) [en]: <-- ENTER
Installation mode (standard,expert) [standard]: <-- ENTER
Full qualified hostname (FQDN) of the server, eg server1.domain.tld [server1.example.com]: <-- ENTER
MySQL server hostname [localhost]: <-- ENTER
MySQL root username [root]: <-- ENTER
MySQL root password []: <- - yourrootsqlpassword
MySQL database to create [dbispconfig]: <-- ENTER
MySQL charset [utf8]: <-- ENTER
Apache and nginx detected. Select server to use for ISPConfig: (apache,nginx) [apache]: <-- nginx
Generating a 2048 bit RSA private key
........+++
.......+++
writing new private key to 'smtpd.key'
-----
You are about to be asked to enter information that will be incorporated
into your certificate request.
What you are about to enter is what is called a Distinguished Name or a DN.
There are quite a few fields but you can leave some blank
For some fields there will be a default value,
If you enter '.', the field will be left blank.
-----
Country Name (2 letter code) [AU]: <-- ENTER
State or Province Name (full name) [Some-State]: <-- ENTER
Locality Name (eg, city) []: <-- ENTER
Organization Name (eg, company) [Internet Widgits Pty Ltd]: <-- ENTER
Organizational Unit Name (eg, section) []: <-- ENTER
Common Name (eg, YOUR name) []: <-- ENTER
Email Address []: <-- ENTER
Configuring Jailkit
Configuring SASL
Configuring PAM
Configuring Courier
Configuring Spamassassin
Configuring Amavisd
Configuring Getmail
Configuring Pureftpd
Configuring BIND
Configuring nginx
Configuring Vlogger
Configuring Apps vhost
Configuring Bastille Firewall
Configuring Fail2ban
Installing ISPConfig
ISPConfig Port [8080]: <-- ENTER
Do you want a secure (SSL) connection to the ISPConfig web interface (y,n) [y]: <-- ENTER
Generating RSA private key, 4096 bit long modulus
.............................................................................++
........................................................................................................................++
e is 65537 (0x10001)
You are about to be asked to enter information that will be incorporated
into your certificate request.
What you are about to enter is what is called a Distinguished Name or a DN.
There are quite a few fi elds but you can leave some blank
For some fields there will be a default value,
If you enter '.', the field will be left blank.
-----
Country Name (2 letter code) [AU]: <-- ENTER
State or Province Name (full name) [Some-State]: <-- ENTER
Locality Name (eg, city) []: <-- ENTER
Organization Name (eg, company) [Internet Widgits Pty Ltd]: <-- ENTER
Organizational Unit Name (eg, section) []: <-- ENTER
Common Name (eg, YOUR name) []: <-- ENTER
Email Address []: <-- ENTER
Please enter the following 'extra' attributes
to be sent with your certificate request
A challenge password []: <-- ENTER
An optional company name []: <-- ENTER
writing RSA key
Configuring DBServer
Installing ISPConfig crontab
no crontab for root
no crontab for getmail
Restarting services ...
Rather than invoking init scripts through /etc/init.d, use the service(8)
utility, e.g. service mysql restart
Since the script you are attempting to invoke has been converted to an
Upstart job, you may also use the stop(8) and then start(8) utilities,
e.g. stop mysql ; start mysql. The restart(8) utility is also available.
mysql stop/waiting
mysql start/running, process 2463
* Stopping Postfix Mail Transport Agent postfix
...done.
* Starting Postfix Mail Transport Agent postfix
...done.
* Stopping SASL Authentication Daemon saslauthd
...done.
* Starting SASL Authentication Daemon saslauthd
...done.
Stopping amavisd: amavisd-new.
Starting amavisd: amavisd-new.
* Stopping ClamAV daemon clamd
...done.
* Starting ClamAV daemon clamd
Bytecode: Security mode set to "TrustSigned".
...done.
* Stopping Courier authentication services authdaemond
...done.
* Starting Courier authentication services authdaemond
...done.
* Stopping Courier IMAP server imapd
...done.
* Starting Courier IMAP server imapd
...done.
* Stopping Courier IMAP-SSL server imapd-ssl
...done.
* Starting Courier IMAP-SSL se rver imapd-ssl
...done.
* Stopping Courier POP3 server...
...done.
* Starting Courier POP3 server...
...done.
* Stopping Courier POP3-SSL server...
...done.
* Starting Courier POP3-SSL server...
...done.
* Restarting Mailman master qrunner mailmanctl
* Waiting...
...fail!
The master qrunner lock could not be acquired because it appears as if another
master qrunner is already running.
...done.
* Reloading PHP5 FastCGI Process Manager php5-fpm
...done.
Reloading nginx configuration: nginx.
Restarting ftp server: Running: /usr/sbin/pure-ftpd-mysql-virtualchroot -l mysql:/etc/pure-ftpd/db/mysql.conf -l pam -8 UTF-8 -O clf:/var/log/pure-ftpd/transfer.log -D -H -b -A -E -u 1000 -Y 1 -B
Installation completed.
You have mail in /var/mail/root
[email protected]:/tmp/ispconfig3_install/install#
The installer automatically configures all underlying services, so no manual configuration is needed.
You now also have the possibility to let the installer create an SSL vhost for the ISPConfig control panel, so that ISPConfig can be accessed using https:// instead of http://. To achieve this, just press ENTER when you see this question:Do you want a secure (SSL) connection to the ISPConfig web interface (y,n) [y]:.
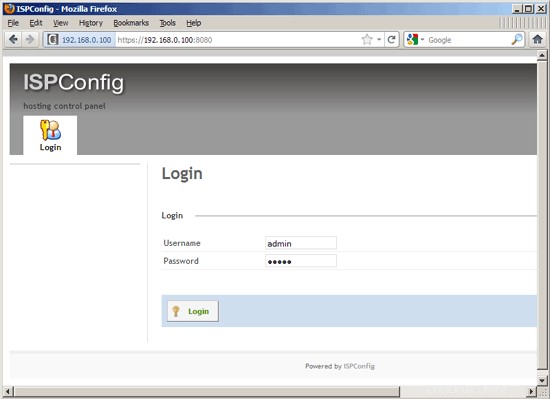
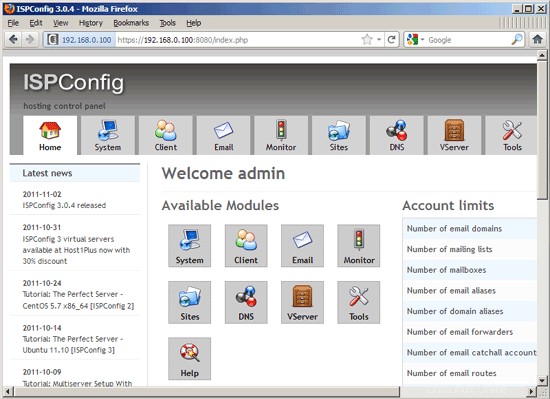
Afterwards you can access ISPConfig 3 under http(s)://server1.example.com:8080/ or http(s)://192.168.0.100:8080/ ( http or https depends on what you chose during installation). Log in with the username admin and the password admin (you should change the default password after your first login):
(If you get a 502 Bad Gateway error, just restart PHP-FPM and try again:
/etc/init.d/php5-fpm restart
)
The system is now ready to be used.
22.1 ISPConfig 3 Manual
In order to learn how to use ISPConfig 3, I strongly recommend to download the ISPConfig 3 Manual.
On about 300 pages, it covers the concept behind ISPConfig (admin, resellers, clients), explains how to install and update ISPConfig 3, includes a reference for all forms and form fields in ISPConfig together with examples of valid inputs, and provides tutorials for the most common tasks in ISPConfig 3. It also lines out how to make your server more secure and comes with a troubleshooting section at the end.
22.2 ISPConfig Monitor App For Android
With the ISPConfig Monitor App, you can check your server status and find out if all services are running as expected. You can check TCP and UDP ports and ping your servers. In addition to that you can use this app to request details from servers that have ISPConfig installed (please note that the minimum installed ISPConfig 3 version with support for the ISPConfig Monitor App is 3.0.3.3! ); these details include everything you know from the Monitor module in the ISPConfig Control Panel (e.g. services, mail and system logs, mail queue, CPU and memory info, disk usage, quota, OS details, RKHunter log, etc.), and of course, as ISPConfig is multiserver-capable, you can check all servers that are controlled from your ISPConfig master server.
For download and usage instructions, please visit http://www.ispconfig.org/ispconfig-3/ispconfig-monitor-app-for-android/.
23 Additional Notes
23.1 OpenVZ
If the Ubuntu server that you've just set up in this tutorial is an OpenVZ container (virtual machine), you should do this on the host system (I'm assuming that the ID of the OpenVZ container is 101 - replace it with the correct VPSID on your system):
VPSID=101
for CAP in CHOWN DAC_READ_SEARCH SETGID SETUID NET_BIND_SERVICE NET_ADMIN SYS_CHROOT SYS_NICE CHOWN DAC_READ_SEARCH SETGID SETUID NET_BIND_SERVICE NET_ADMIN SYS_CHROOT SYS_NICE
do
vzctl set $VPSID --capability ${CAP}:on --save
done
24 Links
- Ubuntu:http://www.ubuntu.com/
- ISPConfig:http://www.ispconfig.org/
About The Author

Falko Timme is the owner of  Timme Hosting (ultra-fast nginx web hosting). He is the lead maintainer of HowtoForge (since 2005) and one of the core developers of ISPConfig (since 2000). He has also contributed to the O'Reilly book "Linux System Administration".