Il server perfetto - Ubuntu Natty Narwhal (Ubuntu 11.04) [ISPConfig 2]
Questo tutorial mostra come configurare un server Ubuntu Natty Narwhal (Ubuntu 11.04) che offre tutti i servizi necessari agli ISP e agli hoster:server Web Apache (compatibile con SSL), server di posta Postfix con SMTP-AUTH e TLS, server BIND DNS, Proftpd Server FTP, server MySQL, Courier POP3/IMAP, Quota, Firewall, ecc. Alla fine dovresti avere un sistema che funzioni in modo affidabile e, se lo desideri, puoi installare il pannello di controllo del webhosting gratuito ISPConfig 2 (ovvero, ISPConfig funziona su di esso fuori dagli schemi).
Userò il seguente software:
- Server Web:Apache 2.2.17 con PHP 5.3.5, Python, Ruby e WebDAV
- Server di database:MySQL 5.1.54
- Server di posta:Postfix
- Server DNS:BIND9
- Server FTP:proftpd
- POP3/IMAP:utilizzerò il formato Maildir e quindi installerò Courier-POP3/Courier-IMAP.
- Webalizer per le statistiche del sito web
Tieni presente che questa configurazione non funziona per ISPConfig 3 ! È valido solo per ISPConfig 2!
Voglio dire in primo luogo che questo non è l'unico modo per impostare un tale sistema. Ci sono molti modi per raggiungere questo obiettivo, ma questo è il modo in cui prendo. Non garantisco che questo funzionerà per te!
1 Requisiti
Per installare un tale sistema avrai bisogno di quanto segue:
- il CD del server Ubuntu 11.04, disponibile qui:http://releases.ubuntu.com/releases/11.04/ubuntu-11.04-server-i386.iso (i386) o http://releases.ubuntu.com/releases /11.04/ubuntu-11.04-server-amd64.iso (x86_64)
- una connessione Internet veloce.
2 Nota preliminare
In questo tutorial utilizzo l'hostname server1.example.com con l'indirizzo IP 192.168.0.100 e il gateway 192.168.0.1. Queste impostazioni potrebbero differire per te, quindi devi sostituirle dove appropriato.
3 Il sistema base
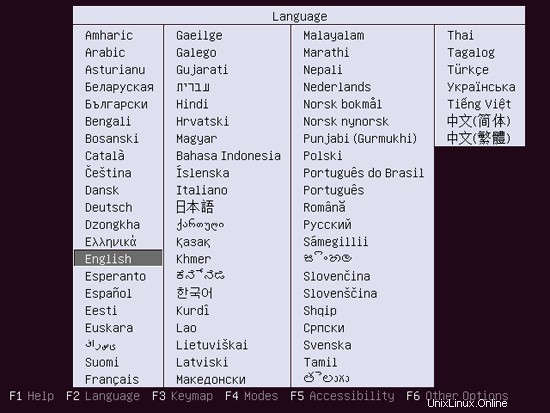
Inserisci il tuo CD di installazione di Ubuntu nel tuo sistema e avvia da esso. Seleziona la tua lingua:
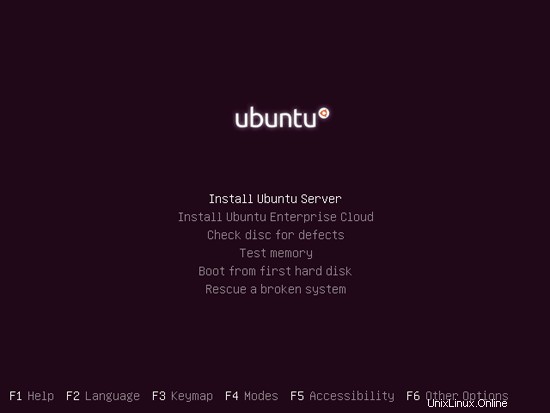
Quindi seleziona Installa Ubuntu Server:
Scegli di nuovo la tua lingua (?):

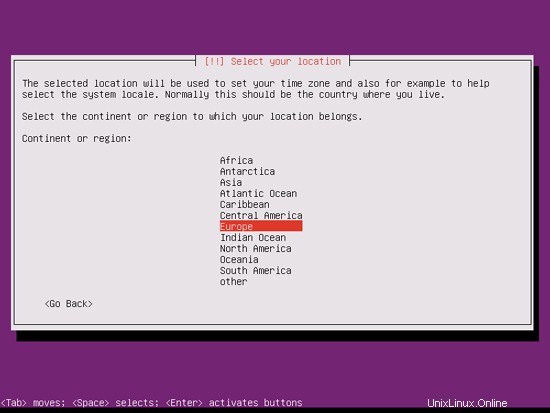
Quindi seleziona la tua posizione:

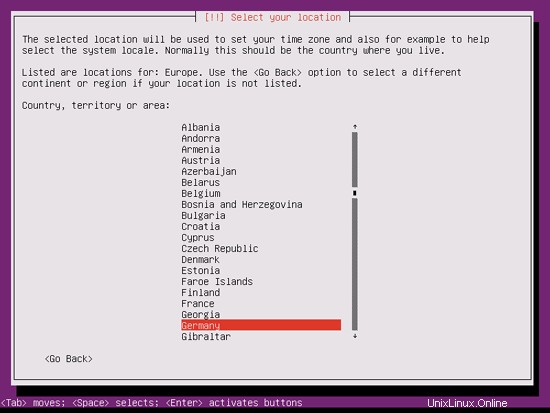
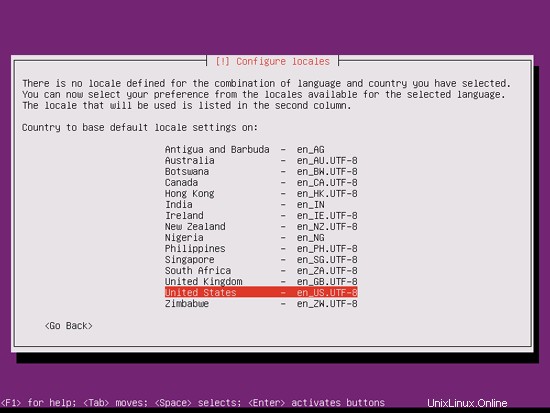
Se hai selezionato una combinazione insolita di lingua e posizione (come l'inglese come lingua e la Germania come posizione, come nel mio caso), il programma di installazione potrebbe dirti che non esiste una locale definita per questa combinazione; in questo caso devi selezionare la locale manualmente. Seleziono en_US.UTF-8 qui:
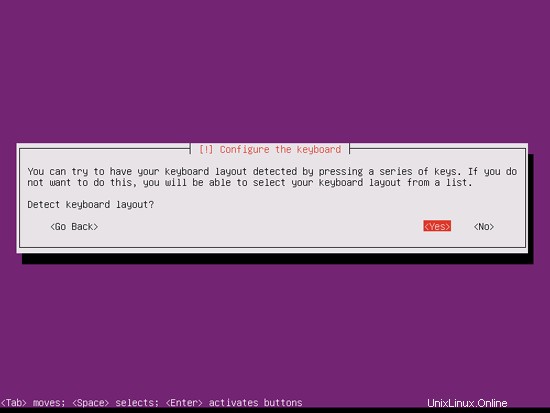
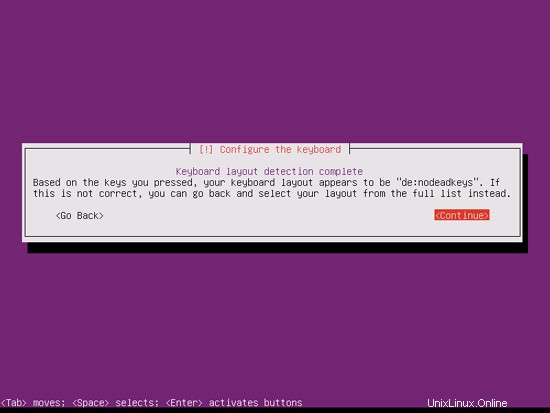
Scegli un layout di tastiera (ti verrà chiesto di premere alcuni tasti e il programma di installazione proverà a rilevare il layout di tastiera in base ai tasti premuti):
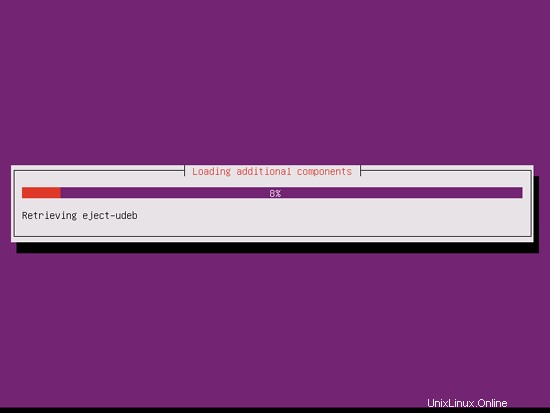
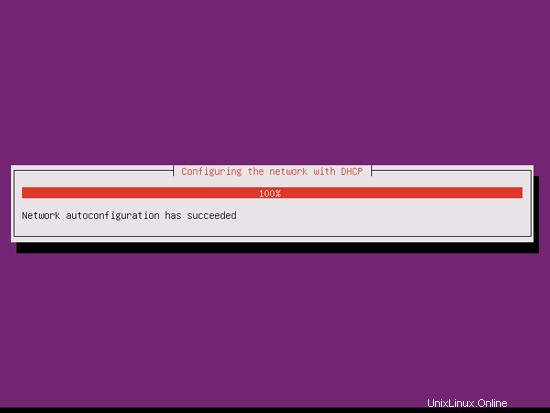
Il programma di installazione controlla il CD di installazione, l'hardware e configura la rete con DHCP se è presente un server DHCP nella rete:
Il server perfetto - Ubuntu Natty Narwhal (Ubuntu 11.04) [ISPConfig 2] - Pagina 2
4 Ottieni privilegi di root
Dopo il riavvio è possibile effettuare il login con il nome utente creato in precedenza (es. amministratore). Poiché dobbiamo eseguire tutti i passaggi di questo tutorial con i privilegi di root, possiamo anteporre tutti i comandi in questo tutorial con la stringa sudo, oppure diventare root in questo momento digitando
sudo su
(Puoi anche abilitare il login di root eseguendo
sudo passwd root
e dando una password a root. Puoi quindi accedere direttamente come root, ma questo è disapprovato dagli sviluppatori e dalla comunità di Ubuntu per vari motivi. Vedi http://ubuntuforums.org/showthread.php?t=765414.)
5 Installare il server SSH (opzionale)
Se non hai installato il server OpenSSH durante l'installazione del sistema, puoi farlo ora:
apt-get install ssh openssh-server
D'ora in poi puoi utilizzare un client SSH come PuTTY e connetterti dalla tua workstation al tuo server Ubuntu 11.04 e seguire i passaggi rimanenti di questo tutorial.
6 Installa vim-nox (opzionale)
Userò vi come editor di testo in questo tutorial. Il programma vi predefinito ha uno strano comportamento su Ubuntu e Debian; per risolvere questo problema, installiamo vim-nox:
apt-get install vim-nox
(Non devi farlo se usi un editor di testo diverso come joe o nano.)
7 Configura la rete
Poiché il programma di installazione di Ubuntu ha configurato il nostro sistema per ottenere le sue impostazioni di rete tramite DHCP, dobbiamo cambiarlo ora perché un server dovrebbe avere un indirizzo IP statico. Modifica /etc/network/interfaces e adattarlo alle tue esigenze (in questa configurazione di esempio userò l'indirizzo IP 192.168.0.100 ):
vi /etc/network/interfaces
# This file describes the network interfaces available on your system
# and how to activate them. For more information, see interfaces(5).

# The loopback network interface
auto lo
iface lo inet loopback

# The primary network interface
auto eth0
iface eth0 inet static
        address 192.168.0.100
        netmask 255.255.255.0
        network 192.168.0.0
        broadcast 192.168.0.255
gateway 192.168.0.1 |
Quindi riavvia la rete:
/etc/init.d/networking restart
Quindi modifica /etc/hosts. Rendilo simile a questo:
vi /etc/hosts
127.0.0.1 localhost.localdomain localhost 192.168.0.100 server1.example.com server1 # The following lines are desirable for IPv6 capable hosts ::1 ip6-localhost ip6-loopback fe00::0 ip6-localnet ff00::0 ip6-mcastprefix ff02::1 ip6-allnodes ff02::2 ip6-allrouters |
Ora corri
echo server1.example.com> /etc/hostname
/etc/init.d/hostname riavvia
Successivamente, corri
hostname
hostname -f
Entrambi dovrebbero mostrare server1.example.com ora.
8 Modifica /etc/apt/sources.list e aggiorna la tua installazione Linux
Modifica /etc/apt/sources.list. Commenta o rimuovi il CD di installazione dal file e assicurati che i repository Universe e Multiverse siano abilitati. Dovrebbe assomigliare a questo:
vi /etc/apt/sources.list
# # deb cdrom:[Ubuntu-Server 11.04 _Natty Narwhal_ - Release amd64 (20110426)]/ natty main restricted #deb cdrom:[Ubuntu-Server 11.04 _Natty Narwhal_ - Release amd64 (20110426)]/ natty main restricted # See http://help.ubuntu.com/community/UpgradeNotes for how to upgrade to # newer versions of the distribution. deb http://de.archive.ubuntu.com/ubuntu/ natty main restricted deb-src http://de.archive.ubuntu.com/ubuntu/ natty main restricted ## Major bug fix updates produced after the final release of the ## distribution. deb http://de.archive.ubuntu.com/ubuntu/ natty-updates main restricted deb-src http://de.archive.ubuntu.com/ubuntu/ natty-updates main restricted ## N.B. software from this repository is ENTIRELY UNSUPPORTED by the Ubuntu ## team. Also, please note that software in universe WILL NOT receive any ## review or updates from the Ubuntu security team. deb http://de.archive.ubuntu.com/ubuntu/ natty universe deb-src http://de.archive.ubuntu.com/ubuntu/ natty universe deb http://de.archive.ubuntu.com/ubuntu/ natty-updates universe deb-src http://de.archive.ubuntu.com/ubuntu/ natty-updates universe ## N.B. software from this repository is ENTIRELY UNSUPPORTED by the Ubuntu ## team, and may not be under a free licence. Please satisfy yourself as to ## your rights to use the software. Also, please note that software in ## multiverse WILL NOT receive any review or updates from the Ubuntu ## security team. deb http://de.archive.ubuntu.com/ubuntu/ natty multiverse deb-src http://de.archive.ubuntu.com/ubuntu/ natty multiverse deb http://de.archive.ubuntu.com/ubuntu/ natty-updates multiverse deb-src http://de.archive.ubuntu.com/ubuntu/ natty-updates multiverse ## Uncomment the following two lines to add software from the 'backports' ## repository. ## N.B. software from this repository may not have been tested as ## extensively as that contained in the main release, although it includes ## newer versions of some applications which may provide useful features. ## Also, please note that software in backports WILL NOT receive any review ## or updates from the Ubuntu security team. # deb http://de.archive.ubuntu.com/ubuntu/ natty-backports main restricted universe multiverse # deb-src http://de.archive.ubuntu.com/ubuntu/ natty-backports main restricted universe multiverse deb http://security.ubuntu.com/ubuntu natty-security main restricted deb-src http://security.ubuntu.com/ubuntu natty-security main restricted deb http://security.ubuntu.com/ubuntu natty-security universe deb-src http://security.ubuntu.com/ubuntu natty-security universe deb http://security.ubuntu.com/ubuntu natty-security multiverse deb-src http://security.ubuntu.com/ubuntu natty-security multiverse ## Uncomment the following two lines to add software from Canonical's ## 'partner' repository. ## This software is not part of Ubuntu, but is offered by Canonical and the ## respective vendors as a service to Ubuntu users. # deb http://archive.canonical.com/ubuntu natty partner # deb-src http://archive.canonical.com/ubuntu natty partner ## Uncomment the following two lines to add software from Ubuntu's ## 'extras' repository. ## This software is not part of Ubuntu, but is offered by third-party ## developers who want to ship their latest software. # deb http://extras.ubuntu.com/ubuntu natty main # deb-src http://extras.ubuntu.com/ubuntu natty main |
Quindi esegui
apt-get update
per aggiornare il database del pacchetto apt e
apt-get upgrade
per installare gli ultimi aggiornamenti (se presenti). Se vedi che un nuovo kernel viene installato come parte degli aggiornamenti, dovresti riavviare il sistema in seguito:
reboot
9 Modifica la shell predefinita
/bin/sh è un collegamento simbolico a /bin/dash, tuttavia abbiamo bisogno di /bin/bash, non di /bin/dash. Pertanto facciamo questo:
dpkg-reconfigure dash
Utilizzare dash come shell di sistema predefinita (/bin/sh)? <-- No
In caso contrario, l'installazione di ISPConfig avrà esito negativo.
10 Disattiva AppArmor
AppArmor è un'estensione di sicurezza (simile a SELinux) che dovrebbe fornire una sicurezza estesa. Secondo me non è necessario per configurare un sistema sicuro e di solito causa più problemi che vantaggi (pensaci dopo aver fatto una settimana di risoluzione dei problemi perché alcuni servizi non funzionavano come previsto, e quindi scopri che era tutto ok, solo AppArmor stava causando il problema). Pertanto lo disabilito (questo è un must se vuoi installare ISPConfig in un secondo momento).
Possiamo disabilitarlo in questo modo:
/etc/init.d/apparmor stop
update-rc.d -f apparmor remove
apt-get remove apparmor apparmor-utils
Il server perfetto - Ubuntu Natty Narwhal (Ubuntu 11.04) [ISPConfig 2] - Pagina 4
11 Installa del software
Ora installiamo alcuni pacchetti che saranno necessari in seguito. Corri
apt-get install binutils cpp fetchmail flex gcc libarchive-zip-perl libc6-dev libcompress-zlib-perl libdb4.6-dev libpcre3 libpopt-dev lynx m4 make ncftp nmap openssl perl perl-modules unzip zip zlib1g-dev autoconf automake1.9 libtool bison autotools-dev g++ build-essential
(Questo comando deve essere inserito in una riga !)
Quota di 12 journal
(Se hai scelto uno schema di partizionamento diverso dal mio, devi modificare questo capitolo in modo che la quota si applichi alle partizioni dove ne hai bisogno.)
Per installare la quota, esegui
apt-get install quota
Modifica /etc/fstab. Il mio è simile a questo (ho aggiunto ,usrjquota=quota.user,grpjquota=quota.group,jqfmt=vfsv0 alla partizione con il punto di montaggio /):
vi /etc/fstab
# /etc/fstab: static file system information. # # Use 'blkid -o value -s UUID' to print the universally unique identifier # for a device; this may be used with UUID= as a more robust way to name # devices that works even if disks are added and removed. See fstab(5). # # <file system> <mount point> <type> <options> <dump> <pass> proc /proc proc nodev,noexec,nosuid 0 0 /dev/mapper/server1-root / ext4 errors=remount-ro,usrjquota=quota.user,grpjquota=quota.group,jqfmt=vfsv0 0 1 # /boot was on /dev/sda1 during installation UUID=deae7cd1-b106-47aa-9a7c-512f046d2ebf /boot ext2 defaults 0 2 /dev/mapper/server1-swap_1 none swap sw 0 0 /dev/fd0 /media/floppy0 auto rw,user,noauto,exec,utf8 0 0 |
Per abilitare la quota, esegui questi comandi:
mount -o remount /
quotacheck -avugm
quotaon -avug
13 Server DNS
Corri
apt-get install bind9
Per motivi di sicurezza, vogliamo eseguire BIND in chroot, quindi dobbiamo eseguire i seguenti passaggi:
/etc/init.d/bind9 stop
Modificare il file /etc/default/bind9 in modo che il demone venga eseguito come bind dell'utente senza privilegi, con chroot in /var/lib/named. Modifica la riga:OPTIONS="-u bind" in modo che legga OPTIONS="-u bind -t /var/lib/named":
vi /etc/default/bind9
# run resolvconf? RESOLVCONF=yes # startup options for the server OPTIONS="-u bind -t /var/lib/named" |
Crea le directory necessarie in /var/lib:
mkdir -p /var/lib/named/etc
mkdir /var/lib/named/dev
mkdir -p /var/lib/named/var/cache/bind
mkdir -p /var/lib/named/var/run/bind/run
Quindi sposta la directory di configurazione da /etc a /var/lib/named/etc:
mv /etc/bind /var/lib/named/etc
Crea un collegamento simbolico alla nuova directory di configurazione dalla vecchia posizione (per evitare problemi quando il collegamento verrà aggiornato in futuro):
ln -s /var/lib/named/etc/bind /etc/bind
Crea dispositivi nulli e casuali e correggi i permessi delle directory:
mknod /var/lib/named/dev/null c 1 3
mknod /var/lib/named/dev/random c 1 8
chmod 666 /var/lib/named/dev/null /var /lib/named/dev/random
chown -R bind:bind /var/lib/named/var/*
chown -R bind:bind /var/lib/named/etc/bind
Dobbiamo creare il file /etc/rsyslog.d/bind-chroot.conf...
vi /etc/rsyslog.d/bind-chroot.conf
... e aggiungi la seguente riga in modo che possiamo ancora ottenere messaggi importanti registrati nei registri di sistema:
$AddUnixListenSocket /var/lib/named/dev/log |
Riavvia il demone di registrazione:
/etc/init.d/rsyslog restart
Avvia BIND e controlla /var/log/syslog per gli errori:
/etc/init.d/bind9 start
14 MySQL
Per installare MySQL, eseguiamo
apt-get install mysql-server mysql-client libmysqlclient-dev
Ti verrà chiesto di fornire una password per l'utente root di MySQL:questa password è valida per l'utente [email protected] così come per [email protected], quindi non dobbiamo specificare manualmente una password di root MySQL in seguito :
Nuova password per l'utente "root" di MySQL:<-- yourrootsqlpassword
Ripeti la password per l'utente "root" di MySQL:<-- yourrootsqlpassword
Vogliamo che MySQL ascolti su tutte le interfacce, non solo su localhost, quindi modifichiamo /etc/mysql/my.cnf e commentiamo la riga bind-address =127.0.0.1:
vi /etc/mysql/my.cnf
[...] # Instead of skip-networking the default is now to listen only on # localhost which is more compatible and is not less secure. #bind-address = 127.0.0.1 [...] |
Quindi riavviamo MySQL:
/etc/init.d/mysql restart
Ora controlla che la rete sia abilitata. Corri
netstat -tap | grep mysql
L'output dovrebbe essere simile a questo:
[email protected]:~# netstat -tap | grep mysql
tcp 0 0 *:mysql *:* ASCOLTA 7220/mysqld
[email protected]:~#
Il server perfetto - Ubuntu Natty Narwhal (Ubuntu 11.04) [ISPConfig 2] - Pagina 5
15 Postfix con SMTP-AUTH e TLS
Per installare Postfix con SMTP-AUTH e TLS, procedi come segue:
apt-get install postfix libsasl2-2 sasl2-bin libsasl2-modules procmail
Ti verranno poste due domande. Rispondi come segue:
Tipo generale di configurazione della posta:<-- Sito Internet
Nome della posta di sistema:<-- server1.example.com
Quindi esegui
dpkg-reconfigure postfix
Anche in questo caso, ti verranno poste alcune domande:
Tipo generale di configurazione della posta:<-- Sito Internet
Nome della posta di sistema:<-- server1.example.com
Destinatario della posta root e postmaster:<-- [vuoto]
Altre destinazioni a accetta posta per (vuoto per nessuno):<-- server1.example.com, localhost.example.com, localhost.localdomain, localhost
Forzare aggiornamenti sincroni sulla coda di posta? <-- No
Reti locali:<-- 127.0.0.0/8 [::ffff:127.0.0.0]/104 [::1]/128
Utilizzare procmail per la consegna locale? <-- Sì
Limite dimensione cassetta postale (byte):<-- 0
Carattere estensione indirizzo locale:<-- +
Protocolli Internet da utilizzare:<-- tutti
Quindi, fai questo:
postconf -e 'smtpd_sasl_local_domain ='
postconf -e 'smtpd_sasl_auth_enable =yes'
postconf -e 'smtpd_sasl_security_options =noanonymous'
postconf -e 'broken_sasl_auth_clients =yes'
postconf -e 'smtpd_sasl_authenticated_header =yes'
postconf -e 'smtpd_recipient_restrictions =permit_sasl_authenticated,permit_mynetworks,reject_unauth_destination'
postconf -e 'inet_interfaces =all'
echo 'pwcheck_method:saslauthd'>> /etc/postfix/ sasl/smtpd.conf
echo 'mech_list:login semplice'>> /etc/postfix/sasl/smtpd.conf
Successivamente creiamo i certificati per TLS:
mkdir /etc/postfix/ssl
cd /etc/postfix/ssl/
openssl genrsa -des3 -rand /etc/hosts -out smtpd.key 1024
chmod 600 smtpd.key
openssl req -new -key smtpd.key -out smtpd.csr
openssl x509 -req -days 3650 -in smtpd.csr -signkey smtpd.key -out smtpd.crt
openssl rsa -in smtpd.key -out smtpd.key.unencrypted
mv -f smtpd.key.unencrypted smtpd.key
openssl req -new -x509 -extensions v3_ca -keyout cakey.pem -out cacert.pem -days 3650
Quindi configuriamo Postfix per TLS (assicurati di utilizzare il nome host corretto per myhostname):
postconf -e 'myhostname = server1.example.com'
postconf -e 'smtpd_tls_auth_only =no'
postconf -e 'smtp_use_tls =yes'
postconf -e 'smtpd_use_tls =yes'
postconf -e 'smtp_tls_note_starttls_offer =yes'
postconf - e 'smtpd_tls_key_file =/etc/postfix/ssl/smtpd.key'
postconf -e 'smtpd_tls_cert_file =/etc/postfix/ssl/smtpd.crt'
postconf -e 'smtpd_tls_CAfile =/etc/postfix /ssl/cacert.pem'
postconf -e 'smtpd_tls_loglevel =1'
postconf -e 'smtpd_tls_received_header =yes'
postconf -e 'smtpd_tls_session_cache_timeout =3600s'
postconf -e 'tls_random_source =dev:/dev/urandom'
Il file /etc/postfix/main.cf dovrebbe ora assomigliare a questo:
cat /etc/postfix/main.cf
# See /usr/share/postfix/main.cf.dist for a commented, more complete version


# Debian specific:  Specifying a file name will cause the first
# line of that file to be used as the name.  The Debian default
# is /etc/mailname.
#myorigin = /etc/mailname

smtpd_banner = $myhostname ESMTP $mail_name (Ubuntu)
biff = no

# appending .domain is the MUA's job.
append_dot_mydomain = no

# Uncomment the next line to generate "delayed mail" warnings
#delay_warning_time = 4h

readme_directory = no

# TLS parameters
smtpd_tls_cert_file = /etc/postfix/ssl/smtpd.crt
smtpd_tls_key_file = /etc/postfix/ssl/smtpd.key
smtpd_use_tls = yes
smtpd_tls_session_cache_database = btree:${data_directory}/smtpd_scache
smtp_tls_session_cache_database = btree:${data_directory}/smtp_scache

# See /usr/share/doc/postfix/TLS_README.gz in the postfix-doc package for
# information on enabling SSL in the smtp client.

myhostname = server1.example.com
alias_maps = hash:/etc/aliases
alias_database = hash:/etc/aliases
myorigin = /etc/mailname
mydestination = server1.example.com, localhost.example.com, localhost.localdomain, localhost
relayhost =
mynetworks = 127.0.0.0/8 [::ffff:127.0.0.0]/104 [::1]/128
mailbox_command = procmail -a "$EXTENSION"
mailbox_size_limit = 0
recipient_delimiter = +
inet_interfaces = all
inet_protocols = all
smtpd_sasl_local_domain =
smtpd_sasl_auth_enable = yes
smtpd_sasl_security_options = noanonymous
broken_sasl_auth_clients = yes
smtpd_sasl_authenticated_header = yes
smtpd_recipient_restrictions = permit_sasl_authenticated,permit_mynetworks,reject_unauth_destination
smtpd_tls_auth_only = no
smtp_use_tls = yes
smtp_tls_note_starttls_offer = yes
smtpd_tls_CAfile = /etc/postfix/ssl/cacert.pem
smtpd_tls_loglevel = 1
smtpd_tls_received_header = yes
smtpd_tls_session_cache_timeout = 3600s
tls_random_source = dev:/dev/urandom |
L'autenticazione verrà eseguita da saslauthd. Dobbiamo cambiare alcune cose per farlo funzionare correttamente. Poiché Postfix viene eseguito in chroot in /var/spool/postfix, dobbiamo fare quanto segue:
mkdir -p /var/spool/postfix/var/run/saslauthd
Ora dobbiamo modificare /etc/default/saslauthd per attivare saslauthd. Imposta START su yes e cambia la riga OPTIONS="-c -m /var/run/saslauthd" in OPTIONS="-c -m /var/spool/postfix/var/run/saslauthd -r":
vi /etc/default/saslauthd
# # Settings for saslauthd daemon # Please read /usr/share/doc/sasl2-bin/README.Debian for details. # # Should saslauthd run automatically on startup? (default: no) START=yes # Description of this saslauthd instance. Recommended. # (suggestion: SASL Authentication Daemon) DESC="SASL Authentication Daemon" # Short name of this saslauthd instance. Strongly recommended. # (suggestion: saslauthd) NAME="saslauthd" # Which authentication mechanisms should saslauthd use? (default: pam) # # Available options in this Debian package: # getpwent -- use the getpwent() library function # kerberos5 -- use Kerberos 5 # pam -- use PAM # rimap -- use a remote IMAP server # shadow -- use the local shadow password file # sasldb -- use the local sasldb database file # ldap -- use LDAP (configuration is in /etc/saslauthd.conf) # # Only one option may be used at a time. See the saslauthd man page # for more information. # # Example: MECHANISMS="pam" MECHANISMS="pam" # Additional options for this mechanism. (default: none) # See the saslauthd man page for information about mech-specific options. MECH_OPTIONS="" # How many saslauthd processes should we run? (default: 5) # A value of 0 will fork a new process for each connection. THREADS=5 # Other options (default: -c -m /var/run/saslauthd) # Note: You MUST specify the -m option or saslauthd won't run! # # WARNING: DO NOT SPECIFY THE -d OPTION. # The -d option will cause saslauthd to run in the foreground instead of as # a daemon. This will PREVENT YOUR SYSTEM FROM BOOTING PROPERLY. If you wish # to run saslauthd in debug mode, please run it by hand to be safe. # # See /usr/share/doc/sasl2-bin/README.Debian for Debian-specific information. # See the saslauthd man page and the output of 'saslauthd -h' for general # information about these options. # # Example for postfix users: "-c -m /var/spool/postfix/var/run/saslauthd" #OPTIONS="-c -m /var/run/saslauthd" OPTIONS="-c -m /var/spool/postfix/var/run/saslauthd -r" |
Quindi aggiungi l'utente postfix al gruppo sasl (questo assicura che Postfix abbia il permesso di accedere a saslauthd):
adduser postfix sasl
Ora riavvia Postfix e avvia saslauthd:
/etc/init.d/postfix restart
/etc/init.d/saslauthd start
Per vedere se SMTP-AUTH e TLS funzionano correttamente ora esegui il seguente comando:
telnet localhost 25
Dopo aver stabilito la connessione al tipo di server di posta Postfix
ehlo localhost
Se vedi le linee
250-STARTTLS
e
250-AUTH PLAIN LOGIN
va tutto bene.
L'output sul mio sistema è simile al seguente:
[email protected]:/etc/postfix/ssl# telnet localhost 25
Tentativo 127.0.0.1...
Connesso a localhost.localdomain.
Il carattere di escape è '^]'.
220 server1.example.com ESMTP Postfix (Ubuntu)
ehlo localhost
250-server1.example.com
250-PIPELINING
250-SIZE 10240000
250-VRFY
250-ETRN
250-STARTTLS
250-AUTH PLAIN LOGIN
250-AUTH=PLAIN LOGIN
250-ENHANCEDSTATUSCODES
250-8BITMIME
250 DSN
chiudi
221 2.0.0 Ciao
Connessione chiusa da host esterno.
[email protected]:/etc/postfix/ssl#
Digita
quit
per tornare alla shell del sistema.
16 Courier-IMAP/Courier-POP3
Esegui questo per installare Courier-IMAP/Courier-IMAP-SSL (per IMAP sulla porta 993) e Courier-POP3/Courier-POP3-SSL (per POP3 sulla porta 995):
apt-get install courier-authdaemon courier-base courier-imap courier-imap-ssl courier-pop courier-pop-ssl courier-ssl gamin libgamin0 libglib2.0-0
Ti verranno poste due domande:
Creare directory per l'amministrazione basata sul Web? <-- Nessun
certificato SSL richiesto <-- Ok
Durante l'installazione, i certificati SSL per IMAP-SSL e POP3-SSL vengono creati con il nome host localhost. Per cambiarlo nel nome host corretto (server1.example.com in questo tutorial), elimina i certificati...
cd /etc/courier
rm -f /etc/courier/imapd.pem
rm -f /etc/courier/pop3d.pem
... e modificare i due file seguenti; sostituisci CN=localhost con CN=server1.example.com (puoi anche modificare gli altri valori, se necessario):
vi /etc/courier/imapd.cnf
[...] CN=server1.example.com [...] |
vi /etc/courier/pop3d.cnf
[...] CN=server1.example.com [...] |
Quindi ricrea i certificati...
mkimapdcert
mkpop3dcert
... e riavvia Courier-IMAP-SSL e Courier-POP3-SSL:
/etc/init.d/courier-imap-ssl restart
/etc/init.d/courier-pop-ssl restart
Se non desideri utilizzare ISPConfig, configura Postfix per inviare e-mail alla Maildir di un utente*:
postconf -e 'home_mailbox =Maildir/'
postconf -e 'mailbox_command ='
/etc/init.d/postfix restart
*Nota: Non è necessario farlo se si intende utilizzare ISPConfig sul sistema poiché ISPConfig esegue la configurazione necessaria utilizzando le ricette procmail. Ma assicurati di abilitare Maildir in Gestione -> Server -> Impostazioni -> E-mail nell'interfaccia web di ISPConfig.
Il server perfetto - Ubuntu Natty Narwhal (Ubuntu 11.04) [ISPConfig 2] - Pagina 6
17 Apache/PHP5/Ruby/Python/WebDAV
Ora installiamo Apache:
apt-get install apache2 apache2-doc apache2-mpm-prefork apache2-utils apache2-suexec libexpat1 ssl-cert
Successivamente installiamo PHP5, Ruby e Python (tutti e tre come moduli Apache):
apt-get install libapache2-mod-php5 libapache2-mod-ruby libapache2-mod-python php5 php5-common php5-curl php5-dev php5-gd php5-idn php-pear php5-imagick php5-imap php5-mcrypt php5-memcache php5-ming php5-mysql php5-pspell php5-recode php5-snmp php5-sqlite php5-tidy php5-xmlrpc php5-xsl
Quindi modifichiamo /etc/apache2/mods-available/dir.conf:
vi /etc/apache2/mods-available/dir.conf
e cambia la riga DirectoryIndex:
<IfModule mod_dir.c>

          #DirectoryIndex index.html index.cgi index.pl index.php index.xhtml index.htm
          DirectoryIndex index.html index.htm index.shtml index.cgi index.php index.php3 index.pl index.xhtml

</IfModule> |
Ora dobbiamo abilitare alcuni moduli Apache (SSL, rewrite, suexec, include e WebDAV):
a2enmod ssl
a2enmod rewrite
a2enmod suexec
a2enmod include
a2enmod dav_fs
a2enmod dav
Riavvia Apache:
/etc/init.d/apache2 restart
Dobbiamo risolvere un piccolo problema con Ruby. Se installi ISPConfig e abiliti Ruby per un sito web, i file .rbx verranno eseguiti correttamente e visualizzati nel browser, ma questo non funziona per i file .rb - ti verrà chiesto di scaricare il file .rb - lo stesso accade se configuri Ruby manualmente per un vhost (cioè, non ha nulla a che fare con ISPConfig). Per risolvere questo problema, apriamo /etc/mime.types...
vi /etc/mime.types
... e commenta la riga application/x-ruby:
[...] #application/x-ruby rb [...] |
Riavvia Apache:
/etc/init.d/apache2 restart
Ora i file .rb verranno eseguiti e visualizzati nel browser, proprio come i file .rbx.
Nel prossimo capitolo (17.1) disabiliteremo PHP (questo è necessario solo se volete installare ISPConfig su questo server). A differenza di PHP, Ruby e Python sono disabilitati per impostazione predefinita, quindi non dobbiamo farlo.
17.1 Disattiva PHP a livello globale
(Se non prevedi di installare ISPConfig su questo server, salta questa sezione!)
In ISPConfig configurerai PHP in base al sito Web, ovvero puoi specificare quale sito Web può eseguire script PHP e quale no. Questo può funzionare solo se PHP è disabilitato a livello globale perché altrimenti tutti i siti Web sarebbero in grado di eseguire script PHP, indipendentemente da ciò che specifichi in ISPConfig.
Per disabilitare PHP a livello globale, modifichiamo /etc/mime.types e commentiamo le righe application/x-httpd-php:
vi /etc/mime.types
[...] #application/x-httpd-php phtml pht php #application/x-httpd-php-source phps #application/x-httpd-php3 php3 #application/x-httpd-php3-preprocessed php3p #application/x-httpd-php4 php4 #application/x-httpd-php5 php5 [...] |
Modifica /etc/apache2/mods-enabled/php5.conf e commenta le righe di SetHandler:
vi /etc/apache2/mods-enabled/php5.conf
<IfModule mod_php5.c>
    <FilesMatch "\.ph(p3?|tml)$">
        #SetHandler application/x-httpd-php
    </FilesMatch>
    <FilesMatch "\.phps$">
        #SetHandler application/x-httpd-php-source
    </FilesMatch>
    # To re-enable php in user directories comment the following lines
    # (from <IfModule ...> to </IfModule>.) Do NOT set it to On as it
    # prevents .htaccess files from disabling it.
    <IfModule mod_userdir.c>
        <Directory /home/*/public_html>
            php_admin_value engine Off
        </Directory>
    </IfModule>
</IfModule> |
Quindi riavvia Apache:
/etc/init.d/apache2 restart
18 Proftpd
Per installare Proftpd, esegui
apt-get install proftpd ucf
Ti verrà fatta una domanda:
Esegui proftpd:<-- autonomo
Per motivi di sicurezza aggiungi le seguenti righe a /etc/proftpd/proftpd.conf (grazie a Reinaldo Carvalho; maggiori informazioni possono essere trovate qui:http://proftpd.org/localsite/Userguide/linked/userguide.html):
vi /etc/proftpd/proftpd.conf
[...] DefaultRoot ~ ServerIdent on "FTP Server ready." [...] |
ISPConfig si aspetta che la configurazione sia in /etc/proftpd.conf invece di /etc/proftpd/proftpd.conf, quindi creiamo un collegamento simbolico (puoi saltare questo comando se non vuoi installare ISPConfig):
ln -s /etc/proftpd/proftpd.conf /etc/proftpd.conf
Quindi riavvia Proftpd:
/etc/init.d/proftpd restart
Il server perfetto - Ubuntu Natty Narwhal (Ubuntu 11.04) [ISPConfig 2] - Pagina 7
19 Webalizer
Per installare webalizer, esegui
apt-get install webalizer geoip-database
20 Sincronizzare l'orologio di sistema
È una buona idea sincronizzare l'orologio di sistema con un NTP (n rete t ora p rotocol) server su Internet. Esegui semplicemente
apt-get install ntp ntpdate
e l'ora del tuo sistema sarà sempre sincronizzata.
21 Install Some Perl Modules Needed By SpamAssassin (Comes With ISPConfig)
Corri
apt-get install libhtml-parser-perl libdb-file-lock-perl libnet-dns-perl libnetaddr-ip-perl perl-modules
22 ISPConfig
The configuration of the server is now finished, and if you wish you can now install ISPConfig on it. Please check out the ISPConfig installation manual:http://www.ispconfig.org/manual_installation.htm
Before you install ISPConfig, there's one important thing you must do. Open /usr/include/stdio.h and replace getline with parseline in line 671:
vi /usr/include/stdio.h
[...]
   This function is not part of POSIX and therefore no official
   cancellation point.  But due to similarity with an POSIX interface
   or due to the implementation it is a cancellation point and
   therefore not marked with __THROW.  */
extern _IO_ssize_t parseline (char **__restrict __lineptr,
                            size_t *__restrict __n,
                            FILE *__restrict __stream) __wur;
#endif
[...] |
If you don't do this, the installation will fail because of the following error:
htpasswd.c:101:error:conflicting types for 'getline'
/usr/include/stdio.h:671:note:previous declaration of 'getline' was here
make[2]:*** [htpasswd.o] Error 1
make[2]:Leaving directory `/home/ISPConfig-2.2.stable/install_ispconfig/compile_aps/apache_1.3.41/src/support'
make[1]:*** [build-support] Error 1
make[1]:Leaving directory `/home/ISPConfig-2.2.stable/install_ispconfig/compile_aps/apache_1.3.41'
make:*** [build] Error 2
ERROR:Could not make Apache
You can undo the change to /usr/include/stdio.h after the successful ISPConfig installation (but don't forget to change it back whenever you want to update ISPConfig!).
22.1 A Note On SuExec
If you want to run CGI scripts under suExec, you should specify /var/www as the home directory for websites created by ISPConfig as Ubuntu's suExec is compiled with /var/www as Doc_Root. Corri
/usr/lib/apache2/suexec -V
and the output should look like this:
[email protected]:~# /usr/lib/apache2/suexec -V
-D AP_DOC_ROOT="/var/www"
-D AP_GID_MIN=100
-D AP_HTTPD_USER="www-data"
-D AP_LOG_EXEC="/var/log/apache2/suexec.log"
-D AP_SAFE_PATH="/usr/local/bin:/usr/bin:/bin"
-D AP_UID_MIN=100
-D AP_USERDIR_SUFFIX="public_html"
[email protected]:~#
So if you want to use suExec with ISPConfig, don't change the default web root (which is /var/www) if you use expert mode during the ISPConfig installation (in standard mode you can't change the web root anyway so you'll be able to use suExec in any case).
23 Links
- Ubuntu:http://www.ubuntu.com/
- Configurazione ISP:http://www.ispconfig.org/