MySQL è un sistema di gestione di database open source comunemente utilizzato negli stack di applicazioni Web per archiviare e recuperare record e informazioni.
MySQL era l'applicazione di database principale per il sistema operativo Linux fino a MariaDB , un fork di MySQL, è entrato in scena. MySQL è stato sviluppato per la prima volta da MYSQL AB, ora di proprietà di Oracle Corporation.
In questa guida, vedremo i passaggi per installare MySQL 8 su Ubuntu 18.04.
Novità di MySQL 8.0
- MySQL ora incorpora un dizionario di dati transazionali
- Supporta i ruoli, una raccolta di privilegi.
- Memorizza la cronologia delle password
- Il set di caratteri predefinito è cambiato da latin1 a utf8mb4.
- Miglioramenti in InnoDB e JSON
- Migliore gestione delle risorse
- La registrazione degli errori è stata riscritta per utilizzare l'architettura del componente MySQL
- Miglioramenti alla replica MySQL
Installa MySQL 8.0 su Ubuntu 18.04
Come già saprai, il server MySQL non è più distribuito tramite l'immagine del sistema operativo di base o i repository del sistema operativo a causa di problemi di licenza.
Come primo passo, configureremo ora il repository ufficiale di MySQL sul sistema.
wget https://dev.mysql.com/get/mysql-apt-config_0.8.10-1_all.deb
Installa il pacchetto del repository usando dpkg comando.
sudo dpkg -i mysql-apt-config_0.8.10-1_all.deb
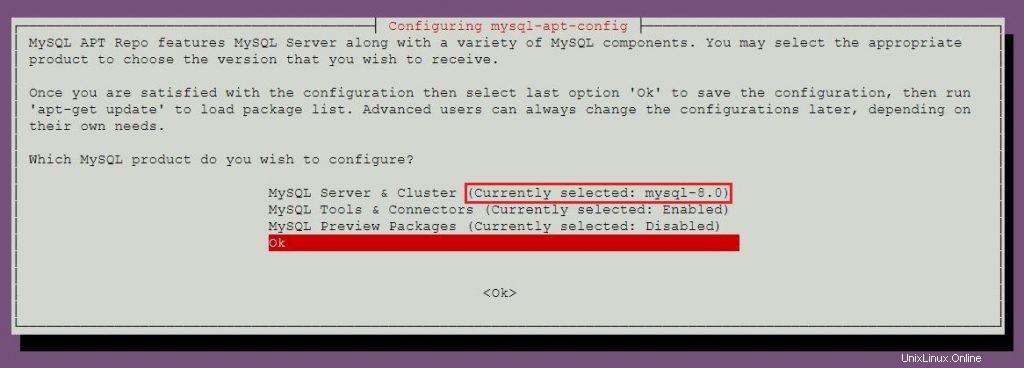
Il programma di installazione di MySQL ti chiederà di selezionare il repository MySQL. In base alla tua selezione, il programma di installazione configurerà i repository sul sistema per ricevere la versione appropriata di MySQL.
Qui sceglierò MySQL 8.0 che è quello predefinito. Quindi seleziona OK e premi invio.
Per installare MySQL 5.7, vai alla sezione Installazione MySQL 5.7 per saperne di più sulla selezione del repository MySQL 5.7.
Aggiorna l'indice del repository utilizzando apt-get update comando.
sudo apt-get update
Usa il apt comando per installare l'ultima versione stabile di MySQL .
sudo apt-get -y install mysql-server
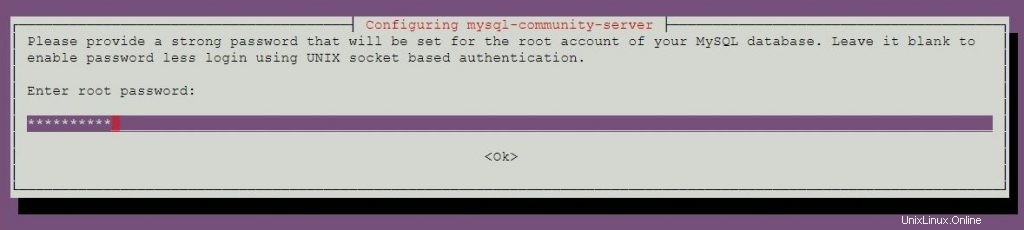
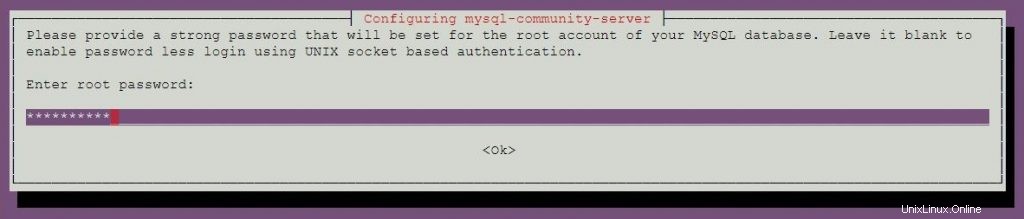
Il programma di installazione del pacchetto ti chiederà di impostare la password di root MySQL.
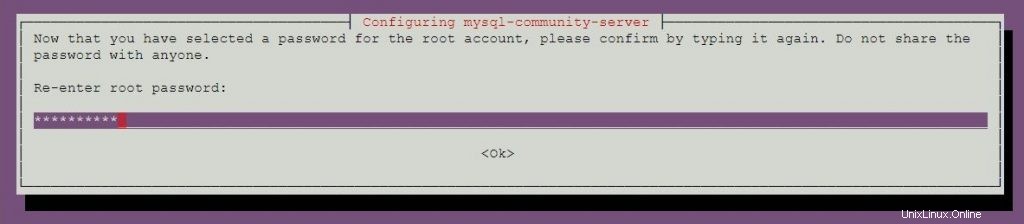
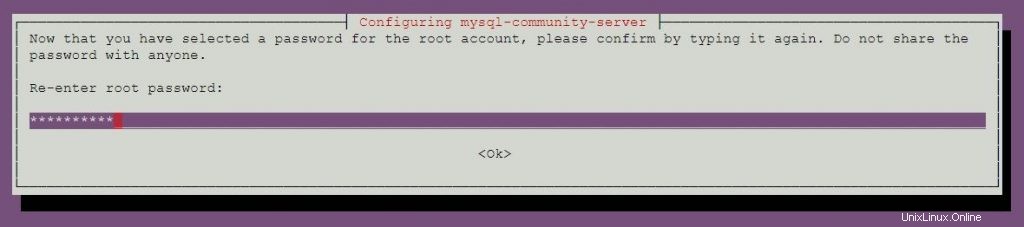
Reinserire la password.
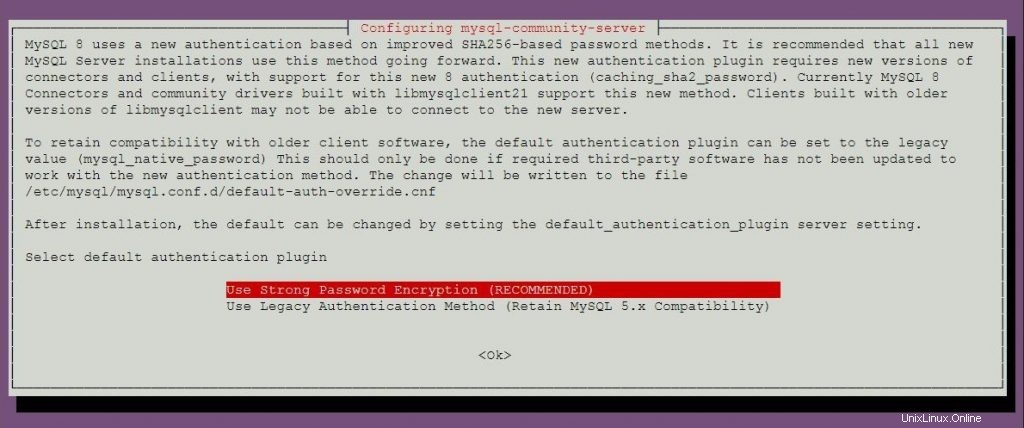
MySQL 8.0 utilizza una nuova autenticazione basata su metodi di password SHA 256 migliorati. Se scegli questa opzione, i vecchi client potrebbero non essere in grado di connettersi al server. Puoi modificare l'autenticazione predefinita in qualsiasi momento impostando default-authentication-plugin = mysql_native_password nel file di configurazione.
Seleziona il plug-in di autenticazione predefinito.
Installa MySQL 5.7 su Ubuntu 18.04
Ora configureremo il repository ufficiale di MySQL sul sistema.
wget https://dev.mysql.com/get/mysql-apt-config_0.8.10-1_all.deb
Installa il pacchetto del repository usando dpkg comando.
sudo dpkg -i mysql-apt-config_0.8.10-1_all.deb
O
Nel caso in cui il sistema abbia già il pacchetto del repository MySQL e desideri installare MySQL 5.7 sul sistema.
sudo dpkg-reconfigure mysql-apt-config
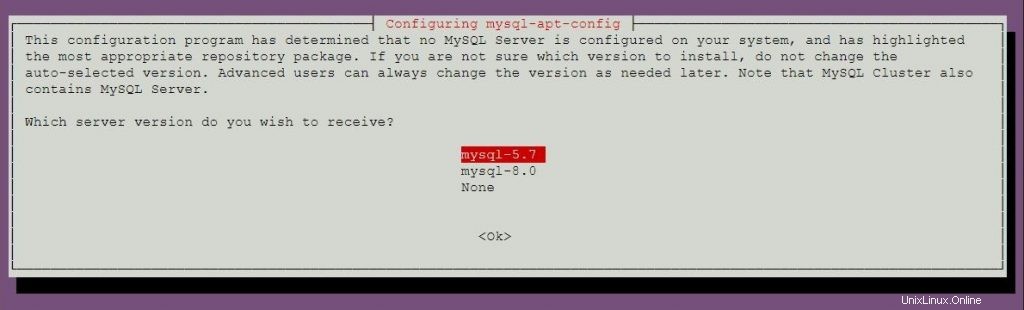
Il programma di installazione del pacchetto MySQL ti chiederà di selezionare il repository MySQL. In base alla tua selezione, il programma di installazione configurerà i repository per ricevere la versione appropriata di MySQL.
Premi il tasto Invio per cambiare la versione di MySQL in questa finestra.

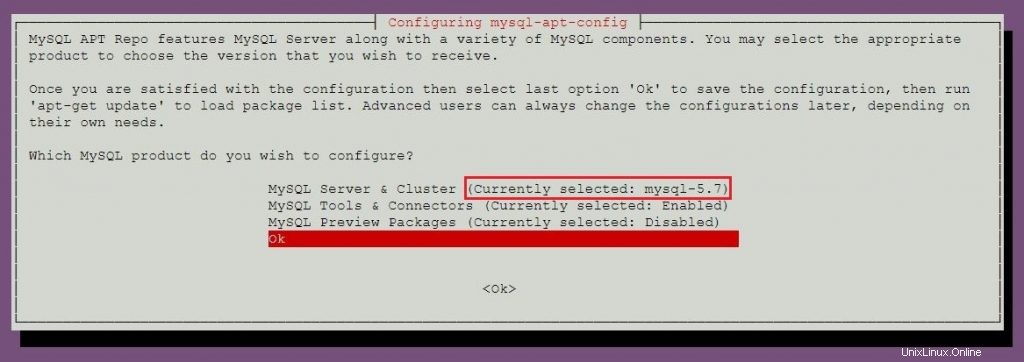
Scegli mysql-5.7 e quindi premere invio.
Scegli OK e poi premi invio.
Aggiorna l'indice del repository usando il comando apt.
sudo apt-get update
Esegui il comando seguente per installare MySQL 5.7 sul tuo computer.
sudo apt-get -y install mysql-server
Il programma di installazione del pacchetto ti chiederà di impostare la password di root MySQL.
Reinserire la password.
Avvia il server MySQL
Dopo l'installazione di MySQL, puoi avviare il server MySQL usando il comando seguente.
sudo systemctl start mysql
Abilita il server MySQL all'avvio del sistema.
sudo systemctl enable mysql
Verifica che il servizio del server MySQL sia avviato utilizzando il comando seguente.
sudo systemctl status mysql
Risultato:
● mysql.service - MySQL Community Server
   Loaded: loaded (/lib/systemd/system/mysql.service; enabled; vendor preset: enabled)
   Active: active (running) since Mon 2018-05-14 11:15:52 UTC; 27min ago
 Main PID: 3269 (mysqld)
    Tasks: 27 (limit: 1997)
   CGroup: /system.slice/mysql.service
           └─3269 /usr/sbin/mysqld --daemonize --pid-file=/var/run/mysqld/mysqld.pid

May 14 11:15:51 mysqlub18 systemd[1]: Starting MySQL Community Server...
May 14 11:15:52 mysqlub18 systemd[1]: Started MySQL Community Server.
Server MySQL sicuro
Come primo passaggio dopo l'installazione, è necessario eseguire lo script di sicurezza MySQL fornito con il pacchetto per rendere più sicura questa istanza MySQL.
sudo mysql_secure_installation
Questo comando richiede la password di root MySQL.
Securing the MySQL server deployment.

Enter password for user root: <-- Enter MySQL root password

VALIDATE PASSWORD PLUGIN can be used to test passwords
and improve security. It checks the strength of password
and allows the users to set only those passwords which are
secure enough. Would you like to setup VALIDATE PASSWORD plugin?

Press y|Y for Yes, any other key for No: n <-- N for not to validate the password
Using existing password for root.
Change the password for root ? ((Press y|Y for Yes, any other key for No) : no <-- No, as we have already set root password

 ... skipping.
By default, a MySQL installation has an anonymous user,
allowing anyone to log into MySQL without having to have
a user account created for them. This is intended only for
testing, and to make the installation go a bit smoother.
You should remove them before moving into a production
environment.

Remove anonymous users? (Press y|Y for Yes, any other key for No) : y <-- Remove anonymous users
Success.


Normally, root should only be allowed to connect from
'localhost'. This ensures that someone cannot guess at
the root password from the network.

Disallow root login remotely? (Press y|Y for Yes, any other key for No) : y <-- Disallow root login
Success.

By default, MySQL comes with a database named 'test' that
anyone can access. This is also intended only for testing,
and should be removed before moving into a production
environment.


Remove test database and access to it? (Press y|Y for Yes, any other key for No) : y <-- Remove test database
 - Dropping test database...
Success.

 - Removing privileges on test database...
Success.

Reloading the privilege tables will ensure that all changes
made so far will take effect immediately.

Reload privilege tables now? (Press y|Y for Yes, any other key for No) : y <-- Reload privilege table
Success.

All done!
Lavora con MySQL Server
Accedi al server MySQL con l'utente root e la password che hai impostato durante l'installazione di MySQL.
mysql -u root -p
MySQL 8.0:
Enter password:
Welcome to the MySQL monitor.  Commands end with ; or \g.
Your MySQL connection id is 8
Server version: 8.0.11 MySQL Community Server - GPL

Copyright (c) 2000, 2018, Oracle and/or its affiliates. All rights reserved.

Oracle is a registered trademark of Oracle Corporation and/or its
affiliates. Other names may be trademarks of their respective
owners.

Type 'help;' or '\h' for help. Type '\c' to clear the current input statement.

mysql>
MySQL 5.7:
Enter password:
Welcome to the MySQL monitor.  Commands end with ; or \g.
Your MySQL connection id is 4
Server version: 5.7.21 MySQL Community Server (GPL)

Copyright (c) 2000, 2018, Oracle and/or its affiliates. All rights reserved.

Oracle is a registered trademark of Oracle Corporation and/or its
affiliates. Other names may be trademarks of their respective
owners.

Type 'help;' or '\h' for help. Type '\c' to clear the current input statement.

mysql>
Questo è tutto.