Questo è un "copia e incolla" Come fare! Il modo più semplice per seguire questo tutorial è utilizzare un client a riga di comando/client SSH (come PuTTY per Windows) e copiare e incollare semplicemente i comandi (tranne dove devi fornire informazioni personali come indirizzi IP, nomi host, password,... ). Questo aiuta a evitare errori di battitura.
ISP-ServerSetup -Ubuntu 5.10 "Breezy Badger"
Versione 1.0
Autore:Till Brehm
Questa è una descrizione dettagliata dei passaggi da eseguire per configurare un Ubuntu server basato (Ubuntu 5.10 - Breezy Badger) che offre tutti i servizi necessari agli ISP e agli hoster (server web (con capacità SSL), server di posta (con SMTP-AUTH e TLS!), server DNS, server FTP, server MySQL, POP3/POP3/ IMAP/IMAP, quota, firewall, ecc.).
Utilizzerò il seguente software:
- Server Web:Apache 2.0.x
- Server di posta:Postfix (più facile da configurare di sendmail; ha una cronologia di falle di sicurezza più breve rispetto a sendmail)
- Server DNS:BIND9
- Server FTP:proftpd
- POP3/POP3s/IMAP/IMAPs:in questo esempio puoi scegliere tra il tradizionale formato della casella di posta UNIX (usiamo quindi ipopd/ uw-imapd) o il formato Maildir (in questo caso useremo Courier-POP3/Courier-IMAP).
- Webalizer per le statistiche dei siti web
Alla fine dovresti avere un sistema che funzioni in modo affidabile ed è pronto per il pannello di controllo di webhosting gratuito ISPConfig (ovvero, ISPConfig viene eseguito su di esso dal casella).
Voglio dire innanzitutto che questo non è l'unico modo per configurare un sistema del genere. Ci sono molti modi per raggiungere questo obiettivo, ma questo è il modo in cui prendo. Non garantisco che questo funzionerà per te!
Requisiti
Per installare un tale sistema avrai bisogno di quanto segue:
- Un CD di installazione di Ubuntu (disponibile qui:http://www.ubuntu.com/download/)
- Una connessione Internet poiché descriverò un'installazione di rete in questo documento.
1 TheBase System
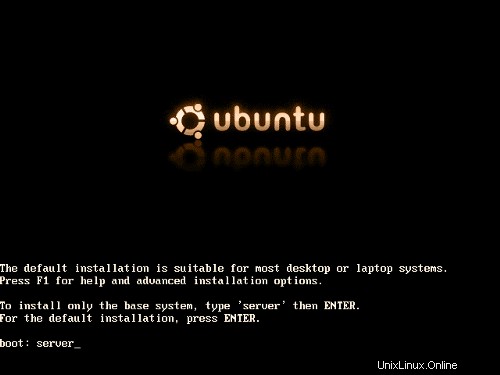
Inserisci il CD di installazione di Ubuntu nel sistema e avvia da esso (inserisci server al prompt di avvio per installare solo un sistema di base adatto ai server).
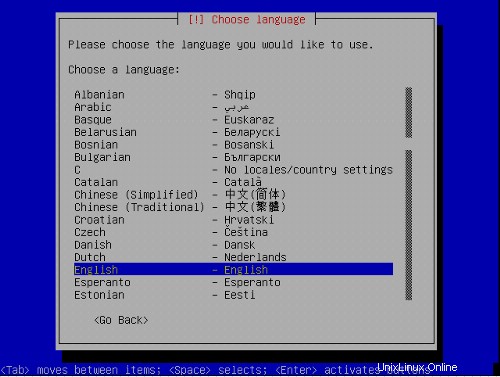
Si avvia l'installazione e prima devi scegliere la lingua:
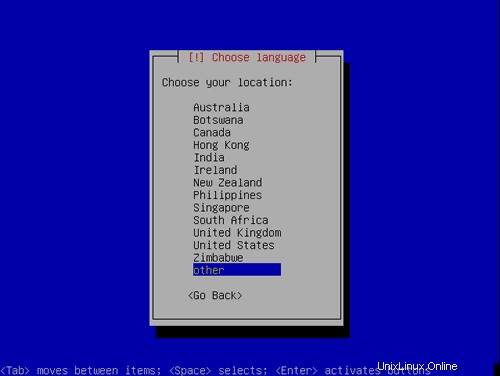
Scegli la tua posizione:
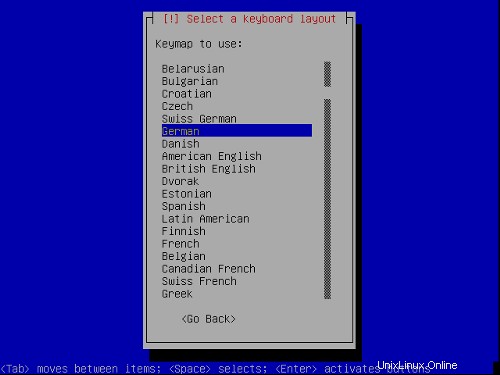
Scegli una disposizione della tastiera:

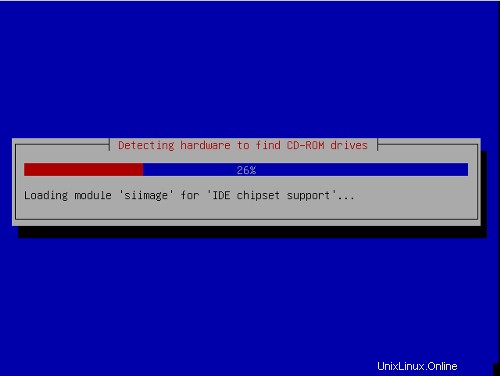
Inizia il rilevamento dell'hardware:
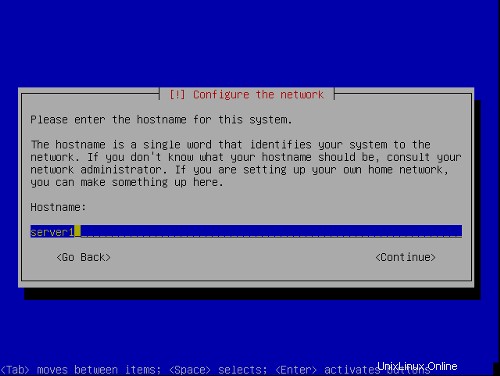
Inserisci il nome host.In questo esempio, il mio sistema si chiama server1 .example.com , quindi inserisco server1 :
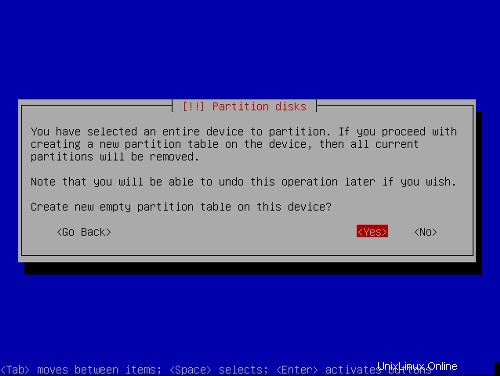
Ora creiamo le partizioni. Seleziona Modifica manualmente la tabella delle partizioni . Se ci sono già alcune partizioni, eliminale prima selezionandole, premi Invio e quindi seleziona Elimina.

Userò il seguente schema di partizione:
/boot 50 MB
/swap 1GB
/ 10 GB
/var il resto del disco rigido
Creazione di una partizione:Seleziona il tuo disco rigido (nel mio caso SCSI1), premi invio, quindi:

Creazione di una tabella di partizioni:Seleziona SPAZIO LIBERO , premi invio, quindi:

1) Seleziona Crea nuova partizione .
2) Immettere la dimensione della partizione. I valori possono essere inseriti in MB e GB o in percentuale(%)
3) Seleziona il tipo di partizione:primary
4) Seleziona la posizione della partizione:inizio
5) Modifica Utilizza come :Userò EXT3 per tutte le partizioni tranne la partizione di swap, che è di tipo swap.
6) Modifica:Seleziona il punto di montaggio
7) Seleziona Impostazione della partizione completata
Ripeti questa operazione per tutte le partizioni nella tabella delle partizioni sopra.
Ora la tabella delle partizioni dovrebbe essere simile a questa:
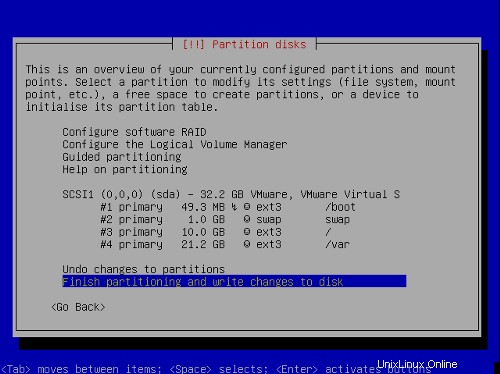
Seleziona Termina partizionamento e scrivi le modifiche su disco , quindi Sì ,per procedere con il passaggio successivo.
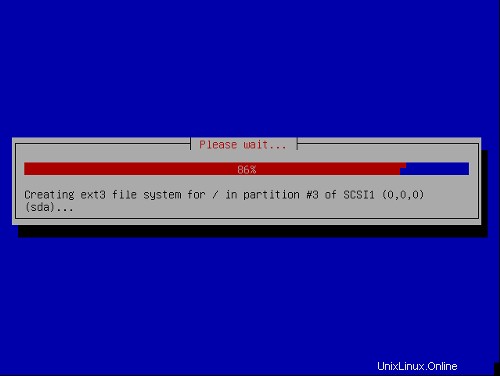
Ora il sistema di base è in fase di installazione:
Configura il tuo fuso orario:

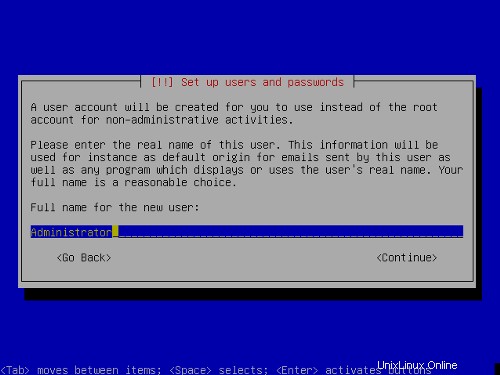
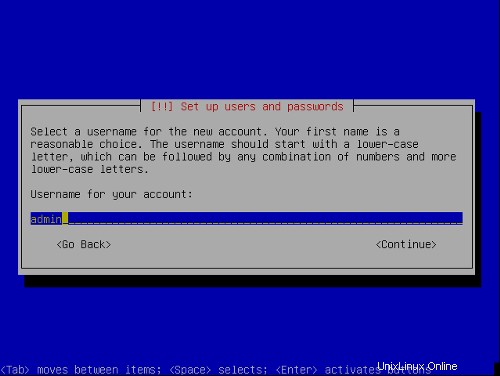
Configura un utente:

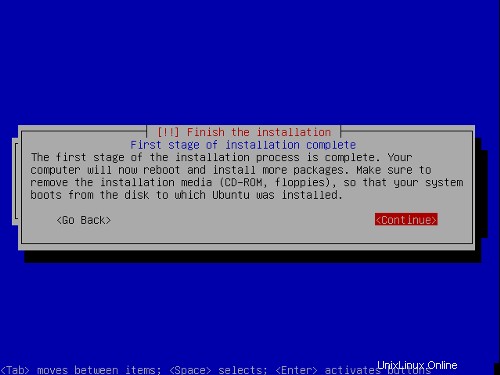
La prima fase del processo di installazione è terminata e il server si avvia nel Linux Ubuntu installato.
2 Installazione e configurazione del resto del sistema
Abilita utente root
Ora posso accedere con il nome utente e la password che ho inserito sopra. Per prima cosa abilito l'utente root per facilitare l'installazione. Puoi disabilitarlo in seguito, se lo desideri.
radice sudopasswd
su
Ora siamo loggati come utente root.
Configura TheNetwork
Poiché il programma di installazione di Ubuntu ha configurato il nostro sistema per ottenere le sue impostazioni di rete tramite DHCP, dobbiamo cambiarlo ora perché un server dovrebbe avere un indirizzo IP statico . Modifica/etc/network/interfaces e adattarlo alle tue esigenze (in questa configurazione di esempio userò l'indirizzo IP 192.168.0.100 ):
# This file describes the network interfaces available on your system |
Se vuoi aggiungere l'indirizzo IP 192.168.0.101 all'interfaccia eth0 dovresti cambiare il file in modo che assomigli a questo:
# This file describes the network interfaces available on your system |
Quindi riavvia la tua rete:
/etc/init.d/networkingrestart
Modifica /etc/hosts e aggiungi i tuoi nuovi indirizzi IP:
127.0.0.1 localhost.localdomain localhost server1 |
Impostazione del nome host
echo server1.example.com> /etc/hostname
/bin/hostname -F /etc/hostname
Modifica /etc/apt/sources.listE aggiorna la tua installazione Linux
Modifica /etc/apt/sources.list .Dovrebbe apparire così:
# deb cdrom:[Ubuntu 5.10 _Breezy Badger_ - Release i386 (20051012)]/ breezy main restricted |
apt-get update
apt-get upgrade
InstallSSH Demon
apt-get install sshopenssh-server
Installa/Rimuovi alcuni software
Ora installiamo del software di cui abbiamo bisogno in seguito e rimuoviamo alcuni pacchetti che non ci servono:
apt-get install binutilscpp cpp-4.0 fetchmail flex gcc gcc-4.0 libarchive-zip-perl libc6-dev libcompress-zlib-perllibdb4.3 -dev libpcre3 libpopt-dev linux-kernel-headers lynx m4 make ncftp nmapopenssl perl perl-modules unzip zip zlib1g-dev autoconf automake1.9 libtoolbison autotools-dev cpp g++ (in1 Line!!)
Quota
quota di installazione apt-get
Modifica /etc/fstab per assomigliare a questo (ho aggiunto ,usrquota,grpquota alle partizioni con il punto di montaggio / e /var ):
# /etc/fstab: static file system information. |
Quindi esegui:
touch /quota.user /quota.group
chmod 600 /quota.*
mount -o remount /
tocca /var/quota.user /var/quota.group
chmod 600 /var/quota.*
mount -o remount /var
quotacheck -avugm
quotaon -avug
Server DNS
apt-getinstall bind9
Per motivi di sicurezza, vogliamo eseguire BIND in chroot, quindi dobbiamo eseguire i seguenti passaggi:
/etc/init.d/bind9 stop
Modifica il file /etc/default/bind9 in modo che il demone venga eseguito come utente non privilegiato 'bind ', chrooted su /var/lib/named .Modifica la riga:OPTS=" -ubind " in modo che si legga OPTIONS="-u bind-t /var/lib/named" :
OPTIONS="-u bind -t /var/lib/named" |
Crea le directory necessarie sotto /var/lib :
mkdir -p /var/lib/named/etc
mkdir /var/lib/named/dev
mkdir -p /var/lib/named/var/cache/bind
mkdir -p /var/lib/named/var/run/bind/run
Quindi sposta la directory di configurazione da /etc a /var/lib/named/etc :
mv /etc/bind /var/lib/named/etc
Crea un collegamento simbolico alla nuova directory di configurazione dalla vecchia posizione (per evitare problemi quando bind viene aggiornato in futuro):
ln -s /var/lib/named/etc/bind/etc/bind
Crea dispositivi nulli e casuali e correggi i permessi delle directory:
mknod /var/lib/named/dev/nullc 1 3
mknod /var/lib/named/dev /random c 1 8
chmod 666 /var/lib/named/dev/null /var/lib/named/dev/random
chown -R bind:bind /var/lib/named/var/ *
chown -R bind:bind /var/lib/named/etc/bind
Dobbiamo modificare lo script di avvio /etc/init.d/ log di sistema di sysklogd in modo che possiamo ancora ottenere messaggi importanti registrati nei registri di sistema. Modifica la riga: SYSLOGD="-u syslog" in modo che si legga:SYSLOGD="-u syslog -a /var/lib/named/dev/log" :
#! /bin/sh |
Riavvia il loggingdaemon:
/etc/init.d/sysklogd restart
Avvia BIND e controlla /var/log/syslog per eventuali errori:
/etc/init.d/bind9 start
MySQL
apt-getinstall mysql-server mysql-client libmysqlclient12-dev
mysqladmin -u root passwordyourrootsqlpassword
mysqladmin -h server1.example.com -u root password yourrootsqlpassword
Quando esegui netstat-tap ora dovresti vedere una linea come questa:
tcp 0 0 localhost.localdo:mysql *:* LISTEN 2449/mysqld |
il che significa che MySQL è accessibile sulla porta 3306. Puoi andare alla sezione successiva (Postfix). Se non vedi questa riga, modifica /etc/mysql/my.cnf e commenta skip-networking :
# skip-networking |
Se dovessi modificare/etc/mysql/my.cnf devi riavviare MySQL:
/etc/init.d/mysql restart
Postfix
Per installare Postfix con SMTP-AUTH e TLS, procedi come segue:
apt-get install postfixpostfix-tls libsasl2 sasl2-bin libsasl2-modules libdb3-util procmail (1 riga!)
dpkg-reconfigurepostfix
<- Sito Internet
<- NESSUNO
<- server1.example.com
<- server1.example.com, localhost.example.com, localhost
<- No
<- 127.0.0.0/8
<- 0
<- +
postconf -e 'smtpd_sasl_local_domain='
postconf -e 'smtpd_sasl_auth_enable =yes'
postconf -e 'smtpd_sasl_security_options =noanonymous'
postconf -e 'broken_sasl_auth_clients =yes'
postconf -e 'smtpd_recipient_restrictions =permit_sasl_authenticated,permit_mynetworks,reject_unauth_destination'
postconf -e 'inet_interfaces =all'
echo 'pwcheck_method:saslauthd'>> /etc/postfix/sasl/smtpd.conf
echo 'mech_list:login semplice'>> /etc/postfix/sasl/smtpd.conf
mkdir /etc/postfix/ssl
cd /etc/postfix/ssl/
openssl genrsa - des3 -rand /etc/hosts -out smtpd.key 1024
chmod 600 smtpd.key
openssl req -new -key smtpd.key -out smtpd.csr
openssl x509 -req -days 3650 -in smtpd.csr -signkey smtpd.key -out smtpd.crt
openssl rsa -in smtpd.key -out smtpd.key.unencrypted
mv -f smtpd.key.unencrypted smtpd.key
openssl req -new -x509 -extensions v3_ca -keyout cakey.pem -out cacert.pem -days3650
postconf -e 'smtpd_tls_auth_only=no'
postconf -e 'smtp_use_tls =yes'
postconf - e 'smtpd_use_tls =yes'
postconf -e 'smtp_tls_note_starttls_offer =yes'
postconf -e 'smtpd_tls_key_file =/etc/postfix/ssl/smtpd.key'
postconf -e 'smtpd_tls_cert_file =/ etc/postfix/ssl/smtpd.crt'
postconf -e 'smtpd_tls_CAfile =/etc/postfix/ssl/cacert.pem'
postconf -e 'smtpd_tls_loglevel =1'
postconf -e 'smtpd_tls_received_header =yes'
postconf -e 'smtpd_tls_session_cache_timeout =3600s'
postconf -e 'tls_random_source =dev:/dev/urandom'
postconf -e 'myhostname =server1.example.com'
Il file /etc/postfix/main.cf ora dovrebbe apparire così:
# See /usr/share/postfix/main.cf.dist for a commented, more complete version |
/etc/init.d/postfixrestart
L'autenticazione sarà eseguita da saslauthd .Dobbiamo cambiare alcune cose per farlo funzionare correttamente. Perché Postfix è radicato in /var/spool/postfix dobbiamo fare quanto segue:
mkdir -p /var/spool/postfix/var/run/saslauthd
rm -fr /var/run/saslauthd
Ora dobbiamo modificare /etc/default/saslauthd per attivare saslauthd .Remove # in front of START=yes and add the line PARAMS="-m/var/spool/postfix/var/run/saslauthd" :
# This needs to be uncommented before saslauthd will be run automatically |
Finally we haveto edit /etc/init.d/saslauthd .Change the line
dir=`dpkg-statoverride --list $PWDIR` |
to
#dir=`dpkg-statoverride --list $PWDIR` |
Then change thevariables PWDIR and PIDFILE and add the variable dir at the beginning of the file:
PWDIR="/var/spool/postfix/var/run/${NAME}" |
/etc/init.d/saslauthd should now looklike this:
#!/bin/sh -e |
Now start saslauthd :
/etc/init.d/saslauthd start
To see if SMTP-AUTHand TLS work properly now run the following command:
telnetlocalhost 25
After you haveestablished the connection to your postfix mail server type
ehlolocalhost
If you see thelines
250-STARTTLS
and
250-AUTH
everything is fine.

Type
quit
to return to thesystem's shell.
Courier-IMAP/Courier-POP3
Install Courier-IMAP/Courier-IMAP-SSL(for IMAPs on port 993) and Courier-POP3/Courier-POP3-SSL (for POP3s on port995).
apt-get install courier-authdaemoncourier-base courier-imap courier-imap-ssl courier-pop courier-pop-ssl courier-sslgamin libgamin0 libglib2.0-0 (oneline!)
<- No
<- OK
Then configurePostfix to deliver emails to a user's Maildir:
postconf -e 'home_mailbox=Maildir/'
postconf -e 'mailbox_command ='
/etc/init.d/postfix restart
Please go sureto enable Maildir underManagement -> Settings -> EMail in the ISPConfig web interface.
Apache
Run
apt-get install apache2apache2-common apache2-doc apache2-mpm-prefork apache2-utils libapr0 libexpat1ssl-cert (1line!)
apt-get install autoconf automake1.4 autotools-dev libapache2-mod-php4 libkrb53php4 php4-common php4-dev php4-imagick php4-mcrypt php4-rrdtool php4-sqlitephp4-curl php4-domxml php4-gd php4-imap php4-ldap php4-mcal php4-mhash php4-mysqlphp4-odbc php4-pear php4-xslt (1 line!)
<- Yes
Edit /etc/apache2/apache2.conf . Change
DirectoryIndex index.html index.cgi index.pl index.php index.xhtml |
to
DirectoryIndex index.html index.htm index.shtml index.cgi index.php index.php3 index.pl index.xhtml |
Edit /etc/mime.types and comment out the following lines:
#application/x-httpd-php phtml pht php |
Edit /etc/apache2/mods-enabled/php4.conf and comment out the following lines:
<IfModule mod_php4.c> |
Edit /etc/apache2/ports.conf and add Listen 443 :
Listen 80 |
Now we have toenable some Apache modules (SSL , rewrite and suexec ):
a2enmod ssl
a2enmod rewrite
a2enmod suexec
a2enmod include
Reload Apacheconfiguration:
/etc/init.d/apache2force-reload
Proftpd
apt-getinstall proftpd proftpd-common ucf
<- standalone
For security reasonsyou can add the following lines to /etc/proftpd.conf (thanks to Reinaldo Carvalho; more information can be found here:http://proftpd.linux.co.uk/localsite/Userguide/linked/userguide.html):
DefaultRoot ~
IdentLookups off
ServerIdent on "FTP Server ready."
and restart Proftpd:
/etc/init.d/proftpd restart
Webalizer
apt-getinstall webalizer
Install somePerl Modules needed by SpamAssassin (comes with ISPConfig)
apt-get installlibhtml-parser-perl libdb-file-lock-perl libnet-dns-perl
On To TheNext Step...
The configurationof the server is now finished, and we go on by installing ISPConfigon it.
3 Installing ISPConfig
I will installthe current ISPConfig version. Download the current ISPConfig version from http://www.ispconfig.org/downloads.htmto your /tmp directory.
Unpack the ISPConfig-archiveand change to the directory install_ispconfig :
tarxvfz ISPConfig*.tar.gz
cd install_ispconfig
Start the setupscript
./setup
The installer willnow compile an Apache with PHP5 that will run on port 81 and is needed by theISPConfig system itself. It will not interfere with your existing Apache installationso you can go on unworried.
When the ISPConfigApache is built, a custom SSL certificate is built. Therefore you are askeda few questions. You can accept the default values, or you can enter new valuesthere, this does not matter:
In step 7 (EncryptingRSA private key of CA with a pass phrase for security [ca.key] ) andstep 8 (Encrypting RSA private keyof SERVER with a pass phrase for security [server.key] ) of the certificatecreation process you are asked if you want to encrypt the respective key now.Choose n there becauseotherwise you will always be asked for a password whenever you want to restartthe ISPConfig system which means it cannot be restarted without human interaction!
If the compilationfails, the setup is stopped and all compiled files are removed. From the errormessage you get you should be able to see the reason for the failure (in mostcases a package (like the MySQL header files) is missing). Try to solve theproblem and the re-run ./setup .
In case of successthe setup goes on:
Pleasechoose your language. This is the language of the ISPConfig interface.
Afterwards youare shown the ISPConfig licence (BSD licence). Please read it carefully! Youaccept it by typing y .If you do not want to accept the ISPConfig licence, type n ,and the installation routine stops.
As installation mode I chose expert becausei want to set the website root to /var/www .When you are asked for installation mode, type 2 and hit return.
Now you are askif the daemons like postfix etc. are recognized correctly and for their filelocations, chose yes y .
When you are asked:
Web-Root:/home/www
Is this correct? [y/n]
choose n and enter /var/www as Web-Root.
Now you are askedfor some installation settings:
Pleaseenter your MySQL server: localhost
Please enter your MySQL user: root
Please enter your MySQL password: (Enter the password you chose when setting up the MySQL Server)
Please enter a name for the ISPConfigdatabase (e.g. db_ispconfig): db_ispconfig
Please enter the IP addressof the ISPConfig web (e.g. 192.168.0.1): 192.168.0.100 (Enteryour IP here)
Now you are askto enter the host and domain of your server. If your server has a host and domainname,enter them now. As this is a test install in my local network, I leave the hostempty and enter my IP address instead of the domain.
Pleaseenter the host name (e.g. www):
Please enter the domain (e.g.xyz.de): 192.169.0.100
Pleaseselect the protocol (http or https (SSL encryption)) to use to access the ISPConfigsystem:
1) HTTPS
2) HTTP
Your Choice: 1
After you haveanswered the questions ISPConfig should be duly installed. If you indicated www as host and xyz.com as the domain during the installation, you will find the ISPConfig interfaceunder https://www.xyz.de:81 or http://www.xyz.de:81 .Here you can login first with the user name admin and password admin . Itis recommended to change the password immediately! This can be done in the ISPConfigweb interface under Tools -> Changepassword .
Then go to Management-> Server -> Settings in the ISPConfig control panel and tickthe Maildir checkbox onthe EMail tab.
If your serverhas more than one IP address, please check if your additional IP addresses havebeen correctly detected by the installation routine under Management-> Server ->
Settings on the tab Server-> IP List .
You can find thewhole ISPConfig installation instructions here:http://www.ispconfig.org/manual_installation.htm
The ISPConfig manualscan be found here:http://www.ispconfig.org/documentation.htm
Links
- http://www.ubuntu.com
- http://www.ispconfig.org