Questo tutorial è Copyright (c) 2013 di Falko Timme. È derivato da un tutorial di Christoph Haas che puoi trovare su http://workaround.org. Sei libero di utilizzare questo tutorial con la licenza Creative Commons 2.5 o qualsiasi versione successiva.
Questo documento descrive come installare un server di posta Postfix basato su utenti e domini virtuali, ovvero utenti e domini che si trovano in un database MySQL. Dimostrerò anche l'installazione e la configurazione di Courier (Courier-POP3, Courier-IMAP), in modo che Courier possa autenticarsi sullo stesso database MySQL utilizzato da Postfix.
Il server Postfix risultante è in grado di SMTP-AUTH e TLS e quota (quota non è incorporata in Postfix per impostazione predefinita, mostrerò come applicare una patch a Postfix in modo appropriato). Le password sono archiviate in crittografate modulo nel database (la maggior parte dei documenti che ho trovato riguardavano password in testo normale, il che rappresenta un rischio per la sicurezza). In aggiunta a ciò, questo tutorial copre l'installazione di Amavisd , SpamAssassin e ClamAV in modo che le e-mail vengano scansionate alla ricerca di spam e virus. Mostrerò anche come installare SquirrelMail come interfaccia webmail in modo che gli utenti possano leggere e inviare e-mail e modificare le proprie password.
Il vantaggio di tale configurazione "virtuale" (utenti virtuali e domini in un database MySQL) è che è molto più performante di una configurazione basata su utenti di sistema "reali". Con questa configurazione virtuale il tuo server di posta può gestire migliaia di domini e utenti. Inoltre, è più facile da amministrare perché hai a che fare con il database MySQL solo quando aggiungi nuovi utenti/domini o modifichi quelli esistenti. Niente più comandi postmap per creare file db, niente più ricarica di Postfix, ecc. Per l'amministrazione del database MySQL puoi usare strumenti web based come phpMyAdmin che sarà installato anche in questo howto. Il terzo vantaggio è che gli utenti hanno un indirizzo e-mail come nome utente (invece di un nome utente + un indirizzo e-mail) che è più facile da capire e tenere a mente.
Questo howto vuole essere una guida pratica; non copre le basi teoriche. Sono trattati in molti altri documenti nel Web.
Questo documento viene fornito senza garanzie di alcun tipo! Voglio dire che questo non è l'unico modo per creare un sistema del genere. Ci sono molti modi per raggiungere questo obiettivo, ma questo è il modo in cui prendo. Non garantisco che questo funzionerà per te!
1 Nota preliminare
Questo tutorial è basato su CentOS 6.3 x86_64, quindi dovresti configurare un'installazione di base del server CentOS 6.3 prima di continuare con questo tutorial. Il sistema dovrebbe avere un indirizzo IP statico. Uso 192.168.0.100 come indirizzo IP in questo tutorial e server1.example.com come nome host.
Dovresti assicurarti che il firewall sia disattivato (almeno per ora) e che SELinux sia disabilitato (questo è importante!).
2 Abilita repository aggiuntivi e installa del software
Per prima cosa importiamo le chiavi GPG per i pacchetti software:
rpm --import /etc/pki/rpm-gpg/RPM-GPG-KEY*
Quindi abilitiamo i repository RPMforge ed EPEL sul nostro sistema CentOS poiché molti dei pacchetti che installeremo nel corso di questo tutorial non sono disponibili nei repository CentOS 6.3 ufficiali:
rpm --import http://dag.wieers.com/rpm/packages/RPM-GPG-KEY.dag.txt
cd /tmp
wget http://pkgs.repoforge.org/rpmforge-release/rpmforge-release-0.5.2-2.el6.rf.x86_64.rpm
rpm -ivh rpmforge-release-0.5.2-2.el6.rf.x86_64.rpm
(Se il link sopra non funziona più, puoi trovare la versione corrente di rpmforge-release qui:http://packages.sw.be/rpmforge-release/)
rpm --import https://fedoraproject.org/static/0608B895.txt
wget http://dl.fedoraproject.org/pub/epel/6/x86_64/epel-release-6-8.noarch.rpm
rpm -ivh epel-release-6-8.noarch.rpm
yum install yum-priorities
Modifica /etc/yum.repos.d/epel.repo...
vi /etc/yum.repos.d/epel.repo
... e aggiungi la linea priority=10 alla sezione [epel]:
[epel] name=Extra Packages for Enterprise Linux 6 - $basearch #baseurl=http://download.fedoraproject.org/pub/epel/6/$basearch mirrorlist=https://mirrors.fedoraproject.org/metalink?repo=epel-6&arch=$basearch failovermethod=priority enabled=1 priority=10 gpgcheck=1 gpgkey=file:///etc/pki/rpm-gpg/RPM-GPG-KEY-EPEL-6 [...] |
Quindi aggiorniamo i nostri pacchetti esistenti sul sistema:
yum update
Ora installiamo alcuni software di cui avremo bisogno in seguito:
yum groupinstall 'Development Tools'
3 Installa Apache, MySQL, phpMyAdmin
Tutto questo può essere installato con un solo comando (inclusi i pacchetti di cui abbiamo bisogno per compilare Courier-IMAP):
yum install ntp httpd mysql-server php php-mysql php-mbstring rpm-build gcc mysql-devel openssl-devel cyrus-sasl-devel pkgconfig zlib-devel phpMyAdmin pcre-devel openldap-devel postgresql-devel expect libtool-ltdl-devel openldap-servers libtool gdbm-devel pam-devel gamin-devel libidn-devel db4-devel mod_ssl telnet sqlite-devel
4 Installa Courier-IMAP, Courier-Authlib e Maildrop
Sfortunatamente non ci sono pacchetti rpm per Courier-IMAP, Courier-Authlib e Maildrop, quindi dobbiamo costruirli noi stessi.
I pacchetti RPM non dovrebbero essere compilati come root; Courier-imap rifiuterà anche di compilare se rileva che la compilazione viene eseguita come utente root. Pertanto ora creiamo un normale account utente (falko in questo esempio) e gli diamo una password:
useradd -m -s /bin/bash falko
passwd falko
Avremo bisogno del comando sudo in seguito in modo che l'utente falko possa compilare e installare i pacchetti rpm. Ma prima, dobbiamo consentire a falko di eseguire tutti i comandi usando sudo:
Corri
visudo
Nel file che si apre c'è una riga radice ALL=(ALL) ALL. Aggiungi una linea simile per falko appena sotto quella linea:
[...] |
Ora siamo pronti per costruire il nostro pacchetto rpm. Prima diventa l'utente falko:
su falko
Quindi creiamo il nostro ambiente di costruzione:
mkdir $HOME/rpm
mkdir $HOME/rpm/SOURCES
mkdir $HOME/rpm/SPECS
mkdir $HOME/rpm/BUILD
mkdir $HOME/rpm/BUILDROOT
mkdir $HOME/rpm/SRPMS
mkdir $HOME/rpm/RPMS
mkdir $HOME/rpm/RPMS/i386
mkdir $HOME/rpm/RPMS/x86_64
echo "%_topdir $HOME/rpm" >> $HOME/.rpmmacros
Ora creiamo una directory di download e scarichiamo i file sorgente da http://www.courier-mta.org/download.php:
mkdir $HOME/downloads
cd $HOME/downloads
wget --no-check-certificate https://sourceforge.net/projects/courier/files/authlib/0.65.0/courier-authlib-0.65.0.tar.bz2/download
wget --no-check-certificate https://sourceforge.net/projects/courier/files/imap/4.12.0/courier-imap-4.12.0.tar.bz2/download
wget --no-check-certificate https://sourceforge.net/projects/courier/files/maildrop/2.6.0/maildrop-2.6.0.tar.bz2/download
Ora (sempre in $HOME/downloads) possiamo costruire corriere-authlib:
sudo rpmbuild -ta courier-authlib-0.65.0.tar.bz2
Dopo il processo di compilazione, i pacchetti rpm possono essere trovati in /root/rpmbuild/RPMS/x86_64 (/root/rpmbuild/RPMS/i386 se sei su un sistema i386). Il comando
sudo ls -l /root/rpmbuild/RPMS/x86_64
mostra i pacchetti rpm disponibili:
[[email protected] downloads]$ sudo ls -l /root/rpmbuild/RPMS/x86_64
total 544
-rw-r--r-- 1 root root 126728 Mar  4 12:49 courier-authlib-0.65.0-1.el6.x86_64.rpm
-rw-r--r-- 1 root root 274772 Mar  4 12:49 courier-authlib-debuginfo-0.65.0-1.el6.x86_64.rpm
-rw-r--r-- 1 root root  37824 Mar  4 12:49 courier-authlib-devel-0.65.0-1.el6.x86_64.rpm
-rw-r--r-- 1 root root  17256 Mar  4 12:49 courier-authlib-ldap-0.65.0-1.el6.x86_64.rpm
-rw-r--r-- 1 root root  12000 Mar  4 12:49 courier-authlib-mysql-0.65.0-1.el6.x86_64.rpm
-rw-r--r-- 1 root root  12984 Mar  4 12:49 courier-authlib-pgsql-0.65.0-1.el6.x86_64.rpm
-rw-r--r-- 1 root root   8244 Mar  4 12:49 courier-authlib-pipe-0.65.0-1.el6.x86_64.rpm
-rw-r--r-- 1 root root  10620 Mar  4 12:49 courier-authlib-sqlite-0.65.0-1.el6.x86_64.rpm
-rw-r--r-- 1 root root  34644 Mar  4 12:49 courier-authlib-userdb-0.65.0-1.el6.x86_64.rpm
[[email protected] downloads]$
Seleziona quelli che desideri installare e installali in questo modo:
sudo rpm -ivh /root/rpmbuild/RPMS/x86_64/courier-authlib-0.65.0-1.el6.x86_64.rpm /root/rpmbuild/RPMS/x86_64/courier-authlib-mysql-0.65.0-1.el6.x86_64.rpm /root/rpmbuild/RPMS/x86_64/courier-authlib-devel-0.65.0-1.el6.x86_64.rpm
Ora torniamo alla nostra directory dei download:
cd $HOME/downloads
Esegui i seguenti comandi per creare le directory richieste/modificare i permessi delle directory (perché altrimenti il processo di compilazione per Courier-Imap fallirà):
sudo mkdir -p /var/cache/ccache/tmp
sudo chmod o+rwx /var/cache/ccache/
sudo chmod 777 /var/cache/ccache/tmp
Ora esegui di nuovo rpmbuild, questa volta senza sudo, altrimenti la compilazione fallirà perché è stata eseguita come root:
rpmbuild -ta courier-imap-4.12.0.tar.bz2
Dopo il processo di compilazione, i pacchetti rpm possono essere trovati in $HOME/rpm/RPMS/x86_64 ($HOME/rpm/RPMS/i386 se sei su un sistema i386):
cd $HOME/rpm/RPMS/x86_64
Il comando
ls -l
mostra i pacchetti rpm disponibili:
[[email protected] x86_64]$ ls -l
total 1116
-rw-rw-r-- 1 falko falko 332112 Mar  4 12:53 courier-imap-4.12.0-1.x86_64.rpm
-rw-rw-r-- 1 falko falko 805288 Mar  4 12:53 courier-imap-debuginfo-4.12.0-1.x86_64.rpm
[[email protected] x86_64]$
Puoi installare corriere-imap in questo modo:
sudo rpm -ivh courier-imap-4.12.0-1.x86_64.rpm
Ora torniamo alla nostra directory dei download:
cd $HOME/downloads
ed esegui di nuovo rpmbuild, questa volta per creare un pacchetto maildrop:
sudo rpmbuild -ta maildrop-2.6.0.tar.bz2
Dopo il processo di compilazione, i pacchetti rpm possono essere trovati in /root/rpmbuild/RPMS/x86_64 (/root/rpmbuild/RPMS/i386 se sei su un sistema i386). Il comando
sudo ls -l /root/rpmbuild/RPMS/x86_64
mostra i pacchetti rpm disponibili:
[[email protected] downloads]$ sudo ls -l /root/rpmbuild/RPMS/x86_64
total 1732
-rw-r--r-- 1 root root 126728 Mar  4 12:49 courier-authlib-0.65.0-1.el6.x86_64.rpm
-rw-r--r-- 1 root root 274772 Mar  4 12:49 courier-authlib-debuginfo-0.65.0-1.el6.x86_64.rpm
-rw-r--r-- 1 root root  37824 Mar  4 12:49 courier-authlib-devel-0.65.0-1.el6.x86_64.rpm
-rw-r--r-- 1 root root  17256 Mar  4 12:49 courier-authlib-ldap-0.65.0-1.el6.x86_64.rpm
-rw-r--r-- 1 root root  12000 Mar  4 12:49 courier-authlib-mysql-0.65.0-1.el6.x86_64.rpm
-rw-r--r-- 1 root root  12984 Mar  4 12:49 courier-authlib-pgsql-0.65.0-1.el6.x86_64.rpm
-rw-r--r-- 1 root root   8244 Mar  4 12:49 courier-authlib-pipe-0.65.0-1.el6.x86_64.rpm
-rw-r--r-- 1 root root  10620 Mar  4 12:49 courier-authlib-sqlite-0.65.0-1.el6.x86_64.rpm
-rw-r--r-- 1 root root  34644 Mar  4 12:49 courier-authlib-userdb-0.65.0-1.el6.x86_64.rpm
-rw-r--r-- 1 root root 286752 Mar  4 13:03 maildrop-2.6.0-1.x86_64.rpm
-rw-r--r-- 1 root root 751304 Mar  4 13:03 maildrop-debuginfo-2.6.0-1.x86_64.rpm
-rw-r--r-- 1 root root 102052 Mar  4 13:03 maildrop-devel-2.6.0-1.x86_64.rpm
-rw-r--r-- 1 root root  66184 Mar  4 13:03 maildrop-man-2.6.0-1.x86_64.rpm
[[email protected] downloads]$
Ora puoi installare maildrop in questo modo:
sudo rpm -ivh /root/rpmbuild/RPMS/x86_64/maildrop-2.6.0-1.x86_64.rpm
Dopo aver compilato e installato tutti i pacchetti necessari, puoi diventare di nuovo root digitando
exit
5 Applica patch di quota a Postfix
Dobbiamo ottenere l'rpm sorgente di Postfix, patcharlo con la patch di quota, creare un nuovo pacchetto rpm di Postfix e installarlo.
cd /usr/src
wget http://vault.centos.org/6.3/os/Source/SPackages/postfix-2.6.6-2.2.el6_1.src.rpm
rpm -ivh postfix-2.6.6-2.2.el6_1.src.rpm
L'ultimo comando mostrerà alcuni avvisi che puoi ignorare:
warning: user mockbuild does not exist - using root
warning: group mockbuild does not exist - using root
cd /root/rpmbuild/SOURCES
wget http://vda.sourceforge.net/VDA/postfix-2.6.5-vda-ng.patch.gz
gunzip postfix-2.6.5-vda-ng.patch.gz
cd /root/rpmbuild/SPECS/
Ora dobbiamo modificare il file postfix.spec:
vi postfix.spec
Aggiungi Patch0:postfix-2.6.5-vda-ng.patch alla stanza # Patches e %patch0 -p1 -b .vda-ng alla stanza %setup -q:
[...] |
Quindi costruiamo il nostro nuovo pacchetto rpm Postfix con quota e supporto MySQL:
rpmbuild -ba postfix.spec
Il nostro pacchetto rpm Postfix viene creato in /root/rpmbuild/RPMS/x86_64 (/root/rpmbuild/RPMS/i386 se sei su un sistema i386), quindi andiamo lì:
cd /root/rpmbuild/RPMS/x86_64
Il comando
ls -l
ti mostra i pacchetti disponibili:
[[email protected] x86_64]# ls -l
total 10748
-rw-r--r-- 1 root root  126728 Mar  4 12:49 courier-authlib-0.65.0-1.el6.x86_64.rpm
-rw-r--r-- 1 root root  274772 Mar  4 12:49 courier-authlib-debuginfo-0.65.0-1.el6.x86_64.rpm
-rw-r--r-- 1 root root   37824 Mar  4 12:49 courier-authlib-devel-0.65.0-1.el6.x86_64.rpm
-rw-r--r-- 1 root root   17256 Mar  4 12:49 courier-authlib-ldap-0.65.0-1.el6.x86_64.rpm
-rw-r--r-- 1 root root   12000 Mar  4 12:49 courier-authlib-mysql-0.65.0-1.el6.x86_64.rpm
-rw-r--r-- 1 root root   12984 Mar  4 12:49 courier-authlib-pgsql-0.65.0-1.el6.x86_64.rpm
-rw-r--r-- 1 root root    8244 Mar  4 12:49 courier-authlib-pipe-0.65.0-1.el6.x86_64.rpm
-rw-r--r-- 1 root root   10620 Mar  4 12:49 courier-authlib-sqlite-0.65.0-1.el6.x86_64.rpm
-rw-r--r-- 1 root root   34644 Mar  4 12:49 courier-authlib-userdb-0.65.0-1.el6.x86_64.rpm
-rw-r--r-- 1 root root  286752 Mar  4 13:03 maildrop-2.6.0-1.x86_64.rpm
-rw-r--r-- 1 root root  751304 Mar  4 13:03 maildrop-debuginfo-2.6.0-1.x86_64.rpm
-rw-r--r-- 1 root root  102052 Mar  4 13:03 maildrop-devel-2.6.0-1.x86_64.rpm
-rw-r--r-- 1 root root   66184 Mar  4 13:03 maildrop-man-2.6.0-1.x86_64.rpm
-rw-r--r-- 1 root root 2138908 Mar  4 13:15 postfix-2.6.6-2.2.el6.x86_64.rpm
-rw-r--r-- 1 root root 7021184 Mar  4 13:15 postfix-debuginfo-2.6.6-2.2.el6.x86_64.rpm
-rw-r--r-- 1 root root   61752 Mar  4 13:15 postfix-perl-scripts-2.6.6-2.2.el6.x86_64.rpm
[[email protected] x86_64]#
Per assicurarti che nessuna versione di postfix sia stata precedentemente installata sul tuo sistema, usa:
yum remove postfix
Scegli il pacchetto Postfix e installalo in questo modo:
rpm -ivh postfix-2.6.6-2.2.el6.x86_64.rpm
6 Imposta password MySQL e configura phpMyAdmin
Avvia MySQL:
chkconfig --levels 235 mysqld on
/etc/init.d/mysqld start
Quindi imposta le password per l'account root MySQL:
mysql_secure_installation
[[email protected] ~]# mysql_secure_installation
NOTA: L'ESECUZIONE DI TUTTE LE PARTI DI QUESTO SCRIPT È CONSIGLIATA PER TUTTI MySQL
SERVER IN PRODUZIONE UTILIZZA ! PER FAVORE, LEGGERE ATTENTAMENTE OGNI PASSAGGIO!
Per accedere a MySQL per proteggerlo, avremo necessità della password
corrente per l'utente root. Se hai appena installato MySQL e
non hai impostato la password root, la password sarà vuota,
quindi dovresti premere invio qui.
Entra password corrente per la radice (inserire per nessuno): <-- INVIO
OK, password utilizzata con successo, andando avanti...
L'impostazione della password di radice garantisce che nessuno possa accedere a MySQL
utente root senza l'autorizzazione appropriata.
Impostare la password root? [S/n] <-- ENTER
Nuova password: <-- yourrootsqlpassword
Reinserire nuova password: <-- yourrootsqlpassword
Password aggiornata con successo!
Ricaricamento delle tabelle dei privilegi. .
... Successo!
Per impostazione predefinita, un'installazione MySQL ha un utente anonimo, consentendo a chiunque
di accedere a MySQL senza deve avere un account utente creato per
loro. Questo è destinato solo a testing, e a rendere l'installazione
andare un po' più agevole. Dovresti rimuoverli prima di trasferirti in un
ambiente di produzione.
Rimuovere utenti anonimi? [S/n] <-- ENTER
... Successo!
Normalmente, root dovrebbe essere consentito solo di connettersi da 'localhost'. Questo
garantisce che qualcuno non può indovinare la password root dalla rete.
Disattivare l'accesso root da remoto? [S/n] <-- ENTER
... Success!
Per impostazione predefinita, MySQL viene con un database denominato 'test' a cui chiunque può
accedere. Questo è anche destinato solo a test, e dovrebbe essere rimosso
prima di trasferire in un ambiente di produzione.
Rimuovere database di test e accedere ad esso? [S/n] <-- ENTER
- Dropping database di test...
... Successo!
- Rimozione privilegi sul database di test...
... Successo !
Ricaricare le tabelle dei privilegi garantirà che tutte le modifiche apportate finora
diventeranno effettive immediatamente.
Ricaricare le tabelle dei privilegi ora? [S/n] <-- ENTER
... Successo!
Pulizia ...
Tutto fatto! Se hai completato tutti i passaggi precedenti, l'installazione di MySQL
dovrà essere protetta.
Grazie per utilizzare MySQL!
[[ email protetto] ~]#
Ora configuriamo phpMyAdmin. Cambiamo la configurazione di Apache in modo che phpMyAdmin consenta connessioni non solo da localhost (commentando la stanza
vi /etc/httpd/conf.d/phpMyAdmin.conf
[...] |
Quindi creiamo i collegamenti di avvio del sistema per Apache e lo avviamo:
chkconfig --levels 235 httpd on
/etc/init.d/httpd start
Ora puoi indirizzare il tuo browser a http://server1.example.com/phpMyAdmin/ o http://192.168.0.100/phpMyAdmin/ e accedere con il nome utente root e la tua nuova password MySQL di root.
7 Creare il database MySQL per Postfix/Courier
Creiamo un database chiamato mail:
mysqladmin -u root -p create mail
Successivamente, andiamo alla shell MySQL:
mysql -u root -p
Sulla shell MySQL, creiamo l'utente mail_admin con la password mail_admin_password (sostituirla con la propria password) che ha i privilegi SELECT,INSERT,UPDATE,DELETE sul database di posta. Questo utente sarà utilizzato da Postfix e Courier per connettersi al database di posta:
GRANT SELECT, INSERT, UPDATE, DELETE ON mail.* TO 'mail_admin'@'localhost' IDENTIFIED BY 'mail_admin_password';
GRANT SELECT, INSERT, UPDATE, DELETE ON mail.* TO 'mail_admin'@'localhost.localdomain' IDENTIFIED BY 'mail_admin_password';
FLUSH PRIVILEGES;
Sempre sulla shell MySQL, creiamo le tabelle di cui Postfix e Courier hanno bisogno:
USE mail;
CREATE TABLE domains (
domain varchar(50) NOT NULL,
PRIMARY KEY (domain) )
ENGINE=MyISAM;
CREATE TABLE forwardings (
source varchar(80) NOT NULL,
destination TEXT NOT NULL,
PRIMARY KEY (source) )
ENGINE=MyISAM;
CREATE TABLE users (
email varchar(80) NOT NULL,
password varchar(20) NOT NULL,
quota bigint(20) DEFAULT '10485760',
PRIMARY KEY (email)
) ENGINE=MyISAM;
CREATE TABLE transport (
domain varchar(128) NOT NULL default '',
transport varchar(128) NOT NULL default '',
UNIQUE KEY domain (domain)
) ENGINE=MyISAM;
quit;
Come avrai notato, con il chiudi; comando abbiamo lasciato la shell MySQL e siamo tornati sulla shell Linux.
I domini la tabella memorizzerà ogni dominio virtuale per il quale Postfix dovrebbe ricevere e-mail (ad es. example.com ).
| dominio |
| example.com |
Gli inoltri tabella serve per alias un indirizzo e-mail a un altro, ad es. inoltra email per [email protetta] a [email protetta] .
| fonte | destinazione |
| [email protetta] | [email protetta] |
Gli utenti la tabella memorizza tutti gli utenti virtuali (ovvero gli indirizzi e-mail, perché l'indirizzo e-mail e il nome utente sono gli stessi) e le password (in crittografato form!) e un valore di quota per ogni casella di posta (in questo esempio il valore predefinito è 10485760 byte che significa 10 MB).
| password | quota | |
| [email protetta] | No9.E4skNvGa. ("segreto" in forma crittografata) | 10485760 |
Il trasporto la tabella è facoltativa, è per utenti avanzati. Permette di inoltrare mail per singoli utenti, interi domini o tutte le mail ad un altro server. Ad esempio,
| dominio | trasporto |
| example.com | smtp:[1.2.3.4] |
inoltrerebbe tutte le email per example.com tramite il protocollo smtp al server con indirizzo IP 1.2.3.4 (le parentesi quadre [] significa "non effettuare una ricerca del record DNS MX" (che ha senso per gli indirizzi IP...). Se invece utilizzi un nome di dominio completo (FQDN), non utilizzeresti le parentesi quadre.
8 Configura Postfix
Ora dobbiamo dire a Postfix dove può trovare tutte le informazioni nel database. Quindi dobbiamo creare sei file di testo. Noterai che dico a Postfix di connettersi a MySQL sull'indirizzo IP 127.0.0.1 invece di localhost . Questo perché Postfix è in esecuzione in una prigione chroot e non ha accesso al socket MySQL che proverebbe a connettersi se dicessi a Postfix di usare localhost . Se utilizzo 127.0.0.1 Postfix utilizza la rete TCP per connettersi a MySQL, il che non è un problema nemmeno in una jail chroot (l'alternativa sarebbe spostare il socket MySQL nella jail chroot che causa altri problemi).
Ora creiamo i nostri sei file di testo.
vi /etc/postfix/mysql-virtual_domains.cf
user = mail_admin |
vi /etc/postfix/mysql-virtual_forwardings.cf
user = mail_admin |
vi /etc/postfix/mysql-virtual_mailboxes.cf
user = mail_admin |
vi /etc/postfix/mysql-virtual_email2email.cf
user = mail_admin |
vi /etc/postfix/mysql-virtual_transports.cf
user = mail_admin |
vi /etc/postfix/mysql-virtual_mailbox_limit_maps.cf
user = mail_admin |
chmod o= /etc/postfix/mysql-virtual_*.cf
chgrp postfix /etc/postfix/mysql-virtual_*.cf
Ora creiamo un utente e un gruppo chiamato vmail con la directory home /home/vmail . Qui verranno archiviate tutte le caselle di posta.
groupadd -g 5000 vmail
useradd -g vmail -u 5000 vmail -d /home/vmail -m
Quindi eseguiamo alcune configurazioni di Postfix. Assicurati di sostituire server1.example.com con un FQDN valido, altrimenti Postfix potrebbe non funzionare correttamente!
postconf -e 'myhostname = server1.example.com'
postconf -e 'mydestination = server1.example.com, localhost, localhost.localdomain'
postconf -e 'mynetworks = 127.0.0.0/8'
postconf -e 'virtual_alias_domains ='
postconf -e ' virtual_alias_maps = proxy:mysql:/etc/postfix/mysql-virtual_forwardings.cf, mysql:/etc/postfix/mysql-virtual_email2email.cf'
postconf -e 'virtual_mailbox_domains = proxy:mysql:/etc/postfix/mysql-virtual_domains.cf'
postconf -e 'virtual_mailbox_maps = proxy:mysql:/etc/postfix/mysql-virtual_mailboxes.cf'
postconf -e 'virtual_mailbox_base = /home/vmail'
postconf -e 'virtual_uid_maps = static:5000'
postconf -e 'virtual_gid_maps = static:5000'
postconf -e 'smtpd_sasl_auth_enable = yes'
postconf -e 'broken_sasl_auth_clients = yes'
postconf -e 'smtpd_sasl_authenticated_header = yes'
postconf -e 'smtpd_recipient_restrictions = permit_mynetworks, permit_sasl_authenticated, reject_unauth_destination'
postconf -e 'smtpd_use_tls = yes'
postconf -e 'smtpd_tls_cert_file = /etc/postfix/smtpd.cert'
postconf -e 'smtpd_tls_key_file = /etc/postfix/smtpd.key'
postconf -e 'transport_maps = proxy:mysql:/etc/postfix/mysql-virtual_transports.cf'
postconf -e 'virtual_create_maildirsize = yes'
postconf -e 'virtual_maildir_extended = yes'
postconf -e 'virtual_mailbox_limit_maps = proxy:mysql:/etc/postfix/mysql-virtual_mailbox_limit_maps.cf'
postconf -e 'virtual_mailbox_limit_override = yes'
postconf -e 'virtual_maildir_limit_message = "The user you are trying to reach is over quota."'
postconf -e 'virtual_overquota_bounce = yes'
postconf -e 'proxy_read_maps = $local_recipient_maps $mydestination $virtual_alias_maps $virtual_alias_domains $virtual_mailbox_maps $virtual_mailbox_domains $relay_recipient_maps $relay_domains $canonical_maps $sender_canonical_maps $recipient_canonical_maps $relocated_maps $transport_maps $mynetworks $virtual_mailbox_limit_maps'
postconf -e 'inet_interfaces = all'
Successivamente creiamo il certificato SSL necessario per TLS :
cd /etc/postfix
openssl req -new -outform PEM -out smtpd.cert -newkey rsa:2048 -nodes -keyout smtpd.key -keyform PEM -days 365 -x509
Nome del Paese (codice di 2 lettere) [XX]:<-- Inserisci il nome del tuo Paese (ad es. "DE").
Nome Stato o Provincia (nome completo) []:<-- Inserisci il nome del tuo Stato o Provincia .
Nome località (es. città) [Città predefinita]:<-- Inserisci la tua città.
Nome organizzazione (es. azienda) [Default Company Ltd]:<-- Inserisci il nome della tua organizzazione (es. , il nome della tua azienda).
Nome dell'unità organizzativa (ad es. sezione) []:<-- Inserisci il nome dell'unità organizzativa (ad es. "Dipartimento IT").
Nome comune (ad es. il tuo nome o il nome host del tuo server) []:<-- Inserisci il nome di dominio completo del sistema (ad es. "server1.example.com").
Indirizzo e-mail []:<-- Inserisci il tuo indirizzo e-mail.
Quindi cambia i permessi di smtpd.key:
chmod o= /etc/postfix/smtpd.key
9 Configura Saslauthd
Modifica /etc/sasl2/smtpd.conf. Dovrebbe assomigliare a questo:
vi /etc/sasl2/smtpd.conf
pwcheck_method: authdaemond |
Quindi disattiva Sendmail e avvia Postfix, saslauthd e corriere-authlib:
chmod 755 /var/spool/authdaemon
chkconfig --levels 235 courier-authlib on
/etc/init.d/courier-authlib start
chkconfig --levels 235 sendmail off
chkconfig --levels 235 postfix on
chkconfig --levels 235 saslauthd on
/etc/init.d/sendmail stop
/etc/init.d/postfix start
/etc/init.d/saslauthd start
10 Configura corriere
Ora dobbiamo dire a Courier che dovrebbe autenticarsi sul nostro database MySQL. Per prima cosa, modifica /etc/authlib/authdaemonrc e cambia il valore di authmodulelist in modo che legga
vi /etc/authlib/authdaemonrc
[...] |
Quindi modifica /etc/authlib/authmysqlrc. Dovrebbe essere esattamente così (di nuovo, assicurati di inserire i dettagli del database corretti):
cp /etc/authlib/authmysqlrc /etc/authlib/authmysqlrc_orig
cat /dev/null > /etc/authlib/authmysqlrc
vi /etc/authlib/authmysqlrc
MYSQL_SERVER localhost |
Quindi riavvia Courier:
chkconfig --levels 235 courier-imap on
/etc/init.d/courier-authlib restart
/etc/init.d/courier-imap restart
Al primo avvio di Courier-imap, crea automaticamente i file del certificato /usr/lib/courier-imap/share/imapd.pem e /usr/lib/courier-imap/share/pop3d.pem da /usr /lib/courier-imap/etc/imapd.cnf e /usr/lib/courier-imap/etc/pop3d.cnf. Poiché i file .cnf contengono la riga CN=localhost, ma il nostro server è denominato server1.example.com, i certificati potrebbero causare problemi quando si utilizzano connessioni TLS. Per risolvere questo problema, cancelliamo entrambi i certificati...
cd /usr/lib/courier-imap/share
rm -f imapd.pem
rm -f pop3d.pem
... e sostituisci le righe CN=localhost in /usr/lib/courier-imap/etc/imapd.cnf e /usr/lib/courier-imap/etc/pop3d.cnf con CN=server1.example.com:
vi /usr/lib/courier-imap/etc/imapd.cnf
[...] |
vi /usr/lib/courier-imap/etc/pop3d.cnf
[...] |
Quindi ricreiamo entrambi i certificati...
./mkimapdcert
./mkpop3dcert
... e riavvia corriere-authlib e corriere-imap:
/etc/init.d/courier-authlib restart
/etc/init.d/courier-imap restart
Eseguendo
telnet localhost pop3
puoi vedere se il tuo server POP3 funziona correttamente. Dovrebbe restituire +OK Ciao . (digita chiudi per tornare alla shell di Linux):
[[email protected] share]# telnet localhost pop3
Tentativo ::1...
Connesso a localhost.
Il carattere di escape è '^]'.
+OK Salve .
<-- esci
+OK Più fortuna la prossima volta.
Connessione chiusa da host straniero.
[[email protected] share]#
11 Modifica /etc/aliases
Ora dovremmo aprire /etc/alias. Assicurati che postmaster punti a root e root al tuo nome utente o al tuo indirizzo email, ad es. così:
vi /etc/aliases
[...] |
o in questo modo (se l'amministratore è il tuo nome utente):
[...] |
Ogni volta che modifichi /etc/aliases, devi eseguire
newaliases
in seguito e riavvia Postfix:
/etc/init.d/postfix restart
12 Installa Amavisd-new, SpamAssassin e ClamAV
Per installare amavisd-new, spamassassin e clamav, eseguire il comando seguente:
yum install amavisd-new spamassassin clamav clamd unzip bzip2 unrar perl-DBD-mysql
Ora dobbiamo modificare /etc/amavisd/amavisd.conf.
vi /etc/amavisd/amavisd.conf
In questo file cambiamo cinque posizioni:
1) Cambia
$mydomain = 'example.com'; # a convenient default for other settings |
a
$mydomain = 'localhost'; |
2) Cambia
$sa_tag_level_deflt = 2.0; # add spam info headers if at, or above that level |
a
$sa_tag_level_deflt = 2.0; # add spam info headers if at, or above that level |
(Naturalmente, puoi regolare i punteggi di spam a tuo piacimento.)
3) Cambia
# @lookup_sql_dsn = |
a
# @lookup_sql_dsn = |
(Assicurati di inserire i dettagli del database corretti!)
4) Cambia
# $recipient_delimiter = '+'; # undef disables address extensions altogether |
a
$recipient_delimiter = undef; # undef disables address extensions altogether |
5) Cambia
$final_virus_destiny = D_DISCARD; |
a
$final_virus_destiny = D_REJECT; |
(Ovviamente sta a te decidere cosa deve succedere con spam e virus. Decido di accettare lo spam (D_PASS) in modo che lo spam possa essere filtrato nel mio client di posta elettronica con una semplice regola di filtro (basata sull'oggetto che viene riscritto da amavisd-new se ritiene che una mail sia spam).Le azioni consentite (D_PASS, D_DISCARD, D_BOUNCE e D_REJECT) sono spiegate qui:http://www.ijs.si/software/amavisd/amavisd-new-docs.html #azioni)
Dopo le mie modifiche, /etc/amavisd/amavisd.conf appare così:
use strict;
# a minimalistic configuration file for amavisd-new with all necessary settings
#
# see amavisd.conf-default for a list of all variables with their defaults;
# see amavisd.conf-sample for a traditional-style commented file;
# for more details see documentation in INSTALL, README_FILES/*
# and at http://www.ijs.si/software/amavisd/amavisd-new-docs.html
# COMMONLY ADJUSTED SETTINGS:
# @bypass_virus_checks_maps = (1); # controls running of anti-virus code
# @bypass_spam_checks_maps = (1); # controls running of anti-spam code
# $bypass_decode_parts = 1; # controls running of decoders&dearchivers
$max_servers = 2; # num of pre-forked children (2..30 is common), -m
$daemon_user = 'amavis'; # (no default; customary: vscan or amavis), -u
$daemon_group = 'amavis'; # (no default; customary: vscan or amavis), -g
$mydomain = 'localhost';
#$mydomain = 'example.com';   # a convenient default for other settings
$MYHOME = '/var/spool/amavisd'; # a convenient default for other settings, -H
$TEMPBASE = "$MYHOME/tmp"; # working directory, needs to exist, -T
$ENV{TMPDIR} = $TEMPBASE; # environment variable TMPDIR, used by SA, etc.
$QUARANTINEDIR = undef; # -Q
# $quarantine_subdir_levels = 1; # add level of subdirs to disperse quarantine
# $release_format = 'resend'; # 'attach', 'plain', 'resend'
# $report_format = 'arf'; # 'attach', 'plain', 'resend', 'arf'
# $daemon_chroot_dir = $MYHOME; # chroot directory or undef, -R
$db_home = "$MYHOME/db"; # dir for bdb nanny/cache/snmp databases, -D
# $helpers_home = "$MYHOME/var"; # working directory for SpamAssassin, -S
$lock_file = "/var/run/amavisd/amavisd.lock"; # -L
$pid_file = "/var/run/amavisd/amavisd.pid"; # -P
#NOTE: create directories $MYHOME/tmp, $MYHOME/var, $MYHOME/db manually
$log_level = 0; # verbosity 0..5, -d
$log_recip_templ = undef; # disable by-recipient level-0 log entries
$DO_SYSLOG = 1; # log via syslogd (preferred)
$syslog_facility = 'mail'; # Syslog facility as a string
# e.g.: mail, daemon, user, local0, ... local7
$syslog_priority = 'debug'; # Syslog base (minimal) priority as a string,
# choose from: emerg, alert, crit, err, warning, notice, info, debug
$enable_db = 1; # enable use of BerkeleyDB/libdb (SNMP and nanny)
$enable_global_cache = 1; # enable use of libdb-based cache if $enable_db=1
$nanny_details_level = 2; # nanny verbosity: 1: traditional, 2: detailed
$enable_dkim_verification = 1; # enable DKIM signatures verification
$enable_dkim_signing = 1; # load DKIM signing code, keys defined by dkim_key
@local_domains_maps = ( [".$mydomain"] ); # list of all local domains
@mynetworks = qw( 127.0.0.0/8 [::1] [FE80::]/10 [FEC0::]/10
10.0.0.0/8 172.16.0.0/12 192.168.0.0/16 );
$unix_socketname = "$MYHOME/amavisd.sock"; # amavisd-release or amavis-milter
# option(s) -p overrides $inet_socket_port and $unix_socketname
$inet_socket_port = 10024; # listen on this local TCP port(s)
# $inet_socket_port = [10024,10026]; # listen on multiple TCP ports
$policy_bank{'MYNETS'} = { # mail originating from @mynetworks
originating => 1, # is true in MYNETS by default, but let's make it explicit
os_fingerprint_method => undef, # don't query p0f for internal clients
};
# it is up to MTA to re-route mail from authenticated roaming users or
# from internal hosts to a dedicated TCP port (such as 10026) for filtering
$interface_policy{'10026'} = 'ORIGINATING';
$policy_bank{'ORIGINATING'} = { # mail supposedly originating from our users
originating => 1, # declare that mail was submitted by our smtp client
allow_disclaimers => 1, # enables disclaimer insertion if available
# notify administrator of locally originating malware
virus_admin_maps => ["virusalert\@$mydomain"],
spam_admin_maps => ["virusalert\@$mydomain"],
warnbadhsender => 1,
# forward to a smtpd service providing DKIM signing service
forward_method => 'smtp:[127.0.0.1]:10027',
# force MTA conversion to 7-bit (e.g. before DKIM signing)
smtpd_discard_ehlo_keywords => ['8BITMIME'],
bypass_banned_checks_maps => [1], # allow sending any file names and types
terminate_dsn_on_notify_success => 0, # don't remove NOTIFY=SUCCESS option
};
$interface_policy{'SOCK'} = 'AM.PDP-SOCK'; # only applies with $unix_socketname
# Use with amavis-release over a socket or with Petr Rehor's amavis-milter.c
# (with amavis-milter.c from this package or old amavis.c client use 'AM.CL'):
$policy_bank{'AM.PDP-SOCK'} = {
protocol => 'AM.PDP',
auth_required_release => 0, # do not require secret_id for amavisd-release
};
$sa_tag_level_deflt  = 2.0;  # add spam info headers if at, or above that level
$sa_tag2_level_deflt = 4.0;  # add 'spam detected' headers at that level
$sa_kill_level_deflt = $sa_tag2_level_deflt;  # triggers spam evasive actions (e.g. blocks mail)
$sa_dsn_cutoff_level = 10;   # spam level beyond which a DSN is not sent

#$sa_tag_level_deflt  = 2.0;  # add spam info headers if at, or above that level
#$sa_tag2_level_deflt = 6.2;  # add 'spam detected' headers at that level
#$sa_kill_level_deflt = 6.9;  # triggers spam evasive actions (e.g. blocks mail)
#$sa_dsn_cutoff_level = 10;   # spam level beyond which a DSN is not sent
$sa_crediblefrom_dsn_cutoff_level = 18; # likewise, but for a likely valid From
# $sa_quarantine_cutoff_level = 25; # spam level beyond which quarantine is off
$penpals_bonus_score = 8; # (no effect without a @storage_sql_dsn database)
$penpals_threshold_high = $sa_kill_level_deflt; # don't waste time on hi spam
$bounce_killer_score = 100; # spam score points to add for joe-jobbed bounces
$sa_mail_body_size_limit = 400*1024; # don't waste time on SA if mail is larger
$sa_local_tests_only = 0; # only tests which do not require internet access?
# @lookup_sql_dsn =
#   ( ['DBI:mysql:database=mail;host=127.0.0.1;port=3306', 'user1', 'passwd1'],
#     ['DBI:mysql:database=mail;host=host2', 'username2', 'password2'],
#     ["DBI:SQLite:dbname=$MYHOME/sql/mail_prefs.sqlite", '', ''] );
# @storage_sql_dsn = @lookup_sql_dsn;  # none, same, or separate database
@lookup_sql_dsn =
( ['DBI:mysql:database=mail;host=127.0.0.1;port=3306', 'mail_admin', 'mail_admin_password'] );
$sql_select_policy = 'SELECT "Y" as local FROM domains WHERE CONCAT("@",domain) IN (%k)';
$sql_select_white_black_list = undef; # undef disables SQL white/blacklisting
$recipient_delimiter = '+'; # (default is '+')
$replace_existing_extension = 1; # (default is false)
$localpart_is_case_sensitive = 0; # (default is false)
# $timestamp_fmt_mysql = 1; # if using MySQL *and* msgs.time_iso is TIMESTAMP;
# defaults to 0, which is good for non-MySQL or if msgs.time_iso is CHAR(16)
$virus_admin = undef; # notifications recip.
$mailfrom_notify_admin = undef; # notifications sender
$mailfrom_notify_recip = undef; # notifications sender
$mailfrom_notify_spamadmin = undef; # notifications sender
$mailfrom_to_quarantine = ''; # null return path; uses original sender if undef
@addr_extension_virus_maps = ('virus');
@addr_extension_banned_maps = ('banned');
@addr_extension_spam_maps = ('spam');
@addr_extension_bad_header_maps = ('badh');
$recipient_delimiter = undef; # undef disables address extensions altogether
# $recipient_delimiter = '+';  # undef disables address extensions altogether
# when enabling addr extensions do also Postfix/main.cf: recipient_delimiter=+
$path = '/usr/local/sbin:/usr/local/bin:/usr/sbin:/sbin:/usr/bin:/bin';
# $dspam = 'dspam';
$MAXLEVELS = 14;
$MAXFILES = 1500;
$MIN_EXPANSION_QUOTA = 100*1024; # bytes (default undef, not enforced)
$MAX_EXPANSION_QUOTA = 300*1024*1024; # bytes (default undef, not enforced)
$sa_spam_subject_tag = '***SPAM*** ';
$defang_virus = 1; # MIME-wrap passed infected mail
$defang_banned = 1; # MIME-wrap passed mail containing banned name
# for defanging bad headers only turn on certain minor contents categories:
$defang_by_ccat{+CC_BADH.",3"} = 1; # NUL or CR character in header
$defang_by_ccat{+CC_BADH.",5"} = 1; # header line longer than 998 characters
$defang_by_ccat{+CC_BADH.",6"} = 1; # header field syntax error
# OTHER MORE COMMON SETTINGS (defaults may suffice):
# $myhostname = 'host.example.com'; # must be a fully-qualified domain name!
# $notify_method = 'smtp:[127.0.0.1]:10025';
# $forward_method = 'smtp:[127.0.0.1]:10025'; # set to undef with milter!
$final_virus_destiny      = D_REJECT;
$final_banned_destiny     = D_REJECT;
$final_spam_destiny       = D_PASS;
$final_bad_header_destiny = D_PASS;

#$final_virus_destiny      = D_DISCARD;
#$final_banned_destiny     = D_BOUNCE;
#$final_spam_destiny       = D_DISCARD;
#$final_bad_header_destiny = D_BOUNCE;
# $bad_header_quarantine_method = undef;
# $os_fingerprint_method = 'p0f:*:2345'; # to query p0f-analyzer.pl
## hierarchy by which a final setting is chosen:
## policy bank (based on port or IP address) -> *_by_ccat
## *_by_ccat (based on mail contents) -> *_maps
## *_maps (based on recipient address) -> final configuration value
# SOME OTHER VARIABLES WORTH CONSIDERING (see amavisd.conf-default for all)
# $warnbadhsender,
# $warnvirusrecip, $warnbannedrecip, $warnbadhrecip, (or @warn*recip_maps)
#
# @bypass_virus_checks_maps, @bypass_spam_checks_maps,
# @bypass_banned_checks_maps, @bypass_header_checks_maps,
#
# @virus_lovers_maps, @spam_lovers_maps,
# @banned_files_lovers_maps, @bad_header_lovers_maps,
#
# @blacklist_sender_maps, @score_sender_maps,
#
# $clean_quarantine_method, $virus_quarantine_to, $banned_quarantine_to,
# $bad_header_quarantine_to, $spam_quarantine_to,
#
# $defang_bad_header, $defang_undecipherable, $defang_spam
# REMAINING IMPORTANT VARIABLES ARE LISTED HERE BECAUSE OF LONGER ASSIGNMENTS
@keep_decoded_original_maps = (new_RE(
qr'^MAIL$', # retain full original message for virus checking
qr'^MAIL-UNDECIPHERABLE$', # recheck full mail if it contains undecipherables
qr'^(ASCII(?! cpio)|text|uuencoded|xxencoded|binhex)'i,
# qr'^Zip archive data', # don't trust Archive::Zip
));
# for $banned_namepath_re (a new-style of banned table) see amavisd.conf-sample
$banned_filename_re = new_RE(
### BLOCKED ANYWHERE
# qr'^UNDECIPHERABLE$', # is or contains any undecipherable components
qr'^\.(exe-ms|dll)$', # banned file(1) types, rudimentary
# qr'^\.(exe|lha|tnef|cab|dll)$', # banned file(1) types
### BLOCK THE FOLLOWING, EXCEPT WITHIN UNIX ARCHIVES:
# [ qr'^\.(gz|bz2)$' => 0 ], # allow any in gzip or bzip2
[ qr'^\.(rpm|cpio|tar)$' => 0 ], # allow any in Unix-type archives
qr'.\.(pif|scr)$'i, # banned extensions - rudimentary
# qr'^\.zip$', # block zip type
### BLOCK THE FOLLOWING, EXCEPT WITHIN ARCHIVES:
# [ qr'^\.(zip|rar|arc|arj|zoo)$'=> 0 ], # allow any within these archives
qr'^application/x-msdownload$'i, # block these MIME types
qr'^application/x-msdos-program$'i,
qr'^application/hta$'i,
# qr'^message/partial$'i, # rfc2046 MIME type
# qr'^message/external-body$'i, # rfc2046 MIME type
# qr'^(application/x-msmetafile|image/x-wmf)$'i, # Windows Metafile MIME type
# qr'^\.wmf$', # Windows Metafile file(1) type
# block certain double extensions in filenames
qr'\.[^./]*[A-Za-z][^./]*\.\s*(exe|vbs|pif|scr|bat|cmd|com|cpl|dll)[.\s]*$'i,
# qr'\{[0-9a-f]{8}(-[0-9a-f]{4}){3}-[0-9a-f]{12}\}?'i, # Class ID CLSID, strict
# qr'\{[0-9a-z]{4,}(-[0-9a-z]{4,}){0,7}\}?'i, # Class ID extension CLSID, loose
qr'.\.(exe|vbs|pif|scr|cpl)$'i, # banned extension - basic
# qr'.\.(exe|vbs|pif|scr|cpl|bat|cmd|com)$'i, # banned extension - basic+cmd
# qr'.\.(ade|adp|app|bas|bat|chm|cmd|com|cpl|crt|emf|exe|fxp|grp|hlp|hta|
# inf|ins|isp|js|jse|lnk|mda|mdb|mde|mdw|mdt|mdz|msc|msi|msp|mst|
# ops|pcd|pif|prg|reg|scr|sct|shb|shs|vb|vbe|vbs|
# wmf|wsc|wsf|wsh)$'ix, # banned ext - long
# qr'.\.(ani|cur|ico)$'i, # banned cursors and icons filename
# qr'^\.ani$', # banned animated cursor file(1) type
# qr'.\.(mim|b64|bhx|hqx|xxe|uu|uue)$'i, # banned extension - WinZip vulnerab.
);
# See http://support.microsoft.com/default.aspx?scid=kb;EN-US;q262631
# and http://www.cknow.com/vtutor/vtextensions.htm
# ENVELOPE SENDER SOFT-WHITELISTING / SOFT-BLACKLISTING
@score_sender_maps = ({ # a by-recipient hash lookup table,
# results from all matching recipient tables are summed
# ## per-recipient personal tables (NOTE: positive: black, negative: white)
# '[email protected]' => [{'[email protected]' => 10.0}],
# '[email protected]' => [{'.ebay.com' => -3.0}],
# '[email protected]' => [{'[email protected]' => -7.0,
# '.cleargreen.com' => -5.0}],
## site-wide opinions about senders (the '.' matches any recipient)
'.' => [ # the _first_ matching sender determines the score boost
new_RE( # regexp-type lookup table, just happens to be all soft-blacklist
[qr'^(bulkmail|offers|cheapbenefits|earnmoney|foryou)@'i => 5.0],
[qr'^(greatcasino|investments|lose_weight_today|market\.alert)@'i=> 5.0],
[qr'^(money2you|MyGreenCard|new\.tld\.registry|opt-out|opt-in)@'i=> 5.0],
[qr'^(optin|saveonlsmoking2002k|specialoffer|specialoffers)@'i => 5.0],
[qr'^(stockalert|stopsnoring|wantsome|workathome|yesitsfree)@'i => 5.0],
[qr'^(your_friend|greatoffers)@'i => 5.0],
[qr'^(inkjetplanet|marketopt|MakeMoney)\d*@'i => 5.0],
),
# read_hash("/var/amavis/sender_scores_sitewide"),
{ # a hash-type lookup table (associative array)
'[email protected]' => -3.0,
'[email protected]' => -3.0,
'[email protected]' => -3.0,
'[email protected]' => -3.0,
'securityfocus.com' => -3.0,
'[email protected]' => -3.0,
'[email protected]' => -3.0,
'[email protected]' => -3.0,
'[email protected]'=> -3.0,
'[email protected]' => -3.0,
'spamassassin.apache.org' => -3.0,
'[email protected]' => -3.0,
'[email protected]' => -3.0,
'[email protected]' => -3.0,
'[email protected]' => -3.0,
'[email protected]' => -3.0,
'[email protected]' => -3.0,
'[email protected]' => -3.0,
'[email protected]' => -3.0,
'[email protected]' => -3.0,
'[email protected]' => -3.0,
'[email protected]' => -3.0,
'[email protected]' => -3.0,
'[email protected]' => -3.0,
'[email protected]' => -3.0,
'[email protected]' => -5.0,
'[email protected]' => -3.0,
'returns.groups.yahoo.com' => -3.0,
'[email protected]' => -3.0,
lc('[email protected]') => -3.0,
lc('[email protected]') => -5.0,
# soft-blacklisting (positive score)
'[email protected]' => 3.0,
'.example.net' => 1.0,
},
], # end of site-wide tables
});
@decoders = (
['mail', \&do_mime_decode],
['asc', \&do_ascii],
['uue', \&do_ascii],
['hqx', \&do_ascii],
['ync', \&do_ascii],
['F', \&do_uncompress, ['unfreeze','freeze -d','melt','fcat'] ],
['Z', \&do_uncompress, ['uncompress','gzip -d','zcat'] ],
['gz', \&do_uncompress, 'gzip -d'],
['gz', \&do_gunzip],
['bz2', \&do_uncompress, 'bzip2 -d'],
['lzo', \&do_uncompress, 'lzop -d'],
['rpm', \&do_uncompress, ['rpm2cpio.pl','rpm2cpio'] ],
['cpio', \&do_pax_cpio, ['pax','gcpio','cpio'] ],
['tar', \&do_pax_cpio, ['pax','gcpio','cpio'] ],
['deb', \&do_ar, 'ar'],
# ['a', \&do_ar, 'ar'], # unpacking .a seems an overkill
['zip', \&do_unzip],
['7z', \&do_7zip, ['7zr','7za','7z'] ],
['rar', \&do_unrar, ['rar','unrar'] ],
['arj', \&do_unarj, ['arj','unarj'] ],
['arc', \&do_arc, ['nomarch','arc'] ],
['zoo', \&do_zoo, ['zoo','unzoo'] ],
['lha', \&do_lha, 'lha'],
# ['doc', \&do_ole, 'ripole'],
['cab', \&do_cabextract, 'cabextract'],
['tnef', \&do_tnef_ext, 'tnef'],
['tnef', \&do_tnef],
# ['sit', \&do_unstuff, 'unstuff'], # broken/unsafe decoder
['exe', \&do_executable, ['rar','unrar'], 'lha', ['arj','unarj'] ],
);
@av_scanners = (
# ### http://www.clanfield.info/sophie/ (http://www.vanja.com/tools/sophie/)
# ['Sophie',
# \&ask_daemon, ["{}/\n", '/var/run/sophie'],
# qr/(?x)^ 0+ ( : | [\000\r\n]* $)/m, qr/(?x)^ 1 ( : | [\000\r\n]* $)/m,
# qr/(?x)^ [-+]? \d+ : (.*?) [\000\r\n]* $/m ],
# ### http://www.csupomona.edu/~henson/www/projects/SAVI-Perl/
# ['Sophos SAVI', \&sophos_savi ],
# ### http://www.clamav.net/
['ClamAV-clamd',
\&ask_daemon, ["CONTSCAN {}\n", "/var/spool/amavisd/clamd.sock"],
qr/\bOK$/m, qr/\bFOUND$/m,
qr/^.*?: (?!Infected Archive)(.*) FOUND$/m ],
# # NOTE: run clamd under the same user as amavisd, or run it under its own
# # uid such as clamav, add user clamav to the amavis group, and then add
# # AllowSupplementaryGroups to clamd.conf;
# # NOTE: match socket name (LocalSocket) in clamav.conf to the socket name in
# # this entry; when running chrooted one may prefer socket "$MYHOME/clamd".
# ### http://www.clamav.net/ and CPAN (memory-hungry! clamd is preferred)
# # note that Mail::ClamAV requires perl to be build with threading!
# ['Mail::ClamAV', \&ask_clamav, "*", [0], [1], qr/^INFECTED: (.+)/m ],
# ### http://www.openantivirus.org/
# ['OpenAntiVirus ScannerDaemon (OAV)',
# \&ask_daemon, ["SCAN {}\n", '127.0.0.1:8127'],
# qr/^OK/m, qr/^FOUND: /m, qr/^FOUND: (.+)/m ],
# ### http://www.vanja.com/tools/trophie/
# ['Trophie',
# \&ask_daemon, ["{}/\n", '/var/run/trophie'],
# qr/(?x)^ 0+ ( : | [\000\r\n]* $)/m, qr/(?x)^ 1 ( : | [\000\r\n]* $)/m,
# qr/(?x)^ [-+]? \d+ : (.*?) [\000\r\n]* $/m ],
# ### http://www.grisoft.com/
# ['AVG Anti-Virus',
# \&ask_daemon, ["SCAN {}\n", '127.0.0.1:55555'],
# qr/^200/m, qr/^403/m, qr/^403 .*?: ([^\r\n]+)/m ],
# ### http://www.f-prot.com/
# ['F-Prot fpscand', # F-PROT Antivirus for BSD/Linux/Solaris, version 6
# \&ask_daemon,
# ["SCAN FILE {}/*\n", '127.0.0.1:10200'],
# qr/^(0|8|64) /m,
# qr/^([1235679]|1[01345]) |<[^>:]*(?i)(infected|suspicious|unwanted)/m,
# qr/(?i)<[^>:]*(?:infected|suspicious|unwanted)[^>:]*: ([^>]*)>/m ],
# ### http://www.f-prot.com/
# ['F-Prot f-protd', # old version
# \&ask_daemon,
# ["GET {}/*?-dumb%20-archive%20-packed HTTP/1.0\r\n\r\n",
# ['127.0.0.1:10200', '127.0.0.1:10201', '127.0.0.1:10202',
# '127.0.0.1:10203', '127.0.0.1:10204'] ],
# qr/(?i)<summary[^>]*>clean<\/summary>/m,
# qr/(?i)<summary[^>]*>infected<\/summary>/m,
# qr/(?i)<name>(.+)<\/name>/m ],
# ### http://www.sald.com/, http://www.dials.ru/english/, http://www.drweb.ru/
# ['DrWebD', \&ask_daemon, # DrWebD 4.31 or later
# [pack('N',1). # DRWEBD_SCAN_CMD
# pack('N',0x00280001). # DONT_CHANGEMAIL, IS_MAIL, RETURN_VIRUSES
# pack('N', # path length
# length("$TEMPBASE/amavis-yyyymmddTHHMMSS-xxxxx/parts/pxxx")).
# '{}/*'. # path
# pack('N',0). # content size
# pack('N',0),
# '/var/drweb/run/drwebd.sock',
# # '/var/amavis/var/run/drwebd.sock', # suitable for chroot
# # '/usr/local/drweb/run/drwebd.sock', # FreeBSD drweb ports default
# # '127.0.0.1:3000', # or over an inet socket
# ],
# qr/\A\x00[\x10\x11][\x00\x10]\x00/sm, # IS_CLEAN,EVAL_KEY; SKIPPED
# qr/\A\x00[\x00\x01][\x00\x10][\x20\x40\x80]/sm,# KNOWN_V,UNKNOWN_V,V._MODIF
# qr/\A.{12}(?:infected with )?([^\x00]+)\x00/sm,
# ],
# # NOTE: If using amavis-milter, change length to:
# # length("$TEMPBASE/amavis-milter-xxxxxxxxxxxxxx/parts/pxxx").
### http://www.kaspersky.com/ (kav4mailservers)
['KasperskyLab AVP - aveclient',
['/usr/local/kav/bin/aveclient','/usr/local/share/kav/bin/aveclient',
'/opt/kav/5.5/kav4mailservers/bin/aveclient','aveclient'],
'-p /var/run/aveserver -s {}/*',
[0,3,6,8], qr/\b(INFECTED|SUSPICION|SUSPICIOUS)\b/m,
qr/(?:INFECTED|WARNING|SUSPICION|SUSPICIOUS) (.+)/m,
],
# NOTE: one may prefer [0],[2,3,4,5], depending on how suspicious,
# currupted or protected archives are to be handled
### http://www.kaspersky.com/
['KasperskyLab AntiViral Toolkit Pro (AVP)', ['avp'],
'-* -P -B -Y -O- {}', [0,3,6,8], [2,4], # any use for -A -K ?
qr/infected: (.+)/m,
sub {chdir('/opt/AVP') or die "Can't chdir to AVP: $!"},
sub {chdir($TEMPBASE) or die "Can't chdir back to $TEMPBASE $!"},
],
### The kavdaemon and AVPDaemonClient have been removed from Kasperky
### products and replaced by aveserver and aveclient
['KasperskyLab AVPDaemonClient',
[ '/opt/AVP/kavdaemon', 'kavdaemon',
'/opt/AVP/AvpDaemonClient', 'AvpDaemonClient',
'/opt/AVP/AvpTeamDream', 'AvpTeamDream',
'/opt/AVP/avpdc', 'avpdc' ],
"-f=$TEMPBASE {}", [0,8], [3,4,5,6], qr/infected: ([^\r\n]+)/m ],
# change the startup-script in /etc/init.d/kavd to:
# DPARMS="-* -Y -dl -f=/var/amavis /var/amavis"
# (or perhaps: DPARMS="-I0 -Y -* /var/amavis" )
# adjusting /var/amavis above to match your $TEMPBASE.
# The '-f=/var/amavis' is needed if not running it as root, so it
# can find, read, and write its pid file, etc., see 'man kavdaemon'.
# defUnix.prf: there must be an entry "*/var/amavis" (or whatever
# directory $TEMPBASE specifies) in the 'Names=' section.
# cd /opt/AVP/DaemonClients; configure; cd Sample; make
# cp AvpDaemonClient /opt/AVP/
# su - vscan -c "${PREFIX}/kavdaemon ${DPARMS}"
### http://www.centralcommand.com/
['CentralCommand Vexira (new) vascan',
['vascan','/usr/lib/Vexira/vascan'],
"-a s --timeout=60 --temp=$TEMPBASE -y $QUARANTINEDIR ".
"--log=/var/log/vascan.log {}",
[0,3], [1,2,5],
qr/(?x)^\s* (?:virus|iworm|macro|mutant|sequence|trojan)\ found:\ ( [^\]\s']+ )\ \.\.\.\ /m ],
# Adjust the path of the binary and the virus database as needed.
# 'vascan' does not allow to have the temp directory to be the same as
# the quarantine directory, and the quarantine option can not be disabled.
# If $QUARANTINEDIR is not used, then another directory must be specified
# to appease 'vascan'. Move status 3 to the second list if password
# protected files are to be considered infected.
### http://www.avira.com/
### Avira AntiVir (formerly H+BEDV) or (old) CentralCommand Vexira Antivirus
['Avira AntiVir', ['antivir','vexira'],
'--allfiles -noboot -nombr -rs -s -z {}', [0], qr/ALERT:|VIRUS:/m,
qr/(?x)^\s* (?: ALERT: \s* (?: \[ | [^']* ' ) |
(?i) VIRUS:\ .*?\ virus\ '?) ( [^\]\s']+ )/m ],
# NOTE: if you only have a demo version, remove -z and add 214, as in:
# '--allfiles -noboot -nombr -rs -s {}', [0,214], qr/ALERT:|VIRUS:/,
### http://www.commandsoftware.com/
['Command AntiVirus for Linux', 'csav',
'-all -archive -packed {}', [50], [51,52,53],
qr/Infection: (.+)/m ],
### http://www.symantec.com/
['Symantec CarrierScan via Symantec CommandLineScanner',
'cscmdline', '-a scan -i 1 -v -s 127.0.0.1:7777 {}',
qr/^Files Infected:\s+0$/m, qr/^Infected\b/m,
qr/^(?:Info|Virus Name):\s+(.+)/m ],
### http://www.symantec.com/
['Symantec AntiVirus Scan Engine',
'savsecls', '-server 127.0.0.1:7777 -mode scanrepair -details -verbose {}',
[0], qr/^Infected\b/m,
qr/^(?:Info|Virus Name):\s+(.+)/m ],
# NOTE: check options and patterns to see which entry better applies
# ### http://www.f-secure.com/products/anti-virus/ version 4.65
# ['F-Secure Antivirus for Linux servers',
# ['/opt/f-secure/fsav/bin/fsav', 'fsav'],
# '--delete=no --disinf=no --rename=no --archive=yes --auto=yes '.
# '--dumb=yes --list=no --mime=yes {}', [0], [3,6,8],
# qr/(?:infection|Infected|Suspected): (.+)/m ],
### http://www.f-secure.com/products/anti-virus/ version 5.52
['F-Secure Antivirus for Linux servers',
['/opt/f-secure/fsav/bin/fsav', 'fsav'],
'--virus-action1=report --archive=yes --auto=yes '.
'--dumb=yes --list=no --mime=yes {}', [0], [3,4,6,8],
qr/(?:infection|Infected|Suspected|Riskware): (.+)/m ],
# NOTE: internal archive handling may be switched off by '--archive=no'
# to prevent fsav from exiting with status 9 on broken archives
# ### http://www.avast.com/
# ['avast! Antivirus daemon',
# \&ask_daemon, # greets with 220, terminate with QUIT
# ["SCAN {}\015\012QUIT\015\012", '/var/run/avast4/mailscanner.sock'],
# qr/\t\[\+\]/m, qr/\t\[L\]\t/m, qr/\t\[L\]\t([^[ \t\015\012]+)/m ],
# ### http://www.avast.com/
# ['avast! Antivirus - Client/Server Version', 'avastlite',
# '-a /var/run/avast4/mailscanner.sock -n {}', [0], [1],
# qr/\t\[L\]\t([^[ \t\015\012]+)/m ],
['CAI InoculateIT', 'inocucmd', # retired product
'-sec -nex {}', [0], [100],
qr/was infected by virus (.+)/m ],
# see: http://www.flatmtn.com/computer/Linux-Antivirus_CAI.html
### http://www3.ca.com/Solutions/Product.asp?ID=156 (ex InoculateIT)
['CAI eTrust Antivirus', 'etrust-wrapper',
'-arc -nex -spm h {}', [0], [101],
qr/is infected by virus: (.+)/m ],
# NOTE: requires suid wrapper around inocmd32; consider flag: -mod reviewer
# see http://marc.theaimsgroup.com/?l=amavis-user&m=109229779912783
### http://mks.com.pl/english.html
['MkS_Vir for Linux (beta)', ['mks32','mks'],
'-s {}/*', [0], [1,2],
qr/--[ \t]*(.+)/m ],
### http://mks.com.pl/english.html
['MkS_Vir daemon', 'mksscan',
'-s -q {}', [0], [1..7],
qr/^... (\S+)/m ],
# ### http://www.nod32.com/, version v2.52 (old)
# ['ESET NOD32 for Linux Mail servers',
# ['/opt/eset/nod32/bin/nod32cli', 'nod32cli'],
# '--subdir --files -z --sfx --rtp --adware --unsafe --pattern --heur '.
# '-w -a --action-on-infected=accept --action-on-uncleanable=accept '.
# '--action-on-notscanned=accept {}',
# [0,3], [1,2], qr/virus="([^"]+)"/m ],
# ### http://www.eset.com/, version v2.7 (old)
# ['ESET NOD32 Linux Mail Server - command line interface',
# ['/usr/bin/nod32cli', '/opt/eset/nod32/bin/nod32cli', 'nod32cli'],
# '--subdir {}', [0,3], [1,2], qr/virus="([^"]+)"/m ],
# ### http://www.eset.com/, version 2.71.12
# ['ESET Software ESETS Command Line Interface',
# ['/usr/bin/esets_cli', 'esets_cli'],
# '--subdir {}', [0], [1,2,3], qr/virus="([^"]+)"/m ],
### http://www.eset.com/, version 3.0
['ESET Software ESETS Command Line Interface',
['/usr/bin/esets_cli', 'esets_cli'],
'--subdir {}', [0], [1,2,3],
qr/:\s*action="(?!accepted)[^"]*"\n.*:\s*virus="([^"]*)"/m ],
## http://www.nod32.com/, NOD32LFS version 2.5 and above
['ESET NOD32 for Linux File servers',
['/opt/eset/nod32/sbin/nod32','nod32'],
'--files -z --mail --sfx --rtp --adware --unsafe --pattern --heur '.
'-w -a --action=1 -b {}',
[0], [1,10], qr/^object=.*, virus="(.*?)",/m ],
# Experimental, based on posting from Rado Dibarbora (Dibo) on 2002-05-31
# ['ESET Software NOD32 Client/Server (NOD32SS)',
# \&ask_daemon2, # greets with 200, persistent, terminate with QUIT
# ["SCAN {}/*\r\n", '127.0.0.1:8448' ],
# qr/^200 File OK/m, qr/^201 /m, qr/^201 (.+)/m ],
### http://www.norman.com/products_nvc.shtml
['Norman Virus Control v5 / Linux', 'nvcc',
'-c -l:0 -s -u -temp:$TEMPBASE {}', [0,10,11], [1,2,14],
qr/(?i).* virus in .* -> \'(.+)\'/m ],
### http://www.pandasoftware.com/
['Panda CommandLineSecure 9 for Linux',
['/opt/pavcl/usr/bin/pavcl','pavcl'],
'-auto -aex -heu -cmp -nbr -nor -nos -eng -nob {}',
qr/Number of files infected[ .]*: 0+(?!\d)/m,
qr/Number of files infected[ .]*: 0*[1-9]/m,
qr/Found virus :\s*(\S+)/m ],
# NOTE: for efficiency, start the Panda in resident mode with 'pavcl -tsr'
# before starting amavisd - the bases are then loaded only once at startup.
# To reload bases in a signature update script:
# /opt/pavcl/usr/bin/pavcl -tsr -ulr; /opt/pavcl/usr/bin/pavcl -tsr
# Please review other options of pavcl, for example:
# -nomalw, -nojoke, -nodial, -nohackt, -nospyw, -nocookies
# ### http://www.pandasoftware.com/
# ['Panda Antivirus for Linux', ['pavcl'],
# '-TSR -aut -aex -heu -cmp -nbr -nor -nso -eng {}',
# [0], [0x10, 0x30, 0x50, 0x70, 0x90, 0xB0, 0xD0, 0xF0],
# qr/Found virus :\s*(\S+)/m ],
# GeCAD AV technology is acquired by Microsoft; RAV has been discontinued.
# Check your RAV license terms before fiddling with the following two lines!
# ['GeCAD RAV AntiVirus 8', 'ravav',
# '--all --archive --mail {}', [1], [2,3,4,5], qr/Infected: (.+)/m ],
# # NOTE: the command line switches changed with scan engine 8.5 !
# # (btw, assigning stdin to /dev/null causes RAV to fail)
### http://www.nai.com/
['NAI McAfee AntiVirus (uvscan)', 'uvscan',
'--secure -rv --mime --summary --noboot - {}', [0], [13],
qr/(?x) Found (?:
\ the\ (.+)\ (?:virus|trojan) |
\ (?:virus|trojan)\ or\ variant\ ([^ ]+) |
:\ (.+)\ NOT\ a\ virus)/m,
# sub {$ENV{LD_PRELOAD}='/lib/libc.so.6'},
# sub {delete $ENV{LD_PRELOAD}},
],
# NOTE1: with RH9: force the dynamic linker to look at /lib/libc.so.6 before
# anything else by setting environment variable LD_PRELOAD=/lib/libc.so.6
# and then clear it when finished to avoid confusing anything else.
# NOTE2: to treat encrypted files as viruses replace the [13] with:
# qr/^\s{5,}(Found|is password-protected|.*(virus|trojan))/
### http://www.virusbuster.hu/en/
['VirusBuster', ['vbuster', 'vbengcl'],
"{} -ss -i '*' -log=$MYHOME/vbuster.log", [0], [1],
qr/: '(.*)' - Virus/m ],
# VirusBuster Ltd. does not support the daemon version for the workstation
# engine (vbuster-eng-1.12-linux-i386-libc6.tgz) any longer. The names of
# binaries, some parameters AND return codes have changed (from 3 to 1).
# See also the new Vexira entry 'vascan' which is possibly related.
# ### http://www.virusbuster.hu/en/
# ['VirusBuster (Client + Daemon)', 'vbengd',
# '-f -log scandir {}', [0], [3],
# qr/Virus found = (.*);/m ],
# # HINT: for an infected file it always returns 3,
# # although the man-page tells a different story
### http://www.cyber.com/
['CyberSoft VFind', 'vfind',
'--vexit {}/*', [0], [23], qr/##==>>>> VIRUS ID: CVDL (.+)/m,
# sub {$ENV{VSTK_HOME}='/usr/lib/vstk'},
],
### http://www.avast.com/
['avast! Antivirus', ['/usr/bin/avastcmd','avastcmd'],
'-a -i -n -t=A {}', [0], [1], qr/\binfected by:\s+([^ \t\n\[\]]+)/m ],
### http://www.ikarus-software.com/
['Ikarus AntiVirus for Linux', 'ikarus',
'{}', [0], [40], qr/Signature (.+) found/m ],
### http://www.bitdefender.com/
['BitDefender', 'bdscan', # new version
'--action=ignore --no-list {}', qr/^Infected files\s*:\s*0+(?!\d)/m,
qr/^(?:Infected files|Identified viruses|Suspect files)\s*:\s*0*[1-9]/m,
qr/(?:suspected|infected)\s*:\s*(.*)(?:\033|$)/m ],
### http://www.bitdefender.com/
['BitDefender', 'bdc', # old version
'--arc --mail {}', qr/^Infected files *:0+(?!\d)/m,
qr/^(?:Infected files|Identified viruses|Suspect files) *:0*[1-9]/m,
qr/(?:suspected|infected): (.*)(?:\033|$)/m ],
# consider also: --all --nowarn --alev=15 --flev=15. The --all argument may
# not apply to your version of bdc, check documentation and see 'bdc --help'
### ArcaVir for Linux and Unix http://www.arcabit.pl/
['ArcaVir for Linux', ['arcacmd','arcacmd.static'],
'-v 1 -summary 0 -s {}', [0], [1,2],
qr/(?:VIR|WIR):[ \t]*(.+)/m ],
# ### a generic SMTP-client interface to a SMTP-based virus scanner
# ['av_smtp', \&ask_av_smtp,
# ['{}', 'smtp:[127.0.0.1]:5525', '[email protected]'],
# qr/^2/, qr/^5/, qr/^\s*(.*?)\s*$/m ],
# ['File::Scan', sub {Amavis::AV::ask_av(sub{
# use File::Scan; my($fn)[email protected]_;
# my($f)=File::Scan->new(max_txt_size=>0, max_bin_size=>0);
# my($vname) = $f->scan($fn);
# $f->error ? (2,"Error: ".$f->error)
# : ($vname ne '') ? (1,"$vname FOUND") : (0,"Clean")}, @_) },
# ["{}/*"], [0], [1], qr/^(.*) FOUND$/m ],
# ### fully-fledged checker for JPEG marker segments of invalid length
# ['check-jpeg',
# sub { use JpegTester (); Amavis::AV::ask_av(\&JpegTester::test_jpeg, @_) },
# ["{}/*"], undef, [1], qr/^(bad jpeg: .*)$/m ],
# # NOTE: place file JpegTester.pm somewhere where Perl can find it,
# # for example in /usr/local/lib/perl5/site_perl
);
@av_scanners_backup = (
### http://www.clamav.net/ - backs up clamd or Mail::ClamAV
['ClamAV-clamscan', 'clamscan',
"--stdout --no-summary -r --tempdir=$TEMPBASE {}",
[0], qr/:.*\sFOUND$/m, qr/^.*?: (?!Infected Archive)(.*) FOUND$/m ],
### http://www.f-prot.com/ - backs up F-Prot Daemon, V6
['F-PROT Antivirus for UNIX', ['fpscan'],
'--report --mount --adware {}', # consider: --applications -s 4 -u 3 -z 10
[0,8,64], [1,2,3, 4+1,4+2,4+3, 8+1,8+2,8+3, 12+1,12+2,12+3],
qr/^\[Found\s+[^\]]*\]\s+<([^ \t(>]*)/m ],
### http://www.f-prot.com/ - backs up F-Prot Daemon (old)
['FRISK F-Prot Antivirus', ['f-prot','f-prot.sh'],
'-dumb -archive -packed {}', [0,8], [3,6], # or: [0], [3,6,8],
qr/(?:Infection:|security risk named) (.+)|\s+contains\s+(.+)$/m ],
### http://www.trendmicro.com/ - backs up Trophie
['Trend Micro FileScanner', ['/etc/iscan/vscan','vscan'],
'-za -a {}', [0], qr/Found virus/m, qr/Found virus (.+) in/m ],
### http://www.sald.com/, http://drweb.imshop.de/ - backs up DrWebD
['drweb - DrWeb Antivirus', # security LHA hole in Dr.Web 4.33 and earlier
['/usr/local/drweb/drweb', '/opt/drweb/drweb', 'drweb'],
'-path={} -al -go -ot -cn -upn -ok-',
[0,32], [1,9,33], qr' infected (?:with|by)(?: virus)? (.*)$'m ],
### http://www.kaspersky.com/
['Kaspersky Antivirus v5.5',
['/opt/kaspersky/kav4fs/bin/kav4fs-kavscanner',
'/opt/kav/5.5/kav4unix/bin/kavscanner',
'/opt/kav/5.5/kav4mailservers/bin/kavscanner', 'kavscanner'],
'-i0 -xn -xp -mn -R -ePASBME {}/*', [0,10,15], [5,20,21,25],
qr/(?:INFECTED|WARNING|SUSPICION|SUSPICIOUS) (.*)/m,
# sub {chdir('/opt/kav/bin') or die "Can't chdir to kav: $!"},
# sub {chdir($TEMPBASE) or die "Can't chdir back to $TEMPBASE $!"},
],
# Commented out because the name 'sweep' clashes with Debian and FreeBSD
# package/port of an audio editor. Make sure the correct 'sweep' is found
# in the path when enabling.
#
# ### http://www.sophos.com/ - backs up Sophie or SAVI-Perl
# ['Sophos Anti Virus (sweep)', 'sweep',
# '-nb -f -all -rec -ss -sc -archive -cab -mime -oe -tnef '.
# '--no-reset-atime {}',
# [0,2], qr/Virus .*? found/m,
# qr/^>>> Virus(?: fragment)? '?(.*?)'? found/m,
# ],
# # other options to consider: -idedir=/usr/local/sav
# Always succeeds and considers mail clean.
# Potentially useful when all other scanners fail and it is desirable
# to let mail continue to flow with no virus checking (when uncommented).
# ['always-clean', sub {0}],
);
1; # insure a defined return value |
amavisd-new is the program that glues together Postfix and SpamAssassin/ClamAV. Postfix passes the mails to amavisd-new which then invokes SpamAssassin and ClamAV to scan the emails. Please have a look at the Spamassassin and ClamAV settings in /etc/amavisd/amavisd.conf . Of course, you can customize that file a lot more. Feel free to do so, and have a look at the explanations in the original /etc/amavisd/amavisd.conf file!
Now let's create the system startup links for ClamAV and amavisd-new, update ClamAV's virus signature database, and start both services:
chkconfig --levels 235 amavisd on
chkconfig --levels 235 clamd.amavisd on
/usr/bin/freshclam
/etc/init.d/amavisd start
/etc/init.d/clamd.amavisd start
Ora dobbiamo configurare Postfix per reindirizzare la posta in arrivo tramite amavisd-new:
postconf -e 'content_filter = amavis:[127.0.0.1]:10024'
postconf -e 'receive_override_options = no_address_mappings'
Afterwards append the following lines to /etc/postfix/master.cf :
vi /etc/postfix/master.cf
[...] |
and restart Postfix:
/etc/init.d/postfix restart
13 Install Razor, Pyzor And DCC And Configure SpamAssassin
Razor, Pyzor e DCC sono filtri antispam che utilizzano una rete di filtraggio collaborativa. To install Razor and Pyzor, run
yum install perl-Razor-Agent pyzor
Then initialize both services:
chmod -R a+rX /usr/share/doc/pyzor-0.5.0 /usr/bin/pyzor /usr/bin/pyzord
chmod -R a+rX /usr/lib/python2.6/site-packages/pyzor
su -m amavis -c 'pyzor --homedir /var/spool/amavisd discover'
su -m amavis -c 'razor-admin -home=/var/spool/amavisd -create'
su -m amavis -c 'razor-admin -home=/var/spool/amavisd -register'
Then we install DCC as follows:
cd /tmp
wget http://www.dcc-servers.net/dcc/source/dcc-dccproc.tar.Z
tar xzvf dcc-dccproc.tar.Z
cd dcc-dccproc-1.3.144
./configure --with-uid=amavis
make
make install
chown -R amavis:amavis /var/dcc
ln -s /var/dcc/libexec/dccifd /usr/local/bin/dccifd
Ora dobbiamo dire a SpamAssassin di usare questi tre programmi. Edit /etc/mail/spamassassin/local.cf so that it looks like this:
vi /etc/mail/spamassassin/local.cf
# These values can be overridden by editing ~/.spamassassin/user_prefs.cf |
Quindi dobbiamo abilitare il plug-in DCC in SpamAssassin. Open /etc/mail/spamassassin/v310.pre and uncomment the loadplugin Mail::SpamAssassin::Plugin::DCC line:
vi /etc/mail/spamassassin/v310.pre
[...] |
You can check your SpamAssassin configuration by executing:
spamassassin --lint
It shouldn't show any errors.
Corri
/etc/init.d/amavisd restart
afterwards.
Ora aggiorniamo i nostri set di regole SpamAssassin come segue:
sa-update --no-gpg
Creiamo un cron job in modo che i set di regole vengano aggiornati regolarmente. Corri
crontab -e
per aprire l'editor dei lavori cron. Crea il seguente processo cron:
23 4 */2 * * /usr/bin/sa-update --no-gpg &> /dev/null |
Questo aggiornerà i set di regole ogni due giorni alle 4:23.
14 Quota Exceedance Notifications
If you want to get notifications about all the email accounts that are over quota, then create the file /usr/local/sbin/quota_notify:
cd /usr/local/sbin/
vi quota_notify
#!/usr/bin/perl -w

# Author <[email protected]>
#
# This script assumes that virtual_mailbox_base in defined
# in postfix's main.cf file. This directory is assumed to contain
# directories which themselves contain your virtual user's maildirs.
# For example:
#
# -----------/
#            |
#            |
#    home/vmail/domains/
#        |          |
#        |          |
#  example.com/  foo.com/
#                   |
#                   |
#           -----------------
#           |       |       |
#           |       |       |
#         user1/   user2/  user3/
#                           |
#                           |
#                        maildirsize
#

use strict;

my $POSTFIX_CF = "/etc/postfix/main.cf";
my $MAILPROG = "/usr/sbin/sendmail -t";
my $WARNPERCENT = 80;
my @POSTMASTERS = ('[email protected]');
my $CONAME = 'My Company';
my $COADDR = '[email protected]';
my $SUADDR = '[email protected]';
my $MAIL_REPORT = 1;
my $MAIL_WARNING = 1;

#get virtual mailbox base from postfix config
open(PCF, "< $POSTFIX_CF") or die $!;
my $mboxBase;
while (<PCF>) {
   next unless /virtual_mailbox_base\s*=\s*(.*)\s*/;
   $mboxBase = $1;
}
close(PCF);

#assume one level of subdirectories for domain names
my @domains;
opendir(DIR, $mboxBase) or die $!;
while (defined(my $name = readdir(DIR))) {
   next if $name =~ /^\.\.?$/;        #skip '.' and '..'
   next unless (-d "$mboxBase/$name");
   push(@domains, $name);
}
closedir(DIR);
#iterate through domains for username/maildirsize files
my @users;
chdir($mboxBase);
foreach my $domain (@domains) {
        opendir(DIR, $domain) or die $!;
        while (defined(my $name = readdir(DIR))) {
           next if $name =~ /^\.\.?$/;        #skip '.' and '..'
           next unless (-d "$domain/$name");
      push(@users, {"$name\@$domain" => "$mboxBase/$domain/$name"});
        }
}
closedir(DIR);

#get user quotas and percent used
my (%lusers, $report);
foreach my $href (@users) {
   foreach my $user (keys %$href) {
      my $quotafile = "$href->{$user}/maildirsize";
      next unless (-f $quotafile);
      open(QF, "< $quotafile") or die $!;
      my ($firstln, $quota, $used);
      while (<QF>) {
         my $line = $_;
              if (! $firstln) {
                 $firstln = 1;
                 die "Error: corrupt quotafile $quotafile"
                    unless ($line =~ /^(\d+)S/);
                 $quota = $1;
            last if (! $quota);
            next;
         }
         die "Error: corrupt quotafile $quotafile"
            unless ($line =~ /\s*(-?\d+)/);
         $used += $1;
      }
      close(QF);
      next if (! $used);
      my $percent = int($used / $quota * 100);
      $lusers{$user} = $percent unless not $percent;
   }
}

#send a report to the postmasters
if ($MAIL_REPORT) {
   open(MAIL, "| $MAILPROG");
   select(MAIL);
   map {print "To: $_\n"} @POSTMASTERS;
   print "From: $COADDR\n";
   print "Subject: Daily Quota Report.\n";
   print "DAILY QUOTA REPORT:\n\n";
   print "----------------------------------------------\n";
   print "| % USAGE |            ACCOUNT NAME          |\n";
   print "----------------------------------------------\n";
   foreach my $luser ( sort { $lusers{$b} <=> $lusers{$a} } keys %lusers ) {
      printf("|   %3d   | %32s |\n", $lusers{$luser}, $luser);
      print "---------------------------------------------\n";
   }
        print "\n--\n";
        print "$CONAME\n";
        close(MAIL);
}

#email a warning to people over quota
if ($MAIL_WARNING) {
        foreach my $luser (keys (%lusers)) {
           next unless $lusers{$luser} >= $WARNPERCENT;       # skip those under quota
           open(MAIL, "| $MAILPROG");
           select(MAIL);
           print "To: $luser\n";
      map {print "BCC: $_\n"} @POSTMASTERS;
           print "From: $SUADDR\n";
           print "Subject: WARNING: Your mailbox is $lusers{$luser}% full.\n";
           print "Reply-to: $SUADDR\n";
           print "Your mailbox: $luser is $lusers{$luser}% full.\n\n";
           print "Once your e-mail box has exceeded your monthly storage quota\n";
      print "your monthly billing will be automatically adjusted.\n";
      print "Please consider deleting e-mail and emptying your trash folder to clear some space.\n\n";
           print "Contact <$SUADDR> for further assistance.\n\n";
           print "Thank You.\n\n";
           print "--\n";
           print "$CONAME\n";
           close(MAIL);
        }
} |
Assicurati di regolare le variabili in alto (in particolare l'indirizzo email [email protected]).
Dobbiamo rendere eseguibile il file:
chmod 755 quota_notify
Corri
crontab -e
to create a cron job for that script:
0 0 * * * /usr/local/sbin/quota_notify &> /dev/null |
15 Test Postfix
To see if Postfix is ready for SMTP-AUTH and TLS , run
telnet localhost 25
Dopo aver stabilito la connessione al tipo di server di posta Postfix
ehlo localhost
Se vedi le linee
250-STARTTLS
e
250-AUTH PLAIN LOGIN
everything is fine.
[[email protected] sbin]# telnet localhost 25
Trying ::1...
Connected to localhost.
Escape character is '^]'.
220 server1.example.com ESMTP Postfix
<-- ehlo localhost
250-server1.example.com
250-PIPELINING
250-SIZE 10240000
250-VRFY
250-ETRN
250-STARTTLS
250-AUTH PLAIN LOGIN
250-AUTH=PLAIN LOGIN
250-ENHANCEDSTATUSCODES
250-8BITMIME
250 DSN
<-- quit
221 2.0.0 Bye
Connection closed by foreign host.
[[email protected] sbin]#
Digita
quit
to return to the system's shell.
16 Populate The Database And Test
Per popolare il database puoi usare la shell MySQL:
mysql -u root -p
USE mail;
Almeno devi creare voci nelle tabelle domini e utenti :
INSERT INTO `domains` (`domain`) VALUES ('example.com');
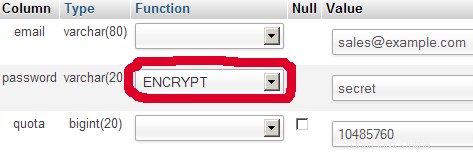
INSERT INTO `users` (`email`, `password`, `quota`) VALUES ('[email protected]', ENCRYPT('secret'), 10485760); (Please take care you use the ENCRYPT syntax in the second INSERT statement in order to encrypt the password!)
Se vuoi inserire voci nelle altre due tabelle, sarebbe simile a questa:
INSERT INTO `forwardings` (`source`, `destination`) VALUES ('[email protected]', '[email protected]');
INSERT INTO `transport` (`domain`, `transport`) VALUES ('example.com', 'smtp:mail.example.com');
Per uscire dalla shell MySQL, digita
quit;
Per la maggior parte delle persone è più facile se hanno un front-end grafico per MySQL; therefore you can also use phpMyAdmin (in this example under http://192.168.0.100/phpMyAdmin/ or http://server1.example.com/phpMyAdmin/) to administrate the mail Banca dati. Again, when you create a user, go sure that you use the ENCRYPT function to encrypt the password:
I do not think I have to explain the domains and users table further.
The forwardings table can have entries like the following:
| fonte | destinazione | |
| [email protected] | [email protected] | Redirects emails for [email protected] to [email protected] |
| @example.com | [email protected] | Creates a Catch-All account for [email protected] All emails to example.com will arrive at [email protected], except those that exist in the users table (i.e., if [email protected] exists in the users table, mails to [email protected] will still arrive at [email protected]). |
| @example.com | @anotherdomain.tld | Questo reindirizza tutte le email a example.com allo stesso utente su un altro dominio.tld. E.g., emails to [email protected] will be forwarded to [email protected] |
| [email protected] | [email protected], [email protected] | Inoltra email per [email protetta] a due o più indirizzi email. All listed email addresses under destination receive a copy of the email. |
The transport table can have entries like these:
| dominio | trasporto | |
| example.com | : | Consegna e-mail per esempio.com localmente. This is as if this record would not exist in this table at all. |
| example.com | smtp:mail.anotherdomain.tld | Delivers all emails for example.com via smtp to the server mail.anotherdomain.com. |
| example.com | smtp:mail.anotherdomain.tld:2025 | Delivers all emails for example.com via smtp to the server mail.anotherdomain.com, but on port 2025, not 25 which is the default port for smtp. |
| example.com |
smtp:[1.2.3.4] | Le parentesi quadre impediscono a Postfix di eseguire ricerche del record DNS MX per l'indirizzo tra parentesi quadre. Makes sense for IP addresses. |
| .example.com | smtp:mail.anotherdomain.tld | Mail for any subdomain of example.com is delivered to mail.anotherdomain.tld. |
| * | smtp:mail.anotherdomain.tld | All emails are delivered to mail.anotherdomain.tld. |
| [email protected] | smtp:mail.anotherdomain.tld | Emails for [email protected] are delivered to mail.anotherdomain.tld. |
See
man transport
for more details.
Tieni presente che l'ordine delle voci nella tabella dei trasporti è importante! The entries will be followed from the top to the bottom.
Importante: Postfix utilizza un meccanismo di memorizzazione nella cache per i trasporti, quindi potrebbe volerci del tempo prima che le modifiche nella tabella di trasporto abbiano effetto. If you want them to take effect immediately, run
postfix reload
after you have made your changes in the transport table.
17 Send A Welcome Email For Creating Maildir
Quando crei un nuovo account e-mail e provi a recuperare le e-mail da esso (con POP3/IMAP) probabilmente riceverai messaggi di errore che dicono che la Maildir non esiste. La Maildir viene creata automaticamente quando arriva la prima email per il nuovo account. Therefore it's a good idea to send a welcome email to a new account.
Per prima cosa installiamo il pacchetto mailx:
yum install mailx
Per inviare un'email di benvenuto a [email protetta], procediamo come segue:
mailx [email protected]
Ti verrà richiesto l'argomento. Digita l'oggetto (es. Benvenuto), quindi premi INVIO e nella riga successiva digita il tuo messaggio. When the message is finished, press ENTER again so that you are in a new line, then press CTRL+D:
[[email protected] ~]# mailx [email protected]
Subject:Welcome <-- ENTER
Welcome! Divertiti con il tuo nuovo account di posta. <-- ENTER
<-- CTRL+D
EOT
[[email protected] ~]#
18 Installing SquirrelMail
SquirrelMail è un'interfaccia webmail che consentirà ai tuoi utenti di inviare e ricevere e-mail in un browser. Questo capitolo mostra come installarlo e adattarlo alla nostra configurazione in modo che gli utenti possano persino modificare la password del proprio account e-mail dall'interfaccia di SquirrelMail.
Per installare SquirrelMail, eseguiamo:
yum install squirrelmail php-pear-DB
Afterwards we restart Apache:
/etc/init.d/httpd restart
SquirrelMail viene fornito con alcuni plug-in preinstallati, sfortunatamente nessuno di essi è in grado di farci cambiare la nostra password e-mail nel nostro database MySQL. Ma c'è il plug-in Cambia password SQL che possiamo installare manualmente:
cd /usr/share/squirrelmail/plugins
wget http://www.squirrelmail.org/plugins/change_sqlpass-3.3-1.2.tar.gz
tar xvfz change_sqlpass-3.3-1.2.tar.gz
cd change_sqlpass
cp config.php.sample config.php
Ora dobbiamo modificare config.php e adattarlo alla nostra configurazione. Modifica le variabili $csp_dsn, $lookup_password_query, $password_update_queries, $password_encryption, $csp_salt_static e $csp_delimiter come segue e commenta $csp_salt_query:
vi config.php
[...] |
Il file completo ha il seguente aspetto:
<?php |
The Change SQL Password plugin also depends on the Compatibility plugin which we install as follows:
cd /usr/share/squirrelmail/plugins
wget http://www.squirrelmail.org/countdl.php?fileurl=http%3A%2F%2Fwww.squirrelmail.org%2Fplugins%2Fcompatibility-2.0.16-1.0.tar.gz
tar xvfz compatibility-2.0.16-1.0.tar.gz
Now we must go into the SquirrelMail configuration and tell SquirrelMail that we use Courier as our POP3 and IMAP server and enable the Change SQL Password and the Compatibility plugins:
/usr/share/squirrelmail/config/conf.pl
You'll see the following menu. Navigate through it as indicated:
SquirrelMail Configuration : Read: config.php (1.4.0)
---------------------------------------------------------
Main Menu --
1.  Organization Preferences
2.  Server Settings
3.  Folder Defaults
4.  General Options
5.  Themes
6.  Address Books
7.  Message of the Day (MOTD)
8.  Plugins
9.  Database
10. Languages

D.  Set pre-defined settings for specific IMAP servers

C   Turn color off
S   Save data
Q   Quit

Command >> <-- D


SquirrelMail Configuration : Read: config.php
---------------------------------------------------------
While we have been building SquirrelMail, we have discovered some
preferences that work better with some servers that don't work so
well with others.  If you select your IMAP server, this option will
set some pre-defined settings for that server.

Please note that you will still need to go through and make sure
everything is correct.  This does not change everything.  There are
only a few settings that this will change.

Please select your IMAP server:
    bincimap    = Binc IMAP server
    courier     = Courier IMAP server
    cyrus       = Cyrus IMAP server
    dovecot     = Dovecot Secure IMAP server
    exchange    = Microsoft Exchange IMAP server
    hmailserver = hMailServer
    macosx      = Mac OS X Mailserver
    mercury32   = Mercury/32
    uw          = University of Washington's IMAP server
    gmail       = IMAP access to Google mail (Gmail) accounts

    quit        = Do not change anything
Command >> <-- courier


              imap_server_type = courier
         default_folder_prefix = INBOX.
                  trash_folder = Trash
                   sent_folder = Sent
                  draft_folder = Drafts
            show_prefix_option = false
          default_sub_of_inbox = false
show_contain_subfolders_option = false
            optional_delimiter = .
                 delete_folder = true

Press enter to continue... <-- ENTER


SquirrelMail Configuration : Read: config.php (1.4.0)
---------------------------------------------------------
Main Menu --
1.  Organization Preferences
2.  Server Settings
3.  Folder Defaults
4.  General Options
5.  Themes
6.  Address Books
7.  Message of the Day (MOTD)
8.  Plugins
9.  Database
10. Languages

D.  Set pre-defined settings for specific IMAP servers

C   Turn color off
S   Save data
Q   Quit

Command >> <-- 8


SquirrelMail Configuration : Read: config.php (1.4.0)
---------------------------------------------------------
Plugins
  Installed Plugins
    1. delete_move_next
    2. squirrelspell
    3. newmail

  Available Plugins:
    4. administrator
    5. bug_report
    6. calendar
    7. change_sqlpass
    8. compatibility
    9. filters
    10. fortune
    11. info
    12. listcommands
    13. mail_fetch
    14. message_details
    15. sent_subfolders
    16. spamcop
    17. test
    18. translate

R   Return to Main Menu
C   Turn color off
S   Save data
Q   Quit

Command >> <-- 8 (or whatever number the compatibility plugin has - it's needed by the change_sqlpass plugin)


SquirrelMail Configuration : Read: config.php (1.4.0)
---------------------------------------------------------
Plugins
  Installed Plugins
    1. delete_move_next
    2. squirrelspell
    3. newmail
    4. compatibility

  Available Plugins:
    5. administrator
    6. bug_report
    7. calendar
    8. change_sqlpass
    9. filters
    10. fortune
    11. info
    12. listcommands
    13. mail_fetch
    14. message_details
    15. sent_subfolders
    16. spamcop
    17. test
    18. translate

R   Return to Main Menu
C   Turn color off
S   Save data
Q   Quit

Command >> <-- 8 (the number of the change_sqlpass plugin)


SquirrelMail Configuration : Read: config.php (1.4.0)
---------------------------------------------------------
Plugins
  Installed Plugins
    1. delete_move_next
    2. squirrelspell
    3. newmail
    4. compatibility
    5. change_sqlpass

  Available Plugins:
    6. administrator
    7. bug_report
    8. calendar
    9. filters
    10. fortune
    11. info
    12. listcommands
    13. mail_fetch
    14. message_details
    15. sent_subfolders
    16. spamcop
    17. test
    18. translate

R   Return to Main Menu
C   Turn color off
S   Save data
Q   Quit

Command >> <-- S


SquirrelMail Configuration : Read: config.php (1.4.0)
---------------------------------------------------------
Plugins
  Installed Plugins
    1. delete_move_next
    2. squirrelspell
    3. newmail
    4. compatibility
    5. change_sqlpass

  Available Plugins:
    6. administrator
    7. bug_report
    8. calendar
    9. filters
    10. fortune
    11. info
    12. listcommands
    13. mail_fetch
    14. message_details
    15. sent_subfolders
    16. spamcop
    17. test
    18. translate

R   Return to Main Menu
C   Turn color off
S   Save data
Q   Quit

Command >> S

Data saved in config.php
Press enter to continue... <-- ENTER


SquirrelMail Configuration : Read: config.php (1.4.0)
---------------------------------------------------------
Plugins
  Installed Plugins
    1. delete_move_next
    2. squirrelspell
    3. newmail
    4. compatibility
    5. change_sqlpass

  Available Plugins:
    6. administrator
    7. bug_report
    8. calendar
    9. filters
    10. fortune
    11. info
    12. listcommands
    13. mail_fetch
    14. message_details
    15. sent_subfolders
    16. spamcop
    17. test
    18. translate

R   Return to Main Menu
C   Turn color off
S   Save data
Q   Quit

Command >> <-- Q
One last thing we need to do is modify the file /etc/squirrelmail/config_local.php and comment out the $default_folder_prefix variable - if you don't do this, you will see the following error message in SquirrelMail after you've logged in:Query:CREATE "Sent" Reason Given:Invalid mailbox name.
vi /etc/squirrelmail/config_local.php
<?php |
Now you can type in http://server1.example.com/webmail or http://192.168.0.100/webmail in your browser to access SquirrelMail.
Log in with your email address (e.g. [email protected]) and your password:
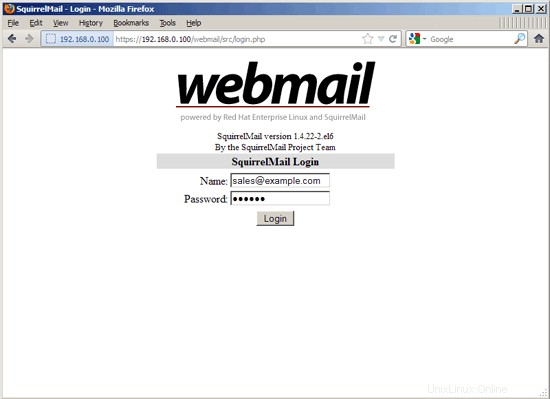
You should find the welcome email in your inbox:
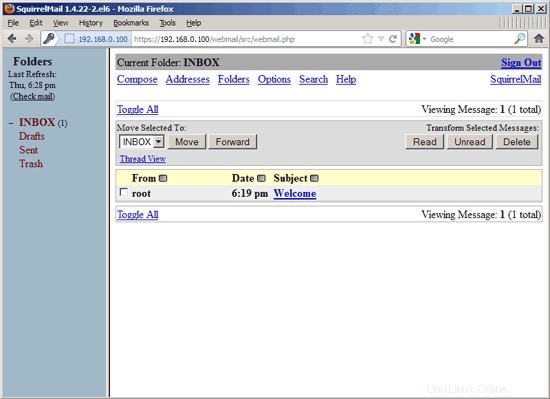
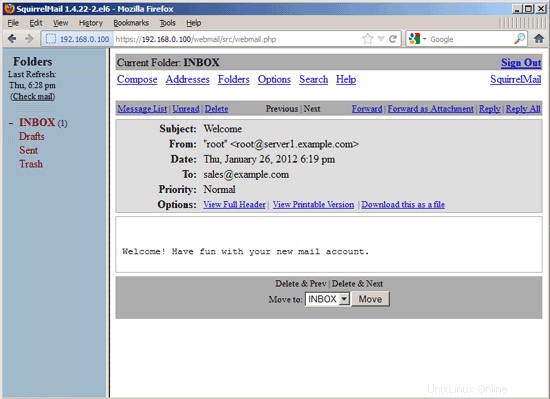
To change your password, go to Options and then select Change Password:
Type in your current password and then your new password twice:
After you've changed the password, you will have to immediately log in again with the new password:
19 VMA (Virtual Mail Admin Interface)
Virtual Mail Admin (VMA) is a small PHP-based web app written to manage the email system set up in this guide. I didn't test it, but I thought I'd share.
This is what the developer (Charl Loubser) wrote to me in an email:
"Hi There,
I don't know if you'll like this, or if this has any use to you, but I thought I'd Share:
I wrote a silly little webapp for the setup you did in the Howto:https://www.howtoforge.com/virtual-users-domains-postfix-courier-mysql-squirrelmail-ubuntu-10.04
If you approve and think it worthy of sharing on your tutorial, you are more than welcome, and can feel free to do so.
As mentioned in the readme, this is not a perfect app, but it does the job for now, and I'd thing it's relatively safe in a closed environment (LAN setup between servers).
The rar file with the app is attached, but can also be downloaded at :http://code.google.com/p/vma/"
20 References
Tutorial:ISP-style Email Service with Debian-Sarge and Postfix 2.1:http://workaround.org/articles/ispmail-sarge/
Postfix + Quota:http://vhcs.net/new/modules/newbb/viewtopic.php?topic_id=3496&forum=17
Mail Passwords Encrypted using saslauthd:http://www.syscp.de/docs/public/contrib/cryptedmailpws
21 Links
- Postfix MTA:http://www.postfix.org/
- Postfix Quota Patch:http://web.onda.com.br/nadal/
- phpMyAdmin:http://www.phpmyadmin.net/
- SquirrelMail:http://www.squirrelmail.org/
- CentOS:http://www.centos.org/