CSF, chiamato anche "Config Server Firewall" è un firewall Stateful Packet Inspection (SPI) per sistemi operativi Linux. Fornisce funzionalità firewall di base e altre funzionalità di sicurezza, inclusi il rilevamento di accesso, intrusioni e inondazioni. Puoi anche integrare CSF con DirectAdmin, cPanel e Webmin. Utilizzando CSF, puoi rilevare molti tipi di attacchi come scansioni delle porte, SYN flood e attacchi di forza bruta di accesso a molti servizi.
In questo post, ti mostreremo come installare e configurare il firewall CSF su Rocky Linux 8.
Prerequisiti
- Un server che esegue Rocky Linux 8 sulla piattaforma Atlantic.Net Cloud
- Una password di root configurata sul tuo server
Fase 1:crea un server cloud Atlantic.Net
Per prima cosa, accedi al tuo server Atlantic.Net Cloud. Crea un nuovo server, scegliendo Rocky Linux 8 come sistema operativo con almeno 2 GB di RAM. Collegati al tuo Cloud Server tramite SSH e accedi utilizzando le credenziali evidenziate in alto nella pagina.
Una volta effettuato l'accesso al server, eseguire il comando seguente per aggiornare il sistema di base con gli ultimi pacchetti disponibili.
dnf update -y
Fase 2 – Installa CSF su Rocky Linux 8
CSF è scritto in Perl, quindi dovrai installare tutti i moduli Perl richiesti sul tuo sistema. Puoi installarli tutti con il seguente comando:
dnf install @perl perl-libwww-perl.noarch perl-LWP-Protocol-https.noarch -y
Dopo aver installato tutti i moduli richiesti, scarica l'ultima versione di CSF utilizzando il comando seguente:
wget https://download.configserver.com/csf.tgz
Una volta completato il download, estrai il file scaricato con il seguente comando:
tar xzf csf.tgz
Quindi, vai alla directory estratta e installa CSF con il seguente comando:
cd csf
sh install.sh
Una volta installato CSF, otterrai il seguente output:
Don't forget to:
1. Configure the following options in the csf configuration to suite your server: TCP_*, UDP_*
2. Restart csf and lfd
3. Set TESTING to 0 once you're happy with the firewall, lfd will not run until you do so

Adding current SSH session IP address to the csf whitelist in csf.allow:
Adding 27.61.171.115 to csf.allow only while in TESTING mode (not iptables ACCEPT)
*WARNING* TESTING mode is enabled - do not forget to disable it in the configuration
'lfd.service' -> '/usr/lib/systemd/system/lfd.service'
'csf.service' -> '/usr/lib/systemd/system/csf.service'
Created symlink /etc/systemd/system/multi-user.target.wants/csf.service → /usr/lib/systemd/system/csf.service.
Created symlink /etc/systemd/system/multi-user.target.wants/lfd.service → /usr/lib/systemd/system/lfd.service.
Created symlink /etc/systemd/system/firewalld.service → /dev/null.
'/etc/csf/csfwebmin.tgz' -> '/usr/local/csf/csfwebmin.tgz'

Installation Completed
Successivamente, verifica che tutti i moduli iptables richiesti siano disponibili.
perl /usr/local/csf/bin/csftest.pl
Se tutto è impostato correttamente, otterrai il seguente output:
Testing ip_tables/iptable_filter...OK
Testing ipt_LOG...OK
Testing ipt_multiport/xt_multiport...OK
Testing ipt_REJECT...OK
Testing ipt_state/xt_state...OK
Testing ipt_limit/xt_limit...OK
Testing ipt_recent...OK
Testing xt_connlimit...OK
Testing ipt_owner/xt_owner...OK
Testing iptable_nat/ipt_REDIRECT...OK
Testing iptable_nat/ipt_DNAT...OK

RESULT: csf should function on this server
Ora puoi controllare la versione CSF usando il seguente comando:
csf -v
Otterrai il seguente output:
csf: v14.12 (generic)
*WARNING* TESTING mode is enabled - do not forget to disable it in the configuration
Passaggio 3:configurazione del liquido cerebrospinale
nano /etc/csf/csf.conf
Modifica TESTING ="1" in TESTING ="0" e aggiungi le porte in entrata e in uscita consentite in base alle tue esigenze:
# lfd will not start while this is enabled
TESTING = "0"

# Allow incoming TCP ports
TCP_IN = "20,21,22,25,53,80,110,143,443,465,587,993,995"

# Allow outgoing TCP ports
TCP_OUT = "20,21,22,25,53,80,110,113,443,587,993,995"
Salva e chiudi il file al termine, quindi avvia e abilita i servizi CSF e LFD:
systemctl start csf lfd
systemctl enable csf lfd
Puoi controllare lo stato di CSF con il seguente comando:
systemctl status csf
Dovresti vedere il seguente output:
● csf.service - ConfigServer Firewall & Security - csf
   Loaded: loaded (/usr/lib/systemd/system/csf.service; enabled; vendor preset: disabled)
   Active: active (exited) since Wed 2021-11-17 08:41:05 UTC; 3s ago
  Process: 13236 ExecStart=/usr/sbin/csf --initup (code=exited, status=0/SUCCESS)
 Main PID: 13236 (code=exited, status=0/SUCCESS)
    Tasks: 0 (limit: 11411)
   Memory: 0B
   CGroup: /system.slice/csf.service

Nov 17 08:41:05 rockylinux csf[13236]: ACCEPT  all opt    in * out lo  ::/0  -> ::/0
Nov 17 08:41:05 rockylinux csf[13236]: LOGDROPOUT  all opt    in * out !lo  ::/0  -> ::/0
Nov 17 08:41:05 rockylinux csf[13236]: LOGDROPIN  all opt    in !lo out *  ::/0  -> ::/0
Nov 17 08:41:05 rockylinux csf[13236]: csf: FASTSTART loading DNS (IPv4)
Nov 17 08:41:05 rockylinux csf[13236]: csf: FASTSTART loading DNS (IPv6)
Nov 17 08:41:05 rockylinux csf[13236]: LOCALOUTPUT  all opt -- in * out !lo  0.0.0.0/0  -> 0.0.0.0/0
Nov 17 08:41:05 rockylinux csf[13236]: LOCALINPUT  all opt -- in !lo out *  0.0.0.0/0  -> 0.0.0.0/0
Nov 17 08:41:05 rockylinux csf[13236]: LOCALOUTPUT  all opt    in * out !lo  ::/0  -> ::/0
Nov 17 08:41:05 rockylinux csf[13236]: LOCALINPUT  all opt    in !lo out *  ::/0  -> ::/0
Nov 17 08:41:05 rockylinux systemd[1]: Started ConfigServer Firewall & Security - csf.
Puoi anche controllare le porte aperte quando CSF è in esecuzione utilizzando il comando seguente:
csf -p
Esempio di output:
Ports listening for external connections and the executables running behind them:
Port/Proto Open Conn  PID/User             Command Line                            Executable
22/tcp     4/6  1     (709/root)           /usr/sbin/sshd -D -oCiphers=aes256-g... /usr/sbin/sshd
80/tcp     4/6  -     (8954/root)          /usr/sbin/httpd -DFOREGROUND            /usr/sbin/httpd
80/tcp     4/6  -     (8957/apache)        /usr/sbin/httpd -DFOREGROUND            /usr/sbin/httpd
80/tcp     4/6  -     (8958/apache)        /usr/sbin/httpd -DFOREGROUND            /usr/sbin/httpd
80/tcp     4/6  -     (8959/apache)        /usr/sbin/httpd -DFOREGROUND            /usr/sbin/httpd
80/tcp     4/6  -     (9172/apache)        /usr/sbin/httpd -DFOREGROUND            /usr/sbin/httpd
323/udp    -/-  -     (552/chrony)         /usr/sbin/chronyd                       /usr/sbin/chronyd
Fase 4 – Come utilizzare il liquido cerebrospinale
Per svuotare tutte le regole CSF, esegui il comando seguente:
csf -f
Per ricaricare il firewall CSF, eseguire il comando seguente:
csf -r
Per consentire le connessioni in entrata dall'IP specifico, eseguire il comando seguente:
csf -a remote-ip-address
Per negare le connessioni dall'IP specifico, eseguire il comando seguente:
csf -d remote-ip-address
Puoi anche modificare il csf.deny e csf.allow file per definire l'elenco degli IP consentiti e negati sul firewall.
Passaggio 5:abilitare l'interfaccia utente CSF
CSF fornisce anche un'interfaccia basata sul Web per gestire il firewall. È disabilitato per impostazione predefinita.
Prima di abilitare l'interfaccia utente CSF, installare i moduli richiesti con il seguente comando:
dnf install perl-IO-Socket-SSL perl-Net-SSLeay perl-IO-Socket-INET6 perl-Socket -y
Quindi, modifica il file di configurazione CSF:
nano /etc/csf/csf.conf
Abilita l'interfaccia utente, definisci la porta di ascolto e imposta il nome utente e la password dell'amministratore come mostrato di seguito:
# 1 to enable, 0 to disable web ui
UI = "1"

# Set port for web UI. The default port is 6666, but
# I change this to 1025 to easy access. Default port create some issue
# with popular chrome and firefox browser (in my case)

UI_PORT = "8080"

# Leave blank to bind to all IP addresses on the server
UI_IP = ""

# Set username for authetnication
UI_USER = "admin"

# Set a strong password for authetnication
UI_PASS = "securepassword"

UI_ALLOW = "0"
Salva e chiudi il file, quindi riavvia il servizio CSF e LFD per applicare le modifiche:
systemctl restart lfd
systemctl restart csf
Passaggio 6:accedere all'interfaccia utente di CSF
Ora apri il tuo browser web e accedi all'interfaccia utente di CSF utilizzando l'URL https://your-server-ip:8080 . Dovresti vedere la pagina di accesso di CSF:

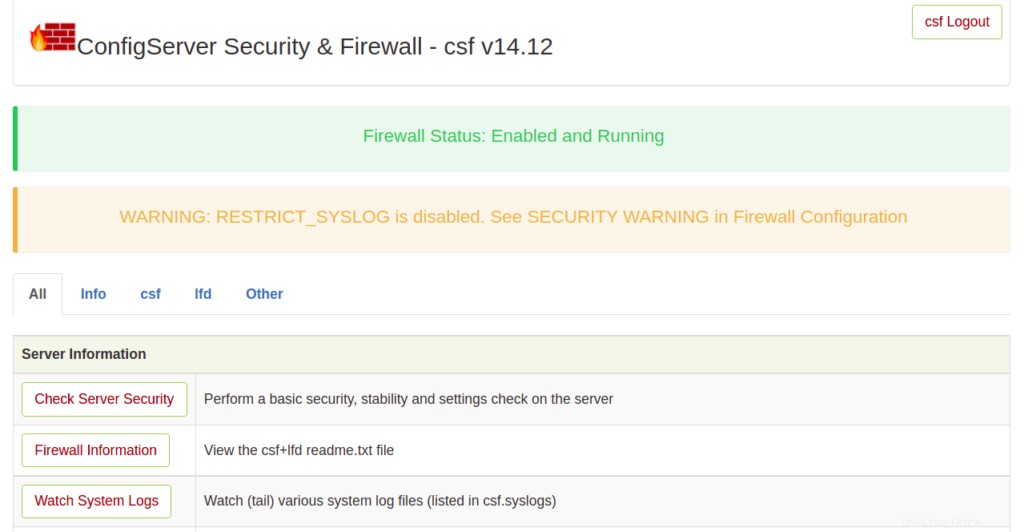
Fornisci il nome utente e la password dell'amministratore e fai clic su Accedi pulsante. Dovresti vedere l'interfaccia web di CSF nella schermata seguente:
Passaggio 7:rimozione del firewall CSF
Se vuoi rimuovere completamente il firewall CSF dal tuo server, esegui semplicemente il seguente script:
bash /etc/csf/uninstall.sh
Ciò rimuoverà il firewall CSF con tutti i file, le directory e le regole create da CSF.
Conclusione
Nella guida sopra, abbiamo spiegato come installare CSF e CSF UI su Rocky Linux 8. Abbiamo anche spiegato come vietare e sbloccare indirizzi IP specifici con CSF. Ora puoi implementare CSF sul tuo server e proteggerlo da vari tipi di attacchi. Provalo sul tuo VPS da Atlantic.Net!