Seafile è una piattaforma di condivisione di file basata su cloud gratuita e open source che può essere utilizzata per archiviare file e sincronizzare i dati su più dispositivi. Seafile è un sistema di archiviazione self-hosted e ad alte prestazioni che ti consente di ospitare sui tuoi server privati. Seafile è gratuito e molto simile ad altri provider di archiviazione tra cui OwnCloud, NextCloud, Google Drive e DropBox.
Con Seafile, puoi accedere e sincronizzare file, contatti e dati su PC e dispositivi mobili.
Seafile viene fornito con un ricco set di funzionalità tra cui supporto per crittografia client, supporto per controllo versione, autenticazione LDAP, autenticazione a due fattori, integrazione antivirus, integrazione con app Web di Office, condivisione di collegamenti pubblici, sincronizzazione file affidabile, supporto Drive Client e molto altro .
In questo tutorial spiegheremo come installare e configurare un server Seafile con Nginx come proxy inverso su Ubuntu 18.04.
Prerequisiti
- Un nuovo VPS Ubuntu 18.04 sulla piattaforma Atlantic.Net Cloud.
- Un nome di dominio valido puntato al tuo indirizzo IP VPS. In questo tutorial utilizzeremo seafile.example.com.
Nota :puoi fare riferimento alla Guida DNS Atlantic per gestire i record DNS.
Fase 1:crea un server cloud Atlantic.Net
Per prima cosa, accedi al tuo server Atlantic.Net Cloud. Crea un nuovo server, scegliendo Ubuntu 18.04 come sistema operativo con almeno 2GB di RAM. Collegati al tuo Cloud Server tramite SSH e accedi utilizzando le credenziali evidenziate in alto nella pagina.
Dopo aver effettuato l'accesso al tuo server Ubuntu 18.04, esegui il comando seguente per aggiornare il tuo sistema di base con gli ultimi pacchetti disponibili.
apt-get update -y
Passaggio 2:installazione delle dipendenze richieste
Innanzitutto, dovrai installare tutte le dipendenze necessarie per l'installazione del server Seafile. Puoi installarli tutti eseguendo il seguente comando:
apt-get install python2.7 libpython2.7 python-setuptools python-pil python-ldap python-urllib3 ffmpeg python-pip python-mysqldb python-memcache python-requests unzip wget -y
Una volta installate tutte le dipendenze, puoi procedere al passaggio successivo.
Fase 3 – Installa Nginx e MariaDB
Successivamente, dovrai installare il server web Nginx e il server del database MariaDB nel tuo server. Puoi installarli eseguendo il seguente comando:
apt-get install nginx mariadb-server mariadb-client -y
Una volta completata l'installazione, avvia il servizio Nginx e MariaDB e abilitalo all'avvio dopo il riavvio del sistema:
systemctl start nginx
systemctl start mariadb
systemctl enable nginx
systemctl enable mariadb
Una volta terminato, puoi procedere al passaggio successivo.
Fase 4:crea un database per Seafile
Seafile è costituito da tre componenti principali:Seahub, server Seafile e server Ccnet. Ciascun componente richiede un database separato per archiviare i propri dati. Dovrai creare un database separato per ciascuno di questi componenti.
Per farlo, accedi alla shell MariaDB con il seguente comando:
mysql -u root -p
Fornisci la tua password di root quando richiesto, quindi crea i database richiesti con i seguenti comandi:
CREATE DATABASE seafiledb character set = 'utf8';
CREATE DATABASE ccnetdb character set = 'utf8';
CREATE DATABASE seahubdb character set = 'utf8';
Quindi, crea l'utente del database con il seguente comando:
CREATE USER 'seafileuser'@'localhost' IDENTIFIED BY 'password';
Quindi, concedi tutti i privilegi all'utente del database Seafile con il seguente comando:
GRANT ALL ON seafiledb.* TO 'seafileuser'@'localhost' IDENTIFIED BY 'password' WITH GRANT OPTION;
GRANT ALL ON ccnetdb.* TO 'seafileuser'@'localhost' IDENTIFIED BY 'password' WITH GRANT OPTION;
GRANT ALL ON seahubdb.* TO 'seafileuser'@'localhost' IDENTIFIED BY 'password' WITH GRANT OPTION;
Quindi, svuota i privilegi ed esci dalla shell MariaDB con il seguente comando:
FLUSH PRIVILEGES;
EXIT;
A questo punto hai creato tutti i database necessari per memorizzare i dati Seafile.
Fase 5 – Installa Seafile Server
Quindi, scarica l'ultima versione di Seafile dal loro sito Web ufficiale con il comando wget:
wget https://download.seadrive.org/seafile-server_7.0.5_x86-64.tar.gz
Una volta scaricato, estrai il file scaricato con il seguente comando:
tar -xvzf seafile-server_7.0.5_x86-64.tar.gz
Quindi, copia la directory estratta nella directory principale web di Nginx:
cp -r seafile-server-7.0.5 /var/www/html/seafile
Quindi, avvia lo script di installazione di Seafile con il seguente comando:
cd /var/www/html/seafile
./setup-seafile-mysql.sh
Durante l'installazione, ti verrà chiesto di rispondere a diverse domande come mostrato di seguito:
Checking python on this machine ...
  Checking python module: python-mysqldb ... Done.

-----------------------------------------------------------------
This script will guide you to setup your seafile server using MySQL.
Make sure you have read seafile server manual at

        https://github.com/haiwen/seafile/wiki

Press ENTER to continue
-----------------------------------------------------------------


What is the name of the server? It will be displayed on the client.
3 - 15 letters or digits
[ server name ] seafile

What is the ip or domain of the server?
For example: www.mycompany.com, 192.168.1.101
[ This server's ip or domain ] seafile.example.com

Where do you want to put your seafile data?
Please use a volume with enough free space
[ default "/var/www/html/seafile-data" ]

Which port do you want to use for the seafile fileserver?
[ default "8082" ]

-------------------------------------------------------
Please choose a way to initialize seafile databases:
-------------------------------------------------------

[1] Create new ccnet/seafile/seahub databases
[2] Use existing ccnet/seafile/seahub databases

[ 1 or 2 ] 2

What is the host of mysql server?
[ default "localhost" ]

What is the port of mysql server?
[ default "3306" ]

Which mysql user to use for seafile?
[ mysql user for seafile ] seafileuser

What is the password for mysql user "seafileuser"?
[ password for seafileuser ]

verifying password of user seafileuser ...  done

Enter the existing database name for ccnet:
[ ccnet database ] ccnetdb

verifying user "seafileuser" access to database ccnetdb ...  done

Enter the existing database name for seafile:
[ seafile database ] seafiledb

verifying user "seafileuser" access to database seafiledb ...  done

Enter the existing database name for seahub:
[ seahub database ] seahubdb

verifying user "seafileuser" access to database seahubdb ...  done

---------------------------------
This is your configuration
---------------------------------

    server name:            seafile
    server ip/domain:       seafile.example.com

    seafile data dir:       /var/www/html/seafile-data
    fileserver port:        8082

    database:               use existing
    ccnet database:         ccnetdb
    seafile database:       seafiledb
    seahub database:        seahubdb
    database user:          seafileuser


---------------------------------
Press ENTER to continue, or Ctrl-C to abort
---------------------------------
Una volta completata l'installazione, dovresti ottenere il seguente output:
-----------------------------------------------------------------
Your seafile server configuration has been finished successfully.
-----------------------------------------------------------------

run seafile server:     ./seafile.sh { start | stop | restart }
run seahub  server:     ./seahub.sh  { start <port> | stop | restart <port> }

-----------------------------------------------------------------
If you are behind a firewall, remember to allow input/output of these tcp ports:
-----------------------------------------------------------------

port of seafile fileserver:   8082
port of seahub:               8000

When problems occur, Refer to

        https://github.com/haiwen/seafile/wiki

for information.
Quindi, dai i permessi a Seafile con il seguente comando:
chown -R www-data:www-data /var/www/html/
Successivamente, dovrai aggiungere un'impostazione FILE_SERVER_ROOT nel file seahub_settings.py:
nano /var/www/html/conf/seahub_settings.py
Aggiungi le impostazioni FILE_SERVER_ROOT come mostrato di seguito:
SECRET_KEY = "x)0=j*l6b+4amq2n^&)c=q5p==exn13%s&6x!*48u4p0p97k)4"
FILE_SERVER_ROOT = 'http://seafile.example.com/seafhttp'
DATABASES = {
    'default': {
        'ENGINE': 'django.db.backends.mysql',
:        'NAME': 'seahubdb',
        'USER': 'seafileuser',
        'PASSWORD': 'password',
        'HOST': '127.0.0.1',
        'PORT': '3306'
    }
}
Salva e chiudi il file quando hai finito.
Fase 6:crea un utente amministratore per Seafile
Successivamente, dovrai creare un utente amministratore e impostare una password per Seafile. Per farlo, cambia la directory in seafile e avvia il servizio seafile con il seguente comando:
cd /var/www/html/seafile
su -p -l www-data -s /bin/bash -c "./seafile.sh start"
Successivamente, avvia il servizio seahub e crea un account amministratore con il seguente comando:
su -p -l www-data -s /bin/bash -c "./seahub.sh start"
Ti verrà chiesto di fornire il tuo indirizzo email e la password di amministratore come mostrato di seguito:
LC_ALL is not set in ENV, set to en_US.UTF-8
Starting seahub at port 8000 ...

----------------------------------------
It's the first time you start the seafile server. Now let's create the admin account
----------------------------------------

What is the email for the admin account?
[ admin email ] example@unixlinux.online

What is the password for the admin account?
[ admin password ]

Enter the password again:
[ admin password again ]


----------------------------------------
Successfully created seafile admin
----------------------------------------

Seahub is started

Done.
Una volta terminato, interrompi i servizi seafile e seahub:
su -p -l www-data -s /bin/bash -c "./seafile.sh stop"
su -p -l www-data -s /bin/bash -c "./seahub.sh stop"
Fase 7:crea un file Systemd per Seafile e Seahub
Successivamente, dovrai creare un file di unità systemd per Seafile e Seahub per gestire il servizio.
Innanzitutto, crea un file di servizio seafile con il seguente comando:
nano /etc/systemd/system/seafile.service
Aggiungi le seguenti righe:
[Unit]
Description=Seafile
After= mysql.service
After=network.target

[Service]
User=www-data
Group=www-data

Type=forking
ExecStart=/var/www/html/seafile-server-latest/seafile.sh start
ExecStop=/var/www/html/seafile-server-latest/seafile.sh stop

[Install]
WantedBy=multi-user.target
Salva e chiudi il file. Quindi, crea un file di servizio systemd per Seahub con il seguente comando:
nano /etc/systemd/system/seahub.service
Aggiungi le seguenti righe:
[Unit]
Description=Seafile
After= mysql.service
After=network.target

[Service]
User=www-data
Group=www-data
Type=forking

ExecStart=/var/www/html/seafile-server-latest/seahub.sh start
ExecStop=/var/www/html/seafile-server-latest/seahub.sh stop

[Install]
WantedBy=multi-user.target
Salva e chiudi il file. Quindi, ricarica il demone systemd con il seguente comando:
systemctl daemon-reload
Quindi, riavvia il servizio Seafile e Seahub e abilita l'avvio dopo il riavvio del sistema con il seguente comando:
systemctl start seafile
systemctl enable seafile
systemctl start seahub
systemctl enable seahub
Per verificare il servizio Seafile, eseguire il comando seguente:
systemctl status seafile
Uscita:
● seafile.service - Seafile
   Loaded: loaded (/etc/systemd/system/seafile.service; disabled; vendor preset: enabled)
   Active: active (running) since Thu 2019-11-28 08:48:31 UTC; 8s ago
  Process: 15487 ExecStart=/var/www/html/seafile-server-latest/seafile.sh start (code=exited, status=0/SUCCESS)
    Tasks: 16 (limit: 1150)
   CGroup: /system.slice/seafile.service
           ├─15522 /var/www/html/seafile/seafile/bin/seafile-controller -c /var/www/html/ccnet -d /var/www/html/seafile-data -F /var/www/html/c
           ├─15524 ccnet-server -F /var/www/html/conf -c /var/www/html/ccnet -f /var/www/html/logs/ccnet.log -d -P /var/www/html/pids/ccnet.pid
           └─15527 seaf-server -F /var/www/html/conf -c /var/www/html/ccnet -d /var/www/html/seafile-data -l /var/www/html/logs/seafile.log -P

Nov 28 08:48:28 ubuntu1804 systemd[1]: Starting Seafile...
Per verificare il servizio Seahub eseguire il seguente comando:
stato systemctl seahub
Uscita:
● seahub.service - Seafile
   Loaded: loaded (/etc/systemd/system/seahub.service; disabled; vendor preset: enabled)
   Active: active (running) since Thu 2019-11-28 08:50:49 UTC; 18s ago
  Process: 15547 ExecStart=/var/www/html/seafile-server-latest/seahub.sh start (code=exited, status=0/SUCCESS)
 Main PID: 15573 (python2.7)
    Tasks: 6 (limit: 1150)
   CGroup: /system.slice/seahub.service
           ├─15573 python2.7 /var/www/html/seafile/seahub/thirdpart/gunicorn seahub.wsgi:application -c /var/www/html/conf/gunicorn.conf --prel
           ├─15579 python2.7 /var/www/html/seafile/seahub/thirdpart/gunicorn seahub.wsgi:application -c /var/www/html/conf/gunicorn.conf --prel
           ├─15580 python2.7 /var/www/html/seafile/seahub/thirdpart/gunicorn seahub.wsgi:application -c /var/www/html/conf/gunicorn.conf --prel
           ├─15581 python2.7 /var/www/html/seafile/seahub/thirdpart/gunicorn seahub.wsgi:application -c /var/www/html/conf/gunicorn.conf --prel
           ├─15582 python2.7 /var/www/html/seafile/seahub/thirdpart/gunicorn seahub.wsgi:application -c /var/www/html/conf/gunicorn.conf --prel
           └─15583 python2.7 /var/www/html/seafile/seahub/thirdpart/gunicorn seahub.wsgi:application -c /var/www/html/conf/gunicorn.conf --prel

Nov 28 08:50:43 ubuntu1804 systemd[1]: Starting Seafile...
Passaggio 8:configura il proxy inverso con Nginx
Successivamente, dovrai installare e configurare Nginx come proxy inverso per Seafile per inoltrare le richieste del client dalle porte 8000 e 8082 alla porta Nginx 80.
Per fare ciò, crea un file di configurazione dell'host virtuale Nginx con il seguente comando:
nano /etc/nginx/sites-available/seafile
Aggiungi le seguenti righe:
server {
    listen 80;
    listen [::]:80;
    root /var/www/html/seafile;
    server_name  seafile.example.com;

     client_max_body_size 100M;

     autoindex off;

     access_log /var/log/nginx/example.com.access.log;
     error_log /var/log/nginx/example.com.error.log;

     location / {
            proxy_pass         http://127.0.0.1:8000;
            proxy_set_header   Host $host;
            proxy_set_header   X-Real-IP $remote_addr;
            proxy_set_header   X-Forwarded-For $proxy_add_x_forwarded_for;
            proxy_set_header   X-Forwarded-Host $server_name;
            proxy_read_timeout  1200s;
        }

     location /seafhttp {
            rewrite ^/seafhttp(.*)$ $1 break;
            proxy_pass http://127.0.0.1:8082;
            proxy_set_header   X-Forwarded-For $proxy_add_x_forwarded_for;
            proxy_connect_timeout  36000s;
            proxy_read_timeout  36000s;
            proxy_send_timeout  36000s;
            send_timeout  36000s;
        }
    location /media {
            root /var/www/html/seafile-server-latest/seahub;
        }
}
Salva e chiudi il file quando hai finito. Quindi, abilita l'host virtuale Nginx con il seguente comando:
ln -s /etc/nginx/sites-available/seafile /etc/nginx/sites-enabled/
Infine, riavvia il servizio Nginx con il seguente comando:
systemctl restart nginx
Fase 9 – Accedi all'interfaccia Web di Seafile
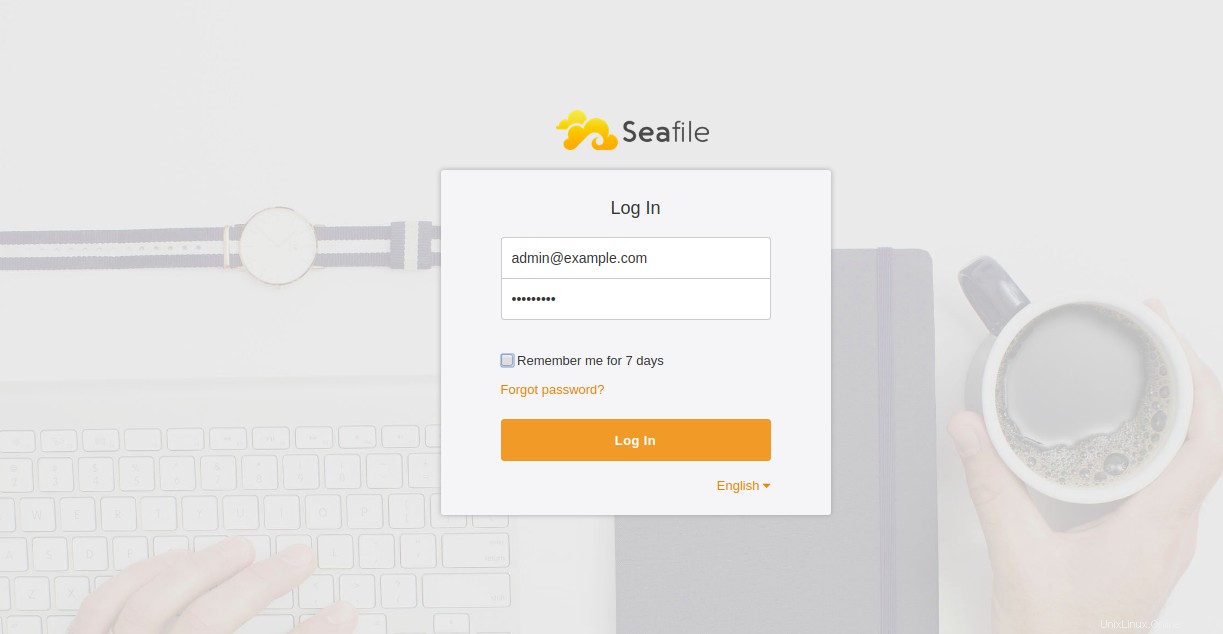
Ora apri il tuo browser web e naviga nell'URL http://seafile.example.com. Dovresti vedere la pagina di accesso di Seafile:

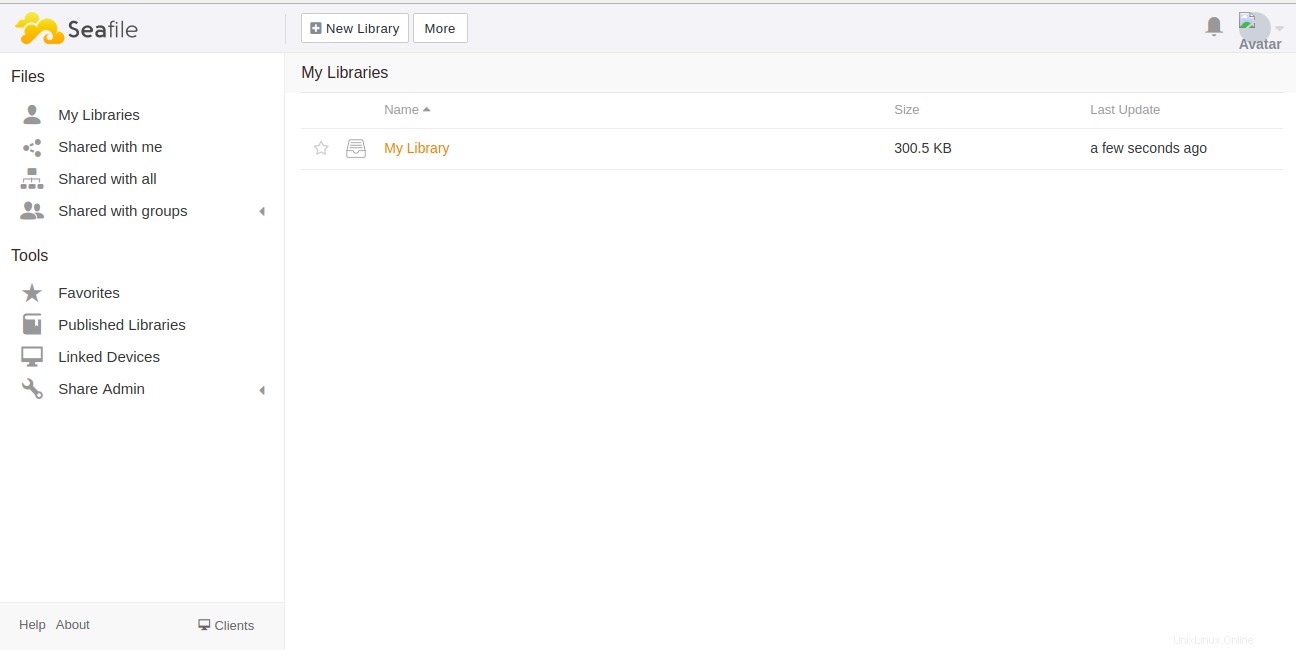
Fornisci il nome utente e la password dell'amministratore e fai clic su Accedi pulsante. Dovresti vedere la dashboard predefinita di Seafile:

Conclusione
Nel tutorial sopra, abbiamo imparato come installare il server Seafile con Nginx come proxy inverso su Ubuntu 18.04 VPS. Spero che ora tu abbia abbastanza conoscenze per ospitare il tuo server di condivisione file utilizzando Seafile. Inizia oggi stesso con Seafile su un VPS di Atlantic.Net!