Questo articolo illustra e illustra i passaggi per installare e configurare un httpd servizio per servire contenuto su HTTPS. Lo scopo dell'utilizzo di HTTPS anziché di HTTP di base è che il contenuto sia crittografato mentre è in transito. Ciò significa che se qualcuno cattura il traffico tra il tuo sistema e il server web, non sarà in grado di vedere cosa è stato inviato. Se stavi accedendo a un server HTTP di base, potrebbero vedere il contenuto.
I prerequisiti
Per iniziare, l'ambiente che utilizzeremo è una macchina virtuale Red Hat Enterprise Linux (RHEL) 8.2 di base. Assicurati che il sistema sia registrato su un Red Hat Satellite o sul Red Hat Customer Portal. Per assistenza in merito, consulta l'Assistente di registrazione.
Dopo che il sistema è stato registrato e gli abbonamenti corretti sono stati allegati, installa httpd e mod_ssl :
[root@webserver ~]# dnf install httpd mod_ssl
### Output truncated ###

Installed:
  apr-1.6.3-9.el8.x86_64                                                         apr-util-1.6.1-6.el8.x86_64
  apr-util-bdb-1.6.1-6.el8.x86_64                                                apr-util-openssl-1.6.1-6.el8.x86_64
  httpd-2.4.37-21.module+el8.2.0+5008+cca404a3.x86_64                            httpd-filesystem-2.4.37-21.module+el8.2.0+5008+cca404a3.noarch
  httpd-tools-2.4.37-21.module+el8.2.0+5008+cca404a3.x86_64                      mod_http2-1.11.3-3.module+el8.2.0+7758+84b4ca3e.1.x86_64
  mod_ssl-1:2.4.37-21.module+el8.2.0+5008+cca404a3.x86_64                        redhat-logos-httpd-81.1-1.el8.noarch

Complete!
[root@webserver ~]#
[ Ai lettori è piaciuto anche: Sopravvivere a un controllo di sicurezza con Linux aziendale ]
Generazione certificati
Dopo aver installato gli RPM, genera i certificati da una CA a tua scelta, se non li hai già:
[root@webserver ~]# openssl req -newkey rsa:2048 -nodes -keyout /etc/pki/tls/private/httpd.key -x509 -days 3650 -out /etc/pki/tls/certs/httpd.crt
Generating a RSA private key
..............+++++
..........................................................................+++++
writing new private key to '/etc/pki/tls/private/httpd.key'
-----
You are about to be asked to enter information that will be incorporated
into your certificate request.
What you are about to enter is what is called a Distinguished Name or a DN.
There are quite a few fields, but you can leave some blank
For some fields, there will be a default value,
If you enter '.', the field will be left blank.
-----
Country Name (2 letter code) [XX]:US
State or Province Name (full name) []:North Carolina
Locality Name (eg, city) [Default City]:Holly Springs
Organization Name (eg, company) [Default Company Ltd]:Example Co
Organizational Unit Name (eg, section) []:Example Unit
Common Name (eg, your name or your server's hostname) []:webserver
Email Address []:root@localhost

[root@webserver ~]#
Puoi verificare che i file siano stati creati:
[root@webserver ~]# ls -l /etc/pki/tls/private/ /etc/pki/tls/certs/
/etc/pki/tls/certs/:
total 4
lrwxrwxrwx. 1 root root   49 Oct 18  2019 ca-bundle.crt -> /etc/pki/ca-trust/extracted/pem/tls-ca-bundle.pem
lrwxrwxrwx. 1 root root   55 Oct 18  2019 ca-bundle.trust.crt -> /etc/pki/ca-trust/extracted/openssl/ca-bundle.trust.crt
-rw-r--r--. 1 root root 1489 Oct  1 12:02 httpd.crt

/etc/pki/tls/private/:
total 4
-rw-------. 1 root root 1704 Oct  1 12:00 httpd.key
Ora che i certificati sono stati generati, devi creare una directory da cui il tuo server web servirà il contenuto. Ad esempio:
[root@webserver ~]# mkdir /var/www/https Puoi inserire contenuti di esempio in index.html file lì:
[root@webserver ~]# echo secure content > /var/www/https/index.html
[root@webserver ~]# cat /var/www/https/index.html
secure content
[root@webserver ~]#
Sicurezza SELinux
Verificare che sia impostato il contesto SELinux corretto:
[root@webserver ~]# ll -Z /var/www
total 0
drwxr-xr-x. 2 root root system_u:object_r:httpd_sys_script_exec_t:s0 6 Dec  2  2019 cgi-bin
drwxr-xr-x. 2 root root system_u:object_r:httpd_sys_content_t:s0     6 Dec  2  2019 html
drwxr-xr-x. 2 root root unconfined_u:object_r:httpd_sys_content_t:s0 6 Oct  1 12:34 https

[root@webserver ~]#
Verifica anche che il contesto di SELinux sia corretto per il tuo index.html file:
[root@webserver ~]# ll -Z /var/www/https/index.html
-rw-r--r--. 1 root root unconfined_u:object_r:httpd_sys_content_t:s0 15 Oct  1 15:07 /var/www/https/index.html

[root@webserver ~]#
Ora che hai i certificati giusti, la directory è stata creata e SELinux è corretto, di' a httpd per utilizzare le chiavi:
[root@webserver ~]# vi /etc/httpd/conf.d/ssl.conf
[root@webserver ~]# grep -e httpd.crt -e httpd.key /etc/httpd/conf.d/ssl.conf -B1
#SSLCertificateFile /etc/pki/tls/certs/localhost.crt
SSLCertificateFile /etc/pki/tls/certs/httpd.crt
--
#SSLCertificateKeyFile /etc/pki/tls/private/localhost.key
SSLCertificateKeyFile /etc/pki/tls/private/httpd.key
[root@webserver ~]#
[root@webserver ~]# grep DocumentRoot /etc/httpd/conf.d/ssl.conf
DocumentRoot "/var/www/https"
#DocumentRoot "/var/www/html"

[root@webserver ~]#
Impostazioni firewall
Il httpd il servizio è stato ora configurato, ma dobbiamo assicurarci che il traffico sia consentito attraverso il firewall. Abiliteremo la porta 443, quindi ricarichiamo il firewall:
[root@webserver ~]# firewall-cmd --permanent --add-port=443/tcp
success

[root@webserver ~]# firewall-cmd --reload
success
Configurazione e test finali
Abilita il httpd servizio da avviare all'avvio e quindi riavviare il httpd servizio:
[root@webserver ~]# systemctl enable httpd
Created symlink /etc/systemd/system/multi-user.target.wants/httpd.service → /usr/lib/systemd/system/httpd.service.
[root@webserver ~]# systemctl restart httpd
[root@webserver ~]# systemctl status httpd
● httpd.service - The Apache HTTP Server
   Loaded: loaded (/usr/lib/systemd/system/httpd.service; enabled; vendor preset: disabled)
   Active: active (running) since Thu 2020-10-01 12:35:26 EDT; 1min 30s ago
     Docs: man:httpd.service(8)
 Main PID: 33387 (httpd)
   Status: "Total requests: 1; Idle/Busy workers 100/0;Requests/sec: 0.0112; Bytes served/sec:  40 B/sec"
    Tasks: 213 (limit: 74790)
   Memory: 35.6M
   CGroup: /system.slice/httpd.service
           ├─33387 /usr/sbin/httpd -DFOREGROUND
           ├─33390 /usr/sbin/httpd -DFOREGROUND
           ├─33391 /usr/sbin/httpd -DFOREGROUND
           ├─33392 /usr/sbin/httpd -DFOREGROUND
           └─33393 /usr/sbin/httpd -DFOREGROUND

Oct 01 12:35:26 webserver.example.com systemd[1]: Starting The Apache HTTP Server...
Oct 01 12:35:26 webserver.example.com systemd[1]: Started The Apache HTTP Server.
Oct 01 12:35:26 webserver.example.com httpd[33387]: Server configured, listening on: port 443, port 80

[root@webserver ~]#
Puoi verificare che il servizio sia in esecuzione e in ascolto sulla porta 443 utilizzando netstat :
[root@webserver ~]# netstat -tlpn
Active Internet connections (only servers)
Proto Recv-Q Send-Q Local Address           Foreign Address         State       PID/Program name
tcp        0      0 192.168.124.1:53        0.0.0.0:*               LISTEN      1505/dnsmasq
tcp        0      0 0.0.0.0:22              0.0.0.0:*               LISTEN      1438/sshd
tcp        0      0 127.0.0.1:631           0.0.0.0:*               LISTEN      1904/cupsd
tcp        0      0 0.0.0.0:111             0.0.0.0:*               LISTEN      1/systemd
tcp6       0      0 :::80                   :::*                    LISTEN      33387/httpd
tcp6       0      0 :::22                   :::*                    LISTEN      1438/sshd
tcp6       0      0 ::1:631                 :::*                    LISTEN      1904/cupsd
tcp6       0      0 :::443                  :::*                    LISTEN      33387/httpd
tcp6       0      0 :::111                  :::*                    LISTEN      1/systemd

[root@webserver ~]#
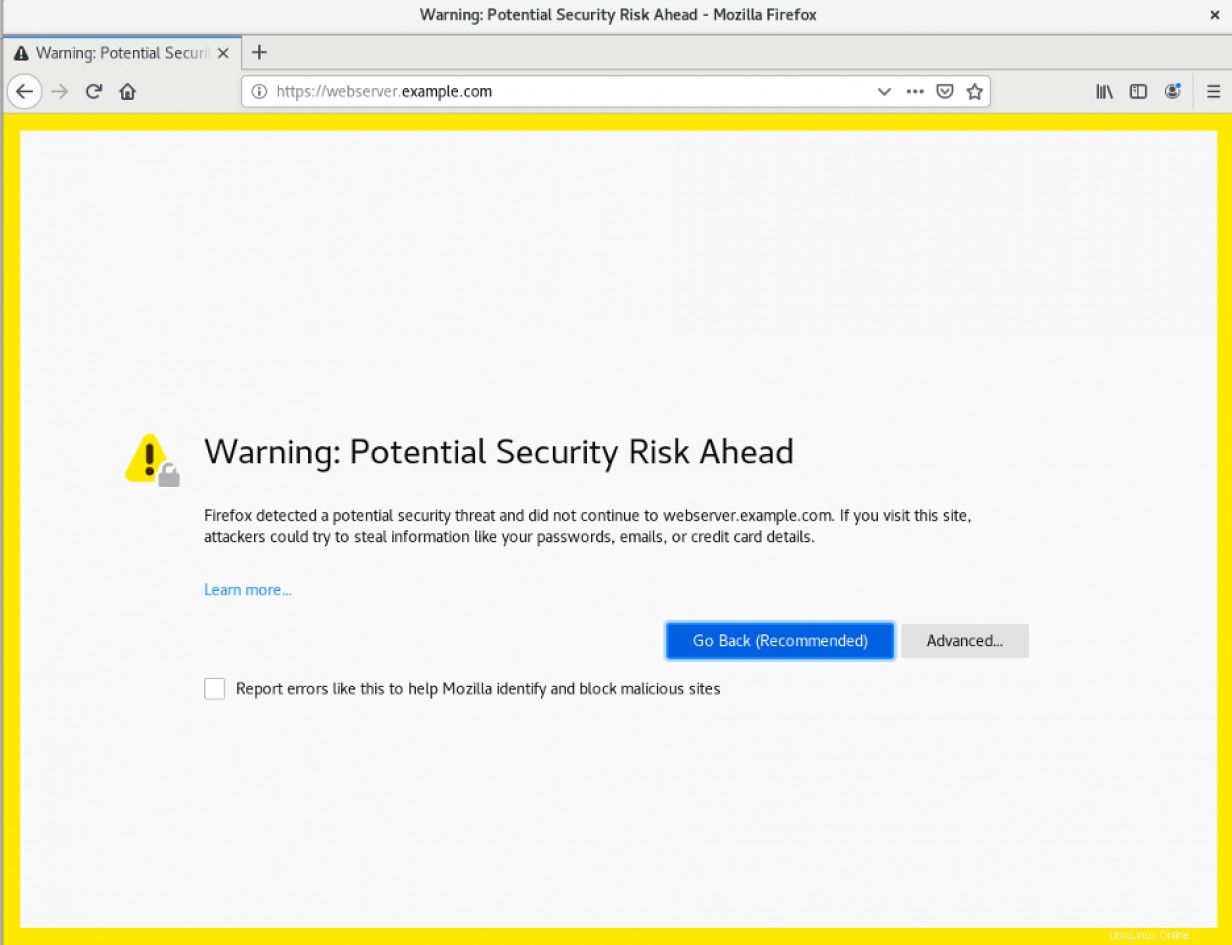
A questo punto, il servizio web dovrebbe funzionare correttamente e visibile ai tuoi clienti. Per verificarlo, prova a utilizzare il tuo browser web per accedere al sito. Se stai utilizzando un certificato autofirmato, dovrai accettarlo:

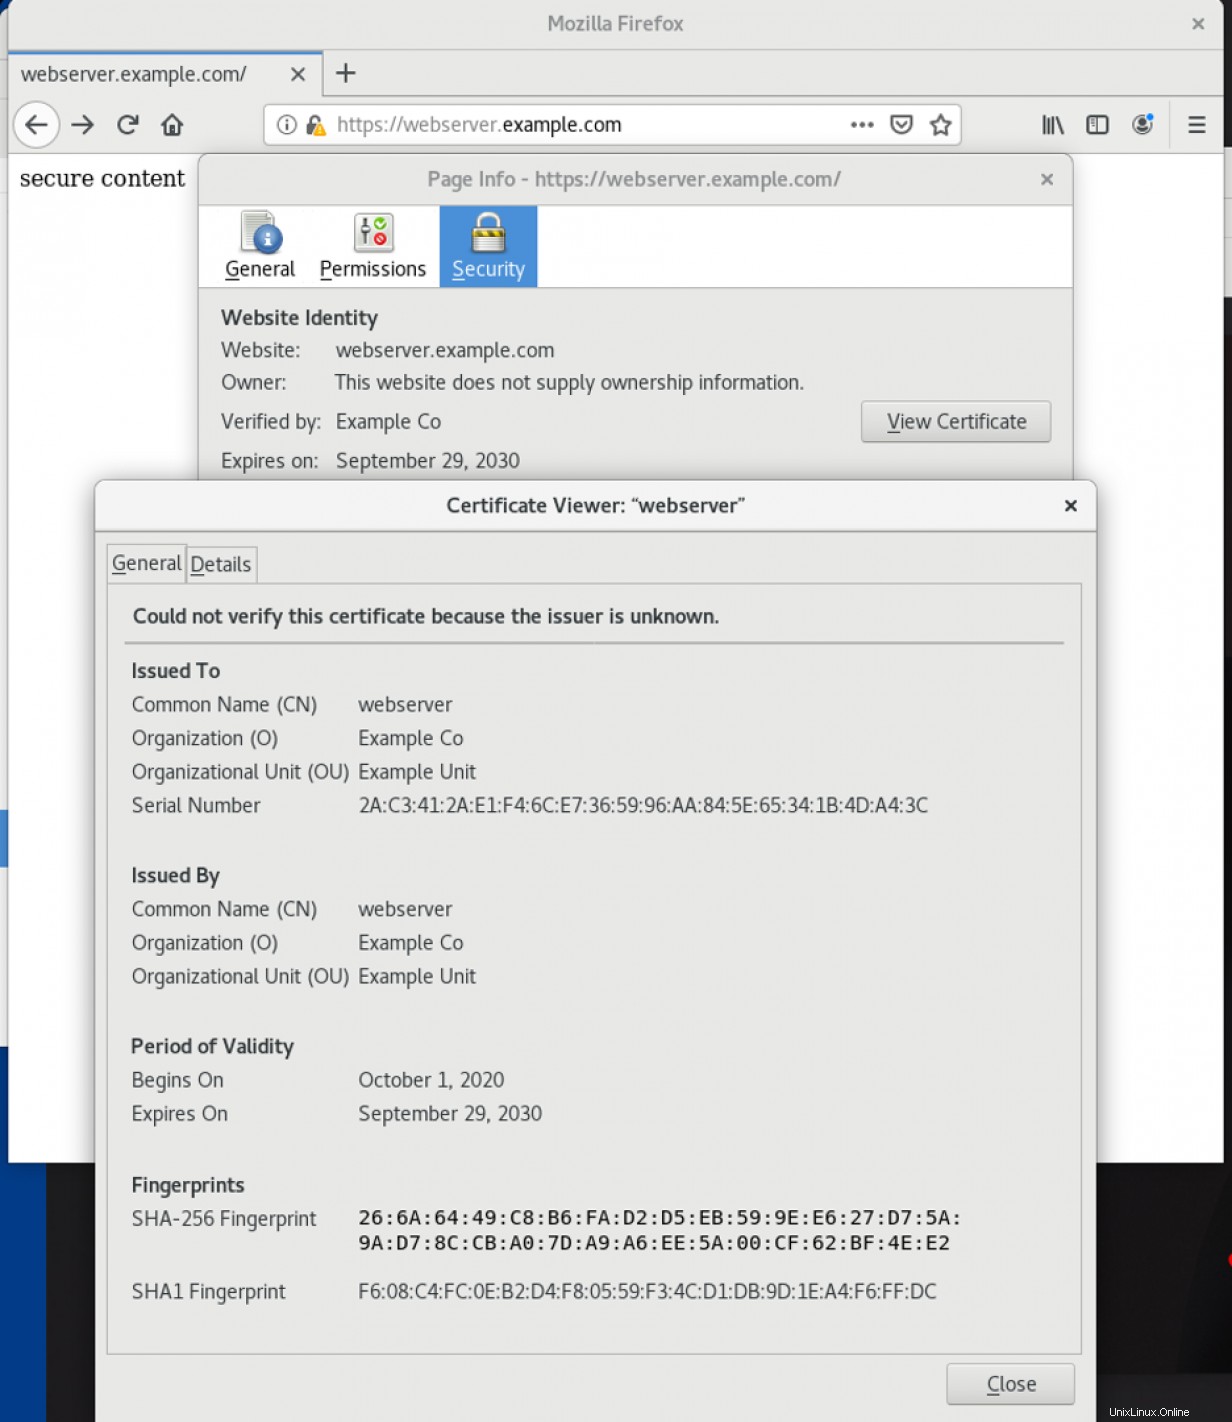
Facendo clic sull'icona del lucchetto nella barra degli indirizzi e selezionando "Visualizza certificato", vedrai le informazioni sul certificato che hai inserito:

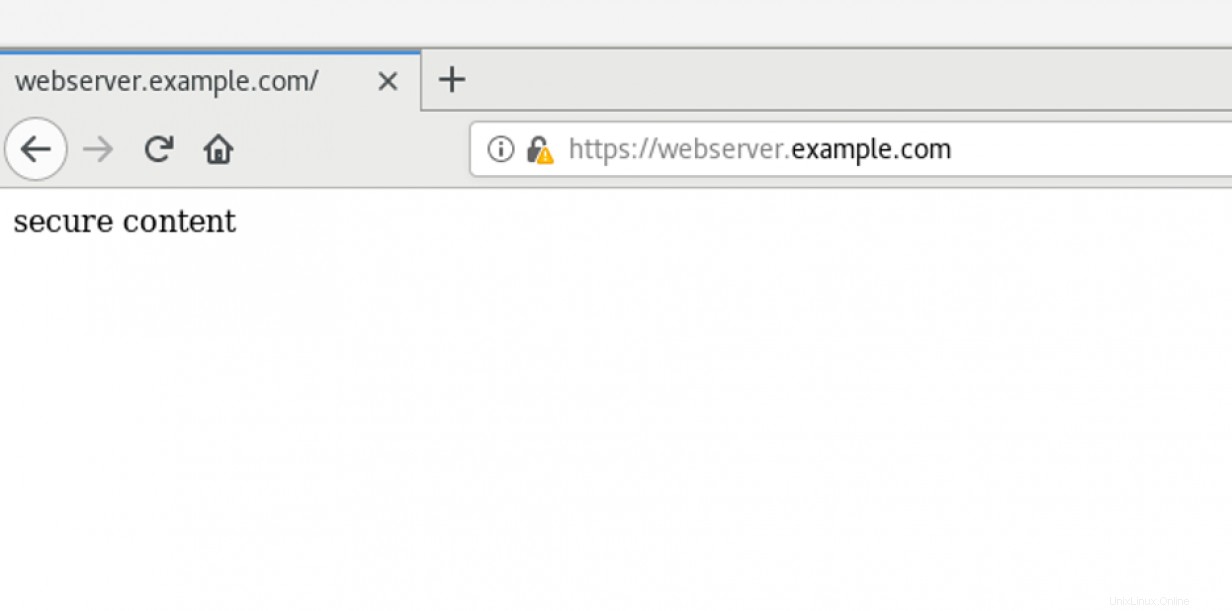
Potrai vedere i contenuti in /var/www/https/index.html file che ti viene servito su HTTPS:

[ Vuoi saperne di più sulla sicurezza? Consulta la checklist di sicurezza e conformità IT. ]
Concludi
Questo articolo ha mostrato come installare e configurare un server HTTPS e quindi verificare che il servizio funzioni correttamente. Ulteriori configurazioni potrebbero includere la configurazione della registrazione remota, l'abilitazione di PHP o la configurazione di un database per il sito Web.