Creare un utente e aggiungervi una chiave pubblica può essere molto noioso. In questo articolo, vedremo come questo processo può essere automatizzato utilizzando uno script di shell che può aiutarci a evitare errori umani che possono verificarsi se eseguiamo l'attività manualmente.
Prerequisiti
- Conoscenza di base degli script Shell.
- Account AWS (crea se non ne hai uno).
- Istanza EC2 con l'utente che ha accesso a sudo (fai clic qui per imparare a creare un'istanza EC2 se non ne hai una o se vuoi imparare )
Cosa faremo
- Crea uno script e una coppia di chiavi pubblica-privata.
- Crea un utente utilizzando lo script.
Crea uno script e una coppia di chiavi pubblica-privata
Crea uno script con il codice seguente al suo interno. Puoi trovare lo stesso codice sul mio repository Github al seguente link.
Github Link: https://github.com/shivalkarrahul/DevOps/blob/master/aws/shell-scripts/aws-ec2-create-user-add-public-key/provide-access.sh
File: provide-access.sh
helpFunction()
{
      echo ""
      printf "\033[1;32mUsage: $0 -K <internal.pem> -U <internal-user> -I <internal-ip> -u <user-to-be-created> -k <\"public-key-string-shared-by-the-user\">"
      echo ""
      echo -e "\t-K \".pem key of the server on which a new user has be created\""
      echo -e "\t-U UserName of the server on which a new user has be created"
      echo -e "\t-I IP of the server on which a new user has be created "
      echo -e "\t-u user to be created on the internal server"
      echo -e "\t-k \"public key string to be added shared by the user\""
      echo -e "Put Public Key in double quotes"

      echo -e  "e.g."
      echo "./provide-access.sh -U ubuntu -K /Users/cloudcover/Documents/Rahul/access/rahuls.pem -I 192.168.134.100  -u rahul -k  \"ssh-rsa Z1rbx6/F/ZntfkvKzX6e82oYOOLb9QtTu4IO+W560+afjp1xLOYqWKeEsZycq0iyHX5herNWxorLU3gGnwGSABCb+62yP3eaESMMHMR91OeDsxeLL41ABANofMROQ8yDjNcYVUxjKWyzNzuJxgnN5KngwkUOWHGbCFmHUsz1WVuWA+rhhk1CPZFywUdsDeGR/Dxd+oNKGvaKGIQuDqK1vY5GiLg0N+OvanTPbLper3/Z5A5d62fRF6+mensZGsKW543 key-name\""

      echo -e "\033[0m" #reset color
      exit 1 # Exit script after printing help
}

while getopts "I:K:U:u:k:" opt
do
   case "$opt" in
      K ) internalServerPemKey="$OPTARG" ;;
      U ) internalServerUser="$OPTARG" ;;
      I ) internalServerIP="$OPTARG" ;;
      u ) userName="$OPTARG" ;;
      k ) keyString="$OPTARG" ;;
      ? ) helpFunction ;; # Print helpFunction in case parameter is non-existent
   esac
done

# Print helpFunction in case parameters are empty
if [ -z "$internalServerIP" ] || [ -z "$internalServerPemKey" ] || [ -z "$internalServerUser" ] || [ -z "$userName" ] || [ -z "$keyString" ]
then
      printf "\033[1;31m"
      echo "Some or all of the parameters are empty";
      helpFunction
fi

# Begin script in case all parameters are correct
printf "\033[1;33m------------------------------------------------------------------Before ssh"
echo -e "\033[0m" #reset color
echo ".pem key of the server on which a new user has be created		:  	$internalServerPemKey"
echo "UserName of the server on which a new user has be created		: 	$internalServerUser"
echo "IP of the server on which a new user has be created			:	$internalServerIP"
echo "user to be created on the internal server				:	$userName"
echo "public key string to be added shared by the user			:	$keyString"


printf "\033[1;31mLogging into: "$internalServerPemKey" "$internalServerUser"@"$internalServerIP"\033[0m\n"

ssh -i "$internalServerPemKey" "$internalServerUser"@"$internalServerIP" << HERE
      printf "\033[1;33m------------------------------------------------------------------After ssh"
      echo -e "\033[0m" #reset color
      echo "Creating user \"$userName\" <--- on="" ---=""> \"$internalServerIP\" <---"
      sudo useradd -m $userName
      sleep 2
      echo "Changing user to \"$userName\""
      sudo -i -u $userName bash << EOF
      echo "User Switched To;"
      whoami
      echo "creating dir: .ssh"
      mkdir -p .ssh
      echo "changing permission of dir .ssh to 700"
      chmod 700 .ssh
      echo "creating a file: .ssh/authorized_keys"
      touch .ssh/authorized_keys
      echo "changing permission of .ssh/authorized_keys to 600"
      chmod 600 .ssh/authorized_keys
      echo "appending $keyString "
      echo "to .ssh/authorized_keys"
      echo '$keyString' >> .ssh/authorized_keys
      echo "Content of .ssh/authorized_keys"
      cat .ssh/authorized_keys
      printf "\033[1;31mExiting from         ---> "$internalServerPemKey" "$internalServerUser"@"$internalServerIP"\033[0m\n"
      #echo "Existing user	---> $userName"
EOF
HERE
Creare una coppia di chiavi per l'utente da creare. Qui, memorizzerò queste chiavi in /tmp/
ssh-keygen
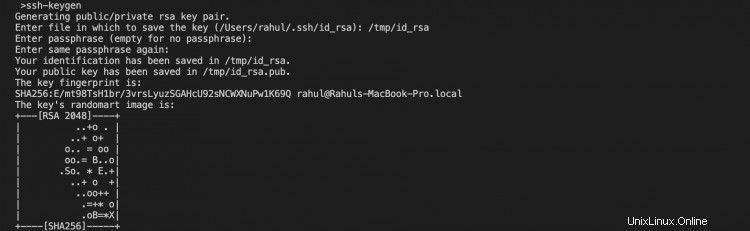
ls /tmp/id_rsa*

Crea un utente usando lo script
Ora creiamo un utente con il seguente comando. Devi cambiare i valori sullo script con quello valido per te. Esegui il seguente comando dal tuo sistema Linux locale.
Prima di eseguire lo script, modifica i suoi permessi
chmod 744 provide-access.sh
./provide-access.sh -U ubuntu -K ~/Downloads/howtoforge-test.pem -I ec2-15-236-64-128.eu-west-3.compute.amazonaws.com -u rahul -k "ssh-rsa AAAAB3NzaC1yc2EAAAADAQABAAABAQCzS60i+fPFEYMbA1w8dLOFK2EAV+vFtlckSU
5+DGxtLHp3smpAxTDkKYJ33bM9Cs6toMDD0HITAH6VRyrgJ4V+Z4EpO6w8kHp3g2Fro5b4X2VX4GWsVdmkLkj0KbUhbd2sKTx/O2x+wNlxT7cUvr0ugii9FIXlXLLjwLsw47bEUNSIhwJB+x7u8tfOc00IBzhghCU9DjfGzMNxWdwpWg2GsAoRWQAT1YGO3laqPpxSVN6RKAzsTJ
gSar7bwJsjEtiCb7+of95SIR/lkP/e1hpsbuDUpc94mTAkde88pFPE/799w+YnbUwaj+1Y8e9R1QRjbs9Xh+b2wAgaAlMTPEFh [email protected]"
Ecco,
- -U =ubuntu =Utente con accesso sudo per accedere all'istanza EC2.
- -K =~/Downloads/howtoforge-test.pem = Ureate per accedere all'istanza EC2.
- -I =ec2-15-236-64-128.eu-west-3.compute.amazonaws.com = IP dell'istanza EC2.
- -u =rahul =Utente da creare
- -k =Chiave pubblica dell'utente da creare.
Questi valori varieranno per te. Aggiungi valori validi per te.

Puoi vedere che l'utente è stato creato.
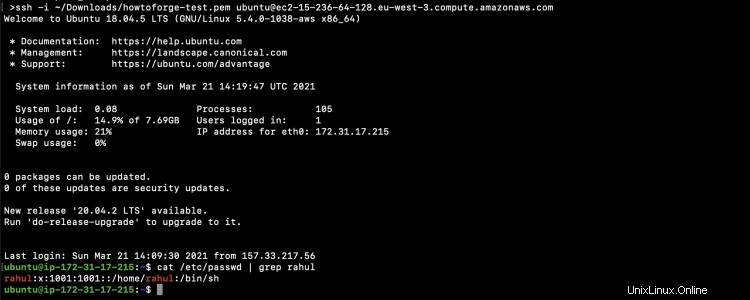
Ora puoi accedere all'istanza EC2 per verificare se l'utente è stato creato o meno.
ssh -i ~/Downloads/howtoforge-test.pem [email protected]
cat /etc/passwd | grep rahul
Ora puoi provare ad accedere al server usando l'utente, cioè rahul, che abbiamo appena creato.
Prima di ciò, modifica le autorizzazioni della chiave privata da utilizzare per l'autenticazione al server.
chmod 400 /tmp/id_rsa.pub
ssh -i /tmp/id_rsa.pub [email protected]
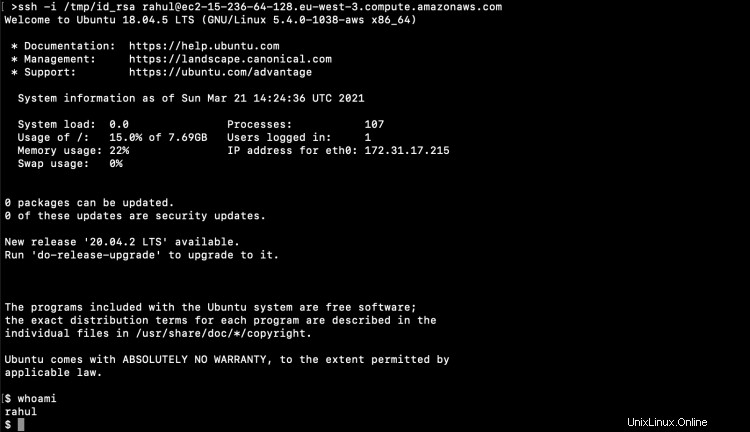
Nello screenshot sopra, puoi vedere che siamo stati in grado di accedere al server utilizzando l'utente che abbiamo creato.
Inoltre, controlla la chiave che abbiamo aggiunto all'utente. Troverai che la chiave pubblica che abbiamo passato allo script è stata aggiunta al server.

Conclusione
In questo articolo, abbiamo visto lo script per automatizzare il processo di creazione di un utente sull'istanza EC2 di Ubuntu e l'aggiunta di una chiave pubblica ad essa.
Questa automazione può aiutare a ridurre al minimo lo sforzo necessario per creare utenti manualmente e aggiungere loro chiavi pubbliche.