Wekan è una Kanban Board gratuita e open source costruita con il framework Meteor JavaScript ed è distribuita con licenza MIT. È molto simile a Workflowy e Trello che ti aiuta a gestire le attività quotidiane, preparare elenchi di cose da fare, gestire altre persone, ecc. Viene fornito con un'interfaccia web completamente reattiva e tradotto in molte lingue. Wekan viene fornito con un ricco set di funzionalità tra cui Esporta scheda Wekan, Importa scheda Trello, Impostazioni SMTP, Ripristina una scheda archiviata, Modulo di gestione utente, Funzioni di trascinamento della selezione e molte altre.
In questo tutorial, ti mostreremo come installare la scheda Wekan Kanban con Nginx come server proxy su Debian 10.
Prerequisiti
- Un server che esegue Debian 10.
- Un nome di dominio valido puntato all'IP del tuo server.
- Sul tuo server è configurata una password di root.
Per iniziare
Prima di iniziare, si consiglia di aggiornare il server con l'ultima versione utilizzando il seguente comando:
apt-get update -y
 apt-get upgrade -y
Una volta aggiornato il server, riavvialo per implementare le modifiche.
Installa Wekan
Il modo più semplice per installare Wekan su Debian 10 è usare snap. Per impostazione predefinita, il pacchetto snap è disponibile nel repository Debian 10. Puoi installarlo eseguendo il seguente comando:
apt-get install snapd -y
Una volta che lo snap è in/in stallo, puoi installare il Wekan eseguendo il seguente comando:
snap install wekan
Una volta installato Wekan, avvierà automaticamente il servizio Wekan e Mongodb.
Puoi vedere lo stato del servizio Wekan con il seguente comando:
systemctl status snap.wekan.wekan
Dovresti vedere il seguente output:
? snap.wekan.wekan.service - Service for snap application wekan.wekan
   Loaded: loaded (/etc/systemd/system/snap.wekan.wekan.service; enabled; vendor preset: enabled)
   Active: active (running) since Sun 2019-12-22 07:43:34 UTC; 7s ago
 Main PID: 7836 (wekan-control)
    Tasks: 11 (limit: 2359)
   Memory: 156.3M
   CGroup: /system.slice/snap.wekan.wekan.service
           ??7836 /bin/bash /snap/wekan/678/bin/wekan-control
           ??8522 /snap/wekan/678/bin/node main.js

Dec 22 07:43:35 debian10 wekan.wekan[7836]: HEADER_LOGIN_EMAIL=Header login email. Example for siteminder: HEADEREMAILADDRESS (default value)
Dec 22 07:43:35 debian10 wekan.wekan[7836]: LOGOUT_WITH_TIMER=false (default value)
Dec 22 07:43:35 debian10 wekan.wekan[7836]: LOGOUT_IN= (default value)
Dec 22 07:43:35 debian10 wekan.wekan[7836]: LOGOUT_ON_HOURS= (default value)
Dec 22 07:43:35 debian10 wekan.wekan[7836]: LOGOUT_ON_MINUTES= (default value)
Dec 22 07:43:35 debian10 wekan.wekan[7836]: DEFAULT_AUTHENTICATION_METHOD= (default value)
Dec 22 07:43:35 debian10 wekan.wekan[7836]: ATTACHMENTS_STORE_PATH= (default value)
Dec 22 07:43:35 debian10 wekan.wekan[7836]: MONGO_URL=mongodb://127.0.0.1:27019/wekan
Dec 22 07:43:37 debian10 wekan.wekan[7836]: Presence started serverId=ijqY8RbEWv8Hg9RSb
Dec 22 07:43:38 debian10 wekan.wekan[7836]: Meteor APM: completed instrumenting the app
Per impostazione predefinita, Wekan viene eseguito sulla porta 8080. Se desideri modificare la porta Wekan su 3001, esegui il comando seguente:
snap set wekan port='3001'
Quindi, riavvia il servizio Wekan e MongoDB per applicare le modifiche:
systemctl restart snap.wekan.mongodb
 systemctl restart snap.wekan.wekan
Gestisci i servizi Wekan e MongoDB
Per avviare e interrompere il servizio Wekan, eseguire il comando seguente:
systemctl stop snap.wekan.wekan
 systemctl start snap.wekan.wekan
Per avviare e interrompere il servizio MongoDB, eseguire il comando seguente:
systemctl stop snap.wekan.mongodb
 systemctl start snap.wekan.mongodb
Configura Nginx come proxy inverso
Wekan è ora installato e in ascolto sulla porta 3001 . Successivamente, è una buona idea eseguire Wekan dietro il proxy Nginx.
Per farlo, installa prima il server web Nginx usando il seguente comando:
apt-get install nginx -y
Una volta installato, apri il file /etc/nginx/nginx.conf e imposta hash_bucket_size:
nano /etc/nginx/nginx.conf
Decommenta la seguente riga:
server_names_hash_bucket_size 64;
Salva e chiudi il file quando hai finito. Quindi, riavvia il servizio Nginx per applicare le modifiche:
systemctl restart nginx
Quindi, crea un file host virtuale Nginx per Wekan come mostrato di seguito:
nano /etc/nginx/conf.d/wekan.conf
Aggiungi le seguenti righe:
map $http_upgrade $connection_upgrade {
    default upgrade;
    ''      close;
}
server {
    listen 80;
    server_name wekan.linuxbuz.com;
    if ($http_user_agent ~ "MSIE" ) {
        return 303 https://browser-update.org/update.html;
    }
    location / {
        proxy_pass http://127.0.0.1:3001;
        proxy_http_version 1.1;
        proxy_set_header Upgrade $http_upgrade; # allow websockets
        proxy_set_header Connection $connection_upgrade;
        proxy_set_header X-Forwarded-For $remote_addr; # preserve client IP
    }
}
Salva e chiudi il file quando hai finito. Quindi, controlla Nginx per eventuali errori di sintassi con il seguente comando:
nginx -t
Dovresti vedere il seguente output:
nginx: the configuration file /etc/nginx/nginx.conf syntax is ok
nginx: configuration file /etc/nginx/nginx.conf test is successful
Infine, riavvia il servizio Nginx per applicare le modifiche:
systemctl restart nginx
A questo punto, Nginx è configurato per inoltrare la richiesta alla porta Wekan 3001.
Sicurezza Wekan con Let's Encrypt Free SSL
Successivamente, si consiglia di proteggere il Wekan con Let's Encrypt SSL gratuito. Per fare ciò, dovrai installare il client Certbot sul tuo server. Certbot è un client Let's Encrypt che può essere utilizzato per scaricare SSL gratuito e configurare Nginx per utilizzare questo certificato.
Per impostazione predefinita, l'ultima versione di Certbot non è disponibile nel repository predefinito di Debian 10. Quindi, dovrai aggiungere il repository Certbot sul tuo server.
Puoi aggiungere il repository usando il seguente comando:
echo "deb http://ftp.debian.org/debian buster-backports main" >> /etc/apt/sources.list
Quindi, aggiorna il repository e installa il client Certbot con il seguente comando:
apt-get update -y
 apt-get install python-certbot-nginx -t buster-backports
Una volta completata l'installazione, esegui il seguente comando per ottenere e installare il certificato SSL per il tuo dominio:
certbot --nginx -d wekan.linuxbuz.com
Ti verrà chiesto di fornire il tuo indirizzo email e di accettare i termini del servizio come mostrato di seguito:
Saving debug log to /var/log/letsencrypt/letsencrypt.log
Plugins selected: Authenticator nginx, Installer nginx
Enter email address (used for urgent renewal and security notices) (Enter 'c' to
cancel): [email protected]

- - - - - - - - - - - - - - - - - - - - - - - - - - - - - - - - - - - - - - - -
Please read the Terms of Service at
https://letsencrypt.org/documents/LE-SA-v1.2-November-15-2017.pdf. You must
agree in order to register with the ACME server at
https://acme-v02.api.letsencrypt.org/directory
- - - - - - - - - - - - - - - - - - - - - - - - - - - - - - - - - - - - - - - -
(A)gree/(C)ancel: A

- - - - - - - - - - - - - - - - - - - - - - - - - - - - - - - - - - - - - - - -
Would you be willing to share your email address with the Electronic Frontier
Foundation, a founding partner of the Let's Encrypt project and the non-profit
organization that develops Certbot? We'd like to send you email about our work
encrypting the web, EFF news, campaigns, and ways to support digital freedom.
- - - - - - - - - - - - - - - - - - - - - - - - - - - - - - - - - - - - - - - -
(Y)es/(N)o: N
Obtaining a new certificate
Performing the following challenges:
http-01 challenge for wekan.linuxbuz.com
Waiting for verification...
Cleaning up challenges
Deploying Certificate to VirtualHost /etc/nginx/conf.d/wekan.conf
Successivamente, dovrai scegliere se reindirizzare o meno il traffico HTTP su HTTPS:
Please choose whether or not to redirect HTTP traffic to HTTPS, removing HTTP access.
- - - - - - - - - - - - - - - - - - - - - - - - - - - - - - - - - - - - - - - -
1: No redirect - Make no further changes to the webserver configuration.
2: Redirect - Make all requests redirect to secure HTTPS access. Choose this for
new sites, or if you're confident your site works on HTTPS. You can undo this
change by editing your web server's configuration.
- - - - - - - - - - - - - - - - - - - - - - - - - - - - - - - - - - - - - - - -
Select the appropriate number [1-2] then [enter] (press 'c' to cancel): 2
Digita 2 e premi Invio per avviare il processo di installazione. Al termine dell'installazione, dovresti ottenere il seguente output:
Redirecting all traffic on port 80 to ssl in /etc/nginx/conf.d/wekan.conf

- - - - - - - - - - - - - - - - - - - - - - - - - - - - - - - - - - - - - - - -
Congratulations! You have successfully enabled https://wekan.linuxbuz.com

You should test your configuration at:
https://www.ssllabs.com/ssltest/analyze.html?d=wekan.linuxbuz.com
- - - - - - - - - - - - - - - - - - - - - - - - - - - - - - - - - - - - - - - -

IMPORTANT NOTES:
 - Congratulations! Your certificate and chain have been saved at:
   /etc/letsencrypt/live/wekan.linuxbuz.com/fullchain.pem
   Your key file has been saved at:
   /etc/letsencrypt/live/wekan.linuxbuz.com/privkey.pem
   Your cert will expire on 2020-03-25. To obtain a new or tweaked
   version of this certificate in the future, simply run certbot again
   with the "certonly" option. To non-interactively renew *all* of
   your certificates, run "certbot renew"
 - Your account credentials have been saved in your Certbot
   configuration directory at /etc/letsencrypt. You should make a
   secure backup of this folder now. This configuration directory will
   also contain certificates and private keys obtained by Certbot so
   making regular backups of this folder is ideal.
 - If you like Certbot, please consider supporting our work by:

   Donating to ISRG / Let's Encrypt:   https://letsencrypt.org/donate
   Donating to EFF:                    https://eff.org/donate-le
Accedi all'interfaccia Web Wekan
Ora apri il tuo browser web e digita l'URL https://wekan.linuxbuz.com . Verrai reindirizzato alla seguente pagina:
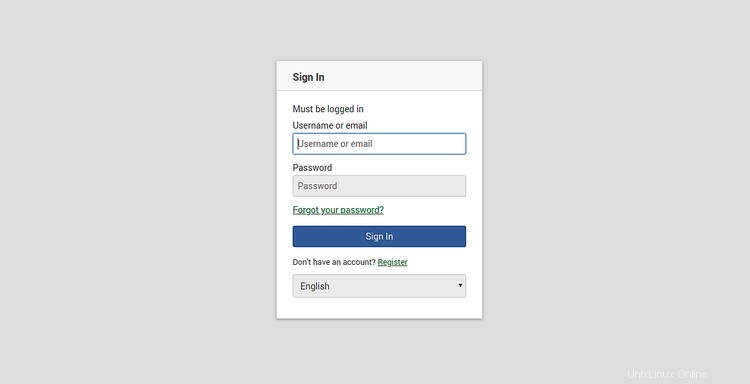
Fai clic su Registrati pulsante. Dovresti vedere la seguente pagina:
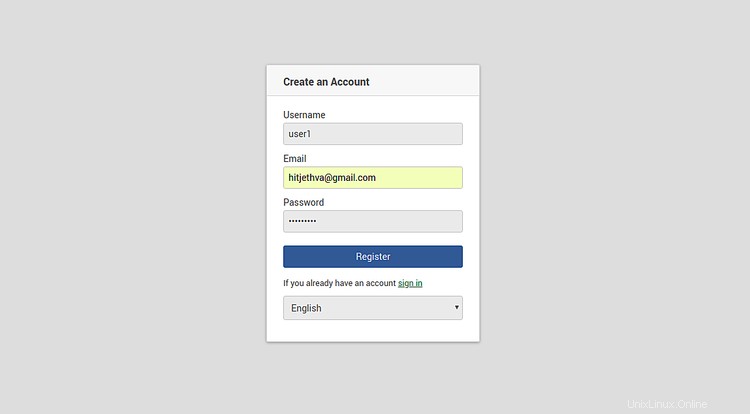
Fornisci il nome utente, la password, l'e-mail desiderati e fai clic su Registrati pulsante. Quindi, fai clic sul segno dentro pulsante. Dovresti vedere la seguente pagina:
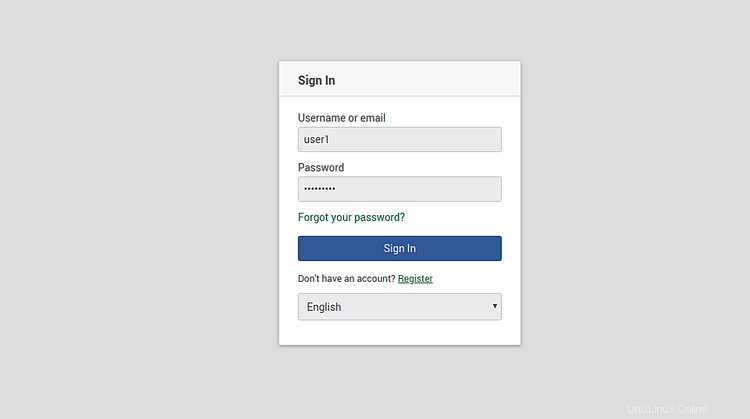
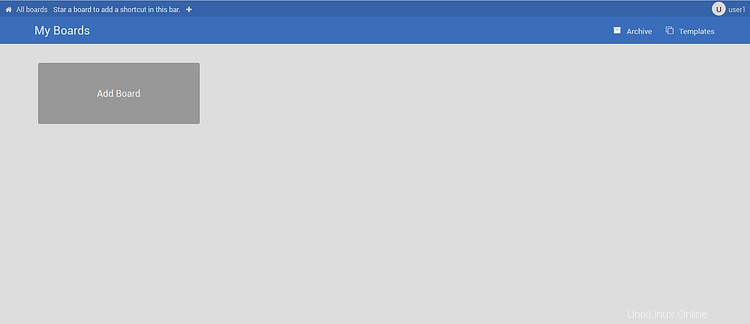
Fornisci il tuo nome utente, password e fai clic su Firma dentro pulsante. Dovresti vedere la dashboard di Wekan nella pagina seguente:
Per ora è tutto. Hai installato con successo il Wekan Kanban sul server Debian 10 e lo hai protetto con Let's Encrypt free SSL.