eCryptfs è un filesystem crittografico impilato di classe enterprise conforme a POSIX per Linux. Puoi usarlo per crittografare partizioni e anche directory che non utilizzano una propria partizione, indipendentemente dal filesystem sottostante, dal tipo di partizione, ecc. Questo tutorial mostra come utilizzare eCryptfs per crittografare una directory su Debian Jessie.
1 Nota preliminare
In questo tutorial, crittograferò la mia directory home, /home/falko/, che si trova sulla partizione / (cioè, /home/falko/ è una directory normale e non usa una partizione propria).
2 Installazione di eCryptfs
eCryptfs può essere facilmente installato come segue:
apt-get -y install ecryptfs-utils
3 Crittografia di una directory
Ora crittograferò la mia home directory /home/falko/. Poiché ci sono già file (non crittografati) in quella directory, devo eseguirne un backup in modo da poterli ripristinare nella directory /home/falko/ crittografata in seguito (altrimenti non è possibile accedere/leggere questi file mentre la directory è crittografato):
cp -pfr /home/falko/ /tmp/
Ora posso crittografare la directory /home/falko/ montandola con il tipo di file system ecryptfs:
mount -t ecryptfs /home/falko /home/falko
Quando lo fai per la prima volta, dovrai rispondere ad alcune domande:
[email protected]:/tmp# mount -t ecryptfs /home/falko /home/falko
Select key type to use for newly created files:
1) tspi
2) passphrase
Selection: <-- 2
Passphrase: <-- Enter a secure password
Select cipher:
1) aes: blocksize = 16; min keysize = 16; max keysize = 32
2) blowfish: blocksize = 8; min keysize = 16; max keysize = 56
3) des3_ede: blocksize = 8; min keysize = 24; max keysize = 24
4) twofish: blocksize = 16; min keysize = 16; max keysize = 32
5) cast6: blocksize = 16; min keysize = 16; max keysize = 32
6) cast5: blocksize = 8; min keysize = 5; max keysize = 16
Selection [aes]: <-- Press ENTER
Select key bytes:
1) 16
2) 32
3) 24
Selection [16]: <-- Press ENTER
Enable plaintext passthrough (y/n) [n]: <-- Press ENTER
Enable filename encryption (y/n) [n]: <-- Press ENTER
Attempting to mount with the following options:
ecryptfs_unlink_sigs
ecryptfs_key_bytes=16
ecryptfs_cipher=aes
ecryptfs_sig=bd28c38da9fc938b
WARNING: Based on the contents of [/root/.ecryptfs/sig-cache.txt],
it looks like you have never mounted with this key
before. This could mean that you have typed your
passphrase wrong.
Would you like to proceed with the mount (yes/no)? : <-- yes
Would you like to append sig [bd28c38da9fc938b] to
[/root/.ecryptfs/sig-cache.txt]
in order to avoid this warning in the future (yes/no)? : <-- yes
Successfully appended new sig to user sig cache file
Mounted eCryptfs
[email protected]:/home/administrator#
Dai un'occhiata all'output di
mount
e dovresti vedere che /home/falko/ è ora crittografato:

Ripristiniamo il nostro backup nella directory ora crittografata /home/falko/ ed eliminiamo il backup in seguito:
cp -pfr /tmp/falko/ /home/
rm -fr /tmp/falko/
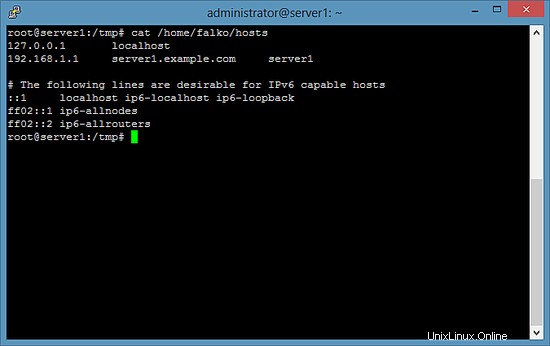
A scopo di test, copiamo qualche altro file, ad es. /etc/hosts, su /home/falko/ per verificare se viene davvero crittografato:
cp /etc/hosts /home/falko
Mentre /home/falko/ è montato con il tipo di file system ecryptfs, dovrebbe essere possibile leggere il contenuto di /home/falko/hosts:
cat /home/falko/hosts
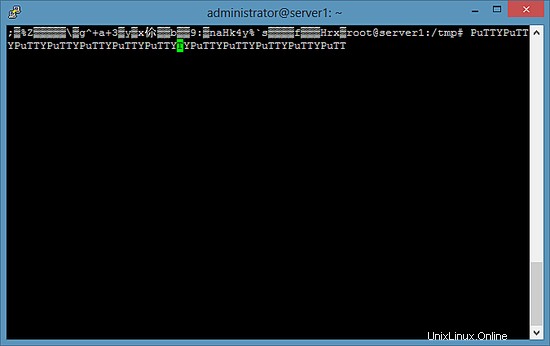
Ora smonta /home/falko/...
umount /home/falko
... e riprova a leggere /home/falko/hosts, e dovresti ottenere qualcosa di criptico:
cat /home/falko/hosts
4 Come montare automaticamente una partizione crittografata all'avvio
Ovviamente, non vogliamo montare /home/falko/ manualmente ogni volta:sarebbe meglio se potesse essere montato automaticamente all'avvio. Per fare ciò, abbiamo bisogno di un file di passphrase e, per motivi di sicurezza, voglio che questo file di passphrase si trovi su una chiave USB.
Collega una chiave USB ed esegui
fdisk -l
per scoprire il nome del dispositivo e il tipo di file system:
[email protected]:~# fdisk -l

Disk /dev/sda: 32.2 GB, 32212254720 bytes
255 heads, 63 sectors/track, 3916 cylinders
Units = cylinders of 16065 * 512 = 8225280 bytes
Sector size (logical/physical): 512 bytes / 512 bytes
I/O size (minimum/optimal): 512 bytes / 512 bytes
Disk identifier: 0x00035e35

   Device Boot      Start         End      Blocks   Id  System
/dev/sda1   *           1        3793    30461952   83  Linux
/dev/sda2            3793        3917      992257    5  Extended
/dev/sda5            3793        3917      992256   82  Linux swap / Solaris

Disk /dev/sdb: 8086 MB, 8086617600 bytes
255 heads, 63 sectors/track, 983 cylinders
Units = cylinders of 16065 * 512 = 8225280 bytes
Sector size (logical/physical): 512 bytes / 512 bytes
I/O size (minimum/optimal): 512 bytes / 512 bytes
Disk identifier: 0x000e439f

   Device Boot      Start         End      Blocks   Id  System
/dev/sdb1               1         983     7895916    b  W95 FAT32
[email protected]:~#
Nel mio caso, il nome del dispositivo è /dev/sdb1 e utilizza un file system FAT32.
Montiamo la chiavetta USB su /mnt/usb:
mkdir /mnt/usb
mount /dev/sdb1 /mnt/usb
Dai un'occhiata all'output di
mount
... e dovresti vedere che è stato montato con il tipo di file system vfat (FAT32) - avremo bisogno di queste informazioni in seguito per il nostro file /etc/fstab:
[email protected]:~# mount
sysfs on /sys type sysfs (rw,nosuid,nodev,noexec,relatime)
proc on /proc type proc (rw,nosuid,nodev,noexec,relatime)
udev on /dev type devtmpfs (rw,relatime,size=10240k,nr_inodes=124251,mode=755)
devpts on /dev/pts type devpts (rw,nosuid,noexec,relatime,gid=5,mode=620,ptmxmode=000)
tmpfs on /run type tmpfs (rw,nosuid,relatime,size=202132k,mode=755)
/dev/sda1 on / type ext4 (rw,relatime,errors=remount-ro,data=ordered)
securityfs on /sys/kernel/security type securityfs (rw,nosuid,nodev,noexec,relatime)
tmpfs on /dev/shm type tmpfs (rw,nosuid,nodev)
tmpfs on /run/lock type tmpfs (rw,nosuid,nodev,noexec,relatime,size=5120k)
tmpfs on /sys/fs/cgroup type tmpfs (ro,nosuid,nodev,noexec,mode=755)
cgroup on /sys/fs/cgroup/systemd type cgroup (rw,nosuid,nodev,noexec,relatime,xattr,release_agent=/lib/systemd/systemd-cgroups-agent,name=systemd)
pstore on /sys/fs/pstore type pstore (rw,nosuid,nodev,noexec,relatime)
cgroup on /sys/fs/cgroup/cpuset type cgroup (rw,nosuid,nodev,noexec,relatime,cpuset)
cgroup on /sys/fs/cgroup/cpu,cpuacct type cgroup (rw,nosuid,nodev,noexec,relatime,cpu,cpuacct)
cgroup on /sys/fs/cgroup/devices type cgroup (rw,nosuid,nodev,noexec,relatime,devices)
cgroup on /sys/fs/cgroup/freezer type cgroup (rw,nosuid,nodev,noexec,relatime,freezer)
cgroup on /sys/fs/cgroup/net_cls,net_prio type cgroup (rw,nosuid,nodev,noexec,relatime,net_cls,net_prio)
cgroup on /sys/fs/cgroup/blkio type cgroup (rw,nosuid,nodev,noexec,relatime,blkio)
cgroup on /sys/fs/cgroup/perf_event type cgroup (rw,nosuid,nodev,noexec,relatime,perf_event)
systemd-1 on /proc/sys/fs/binfmt_misc type autofs (rw,relatime,fd=23,pgrp=1,timeout=300,minproto=5,maxproto=5,direct)
mqueue on /dev/mqueue type mqueue (rw,relatime)
debugfs on /sys/kernel/debug type debugfs (rw,relatime)
hugetlbfs on /dev/hugepages type hugetlbfs (rw,relatime)
rpc_pipefs on /run/rpc_pipefs type rpc_pipefs (rw,relatime)
/dev/sdb1 on /mnt/usb type vfat (rw)
[email protected]:~#
Ora dai un'occhiata al contenuto di /root/.ecryptfs/sig-cache.txt:
cat /root/.ecryptfs/sig-cache.txt
bd28c38da9fc938b
Abbiamo bisogno di questa firma per il file /root/.ecryptfsrc che creiamo come segue:
nano /root/.ecryptfsrc
Assicurati di utilizzare la firma del file /root/.ecryptfs/sig-cache.txt nella riga ecryptfs_sig:
key=passphrase:passphrase_passwd_file=/mnt/usb/passwd_file.txt
ecryptfs_sig=bd28c38da9fc938b
ecryptfs_cipher=aes
ecryptfs_key_bytes=16
ecryptfs_passthrough=n
ecryptfs_enable_filename_crypto=n
Ora creiamo il file passphrase sulla nostra chiavetta USB:
nano /mnt/usb/passwd_file.txt
passphrase_passwd=some_passphrase
Assicurati di utilizzare la passphrase corretta, ovvero la passphrase che useresti se montassi la directory manualmente.
Quindi apri /etc/fstab...
nano /etc/fstab
... e aggiungi le seguenti due righe (assicurati di utilizzare il tipo di file system corretto per la tua chiavetta USB - vfat nel mio caso):
[...]
/dev/sdb1       /mnt/usb        vfat    ro      0 0
/home/falko /home/falko ecryptfs defaults 0 0
(È importante che la riga per la chiave USB venga prima della riga per la partizione crittografata perché la chiave USB deve essere montata prima che la partizione crittografata possa essere montata!)
Quindi riavvia il sistema:
reboot
Se tutto va bene, la partizione crittografata dovrebbe essere montata automaticamente dopo il riavvio. Tuttavia, è possibile che il tuo sistema non riesca a montare la tua chiave USB durante l'avvio, il che significa che nemmeno la tua partizione crittografata può essere montata. Se ciò accade, modifica /etc/rc.local (questo script viene eseguito alla fine del processo di avvio)...
nano /etc/rc.local
... e aggiungi la riga /bin/mount -a prima della riga di uscita 0:
#!/bin/sh -e
#
# rc.local
#
# This script is executed at the end of each multiuser runlevel.
# Make sure that the script will "exit 0" on success or any other
# value on error.
#
# In order to enable or disable this script just change the execution
# bits.
#
# By default this script does nothing.

/bin/mount -a
exit 0
Questo (ri)monterà tutte le partizioni (inclusa la tua chiave USB e la partizione crittografata) alla fine del processo di avvio.
5 link
- eCryptfs:https://launchpad.net/ecryptfs
- Debian:http://www.debian.org/