Automatd è un sistema di gestione dei contenuti gratuito, open source e flat scritto in linguaggio PHP. È veloce, reattivo e offre funzionalità che potrebbero non essere disponibili per altri CMS basati su PHP. Automatd utilizza un file di testo per memorizzare il suo contenuto invece di un database. Automatd fornisce un'interfaccia basata sul Web per la gestione del sito, le impostazioni di sistema, il caricamento di immagini e la scrittura di un post sul blog. Viene fornito con un editor Markdown integrato e un programma di aggiornamento con un clic per mantenere aggiornato il tuo Automad.
In questo tutorial, ti mostreremo come installare Automatad CMS su Debian 10 utilizzando il server web Apache.
Requisiti
- Un server che esegue Debian 10.
- È stata impostata una password di root per il tuo server.
Per iniziare
Prima di iniziare, dovrai aggiornare il tuo sistema con l'ultima versione. Puoi farlo eseguendo il seguente comando:
apt-get update -y
 apt-get upgrade -y
Una volta aggiornato il server, riavvia il server per applicare le modifiche.
Installa Apache e PHP
Automatd è basato su PHP e funziona su un server web. Quindi dovrai installare Apache, PHP e altri moduli richiesti sul tuo server. Puoi installarli tutti eseguendo il seguente comando:
apt-get install apache2 php libapache2-mod-php php-zip php-curl php-mbstring php-gd php-xml php-xmlrpc php-soap unzip -y
Una volta installati tutti i pacchetti, avvia il server web Apache e abilitalo all'avvio al riavvio del sistema con il seguente comando:
systemctl start apache2
 systemctl enable apache2
Una volta terminato, puoi procedere al passaggio successivo.
Installa Automatd
Innanzitutto, dovrai scaricare l'ultima versione di Automatd dal repository Bitbucket. Puoi scaricarlo con il seguente comando:
wget https://bitbucket.org/marcantondahmen/automad/get/default.zip
Una volta completato il download, estrai il file scaricato con il seguente comando:
unzip default.zip
Quindi, sposta la directory estratta nella web root di Apache con il seguente comando:
mv marcantondahmen-automad-c241e88edc3c /var/www/html/automad
Quindi, cambia la proprietà della directory automatizzad in www-data e dai il permesso appropriato con il seguente comando:
chown -R www-data:www-data /var/www/html/automad
 chmod -R 755 /var/www/html/automad
Una volta terminato, puoi procedere al passaggio successivo.
Configura Apache per Automatd
Successivamente, dovrai creare un file di configurazione dell'host virtuale Apache sul server Automatd. Puoi crearlo con il seguente comando:
nano /etc/apache2/sites-available/automad.conf
Aggiungi il seguente contenuto:
<VirtualHost *:80>
     ServerAdmin [email protected]
     DocumentRoot /var/www/html/automad
     ServerName example.com

     <Directory /var/www/html/automad>
          Options FollowSymlinks
          AllowOverride All
          Require all granted
     </Directory>

     ErrorLog ${APACHE_LOG_DIR}/automadcms_error.log
     CustomLog ${APACHE_LOG_DIR}/automadcms_access.log combined

</VirtualHost>
Salva e chiudi il file, quando hai finito. Quindi, controlla Apache per eventuali errori di sintassi con il seguente comando:
apachectl configtest
Se tutto va bene, dovresti ottenere il seguente output:
AH00558: apache2: Could not reliably determine the server's fully qualified domain name, using 127.0.1.1. Set the 'ServerName' directive globally to suppress this message
Syntax OK
Quindi, abilita l'host virtuale Apache e riscrivi il modulo con il seguente comando:
a2ensite automad
 a2enmod rewrite
Infine, riavvia il server web Apache per applicare le modifiche alla configurazione:
systemctl restart apache2
Una volta terminato, puoi procedere al passaggio successivo.
Accedi ad Automated
Automatd è ora installato e configurato, è ora di accedere all'interfaccia web di Automatd.
Apri il tuo browser web e digita l'URL http://example.com. Verrai reindirizzato al sito di Automatd nella schermata seguente:

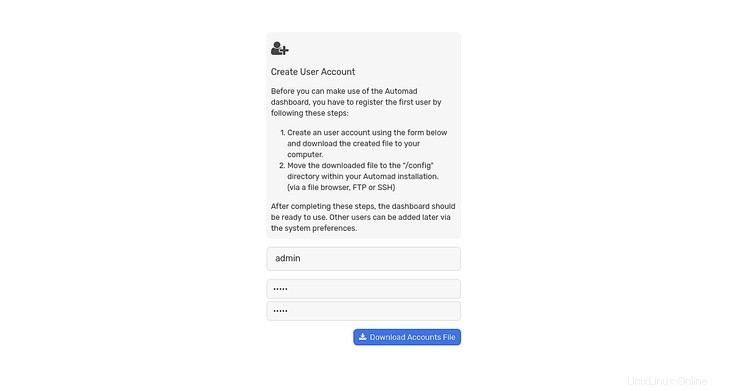
Per creare un account Automatd, apri il tuo browser web e visita l'URL http://example.com/dashboard. Verrai reindirizzato alla seguente pagina:


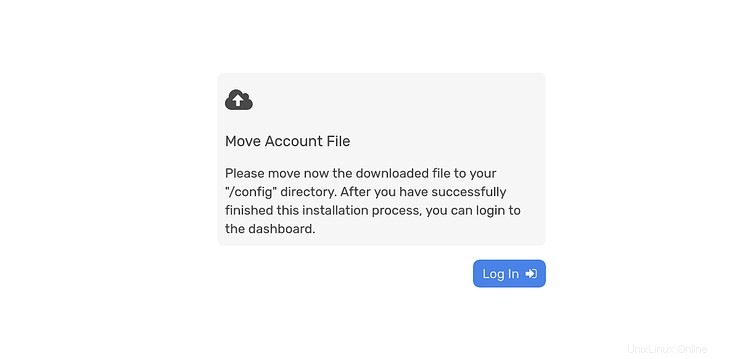
Ora, fornisci il nome utente e la password desiderati, quindi fai clic su Download Account Archivio pulsante per scaricare il modulo di registrazione utente e copiarlo all'interno della directory di configurazione:
mv config.php /var/www/html/automad/config/
Quindi, dai il permesso appropriato al file config.php con il seguente comando:
chown -R www-data:www-data /var/www/html/automad/config/config.php
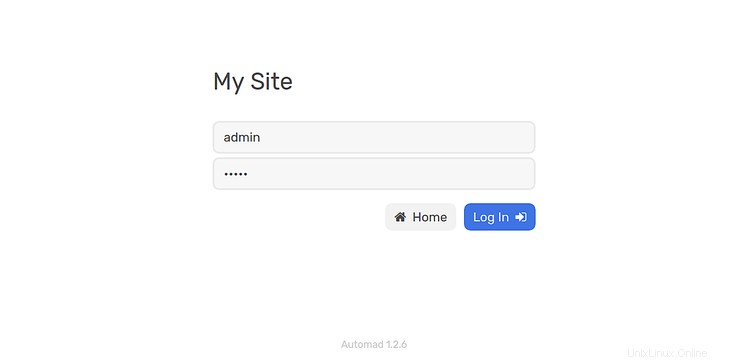
Ora apri il tuo browser web e digita l'URL http://example.com/dashboard. Dovresti vedere la pagina di accesso di Automatd:

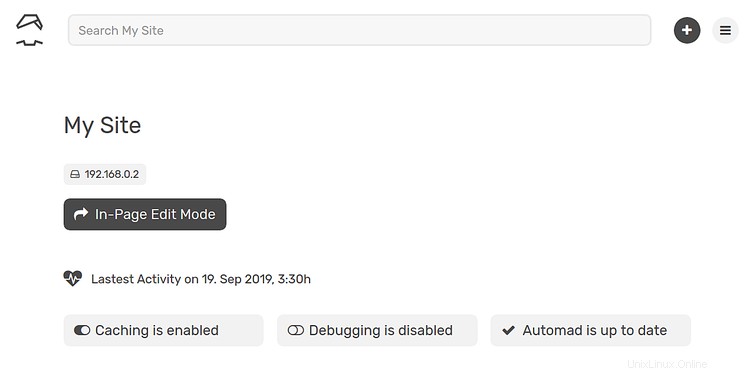
Ora, fornisci il tuo nome utente e password e fai clic sul Registro Nel pulsante. Dovresti vedere la dashboard predefinita di Automatad CMS nella pagina seguente:

Proteggi Automad con Let's Encrypt
Innanzitutto, dovrai installare lo strumento Certbot per scaricare e installare Let's Encrypt SSL gratuito per il tuo sito web.
Innanzitutto, aggiungi il repository Certbot con il seguente comando:
apt-get install software-properties-common
 add-apt-repository ppa:certbot/certbot
Quindi, aggiorna il repository e installa Certbot con il seguente comando:
apt-get update -y
 apt-get install certbot python-certbot-apache -y
Una volta installato, dovrai creare una directory .well nota all'interno della directory di letencrypt. Puoi crearlo con il seguente comando:
mkdir -p /var/lib/letsencrypt/.well-known
Successivamente, dovrai fornire le autorizzazioni appropriate per consentire la crittografia della directory. Puoi farlo con il seguente comando:
chgrp www-data /var/lib/letsencrypt
 chmod g+s /var/lib/letsencrypt
Quindi, crea un file well-known.conf con il seguente comando:
nano /etc/apache2/conf-available/well-known.conf
Aggiungi le seguenti righe:
Alias /.well-known/acme-challenge/ "/var/lib/letsencrypt/.well-known/acme-challenge/"
<Directory "/var/lib/letsencrypt/">
    AllowOverride None
    Options MultiViews Indexes SymLinksIfOwnerMatch IncludesNoExec
    Require method GET POST OPTIONS
</Directory>
Salva e chiudi il file. Quindi, abilita i moduli richiesti con il seguente comando:
a2enmod ssl
 a2enmod http2
 a2enmod headers
 a2enconf well-known
Quindi, riavvia il servizio Apache per applicare tutte le modifiche alla configurazione:
systemctl restart apache2
Ora, installa Let's Encrypt SSL gratuito per il tuo dominio example.com eseguendo il seguente comando:
certbot --apache -d example.com
Innanzitutto, dovrai fornire un indirizzo email valido e accettare i termini di servizio come mostrato di seguito:
Saving debug log to /var/log/letsencrypt/letsencrypt.log
Plugins selected: Authenticator apache, Installer apache
Enter email address (used for urgent renewal and security notices) (Enter 'c' to
cancel): [email protected]

- - - - - - - - - - - - - - - - - - - - - - - - - - - - - - - - - - - - - - - -
Please read the Terms of Service at
https://letsencrypt.org/documents/LE-SA-v1.2-November-15-2017.pdf. You must
agree in order to register with the ACME server at
https://acme-v02.api.letsencrypt.org/directory
- - - - - - - - - - - - - - - - - - - - - - - - - - - - - - - - - - - - - - - -
(A)gree/(C)ancel: A

- - - - - - - - - - - - - - - - - - - - - - - - - - - - - - - - - - - - - - - -
Would you be willing to share your email address with the Electronic Frontier
Foundation, a founding partner of the Let's Encrypt project and the non-profit
organization that develops Certbot? We'd like to send you email about our work
encrypting the web, EFF news, campaigns, and ways to support digital freedom.

- - - - - - - - - - - - - - - - - - - - - - - - - - - - - - - - - - - - - - - -
(Y)es/(N)o: Y
Obtaining a new certificate
Performing the following challenges:
http-01 challenge for example.com
Enabled Apache rewrite module
Waiting for verification...
Cleaning up challenges
Created an SSL vhost at /etc/apache2/sites-available/example.com-le-ssl.conf
Deploying Certificate to VirtualHost /etc/apache2/sites-available/example.com-le-ssl.conf
Enabling available site: /etc/apache2/sites-available/example.com-le-ssl.conf

Please choose whether or not to redirect HTTP traffic to HTTPS, removing HTTP access.
- - - - - - - - - - - - - - - - - - - - - - - - - - - - - - - - - - - - - - - -
1: No redirect - Make no further changes to the webserver configuration.
2: Redirect - Make all requests redirect to secure HTTPS access. Choose this for
new sites, or if you're confident your site works on HTTPS. You can undo this
change by editing your web server's configuration.
- - - - - - - - - - - - - - - - - - - - - - - - - - - - - - - - - - - - - - - -
Select the appropriate number [1-2] then [enter] (press 'c' to cancel): 2
Quindi, scegli l'opzione 2 per scaricare e installare un certificato SSL gratuito per il tuo dominio. Una volta che l'installazione è stata completata con successo. Dovresti ottenere il seguente output:
Enabled Apache rewrite module
Redirecting vhost in /etc/apache2/sites-enabled/example.com.conf to ssl vhost in /etc/apache2/sites-available/
example.com-le-ssl.conf

- - - - - - - - - - - - - - - - - - - - - - - - - - - - - - - - - - - - - - - -
Congratulations! You have successfully enabled https://example.com

You should test your configuration at:
https://www.ssllabs.com/ssltest/analyze.html?d=example.com
- - - - - - - - - - - - - - - - - - - - - - - - - - - - - - - - - - - - - - - -

IMPORTANT NOTES:
 - Congratulations! Your certificate and chain have been saved at:
   /etc/letsencrypt/live/example.com/fullchain.pem
   Your key file has been saved at:
   /etc/letsencrypt/live/example.com/privkey.pem
   Your cert will expire on 2019-10-22. To obtain a new or tweaked
   version of this certificate in the future, simply run certbot again
   with the "certonly" option. To non-interactively renew *all* of
   your certificates, run "certbot renew"
 - Your account credentials have been saved in your Certbot
   configuration directory at /etc/letsencrypt. You should make a
   secure backup of this folder now. This configuration directory will
   also contain certificates and private keys obtained by Certbot so
   making regular backups of this folder is ideal.
 - If you like Certbot, please consider supporting our work by:
   Donating to ISRG / Let's Encrypt:   https://letsencrypt.org/donate
   Donating to EFF:                    https://eff.org/donate-le
Il tuo Automatd CMS è ora protetto con Let's Encrypt SSL gratuito. Puoi accedervi visitando l'URL https://example.com.