In questo tutorial, ti mostreremo come installare il server DNS master e slave BIND9 su Ubuntu. BIND è un server DNS ampiamente utilizzato. Idealmente, un server DNS è composto da 2 macchine che lavorano insieme contemporaneamente, uno funge da master e l'altro da slave.Se il tuo registrar di domini non ti fornisce un server DNS gratuito o se desideri creare un record DNS personalizzato, potresti dover ospitare il tuo Server DNS.
In questo tutorial, tratteremo come configurare il server DNS BIND9 Master e Slave. Entrambi i server utilizzeranno il sistema operativo Ubuntu. Inizieremo a configurare il master e poi lo slave.
Prerequisiti
- Un server che esegue uno dei seguenti sistemi operativi:Ubuntu e qualsiasi altra distribuzione basata su Debian come Linux Mint.
- Si consiglia di utilizzare una nuova installazione del sistema operativo per prevenire potenziali problemi.
- Accesso SSH al server (o semplicemente apri Terminal se sei su un desktop).
- Un
non-root sudo usero accedere all'root user. Ti consigliamo di agire comenon-root sudo user, tuttavia, poiché puoi danneggiare il tuo sistema se non stai attento quando agisci come root.
Installa il server DNS master e slave BIND9 su Ubuntu
Ecco i dati di esempio del server:
Indirizzo IP del server1 (master):108.100.100.1
Indirizzo IP del server2 (slave):108.100.100.2
Dominio:idroot.us
Questo dominio sarà ospitato su questo server:172.217.194.94
SU MASTER
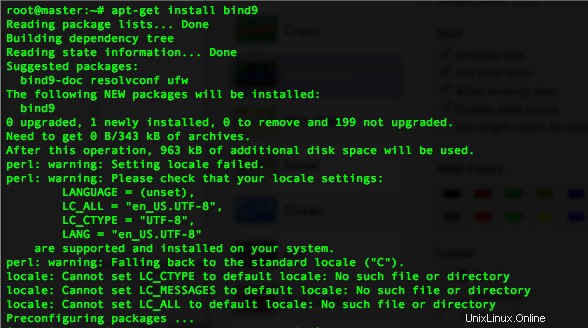
Passaggio 1. Aggiorna il repository Ubuntu e installa Bind usando apt-get.
apt-get update
apt-get install bind9
Passaggio 2. Configura le opzioni di collegamento
*)do this if you haven't installed nano text editor:
apt-get install nano

nano /etc/bind/named.conf.options
options {
	directory "/var/cache/bind";
	additional-from-auth no;
	additional-from-cache no;
	version "Bind Server";

	// If there is a firewall between you and nameservers you want
	// to talk to, you may need to fix the firewall to allow multiple
	// ports to talk.  See http://www.kb.cert.org/vuls/id/800113

	// If your ISP provided one or more IP addresses for stable
	// nameservers, you probably want to use them as forwarders.
	// Uncomment the following block, and insert the addresses replacing
	// the all-0's placeholder.

	 forwarders {
	 	8.8.8.8;
		8.8.4.4;
	 };

	//========================================================================
	// If BIND logs error messages about the root key being expired,
	// you will need to update your keys.  See https://www.isc.org/bind-keys
	//========================================================================
	dnssec-validation auto;
	allow-recursion { 127.0.0.1; };
	auth-nxdomain no;    # conform to RFC1035
	listen-on-v6 { any; };
};
Passaggio 3. Memorizza il nome di dominio e l'impostazione del file di zona
nano /etc/bind/named.conf.local
//place these lines at the bottom of file

zone "idroot.us" {
        type master;
        file "/etc/bind/zones/idroot.us.db";
        allow-transfer { 108.200.200.2; };
        also-notify { 108.200.200.200.2; };
};
Passaggio 4. Perché nella configurazione sopra mettiamo il file di zona in “/etc/bind/zones/idroot.us.d b", quindi dobbiamo creare la cartella e il file
mkdir /etc/bind/zones
nano /etc/bind/zones/idroot.us.db
$TTL    86400
$ORIGIN idroot.us.
@       IN      SOA     ns1.idroot.us. root.idroot.us. (
                              1         ; Serial
                          86400         ; Refresh
                           7200         ; Retry
                        2419200         ; Expire
                         604800 )       ; Negative Cache TTL
;
@       IN      NS      ns1.idroot.us.
@       IN      NS      ns2.idroot.us.
ns1      IN      A       108.100.100.1
ns2      IN      A       108.100.100.2

;also list other computers
@       IN      A       172.217.194.94
www IN A 172.217.194.94 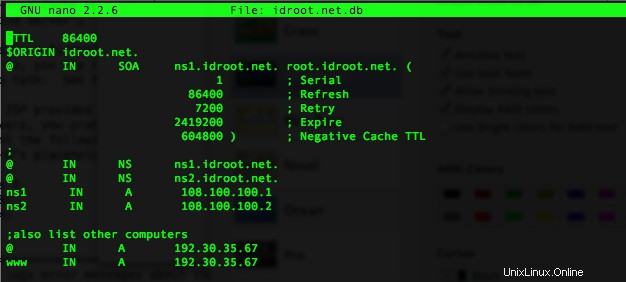
Passaggio 5. (ultimo passaggio su master) Riavvia il servizio DNS bind9
service bind9 restart
SCHIAVO
Ripeti i passaggi 1-2 in modo simile al master.
Passaggio 3. Configura le opzioni di collegamento slave
nano /etc/bind/named.conf.options
zone "idroot.us" {
	type slave;
	file "/var/cache/bind/idroot.us.db";
	masters {108.100.100.1;};
};
nota la differenza in questo file di configurazione dal master.
Passaggio 4. Riavvia il servizio bind9.
service bind9 restart
Cosa fare dopo?
Questo server DNS non funzionerà finché non cambi il server dei nomi del tuo dominio. Può essere fatto dal sito web del registrar del tuo dominio. In questo scenario, cambiamo il server dei nomi in:
ns1.idroot.us
ns2.idroot.us
Test di BIND
Questo test può essere eseguito sul server DNS stesso o da un altro server o dal proprio PC. In questo caso, faremo il test da un altro server con sistema operativo Ubuntu.
Passaggio 1. Installa dnsutils
sudo apt-get install dnsutils
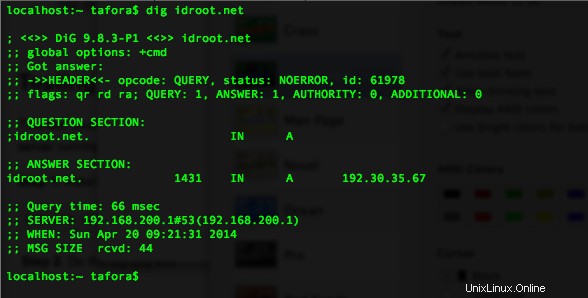
Passaggio 2. Fai il test DNS dig
dig idroot.us
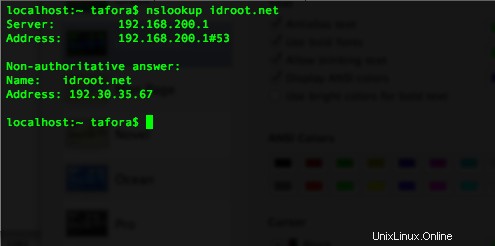
Passaggio 3. Esegui il test DNS di nslookup
nslookup idroot.us