Strider è un server di integrazione e distribuzione continua gratuito e open source scritto in Node.JS, JavaScript e utilizza MongoDB per archiviare i propri dati. Strider viene fornito con molti plug-in che possono essere utilizzati per aggiungere varie funzionalità all'applicazione.
In questo tutorial, spiegheremo come installare Strider sul server Ubuntu 18.04.
Requisiti
- Un server che esegue Ubuntu 18.04.
- Sul tuo server è configurata una password di root.
Per iniziare
Prima di iniziare, si consiglia di aggiornare i pacchetti all'ultima versione. Puoi aggiornare tutti i pacchetti eseguendo il seguente comando:
apt-get update -y
 apt-get upgrade -y
Una volta aggiornati tutti i pacchetti, riavvia il sistema per applicare le modifiche.
Quindi, installa curl e git package con il seguente comando:
apt-get install curl git -y
Una volta installati tutti i pacchetti richiesti, puoi procedere al passaggio successivo.
Installa Node.js
Successivamente, dovrai installare Node.js e altri pacchetti richiesti sul tuo server.
Per impostazione predefinita, Node.js non è disponibile nel repository predefinito di Ubuntu 18.04. Quindi, dovrai aggiungere il repository Node.js al tuo sistema. Puoi aggiungere il repository con il seguente comando:
curl -sL https://deb.nodesource.com/setup_12.x | bash -
Una volta aggiunto il repository, aggiorna il repository e installa Node.js con il seguente comando:
apt-get install nodejs node-gyp -y
Dopo aver installato Node.js, controlla la versione di Node.js e NPM con il seguente comando:
node -v
Dovresti vedere il seguente output:
v12.6.0
npm -v
Dovresti vedere il seguente output:
6.9.0
Installa e configura MongoDB
Strider utilizza MongoDB come negozio di supporto. Quindi, dovrai installare MongoDB sul tuo sistema.
Innanzitutto, importa la chiave pubblica GPG per MongoDB con il seguente comando:
apt-key adv --keyserver hkp://keyserver.ubuntu.com:80 --recv 9DA31620334BD75D9DCB49F368818C72E52529D4
Quindi, aggiungi il repository MongoDB con il seguente comando:
echo "deb [ arch=amd64 ] https://repo.mongodb.org/apt/ubuntu bionic/mongodb-org/4.0 multiverse" | tee /etc/apt/sources.list.d/mongodb-org-4.0.list
Dovresti vedere il seguente output:
Executing: /tmp/apt-key-gpghome.mmTr2ifzC1/gpg.1.sh --keyserver hkp://keyserver.ubuntu.com:80 --recv 9DA31620334BD75D9DCB49F368818C72E52529D4
gpg: key 68818C72E52529D4: public key "MongoDB 4.0 Release Signing Key <[email protected]>" imported
gpg: Total number processed: 1
gpg:               imported: 1
Quindi, aggiorna il repository e installa MongoDB con il seguente comando:
apt-get update -y
 apt-get install mongodb-org -y
Una volta completata l'installazione, avvia il servizio MongoDB e abilitalo all'avvio dopo il riavvio del sistema con il seguente comando:
systemctl start mongod
 systemctl enable mongod
Puoi anche controllare lo stato di MongoDB con il seguente comando:
systemctl status mongod
Dovresti vedere il seguente output:
? mongod.service - MongoDB Database Server
   Loaded: loaded (/lib/systemd/system/mongod.service; disabled; vendor preset: enabled)
   Active: active (running) since Sat 2019-07-13 05:24:41 UTC; 5s ago
     Docs: https://docs.mongodb.org/manual
 Main PID: 13619 (mongod)
   CGroup: /system.slice/mongod.service
           ??13619 /usr/bin/mongod --config /etc/mongod.conf

Jul 13 05:24:41 ubuntu1804 systemd[1]: Started MongoDB Database Server.
Successivamente, dovrai configurare MongoDB per l'autenticazione.
Per farlo, apri la shell MongoDB con il seguente comando:
mongo
Dovresti vedere il seguente output:
MongoDB shell version v4.0.10
connecting to: mongodb://127.0.0.1:27017/?gssapiServiceName=mongodb
Implicit session: session { "id" : UUID("e3edd538-03c4-469a-8c8c-227a16d214d0") }
MongoDB server version: 4.0.10
Welcome to the MongoDB shell.
For interactive help, type "help".
For more comprehensive documentation, see
	http://docs.mongodb.org/
Questions? Try the support group
	http://groups.google.com/group/mongodb-user
Server has startup warnings:
2019-07-13T05:24:46.255+0000 I STORAGE  [initandlisten]
2019-07-13T05:24:46.255+0000 I STORAGE  [initandlisten] ** WARNING: Using the XFS filesystem is strongly recommended with the WiredTiger storage engine
2019-07-13T05:24:46.256+0000 I STORAGE  [initandlisten] **          See http://dochub.mongodb.org/core/prodnotes-filesystem
2019-07-13T05:24:48.774+0000 I CONTROL  [initandlisten]
2019-07-13T05:24:48.774+0000 I CONTROL  [initandlisten] ** WARNING: Access control is not enabled for the database.
2019-07-13T05:24:48.774+0000 I CONTROL  [initandlisten] **          Read and write access to data and configuration is unrestricted.
2019-07-13T05:24:48.775+0000 I CONTROL  [initandlisten]
---
Enable MongoDB's free cloud-based monitoring service, which will then receive and display
metrics about your deployment (disk utilization, CPU, operation statistics, etc).

The monitoring data will be available on a MongoDB website with a unique URL accessible to you
and anyone you share the URL with. MongoDB may use this information to make product
improvements and to suggest MongoDB products and deployment options to you.

To enable free monitoring, run the following command: db.enableFreeMonitoring()
To permanently disable this reminder, run the following command: db.disableFreeMonitoring()
---
Quindi, cambia il database in admin e crea un utente admin con il seguente comando:
>use admin
db.createUser( { user: "admin", pwd: "adminpassword", roles: [ { role: "userAdminAnyDatabase", db: "admin" }, "readWriteAnyDatabase" ] } ) Quindi, esci dalla shell di MongoDB con il seguente comando:
> exit
Quindi, apri il file di configurazione di MongoDB e abilita l'autenticazione con il seguente comando:
nano /etc/mongod.conf
Apporta le seguenti modifiche:
security:
  authorization: enabled
Salva e chiudi il file. Quindi, riavvia il servizio MongoDB per applicare le modifiche alla configurazione con il comando seguente:
systemctl restart mongod
Installa Strider
Innanzitutto, scarica l'ultima versione di Strider con il seguente comando:
cd /opt
 git clone https://github.com/Strider-CD/strider.git
Quindi, installa le dipendenze richieste con il seguente comando:
cd strider
 npm install
Successivamente, dovrai creare un nuovo utente strider e assegnarlo al database strider.
Per farlo, apri la shell MongoDB con il seguente comando:
mongo
Successivamente, autentica la tua sessione MongoDB con l'utente amministratore:
use admin
 db.auth("admin", "adminpassword" )
Quindi, crea un utente del database e assegnalo al nome del database strider:
use strider
 db.createUser({user: "strider", pwd: "password", roles: [{role: "dbOwner", db: "strider"}]})
Quindi, esci dalla shell di MongoDB e crea un utente amministratore per Strider con il seguente comando:
cd /opt/strider
 DB_URI="mongodb://strider:[email protected]:27017/strider" node bin/strider addUser
Fornisci tutte le informazioni richieste come mostrato di seguito:
Connecting to MongoDB URL: mongodb://strider:[email protected]:27017/strider

Enter email []: [email protected]
Enter password []: ****
Is admin? (y/n) [n]y

Email:        [email protected]
Password:    admin
isAdmin:    y
OK? (y/n) [y]y
User created successfully! Enjoy.
Installa e configura PM2
Successivamente, dovrai installare PM2 per gestire il processo Node.js. Innanzitutto, installa PM2 con npm come mostrato di seguito:
npm install pm2 -g
Quindi, crea un nuovo file di configurazione per PM2 con il seguente comando:
cd /opt/strider
 nano ecosystem.config.js
Aggiungi le seguenti righe:
module.exports = {
  apps : [{
    name   : "strider",
    script : "npm",
    args : "start",
    env: {
      "NODE_ENV": "production",
      "DB_URI": "mongodb://strider:[email protected]:27017/strider",
      "SERVER_NAME": "http://your-server-ip:3000",
      "HOST": "0.0.0.0",
      "PORT": "3000"
    }
  }]
}
Salva e chiudi il file, quando hai finito. Quindi, avvia l'applicazione con il seguente comando:
pm2 start ecosystem.config.js
Dovresti vedere il seguente output:
                        -------------

__/\\\\\\\\\\\\\____/\\\\____________/\\\\____/\\\\\\\\\_____
 _\/\\\/////////\\\_\/\\\\\\________/\\\\\\__/\\\///////\\\___
  _\/\\\_______\/\\\_\/\\\//\\\____/\\\//\\\_\///______\//\\\__
   _\/\\\\\\\\\\\\\/__\/\\\\///\\\/\\\/_\/\\\___________/\\\/___
    _\/\\\/////////____\/\\\__\///\\\/___\/\\\________/\\\//_____
     _\/\\\_____________\/\\\____\///_____\/\\\_____/\\\//________
      _\/\\\_____________\/\\\_____________\/\\\___/\\\/___________
       _\/\\\_____________\/\\\_____________\/\\\__/\\\\\\\\\\\\\\\_
        _\///______________\///______________\///__\///////////////__


                          Runtime Edition

        PM2 is a Production Process Manager for Node.js applications
                     with a built-in Load Balancer.

                Start and Daemonize any application:
                $ pm2 start app.js

                Load Balance 4 instances of api.js:
                $ pm2 start api.js -i 4

                Monitor in production:
                $ pm2 monitor

                Make pm2 auto-boot at server restart:
                $ pm2 startup

                To go further checkout:
                http://pm2.io/


                        -------------

[PM2] Spawning PM2 daemon with pm2_home=/root/.pm2
[PM2] PM2 Successfully daemonized
[PM2][WARN] Applications strider not running, starting...
[PM2] App [strider] launched (1 instances)
??????????????????????????????????????????????????????????????????????????????????????????????????????????
? App name ? id ? version ? mode ? pid   ? status ? restart ? uptime ? cpu ? mem       ? user ? watching ?
??????????????????????????????????????????????????????????????????????????????????????????????????????????
? strider  ? 0  ? N/A     ? fork ? 21502 ? online ? 0       ? 0s     ? 0%  ? 25.6 MB   ? root ? disabled ?
??????????????????????????????????????????????????????????????????????????????????????????????????????????
 Use `pm2 show <id|name>` to get more details about an app
Quindi, abilita PM2 per l'avvio automatico dopo il riavvio del sistema con il seguente comando:
pm2 startup
Una volta terminato, puoi procedere al passaggio successivo.
Accedi a Strider
Strider è ora installato e configurato, è ora di accedere a Strider dal browser web.
Apri il tuo browser web e digita l'URL http://your-server-ip:3000. Verrai reindirizzato alla pagina di accesso di Strider come mostrato di seguito:
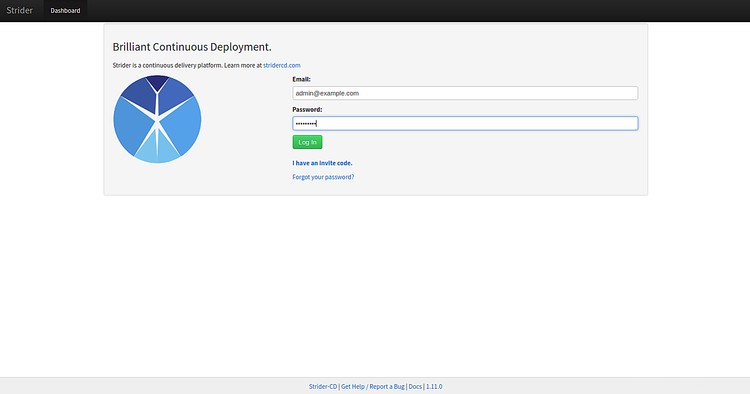
Ora, fornisci il nome utente e la password dell'amministratore che hai creato in precedenza e fai clic su Accedi pulsante. Dopo aver effettuato l'accesso, dovresti vedere la seguente pagina:
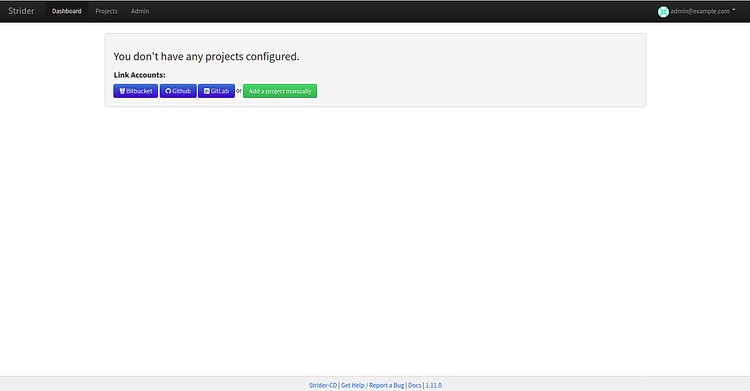
Congratulazioni! hai installato e configurato correttamente Strider sul server Ubuntu 18.04. Sentiti libero di chiedermi se hai domande. Per ulteriori informazioni, puoi visitare la documentazione ufficiale su Strider Doc