
Django è un framework Web di alto livello gratuito e open source utilizzato per sviluppare applicazioni Web Python. Django viene fornito con una serie di strumenti che ti aiutano a creare applicazioni web sicure e scalabili. Il suo scopo principale è facilitare la creazione di applicazioni complesse e mantenere la struttura interna.
In questo tutorial impareremo come installare Django e configurare Nginx come proxy inverso per Django su Rocky Linux 8 e CentOS 8.
Prerequisito
- Server con sistema operativo CentOS 8.
- Accedi come root o utente con privilegi sudo
Installa i pacchetti richiesti
Django è un framework basato su Python, quindi devi installare Python e PIP sul tuo sistema. Per poterlo installare, esegui il seguente comando:
dnf install python36 python3-pip -yUna volta installati entrambi i pacchetti, vai al passaggio successivo.
Installa Django su Rocky Linux 8
Puoi installare Django con il comando PIP come mostrato di seguito:
pip3 install DjangoDopo aver installato Django, controlla la versione di Django con il seguente comando:
django-admin --versionVedrai la versione di Django nel seguente output:
3.0.3
al momento della stesura di questo articolo, la versione di Django è la versione 3.0.3
Crea un progetto Django
A questo punto, Django è stato installato correttamente. Ora è il momento di creare un'app Django.
Puoi creare applicazioni Django usando il comando django-admin nella directory /opt come mostrato di seguito:
cd /opt
 django-admin startproject djangoproject
Una volta creato il progetto django, cambia la directory in djangoproject e migra le modifiche con il seguente comando:
cd djangoproject
 python3 manage.py migrate
Otterrai il seguente output:
Operations to perform:
  Apply all migrations: admin, auth, contenttypes, sessions
Running migrations:
  Applying contenttypes.0001_initial... OK
  Applying auth.0001_initial... OK
  Applying admin.0001_initial... OK
  Applying admin.0002_logentry_remove_auto_add... OK
  Applying admin.0003_logentry_add_action_flag_choices... OK
  Applying contenttypes.0002_remove_content_type_name... OK
  Applying auth.0002_alter_permission_name_max_length... OK
  Applying auth.0003_alter_user_email_max_length... OK
  Applying auth.0004_alter_user_username_opts... OK
  Applying auth.0005_alter_user_last_login_null... OK
  Applying auth.0006_require_contenttypes_0002... OK
  Applying auth.0007_alter_validators_add_error_messages... OK
  Applying auth.0008_alter_user_username_max_length... OK
  Applying auth.0009_alter_user_last_name_max_length... OK
  Applying auth.0010_alter_group_name_max_length... OK
  Applying auth.0011_update_proxy_permissions... OK
  Applying sessions.0001_initial... OK
Successivamente, devi creare un account utente amministratore per gestire il tuo progetto Django con il seguente comando:
python3 manage.py createsuperuserTi verrà chiesto di fornire il tuo nome utente, email e password. Puoi fornirlo secondo la tua scelta come mostrato di seguito:
Username (leave blank to use 'root'): dadmin
Email address:  [email protected]
Password:
Password (again):
Superuser created successfully.
Una volta terminato, puoi passare al passaggio successivo.
Avvia l'app Django
Per impostazione predefinita, è possibile accedere alle applicazioni Django solo da localhost, per consentire a Django di connettersi a Internet, è necessario consentire a Django per host esterni. Puoi farlo aggiungendo l'IP del tuo server in IP settings.py:
nano /opt/djangoproject/djangoproject/settings.pyModifica la seguente riga:
ALLOWED_HOSTS = ['ip_server_Anda']
Salva e chiudi il file. Quindi, esegui l'applicazione Django con il seguente comando:
cd /opt/djangoproject
 python3 manage.py runserver 0.0.0.0:8000
Vedrai il seguente output:
Watching for file changes with StatReloader
Performing system checks...

System check identified no issues (0 silenced).
March 03, 2020 - 02:31:19
Django version 3.0.3, using settings 'djangoproject.settings'
Starting development server at http://0.0.0.0:8000/
Quit the server with CONTROL-C.

Django application is now started and runs on port 8000.
A questo punto, l'applicazione Django è ora attiva e funzionante sulla porta 8000. Ora puoi passare al passaggio successivo.
Configura SELinux e Firewall su Rocky Linux 8
Successivamente, devi consentire le porte 8000 e 80 tramite firewalld. Puoi consentirli con il seguente comando:
firewall-cmd --permanent --add-port=8000/tcp
 firewall-cmd --permanent --add-port=80/tcp
 firewall-cmd --reload
Quindi, configura SELinux con il seguente comando:
setsebool httpd_can_network_connect on -PUna volta terminato, puoi passare al passaggio successivo.
Accedi alle applicazioni Django
Puoi accedere all'applicazione Django visitando l'URL http://your-server-ip:8000. Vedrai la seguente pagina:

Puoi anche accedere all'interfaccia di amministrazione di Django utilizzando l'URL http://server-ip:8000/admin. Vedrai la seguente pagina:
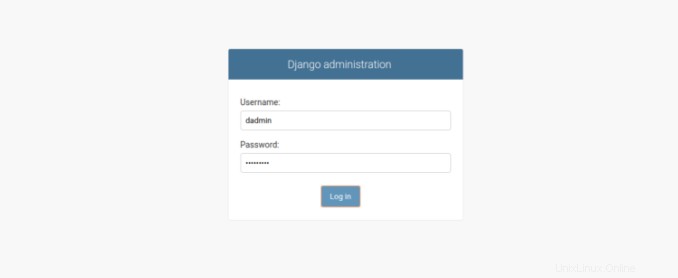
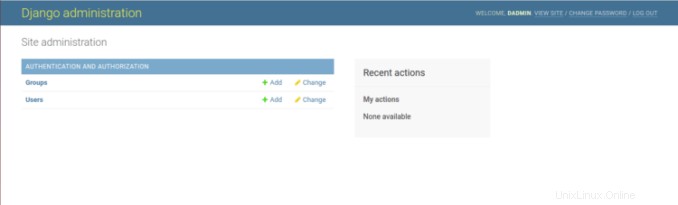
Fornisci il nome utente e la password dell'amministratore e fai clic sul pulsante Accedi in . Vedrai la seguente pagina:
Installa Nginx e Gunicorn su Rocky Linux 8
In questa sezione installeremo Gunicorn per creare e gestire i servizi Django e Nginx per servire le applicazioni Django.
Innanzitutto, installa Nginx con il seguente comando:
dnf install nginx -yQuindi, installa Gunicorn usando il comando PIP come mostrato di seguito:
pip3 install gunicornUna volta installati entrambi i pacchetti, avvia il servizio Nginx e abilitalo all'avvio dopo il riavvio del sistema con il seguente comando:
systemctl start nginx
 systemctl enable nginx
Quindi, cambia la proprietà della directory /opt/djangoproject a Nginx come mostrato di seguito:
chown -R nginx:nginx /opt/djangoprojectCrea un servizio di file systemd per Django
Quindi, crea un file di servizio systemd per gestire i servizi Django con il seguente comando:
nano /etc/systemd/system/django.serviceAggiungi la seguente riga:
[Unit]
Description=django daemon
After=network.target

[Service]
User=nginx
Group=nginx
WorkingDirectory=/opt/djangoproject
ExecStart=/usr/local/bin/gunicorn --workers 3 --bind unix:/opt/djangoproject/djangoproject.sock djangoproject.wsgi:application

[Install]
WantedBy=multi-user.target
Salva e chiudi il file, quindi ricarica il demone systemd con il seguente comando:
systemctl daemon-reloadQuindi, avvia il servizio Django e abilitalo all'avvio dopo il riavvio del sistema con il seguente comando:
systemctl start django
 systemctl enable django
Ora puoi controllare lo stato del servizio Django con il seguente comando:
systemctl status djangoVedrai il seguente output:
? django.service - django daemon
   Loaded: loaded (/etc/systemd/system/django.service; disabled; vendor preset: disabled)
   Active: active (running) since Mon 2020-03-02 22:27:51 UTC; 3min 32s ago
 Main PID: 960 (django)
    Tasks: 4 (limit: 25028)
   Memory: 95.2M
   CGroup: /system.slice/django.service
           ??960 /usr/bin/python3.6 /usr/local/bin/gunicorn --workers 3 --bind unix:/opt/djangoproject/djangoproject.sock djangoproject.wsgi:a>
           ??964 /usr/bin/python3.6 /usr/local/bin/gunicorn --workers 3 --bind unix:/opt/djangoproject/djangoproject.sock djangoproject.wsgi:a>
           ??965 /usr/bin/python3.6 /usr/local/bin/gunicorn --workers 3 --bind unix:/opt/djangoproject/djangoproject.sock djangoproject.wsgi:a>
           ??966 /usr/bin/python3.6 /usr/local/bin/gunicorn --workers 3 --bind unix:/opt/djangoproject/djangoproject.sock djangoproject.wsgi:a>

Mar 02 22:27:51 centos8 systemd[1]: Started django daemon.
Mar 02 22:27:52 centos8 django[960]: [2020-03-02 22:27:52 -0500] [960] [INFO] Starting django 20.0.4
Mar 02 22:27:52 centos8 django[960]: [2020-03-02 22:27:52 -0500] [960] [INFO] Listening at: unix:/opt/djangoproject/djangoproject.sock (960)
Mar 02 22:27:52 centos8 django[960]: [2020-03-02 22:27:52 -0500] [960] [INFO] Using worker: sync
Mar 02 22:27:52 centos8 django[960]: [2020-03-02 22:27:52 -0500] [964] [INFO] Booting worker with pid: 964
Mar 02 22:27:52 centos8 django[960]: [2020-03-02 22:27:52 -0500] [965] [INFO] Booting worker with pid: 965
Mar 02 22:27:52 centos8 django[960]: [2020-03-02 22:27:52 -0500] [966] [INFO] Booting worker with pid: 966
h pid: 966
Configura Nginx per Django
Quindi, configura Nginx come proxy inverso per Django. Per farlo, crea un nuovo file di configurazione Nginx con il seguente comando:
nano /etc/nginx/conf.d/django.confAggiungi la seguente riga:
server {
    listen 80;
    server_name your-server-ip

    location =https://cdn.linuxid.net/favicon.ico?x87109 { access_log off; log_not_found off; }
    location /static/ {
        root /opt/djangoproject;
    }

    location / {
        proxy_set_header Host $http_host;
        proxy_set_header X-Real-IP $remote_addr;
        proxy_set_header X-Forwarded-For $proxy_add_x_forwarded_for;
        proxy_set_header X-Forwarded-Proto $scheme;
        proxy_pass http://unix:/opt/djangoproject/djangoproject.sock;
    }
}
Salva e chiudi il file quando hai finito. Quindi, verifica nginx per eventuali errori di sintassi con il seguente comando:
nginx -tSe non ci sono errori, apparirà il seguente output:
nginx: the configuration file /etc/nginx/nginx.conf syntax is ok
nginx: configuration file /etc/nginx/nginx.conf test is successful
Quindi, riavvia il servizio Nginx per implementare le modifiche:
systemctl start nginxPuoi anche verificare Nginx con il seguente comando:
systemctl status nginxOtterrai il seguente output:
? nginx.service - The nginx HTTP and reverse proxy server
   Loaded: loaded (/usr/lib/systemd/system/nginx.service; disabled; vendor preset: disabled)
   Active: active (running) since Mon 2020-03-02 22:28:13 EST; 4min 14s ago
  Process: 984 ExecStart=/usr/sbin/nginx (code=exited, status=0/SUCCESS)
  Process: 982 ExecStartPre=/usr/sbin/nginx -t (code=exited, status=0/SUCCESS)
  Process: 980 ExecStartPre=/usr/bin/rm -f /run/nginx.pid (code=exited, status=0/SUCCESS)
 Main PID: 985 (nginx)
    Tasks: 3 (limit: 25028)
   Memory: 5.5M
   CGroup: /system.slice/nginx.service
           ??985 nginx: master process /usr/sbin/nginx
           ??986 nginx: worker process
           ??987 nginx: worker process

Mar 02 22:28:12 centos8 systemd[1]: Starting The nginx HTTP and reverse proxy server...
Mar 02 22:28:12 centos8 nginx[982]: nginx: the configuration file /etc/nginx/nginx.conf syntax is ok
Mar 02 22:28:12 centos8 nginx[982]: nginx: configuration file /etc/nginx/nginx.conf test is successful
Mar 02 22:28:13 centos8 systemd[1]: Started The nginx HTTP and reverse proxy server.
Ora puoi accedere alle applicazioni Django utilizzando l'URL http://indirizzo_IP_server.
Conclusione
In questa guida abbiamo appreso come installare Django su Rocky Linux 8 e CentOS 8. Abbiamo anche imparato come utilizzare Gunicorn per creare e gestire servizi Django e configurare Nginx come proxy inverso per servire le applicazioni Django.