LAMP è l'abbreviazione di L inux, A pache, M ySQL, P HP. Questo tutorial mostra come installare un server web Apache2 su un server CentOS 6.4 con supporto PHP5 (mod_php) e supporto MySQL.
Non garantisco che questo funzionerà per te!
1 Nota preliminare
In questo tutorial, utilizzo il nome host server1.example.com con l'indirizzo IP 192.168.0.100. Queste impostazioni potrebbero differire per te, quindi devi sostituirle dove appropriato.
2 Installazione di MySQL 5
Per installare MySQL, facciamo questo:
yum -y install mysql mysql-server
Quindi creiamo i collegamenti di avvio del sistema per MySQL (in modo che MySQL si avvii automaticamente ogni volta che il sistema si avvia) e avviamo il server MySQL:
chkconfig --levels 235 mysqld on
/etc/init.d/mysqld start
Imposta le password per l'account root MySQL:
mysql_secure_installation
[[email protected] ~]# mysql_secure_installation
NOTE: RUNNING ALL PARTS OF THIS SCRIPT IS RECOMMENDED FOR ALL MySQL
SERVERS IN PRODUCTION USE! PLEASE READ EACH STEP CAREFULLY!
In order to log into MySQL to secure it, we'll need the current
password for the root user. If you've just installed MySQL, and
you haven't set the root password yet, the password will be blank,
so you should just press enter here.
Enter current password for root (enter for none):
OK, successfully used password, moving on...
Setting the root password ensures that nobody can log into the MySQL
root user without the proper authorisation.
Set root password? [Y/n] <-- ENTER
New password: <-- yourrootsqlpassword
Re-enter new password: <-- yourrootsqlpassword
Password updated successfully!
Reloading privilege tables..
... Success!
By default, a MySQL installation has an anonymous user, allowing anyone
to log into MySQL without having to have a user account created for
them. This is intended only for testing, and to make the installation
go a bit smoother. You should remove them before moving into a
production environment.
Remove anonymous users? [Y/n] <-- ENTER
... Success!
Normally, root should only be allowed to connect from 'localhost'. This
ensures that someone cannot guess at the root password from the network.
Disallow root login remotely? [Y/n] <-- ENTER
... Success!
By default, MySQL comes with a database named 'test' that anyone can
access. This is also intended only for testing, and should be removed
before moving into a production environment.
Remove test database and access to it? [Y/n] <-- ENTER
- Dropping test database...
... Success!
- Removing privileges on test database...
... Success!
Reloading the privilege tables will ensure that all changes made so far
will take effect immediately.
Reload privilege tables now? [Y/n] <-- ENTER
... Success!
Cleaning up...
All done! If you've completed all of the above steps, your MySQL
installation should now be secure.
Thanks for using MySQL!
3 Installazione di Apache2
Apache2 è disponibile come pacchetto CentOS, quindi possiamo installarlo in questo modo:
yum -y install httpd
Ora configura il tuo sistema per avviare Apache all'avvio...
chkconfig --levels 235 httpd on
... e avvia Apache:
/etc/init.d/httpd start
Ora indirizza il tuo browser a http://192.168.0.100 e dovresti vedere la pagina segnaposto di Apache2:
La radice del documento predefinita di Apache è /var/www/html su CentOS e il file di configurazione è /etc/httpd/conf/httpd.conf. Ulteriori configurazioni sono memorizzate nella directory /etc/httpd/conf.d/.
4 Installazione di PHP5
Possiamo installare PHP5 e il modulo Apache PHP5 come segue:
yum -y install php
In seguito dobbiamo riavviare Apache:
/etc/init.d/httpd restart
5 Testare PHP5 / Ottenere dettagli sull'installazione di PHP5
La radice del documento del sito Web predefinito è /var/www/html. Ora creeremo un piccolo file PHP (info.php) in quella directory e lo chiameremo in un browser. Il file mostrerà molti dettagli utili sulla nostra installazione di PHP, come la versione di PHP installata.
vi /var/www/html/info.php
<?php phpinfo(); ?> |
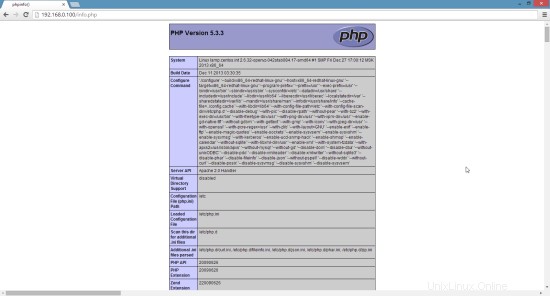
Ora chiamiamo quel file in un browser (es. http://192.168.0.100/info.php):
Come vedi, PHP5 funziona e funziona tramite Apache 2.0 Handler, come mostrato nella riga Server API. Se scorri più in basso, vedrai tutti i moduli che sono già abilitati in PHP5. MySQL non è elencato lì, il che significa che non abbiamo ancora il supporto per MySQL in PHP5.
6 Ottenere supporto MySQL in PHP5
Per ottenere il supporto MySQL in PHP, possiamo installare il pacchetto php-mysql. È una buona idea installare alcuni altri moduli PHP5 e potresti averne bisogno per le tue applicazioni. Puoi cercare i moduli PHP5 disponibili in questo modo:
yum search php
Scegli quelli che ti servono e installali in questo modo:
yum -y install php-mysql
Nella fase successiva installerò alcuni moduli PHP comuni richiesti dai sistemi CMS come Wordpress, Joomla e Drupal:
yum -y install php-gd php-imap php-ldap php-odbc php-pear php-xml php-xmlrpc php-mbstring php-mcrypt php-mssql php-snmp php-soap php-tidy curl curl-devel
APC è un cacher di codice operativo PHP gratuito e aperto per la memorizzazione nella cache e l'ottimizzazione del codice intermedio PHP. È simile ad altri cacher di codice operativo PHP, come eAccelerator e Xcache. Si consiglia vivamente di averne uno installato per velocizzare la tua pagina PHP.
APC può essere installato come segue:
yum -y install php-pecl-apc
Ora riavvia Apache2:
/etc/init.d/httpd restart
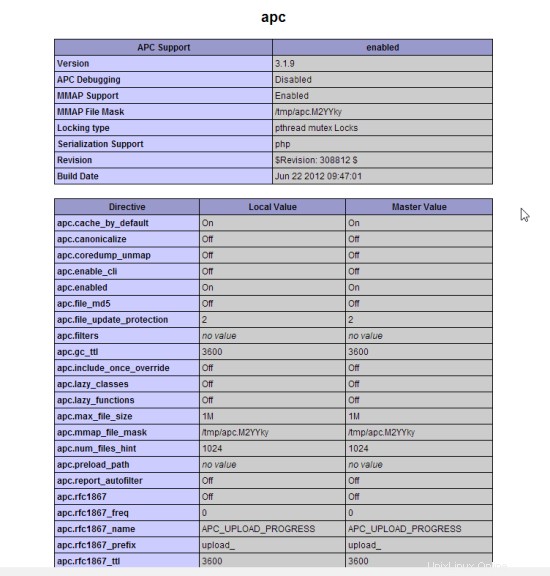
Ora ricarica http://192.168.0.100/info.php nel tuo browser e scorri di nuovo verso il basso fino alla sezione dei moduli. Ora dovresti trovare molti nuovi moduli lì, incluso il modulo APC:
7 phpMyAdmin
phpMyAdmin è un'interfaccia web attraverso la quale puoi gestire i tuoi database MySQL.
Per prima cosa abilitiamo il repository RPMforge sul nostro sistema CentOS poiché phpMyAdmin non è disponibile nei repository CentOS 6.5 ufficiali:
Importa la chiave GPG RPMforge:
rpm --import http://dag.wieers.com/rpm/packages/RPM-GPG-KEY.dag.txt
Su sistemi x86_64:
yum -y install http://pkgs.repoforge.org/rpmforge-release/rpmforge-release-0.5.3-1.el6.rf.x86_64.rpm
Sui sistemi i386:
yum -y install http://pkgs.repoforge.org/rpmforge-release/rpmforge-release-0.5.3-1.el6.rf.i686.rpm
phpMyAdmin ora può essere installato come segue:
yum -y install phpmyadmin
Ora configuriamo phpMyAdmin. Cambiamo la configurazione di Apache in modo che phpMyAdmin consenta connessioni non solo da localhost (commentando la stanza
vi /etc/httpd/conf.d/phpmyadmin.conf
# # Web application to manage MySQL # #<Directory "/usr/share/phpmyadmin"> # Order Deny,Allow # Deny from all # Allow from 127.0.0.1 #</Directory> Alias /phpmyadmin /usr/share/phpmyadmin Alias /phpMyAdmin /usr/share/phpmyadmin Alias /mysqladmin /usr/share/phpmyadmin |
Quindi cambiamo l'autenticazione in phpMyAdmin da cookie a http:
vi /usr/share/phpmyadmin/config.inc.php
[...] /* Authentication type */ $cfg['Servers'][$i]['auth_type'] = 'http'; [...] |
Riavvia Apache:
/etc/init.d/httpd restart
Successivamente, puoi accedere a phpMyAdmin da http://192.168.0.100/phpmyadmin/:

8 link
- Apache:http://httpd.apache.org/
- PHP:http://www.php.net/
- MySQL:http://www.mysql.com/
- CentOS:http://www.centos.org/
- phpMyAdmin:http://www.phpmyadmin.net/