Nel tutorial precedente, ti ho mostrato come distribuire Ansible AWX tramite docker. Nel frattempo, ho trovato due progetti che creano pacchetti rpm per AWX. Quindi, in questo tutorial, ti mostrerò come installare Ansible AWX dai file RPM su CentOS 7. Ansible AWX è la versione OpenSource del software Ansible Tower.
Utilizzerò 3 server con CentOS 7 installazione minima e SELinux in modalità permissiva.
- Server 192.168.1.25 AWX
- 192.168.1.21 client1
- 192.168.1.22 client2
Requisiti minimi di sistema per AWX Server
- Almeno 4 GB di memoria
- Almeno 2 core di CPU
- Almeno 20 GB di spazio
- Esecuzione di Docker, Openshift o Kubernetes
Controlla la configurazione di SELinux.
[[email protected] ~]# sestatus
SELinux status:                 enabled
SELinuxfs mount:                /sys/fs/selinux
SELinux root directory:         /etc/selinux
Loaded policy name:             targeted
Current mode:                   permissive
Mode from config file:          permissive
Policy MLS status:              enabled
Policy deny_unknown status:     allowed
Max kernel policy version:      28
[[email protected] ~]#
Aggiungi le voci host in
/etc/hosts
[[email protected] ~]# cat /etc/hosts
192.168.1.25    awx.sunil.cc awx
192.168.1.21    client1.sunil.cc client1
192.168.1.22    client2.sunil.cc client2
[[email protected] ~]#
Aggiungi le regole del firewall
[[email protected] ~]# systemctl enable firewalld
Created symlink from /etc/systemd/system/dbus-org.fedoraproject.FirewallD1.service to /usr/lib/systemd/system/firewalld.service.
Created symlink from /etc/systemd/system/multi-user.target.wants/firewalld.service to /usr/lib/systemd/system/firewalld.service.
[[email protected] ~]# systemctl start firewalld
[[email protected] ~]# firewall-cmd --add-service=http --permanent;firewall-cmd --add-service=https --permanent
success
success
[[email protected] ~]# systemctl restart firewalld
[[email protected] ~]#
Abilita repository EPEL CentOS.
[[email protected] ~]# yum install -y epel-release
Abbiamo bisogno di postgresql 9.6 per l'installazione di AWX.
Abilita repository postgreSQL.
[[email protected] ~]# yum install -y https://download.postgresql.org/pub/repos/yum/9.6/redhat/rhel-7-x86_64/pgdg-centos96-9.6-3.noarch.rpm
Installazione di postgreSQL.
[[email protected] ~]# yum install postgresql96-server -y
Installazione degli altri rpm necessari.
[[email protected] ~]# yum install -y rabbitmq-server wget memcached nginx ansible
Installazione di Ansible AWX
Aggiunta del repository AWX.
[[email protected] ~]# wget -O /etc/yum.repos.d/awx-rpm.repo https://copr.fedorainfracloud.org/coprs/mrmeee/awx/repo/epel-7/mrmeee-awx-epel-7.repo
Installazione di rpm
[[email protected] ~]# yum install -y awx
Inizializzazione del database
[[email protected] ~]# /usr/pgsql-9.6/bin/postgresql96-setup initdb
Initializing database ... OK

[[email protected] ~]#
Avvio del servizio Rabbitmq
[[email protected] ~]# systemctl start rabbitmq-server
[[email protected] ~]# systemctl enable rabbitmq-server
Created symlink from /etc/systemd/system/multi-user.target.wants/rabbitmq-server.service to /usr/lib/systemd/system/rabbitmq-server.service.
[[email protected] ~]#
Avvio del servizio PostgreSQL
[[email protected] ~]# systemctl enable postgresql-9.6
Created symlink from /etc/systemd/system/multi-user.target.wants/postgresql-9.6.service to /usr/lib/systemd/system/postgresql-9.6.service.
[[email protected] ~]# systemctl start postgresql-9.6
Avvio del servizio Memcached
[[email protected] ~]# systemctl enable memcached
Created symlink from /etc/systemd/system/multi-user.target.wants/memcached.service to /usr/lib/systemd/system/memcached.service.
[[email protected] ~]# systemctl start memcached
Creazione utente Postgres
[[email protected] ~]# sudo -u postgres createuser -S awx
could not change directory to "/root": Permission denied
[[email protected] ~]#
ignora l'errore
Creazione del database
[[email protected] ~]# sudo -u postgres createdb -O awx awx
could not change directory to "/root": Permission denied
[[email protected] ~]#
ignora l'errore
Importazione dei dati nel database
[[email protected] ~]# sudo -u awx /opt/awx/bin/awx-manage migrate
Inizializzazione della configurazione per AWX
[[email protected] ~]# echo "from django.contrib.auth.models import User; User.objects.create_superuser('admin', '[email protected]', 'password')" | sudo -u awx /opt/awx/bin/awx-manage shell
[[email protected] ~]# sudo -u awx /opt/awx/bin/awx-manage create_preload_data
Default organization added.
Demo Credential, Inventory, and Job Template added.
[[email protected] ~]# sudo -u awx /opt/awx/bin/awx-manage provision_instance --hostname=$(hostname)
Successfully registered instance awx.sunil.cc
(changed: True)
[[email protected] ~]# sudo -u awx /opt/awx/bin/awx-manage register_queue --queuename=tower --hostnames=$(hostname)
Creating instance group tower
Added instance awx.sunil.cc to tower
(changed: True)
[[email protected] ~]#
Configura Nginx
Fai il backup di nginx.conf
[[email protected] ~]# cd /etc/nginx/
[[email protected] nginx]# pwd
/etc/nginx
[[email protected] nginx]# cp nginx.conf nginx.conf.bkp
Sostituisci il file conf nginx
[[email protected] nginx]# wget -O /etc/nginx/nginx.conf https://raw.githubusercontent.com/sunilsankar/awx-build/master/nginx.conf
Abilita e avvia il servizio nginx
[[email protected] ~]# systemctl start nginx
[[email protected] ~]# systemctl enable nginx
Avvia i servizi awx
[[email protected] ~]# systemctl start awx-cbreceiver
[[email protected] ~]# systemctl start awx-celery-beat
[[email protected] ~]# systemctl start awx-celery-worker
[[email protected] ~]# systemctl start awx-channels-worker
[[email protected] ~]# systemctl start awx-daphne
[[email protected] ~]# systemctl start awx-web
Assicurati che il servizio sia avviato durante il riavvio
[[email protected] ~]# systemctl enable awx-cbreceiver
Created symlink from /etc/systemd/system/multi-user.target.wants/awx-cbreceiver.service to /usr/lib/systemd/system/awx-cbreceiver.service.
[[email protected] ~]# systemctl enable awx-celery-beat
Created symlink from /etc/systemd/system/multi-user.target.wants/awx-celery-beat.service to /usr/lib/systemd/system/awx-celery-beat.service.
[[email protected] ~]# systemctl enable awx-celery-worker
Created symlink from /etc/systemd/system/multi-user.target.wants/awx-celery-worker.service to /usr/lib/systemd/system/awx-celery-worker.service.
[[email protected] ~]# systemctl enable awx-channels-worker
Created symlink from /etc/systemd/system/multi-user.target.wants/awx-channels-worker.service to /usr/lib/systemd/system/awx-channels-worker.service.
[[email protected] ~]# systemctl enable awx-daphne
Created symlink from /etc/systemd/system/multi-user.target.wants/awx-daphne.service to /usr/lib/systemd/system/awx-daphne.service.
[[email protected] ~]# systemctl enable awx-web
Created symlink from /etc/systemd/system/multi-user.target.wants/awx-web.service to /usr/lib/systemd/system/awx-web.service.
[[email protected] ~]#
Configura l'accesso senza password dal server AWX
Crea un utente su tutti e 3 gli host.
Qui in questo tutorial, sto creando un utente ansible su tutti e 3 i server.
[[email protected] ~]# useradd ansible
[[email protected] ~]# useradd ansible
[[email protected] ~]# useradd ansible
Generazione della chiave ssh nel server awx
[[email protected] nginx]# su - ansible
[[email protected] ~]$ ssh-keygen
Generating public/private rsa key pair.
Enter file in which to save the key (/home/ansible/.ssh/id_rsa):
Created directory '/home/ansible/.ssh'.
Enter passphrase (empty for no passphrase):
Enter same passphrase again:
Your identification has been saved in /home/ansible/.ssh/id_rsa.
Your public key has been saved in /home/ansible/.ssh/id_rsa.pub.
The key fingerprint is:
SHA256:RW/dhTsxcyGicleRI0LpLm+LyhAVinm0xktapodc8gY [email protected]
The key's randomart image is:
+---[RSA 2048]----+
|   . .  ..o. +ooo|
|  = o .  +.oo+*.o|
| E @ . ..oo.+ o*.|
|. # o   oo..  o  |
| = *    S      . |
|  o .  . .       |
|   .    o        |
|    o   .o       |
|     o.....      |
+----[SHA256]-----+
[[email protected] ~]$
Aggiunta della voce sudoers su tutti e 3 i server come ultima voce al file
[[email protected] nginx]# visudo
ansible ALL=(ALL) NOPASSWD: ALL
Copia il contenuto di id_rsa.pub su authorized_keys su tutti e 3 i server
[[email protected] .ssh]$ cat id_rsa.pub
ssh-rsa AAAAB3NzaC1yc2EAAAADAQABAAABAQDStB8JGsVsSLppwYWdnEPLE4xwFqRDn7xE/d3hjBQ6A0JGm1t+GtHB3GPIEjANFTnxQwHpR+cRttbL3mlQvpIYqCZOMZds9XA7VI5qgs0aSGUU8cNYKjmmrMpJa9sB4WVtj3M4u2fEXt9FKKCtjMMpOfiQxIkEhYZ+2GoAX5sHXan7TPcgwb5r7WW6j43aaPc6g9XWN63nonQz6KeMSFZ/y0o2HJMh1FEkktZw6A1HVfn+JNWoQb1glyqGjO1ync+Sok8yXpqakEEWpXNQSQYs4eBEwfkKql5EuolQMIbF9VYhpEcR9LfbMvYdq/RPKWN3mmRMWfPZ2dTZl515XBdV [email protected]
[[email protected] .ssh]$
[[email protected] .ssh]$ cat authorized_keys
ssh-rsa AAAAB3NzaC1yc2EAAAADAQABAAABAQDStB8JGsVsSLppwYWdnEPLE4xwFqRDn7xE/d3hjBQ6A0JGm1t+GtHB3GPIEjANFTnxQwHpR+cRttbL3mlQvpIYqCZOMZds9XA7VI5qgs0aSGUU8cNYKjmmrMpJa9sB4WVtj3M4u2fEXt9FKKCtjMMpOfiQxIkEhYZ+2GoAX5sHXan7TPcgwb5r7WW6j43aaPc6g9XWN63nonQz6KeMSFZ/y0o2HJMh1FEkktZw6A1HVfn+JNWoQb1glyqGjO1ync+Sok8yXpqakEEWpXNQSQYs4eBEwfkKql5EuolQMIbF9VYhpEcR9LfbMvYdq/RPKWN3mmRMWfPZ2dTZl515XBdV [email protected]
[[email protected] .ssh]$ chmod 600 authorized_keys
Cliente1
[[email protected] ~]# su - ansible
[[email protected] ~]$ mkdir .ssh
[[email protected] ~]$ chmod 700 .ssh
[[email protected] ~]$ cat .ssh/authorized_keys
ssh-rsa AAAAB3NzaC1yc2EAAAADAQABAAABAQDStB8JGsVsSLppwYWdnEPLE4xwFqRDn7xE/d3hjBQ6A0JGm1t+GtHB3GPIEjANFTnxQwHpR+cRttbL3mlQvpIYqCZOMZds9XA7VI5qgs0aSGUU8cNYKjmmrMpJa9sB4WVtj3M4u2fEXt9FKKCtjMMpOfiQxIkEhYZ+2GoAX5sHXan7TPcgwb5r7WW6j43aaPc6g9XWN63nonQz6KeMSFZ/y0o2HJMh1FEkktZw6A1HVfn+JNWoQb1glyqGjO1ync+Sok8yXpqakEEWpXNQSQYs4eBEwfkKql5EuolQMIbF9VYhpEcR9LfbMvYdq/RPKWN3mmRMWfPZ2dTZl515XBdV [email protected]
[[email protected] ~]$ chmod 600 .ssh/authorized_keys
Cliente2
[[email protected] ~]# su - ansible
[[email protected] ~]$ mkdir .ssh
[[email protected] ~]$ chmod 700 .ssh
[[email protected] ~]$ cat .ssh/authorized_keys
ssh-rsa AAAAB3NzaC1yc2EAAAADAQABAAABAQDStB8JGsVsSLppwYWdnEPLE4xwFqRDn7xE/d3hjBQ6A0JGm1t+GtHB3GPIEjANFTnxQwHpR+cRttbL3mlQvpIYqCZOMZds9XA7VI5qgs0aSGUU8cNYKjmmrMpJa9sB4WVtj3M4u2fEXt9FKKCtjMMpOfiQxIkEhYZ+2GoAX5sHXan7TPcgwb5r7WW6j43aaPc6g9XWN63nonQz6KeMSFZ/y0o2HJMh1FEkktZw6A1HVfn+JNWoQb1glyqGjO1ync+Sok8yXpqakEEWpXNQSQYs4eBEwfkKql5EuolQMIbF9VYhpEcR9LfbMvYdq/RPKWN3mmRMWfPZ2dTZl515XBdV [email protected]
[[email protected] ~]$ chmod 600 .ssh/authorized_keys
Controlla l'accesso senza password dal server AWX.
[[email protected] ~]$ ssh client1
Last login: Sun Mar 11 13:14:06 2018 from 192.168.1.25
[[email protected] ~]$ exit
logout
Connection to client1 closed.
[[email protected] ~]$ ssh client2
Last login: Sun Mar 11 12:50:14 2018 from 192.168.1.25
[[email protected] ~]$
Convalida l'accesso:
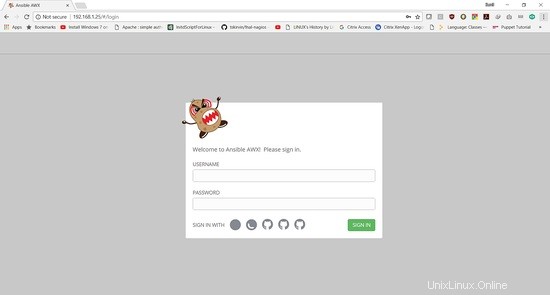
I dettagli di accesso sono:
Nome utente:"amministratore "
Password:"password "
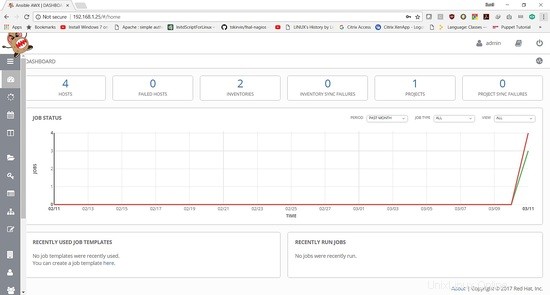
Nel prossimo tutorial verrà mostrato come aggiungere un playbook ed eseguire il lavoro.