Kolab è un software di gruppo gratuito e open source per sistema operativo Unix. Kolab Groupware fornisce una soluzione per il server di posta elettronica (SMTP ), Calendario/Eventi, Rubrica (LDAP ) e altro.
È possibile accedere a Kolab tramite vari client come Outlook in Windows, KDE (Kontact) in Linux e RoundCube Web Interface.
In questo articolo installerò kolab 16 Groupware su un singolo server (CentOS 7 / RHEL 7 ) che includerà servizi come SMTP , IMAP , LDAP , HTTP e server database (MariaDB Server).
Di seguito sono riportati i dettagli del mio Server
- Nome host =kolab.linuxtechi.com
- Indirizzo IP =192.168.1.21
- OS =CentOS 7.x/RHEL 7.x
Passaggio:1 Disabilita SELinux e imposta il nome host
Secondo la documentazione di Kolab, i componenti del groupware di Kolab non sono compatibili con SELinux, quindi lo disabiliteremo usando i comandi seguenti.
[[email protected] ~]# setenforce 0
[[email protected] ~]# getenforce
Permissive
[[email protected] ~]#
Il comando precedente imposterà SELinux in modalità permissiva temporanea, quindi per disabilitarlo in modo permanente, modifica il suo file di configurazione ' /etc/sysconfig/selinux ‘ cambia il parametro ‘SELINUX=enforcing ' a 'SELINUX=disabilitato ' e riavvia il server.
Per impostare il nome host in modo permanente, usa hostnamectl comando.
[[email protected] ~]# hostnamectl set-hostname "kollab.linuxtechi.com"
Aggiorna il file host nel caso in cui non disponi di un server DNS locale.
[[email protected] ~]# vi /etc/hosts
192.168.1.21 kolab.linuxtechi.com
Passaggio:2 Consenti le porte Kolab Standard nel firewall.
Usa i comandi seguenti per consentire le porte standard di kolab nel firewall del sistema operativo.
[[email protected] ~]# firewall-cmd --permanent --add-service=ssh
success
[[email protected] ~]# firewall-cmd --permanent --add-service=http
success
[[email protected] ~]# firewall-cmd --permanent --add-service=https
success
[[email protected] ~]# firewall-cmd --permanent --add-service=pop3s
success
[[email protected] ~]# firewall-cmd --permanent --add-service=imaps
success
[[email protected] ~]# firewall-cmd --permanent --add-service=smtp
success
[[email protected] ~]# firewall-cmd --permanent --add-service=ldap
success
[[email protected] ~]# firewall-cmd --permanent --add-service=ldaps
success
[[email protected]b ~]# firewall-cmd --permanent --add-port=110/tcp
success
[[email protected] ~]# firewall-cmd --permanent --add-port=143/tcp
success
[[email protected] ~]# firewall-cmd --permanent --add-port=587/tcp
success
[[email protected] ~]# firewall-cmd --reload
success
[[email protected] ~]#
Passaggio:3 Abilita EPEL e repository Kolab
Usa i comandi seguenti per abilitare il repository epel e kolab,
[[email protected] ~]# rpm -Uhv https://dl.fedoraproject.org/pub/epel/epel-release-latest-7.noarch.rpm
[[email protected] ~]# cd /etc/yum.repos.d/
[[email protected] yum.repos.d]# wget http://obs.kolabsys.com/repositories/Kolab:/16/CentOS_7/Kolab:16.repo
Usa il comando seguente per importare la chiave che verrà utilizzata per firmare i pacchetti
[[email protected] ~]# rpm --import https://ssl.kolabsys.com/community.asc
[[email protected] ~]#
Installa il pacchetto yum-plugin-priorities
[[email protected] ~]# yum install yum-plugin-priorities
Imposta la priorità alta per il repository Kolab usando il comando seguente.
[[email protected] ~]# for f in /etc/yum.repos.d/Kolab*.repo; do echo "priority = 60" >> $f; done
[[email protected] ~]#
Fase:4 Installa e configura Kolab
Usa il comando yum qui sotto per installare kolab
[[email protected] ~]# yum install kolab
Ora è il momento di configurare Kolab eseguendo sotto "setup-kolab ' comanda e specifica la password LDAP, le informazioni sul dominio e la password del database.
[[email protected] ~]# setup-kolab

Created symlink from /etc/systemd/system/multi-user.target.wants/guam.service to /usr/lib/systemd/system/guam.service.

Please supply a password for the LDAP administrator user 'admin', used to login
to the graphical console of 389 Directory server.

Administrator password [jzucZOpwwwGQ0KO]:
Confirm Administrator password:

Please supply a password for the LDAP Directory Manager user, which is the
administrator user you will be using to at least initially log in to the Web
Admin, and that Kolab uses to perform administrative tasks.

Directory Manager password [e58Z-DlULxLcEeF]:
Confirm Directory Manager password:

Please choose the system user and group the service should use to run under.
These should be existing, unprivileged, local system POSIX accounts with no
shell.

User [nobody]:
Group [nobody]:

This setup procedure plans to set up Kolab Groupware for the following domain
name space. This domain name is obtained from the reverse DNS entry on your
network interface. Please confirm this is the appropriate domain name space.

linuxtechi.com [Y/n]: Y

The standard root dn we composed for you follows. Please confirm this is the root
dn you wish to use.

dc=linuxtechi,dc=com [Y/n]: Y

Setup is now going to set up the 389 Directory Server. This may take a little
while (during which period there is no output and no progress indication).

Created symlink from /etc/systemd/system/multi-user.target.wants/dirsrv.target to /usr/lib/systemd/system/dirsrv.target.

Please supply a Cyrus Administrator password. This password is used by Kolab to
execute administrative tasks in Cyrus IMAP. You may also need the password
yourself to troubleshoot Cyrus IMAP and/or perform other administrative tasks
against Cyrus IMAP directly.

Cyrus Administrator password [0Oc4nmyeTpnjTW2]:
Confirm Cyrus Administrator password:

Please supply a Kolab Service account password. This account is used by various
services such as Postfix, and Roundcube, as anonymous binds to the LDAP server
will not be allowed.

Kolab Service password [sGU25rl-5Q7Ewic]:
Confirm Kolab Service password:
Job for [email protected] failed because start of the service was attempted too often. See "systemctl status [email protected]" and "journalctl -xe" for details.
To force a start use "systemctl reset-failed [email protected]" followed by "systemctl start [email protected]" again.
Created symlink from /etc/systemd/system/multi-user.target.wants/amavisd.service to /usr/lib/systemd/system/amavisd.service.
Created symlink from /etc/systemd/system/multi-user.target.wants/[email protected] to /etc/systemd/system/[email protected]
Created symlink from /etc/systemd/system/multi-user.target.wants/wallace.service to /usr/lib/systemd/system/wallace.service.
Created symlink from /etc/systemd/system/multi-user.target.wants/mariadb.service to /usr/lib/systemd/system/mariadb.service.
What MySQL server are we setting up?
 - 1: Existing MySQL server (with root password already set).
 - 2: New MySQL server (needs to be initialized).
Choice: 2

Please supply a root password for MySQL. This password will be the administrative
user for this MySQL server, and it should be kept a secret. After this setup
process has completed, Kolab is going to discard and forget about this password,
but you will need it for administrative tasks in MySQL.

MySQL root password [-nwxIMrNyT_0cRB]:
Confirm MySQL root password:

Please supply a password for the MySQL user 'kolab'. This password will be used
by Kolab services, such as the Web Administration Panel.

MySQL kolab password [yO2zsl5PEyTmbti]:
Confirm MySQL kolab password:

Please supply the timezone PHP should be using. You have to use a Continent or
Country / City locality name like 'Europe/Berlin', but not just 'CEST'.

Timezone ID [UTC]: Asia/Kolkata

Please supply a password for the MySQL user 'roundcube'. This password will be
used by the Roundcube webmail interface.

MySQL roundcube password [rUf1emw_km1TLMB]:
Confirm MySQL roundcube password:
Created symlink from /etc/systemd/system/multi-user.target.wants/httpd.service to /usr/lib/systemd/system/httpd.service.
Created symlink from /etc/systemd/system/multi-user.target.wants/kolab-saslauthd.service to /usr/lib/systemd/system/kolab-saslauthd.service.
Created symlink from /etc/systemd/system/multi-user.target.wants/cyrus-imapd.service to /usr/lib/systemd/system/cyrus-imapd.service.
Created symlink from /etc/systemd/system/multi-user.target.wants/kolabd.service to /usr/lib/systemd/system/kolabd.service.
Created symlink from /etc/systemd/system/multi-user.target.wants/mongod.service to /usr/lib/systemd/system/mongod.service.
Created symlink from /etc/systemd/system/multi-user.target.wants/manticore.service to /usr/lib/systemd/system/manticore.service.
[[email protected] ~]#
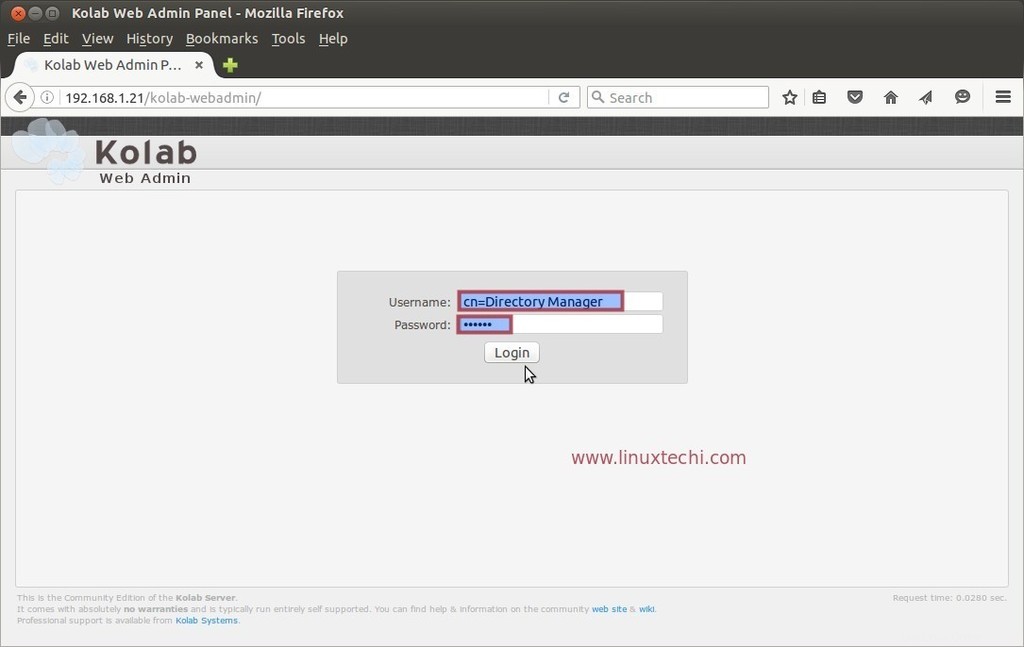
Passaggio:5 Accedi alla Console di amministrazione Web Kolab
Accedi alla console di amministrazione web di kolab utilizzando il seguente URL:
http://192.168.1.21/kolab-webadmin/
OPPURE
http://
Sostituisci l'IP o il nome host secondo la tua configurazione.
Usa il nome utente come 'cn=Directory Manager ' e la password che abbiamo impostato nel passaggio precedente.
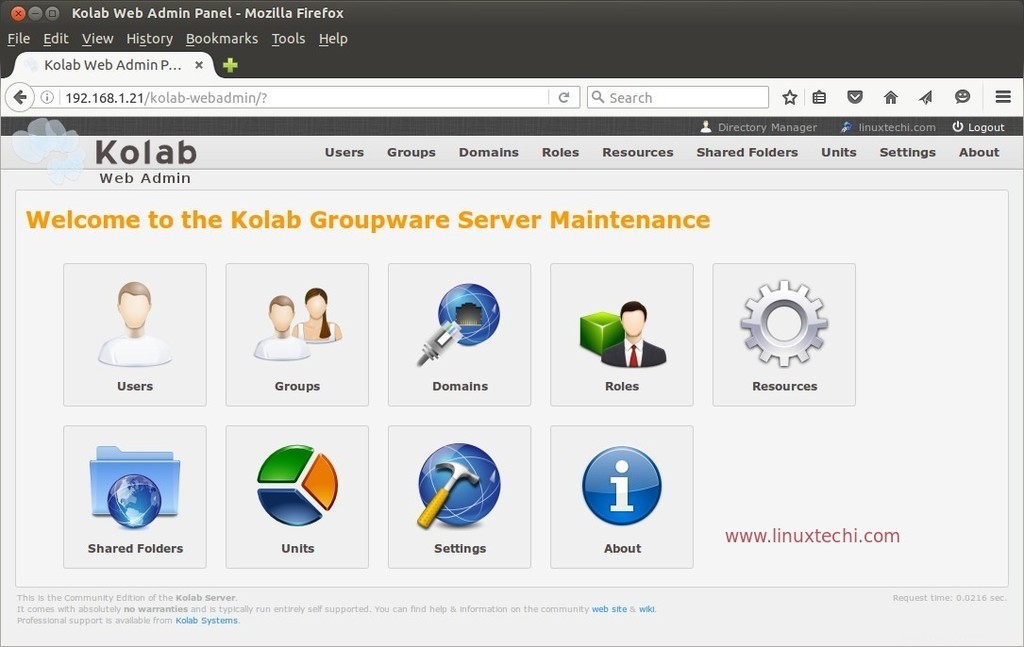
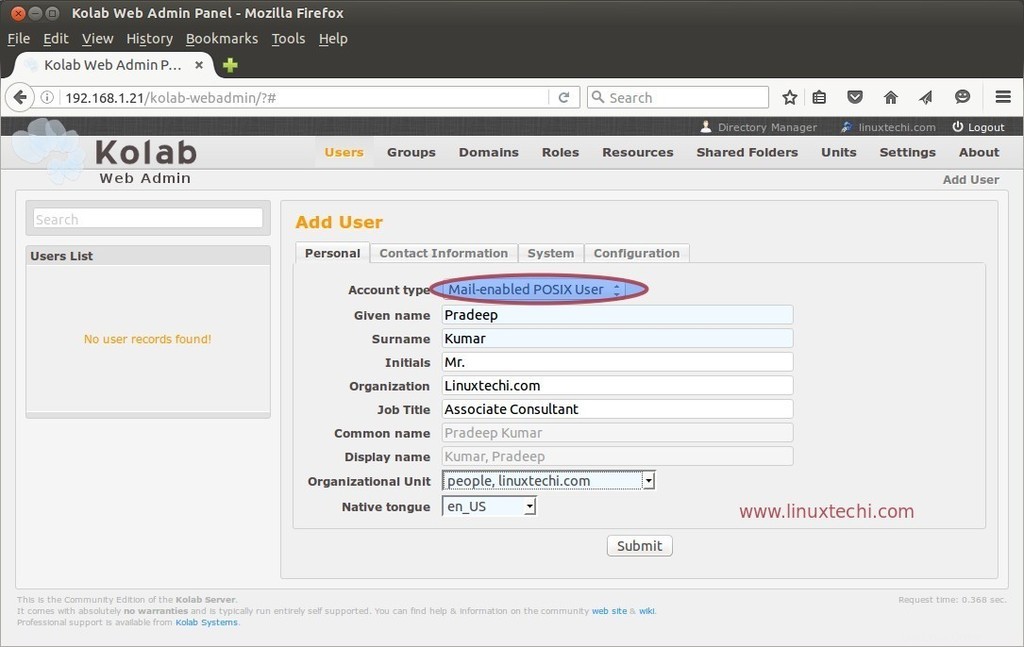
Ora proviamo a creare un utente di posta dal pannello di amministrazione. Fai clic sull'icona Utenti nel Pannello di amministrazione web.
Specifica il tipo di account come "Utente POSIX abilitato alla posta '
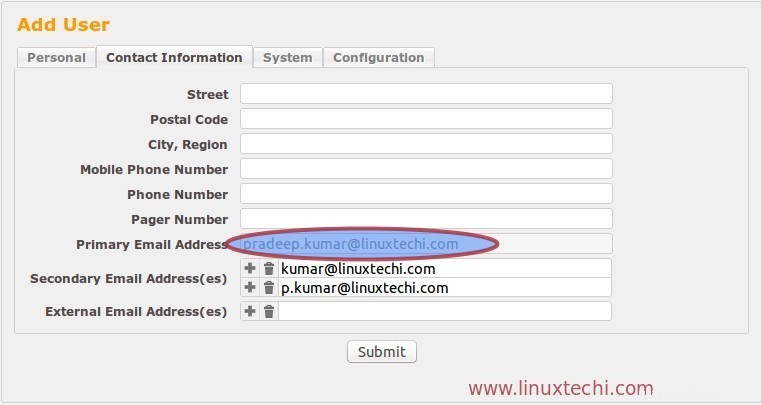
Dalla scheda Contatti, verifica l'indirizzo email dell'utente.
Dalla scheda Sistema, possiamo ottenere la password per l'utente e anche generare una nuova password.
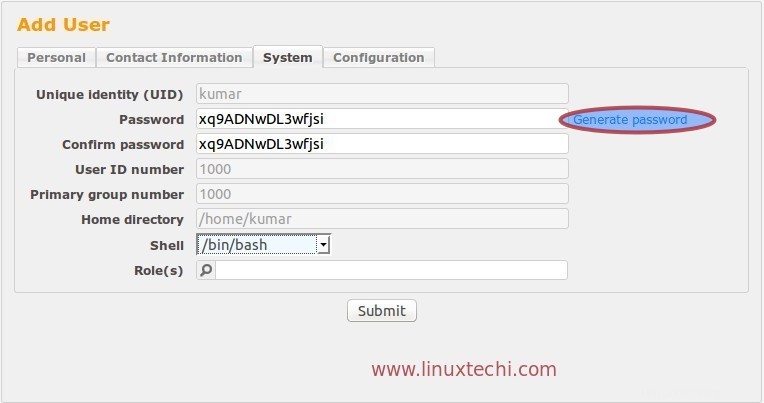
Dalla Tab Configurazione possiamo impostare la Quota email per l'Utente. Una volta terminata tutta la configurazione, fare clic su Invia per creare l'utente.
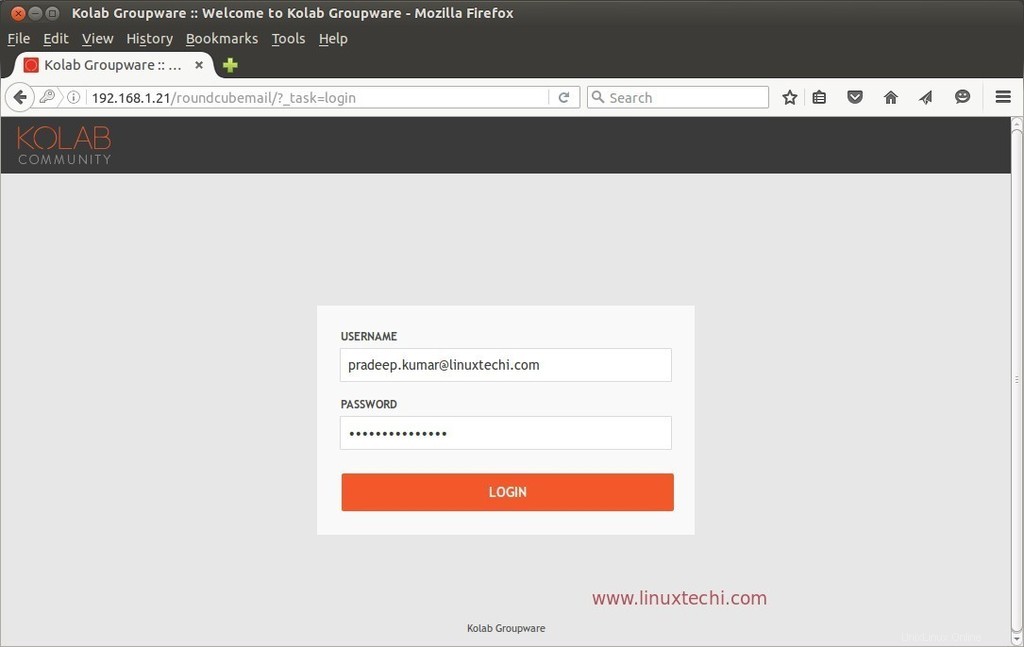
Fase:6 Accedi a Kolab Roundcube Webmail
Utilizza l'URL sottostante per accedere alla webmail Kolab Roundcube.
http://192.168.1.21/roundcubemail/
O
http://
Usa il nome utente come ID email principale, nel mio caso il nome utente è "[email protected]" e la password che abbiamo impostato durante la creazione dell'utente.
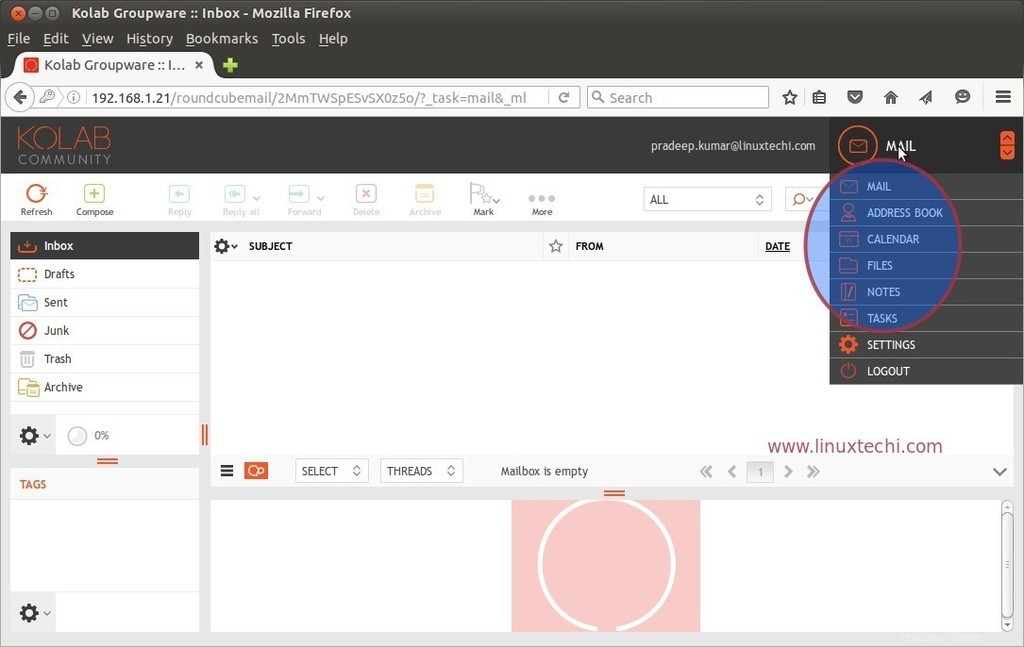
Come vediamo dalla webmail Round cube possiamo accedere alla posta, alla rubrica, ai calendari e alle attività.
Concludi questo articolo e prova a esplorare ulteriormente il Kolab Groupware e divertiti 🙂