Il mod_ssl fornisce il supporto SSL v3 e TLS v1.x per Apache HTTP Server. Questo articolo fornisce un passo dopo passo di base mod_ssl configurazione su server Linux RHEL 8 / CentOS 8 con httpd Server web Apache.
In questo tutorial imparerai:
- Come installare
mod_ssl - Come abilitare
mod_ssl - Come creare un certificato autofirmato
- Come includere il certificato SSL esistente in
httpdconfigurazione - Come reindirizzare tutto il traffico HTTP non SSL a HTTPS
mod_ssl di base configurazione del modulo su RHEL 8 / CentOS 8 con server web Apache Requisiti e convenzioni software utilizzati
| Categoria | Requisiti, convenzioni o versione del software utilizzata |
|---|---|
| Sistema | RHEL 8 / CentOS 8 |
| Software | mod_ssl-2.4.35-6.el8 |
| Altro | Accesso privilegiato al tuo sistema Linux come root o tramite sudo comando. |
| Convenzioni | # – richiede che i comandi linux dati vengano eseguiti con i privilegi di root direttamente come utente root o usando sudo comando$ – richiede che i comandi linux dati vengano eseguiti come un normale utente non privilegiato |
Come installare mod_ssl su RHEL 8 / CentOS 8 istruzioni passo passo
Questo articolo presuppone che tu abbia già eseguito un'installazione e una configurazione di base del server web Apache sul tuo server RHEL 8 / CentOS 8.
- Installa
mod_sslmodule.Il primo passo è installaremod_sslmodulo utilizzandodnfcomando:# dnf install mod_ssl
- Abilita
mod_sslmodulo. Nel caso in cui tu abbia appena installatomod_ssl, il modulo potrebbe non essere ancora abilitato. Per verificare semod_sslè abilitato esegui:# apachectl -M | grep ssl
Nel caso in cui non vedi alcun output dal comando sopra, il tuo
mod_sslnon è abilitato. Per abilitare ilmod_sslmodulo riavvia il tuohttpdServer web Apache:# systemctl restart httpd # apachectl -M | grep ssl ssl_module (shared)
- Apri la porta TCP 443 per consentire il traffico in entrata con
httpsprotocollo:# firewall-cmd --zone=public --permanent --add-service=https success # firewall-cmd --reload success
NOTA
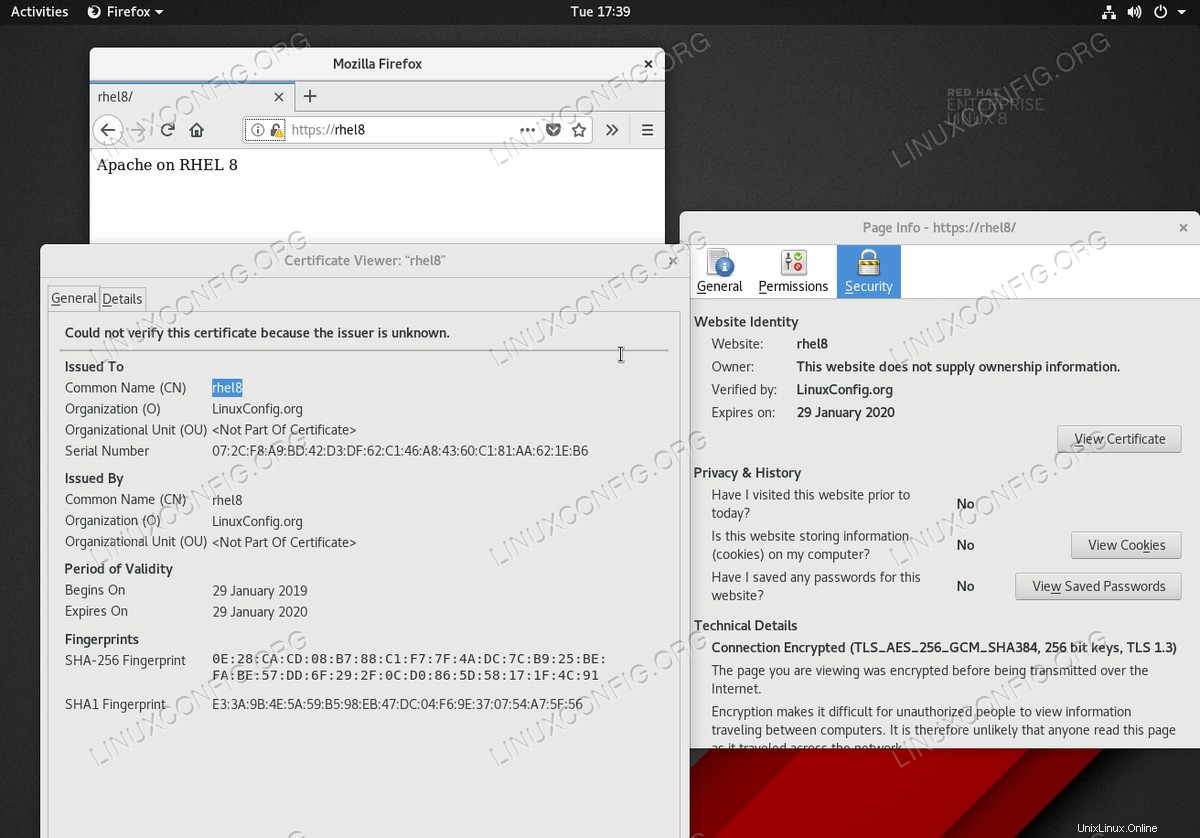
A questo punto dovresti essere in grado di accedere al tuo server web Apache tramite il protocollo HTTPS. Sposta il tuo browser suhttps://your-server-ipohttps://your-server-hostnameper confermaremod_sslconfigurazione. - Genera certificato SSL. Nel caso in cui non possiedi già un certificato SSL appropriato per il tuo server, utilizza il comando seguente per generare un nuovo certificato autofirmato.
Ad esempio, generiamo un nuovo certificato autofirmato per l'host
rhel8con scadenza a 365 giorni:# openssl req -newkey rsa:2048 -nodes -keyout /etc/pki/tls/private/httpd.key -x509 -days 365 -out /etc/pki/tls/certs/httpd.crt Generating a RSA private key ................+++++ ..........+++++ writing new private key to '/etc/pki/tls/private/httpd.key' ----- You are about to be asked to enter information that will be incorporated into your certificate request. What you are about to enter is what is called a Distinguished Name or a DN. There are quite a few fields but you can leave some blank For some fields there will be a default value, If you enter '.', the field will be left blank. ----- Country Name (2 letter code) [XX]:AU State or Province Name (full name) []: Locality Name (eg, city) [Default City]: Organization Name (eg, company) [Default Company Ltd]:LinuxConfig.org Organizational Unit Name (eg, section) []: Common Name (eg, your name or your server's hostname) []:rhel8 Email Address []:
Dopo aver eseguito correttamente il comando precedente verranno creati i seguenti due file SSL:
# ls -l /etc/pki/tls/private/httpd.key /etc/pki/tls/certs/httpd.crt
-rw-r--r--. 1 root root 1269 Jan 29 16:05 /etc/pki/tls/certs/httpd.crt
-rw-------. 1 root root 1704 Jan 29 16:05 /etc/pki/tls/private/httpd.key
- Configura il server web Apache con i nuovi certificati SSL. Per includere il certificato SSL appena creato nella configurazione del server web Apache, apri il
/etc/httpd/conf.d/ssl.conffile con privilegi di amministratore e modificare le seguenti righe:FROM: SSLCertificateFile /etc/pki/tls/certs/localhost.crt SSLCertificateKeyFile /etc/pki/tls/private/localhost.key TO: SSLCertificateFile /etc/pki/tls/certs/httpd.crt SSLCertificateKeyFile /etc/pki/tls/private/httpd.key
Una volta pronto, ricarica il
httpdServer web Apache:# systemctl reload httpd
- Testa il tuo
mod_sslconfigurazione navigando nel browser web suhttps://your-server-ipohttps://your-server-hostnameURL. - Come passaggio facoltativo, reindirizza tutto il traffico HTTP a HTTPS.T, crea un nuovo file
/etc/httpd/conf.d/redirect_http.confcon i seguenti contenuti:<VirtualHost _default_:80> Servername rhel8 Redirect permanent / https://rhel8/ </VirtualHost>Per applicare la modifica, ricarica il
httpddemone:# systemctl reload httpd
La configurazione di cui sopra reindirizzerà il traffico in entrata da
http://rhel8ahttps://rhel8URL. Per ulteriori informazioni sulla configurazione di TLS/SSL sul server RHEL Linux, visita la nostra guida Come configurare SSL/TLS con Apache httpd su Red Hat.