Sono riuscito a prendere pezzi di codice da varie fonti e metterli insieme. È ancora un lavoro in corso. Inoltre, hai qualche immagine di esempio?
'''
Sources:
http://pythonpath.wordpress.com/2012/05/08/pil-to-opencv-image/
http://www.lucaamore.com/?p=638
'''

#Python 2.7.2
#Opencv 2.4.2
#PIL 1.1.7

import cv
import Image

def DetectFace(image, faceCascade):
    #modified from: http://www.lucaamore.com/?p=638

    min_size = (20,20)
    image_scale = 1
    haar_scale = 1.1
    min_neighbors = 3
    haar_flags = 0

    # Allocate the temporary images
    smallImage = cv.CreateImage(
            (
                cv.Round(image.width / image_scale),
                cv.Round(image.height / image_scale)
            ), 8 ,1)

    # Scale input image for faster processing
    cv.Resize(image, smallImage, cv.CV_INTER_LINEAR)

    # Equalize the histogram
    cv.EqualizeHist(smallImage, smallImage)

    # Detect the faces
    faces = cv.HaarDetectObjects(
            smallImage, faceCascade, cv.CreateMemStorage(0),
            haar_scale, min_neighbors, haar_flags, min_size
        )

    # If faces are found
    if faces:
        for ((x, y, w, h), n) in faces:
            # the input to cv.HaarDetectObjects was resized, so scale the
            # bounding box of each face and convert it to two CvPoints
            pt1 = (int(x * image_scale), int(y * image_scale))
            pt2 = (int((x + w) * image_scale), int((y + h) * image_scale))
            cv.Rectangle(image, pt1, pt2, cv.RGB(255, 0, 0), 5, 8, 0)

    return image

def pil2cvGrey(pil_im):
    #from: http://pythonpath.wordpress.com/2012/05/08/pil-to-opencv-image/
    pil_im = pil_im.convert('L')
    cv_im = cv.CreateImageHeader(pil_im.size, cv.IPL_DEPTH_8U, 1)
    cv.SetData(cv_im, pil_im.tostring(), pil_im.size[0]  )
    return cv_im

def cv2pil(cv_im):
    return Image.fromstring("L", cv.GetSize(cv_im), cv_im.tostring())


pil_im=Image.open('testPics/faces.jpg')
cv_im=pil2cv(pil_im)
#the haarcascade files tells opencv what to look for.
faceCascade = cv.Load('C:/Python27/Lib/site-packages/opencv/haarcascade_frontalface_default.xml')
face=DetectFace(cv_im,faceCascade)
img=cv2pil(face)
img.show()
Test sulla prima pagina di Google ("volti" cercati su Google):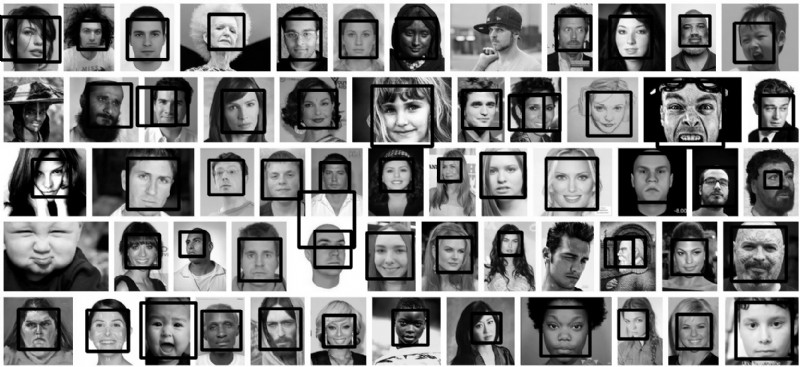
Aggiorna
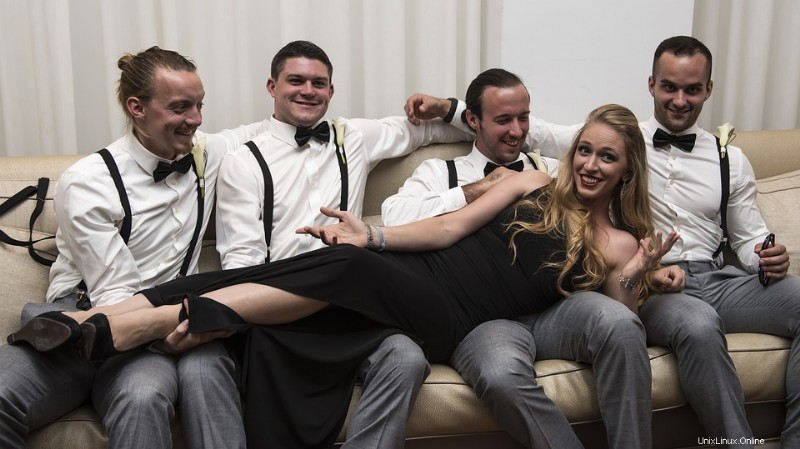
Questo codice dovrebbe fare esattamente quello che vuoi. Fammi sapere se hai domande. Ho cercato di includere molti commenti nel codice:
'''
Sources:
http://opencv.willowgarage.com/documentation/python/cookbook.html
http://www.lucaamore.com/?p=638
'''

#Python 2.7.2
#Opencv 2.4.2
#PIL 1.1.7

import cv #Opencv
import Image #Image from PIL
import glob
import os

def DetectFace(image, faceCascade, returnImage=False):
    # This function takes a grey scale cv image and finds
    # the patterns defined in the haarcascade function
    # modified from: http://www.lucaamore.com/?p=638

    #variables
    min_size = (20,20)
    haar_scale = 1.1
    min_neighbors = 3
    haar_flags = 0

    # Equalize the histogram
    cv.EqualizeHist(image, image)

    # Detect the faces
    faces = cv.HaarDetectObjects(
            image, faceCascade, cv.CreateMemStorage(0),
            haar_scale, min_neighbors, haar_flags, min_size
        )

    # If faces are found
    if faces and returnImage:
        for ((x, y, w, h), n) in faces:
            # Convert bounding box to two CvPoints
            pt1 = (int(x), int(y))
            pt2 = (int(x + w), int(y + h))
            cv.Rectangle(image, pt1, pt2, cv.RGB(255, 0, 0), 5, 8, 0)

    if returnImage:
        return image
    else:
        return faces

def pil2cvGrey(pil_im):
    # Convert a PIL image to a greyscale cv image
    # from: http://pythonpath.wordpress.com/2012/05/08/pil-to-opencv-image/
    pil_im = pil_im.convert('L')
    cv_im = cv.CreateImageHeader(pil_im.size, cv.IPL_DEPTH_8U, 1)
    cv.SetData(cv_im, pil_im.tostring(), pil_im.size[0]  )
    return cv_im

def cv2pil(cv_im):
    # Convert the cv image to a PIL image
    return Image.fromstring("L", cv.GetSize(cv_im), cv_im.tostring())

def imgCrop(image, cropBox, boxScale=1):
    # Crop a PIL image with the provided box [x(left), y(upper), w(width), h(height)]

    # Calculate scale factors
    xDelta=max(cropBox[2]*(boxScale-1),0)
    yDelta=max(cropBox[3]*(boxScale-1),0)

    # Convert cv box to PIL box [left, upper, right, lower]
    PIL_box=[cropBox[0]-xDelta, cropBox[1]-yDelta, cropBox[0]+cropBox[2]+xDelta, cropBox[1]+cropBox[3]+yDelta]

    return image.crop(PIL_box)

def faceCrop(imagePattern,boxScale=1):
    # Select one of the haarcascade files:
    #   haarcascade_frontalface_alt.xml  <-- Best one?
    #   haarcascade_frontalface_alt2.xml
    #   haarcascade_frontalface_alt_tree.xml
    #   haarcascade_frontalface_default.xml
    #   haarcascade_profileface.xml
    faceCascade = cv.Load('haarcascade_frontalface_alt.xml')

    imgList=glob.glob(imagePattern)
    if len(imgList)<=0:
        print 'No Images Found'
        return

    for img in imgList:
        pil_im=Image.open(img)
        cv_im=pil2cvGrey(pil_im)
        faces=DetectFace(cv_im,faceCascade)
        if faces:
            n=1
            for face in faces:
                croppedImage=imgCrop(pil_im, face[0],boxScale=boxScale)
                fname,ext=os.path.splitext(img)
                croppedImage.save(fname+'_crop'+str(n)+ext)
                n+=1
        else:
            print 'No faces found:', img

def test(imageFilePath):
    pil_im=Image.open(imageFilePath)
    cv_im=pil2cvGrey(pil_im)
    # Select one of the haarcascade files:
    #   haarcascade_frontalface_alt.xml  <-- Best one?
    #   haarcascade_frontalface_alt2.xml
    #   haarcascade_frontalface_alt_tree.xml
    #   haarcascade_frontalface_default.xml
    #   haarcascade_profileface.xml
    faceCascade = cv.Load('haarcascade_frontalface_alt.xml')
    face_im=DetectFace(cv_im,faceCascade, returnImage=True)
    img=cv2pil(face_im)
    img.show()
    img.save('test.png')


# Test the algorithm on an image
#test('testPics/faces.jpg')

# Crop all jpegs in a folder. Note: the code uses glob which follows unix shell rules.
# Use the boxScale to scale the cropping area. 1=opencv box, 2=2x the width and height
faceCrop('testPics/*.jpg',boxScale=1)
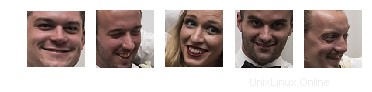
Usando l'immagine sopra, questo codice estrae 52 dei 59 volti, producendo file ritagliati come:


facedetect Wrapper CLI OpenCV scritto in Python
https://github.com/wavexx/facedetect è un bel wrapper Python OpenCV CLI e ho aggiunto il seguente esempio al loro README.
Installazione:
sudo apt install python3-opencv opencv-data imagemagick
git clone https://gitlab.com/wavexx/facedetect
git -C facedetect checkout 5f9b9121001bce20f7d87537ff506fcc90df48ca
Ottieni la mia immagine di prova:
mkdir -p pictures
wget -O pictures/test.jpg https://raw.githubusercontent.com/cirosantilli/media/master/Ciro_Santilli_with_a_stone_carved_Budai_in_the_Feilai_Feng_caves_near_the_Lingyin_Temple_in_Hangzhou_in_2012.jpg
Utilizzo:
mkdir -p faces
for file in pictures/*.jpg; do
  name=$(basename "$file")
  i=0
  facedetect/facedetect --data-dir /usr/share/opencv4 "$file" |
    while read x y w h; do
      convert "$file" -crop ${w}x${h}+${x}+${y} "faces/${name%.*}_${i}.${name##*.}"
    i=$(($i+1))
    done
done
Se non superi --data-dir su questo sistema, fallisce con:
facedetect: error: cannot load HAAR_FRONTALFACE_ALT2 from /usr/share/opencv/haarcascades/haarcascade_frontalface_alt2.xml
e il file che sta cercando è probabilmente in:/usr/share/opencv4/haarcascades sul sistema.
Dopo averlo eseguito, il file:
faces/test_0.jpg
contiene:
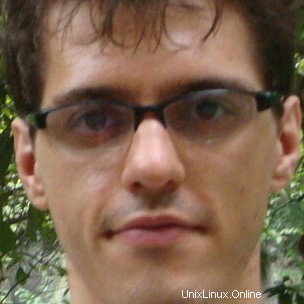
che è stato estratto dall'immagine originale pictures/test.jpg :
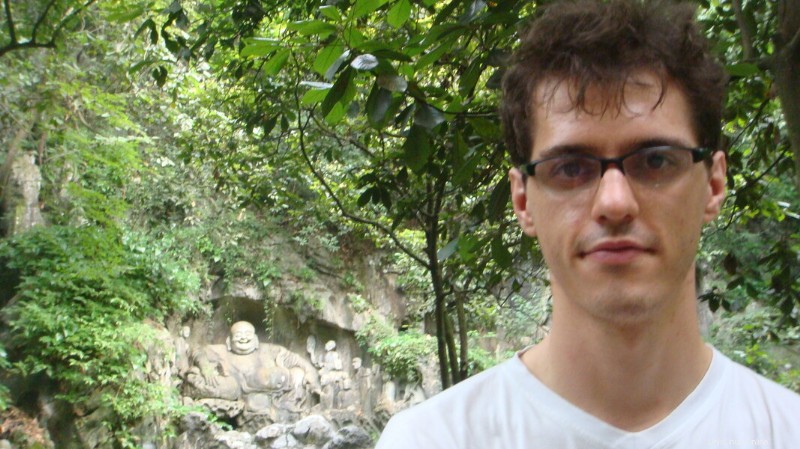
Budai non è stato riconosciuto :-( Se lo avesse, sarebbe apparso sotto faces/test_1.jpg , ma quel file non esiste.
Proviamone un altro con le facce parzialmente girate https://raw.githubusercontent.com/cirosantilli/media/master/Ciro_Santilli_with_his_mother_in_law_during_his_wedding_in_2017.jpg
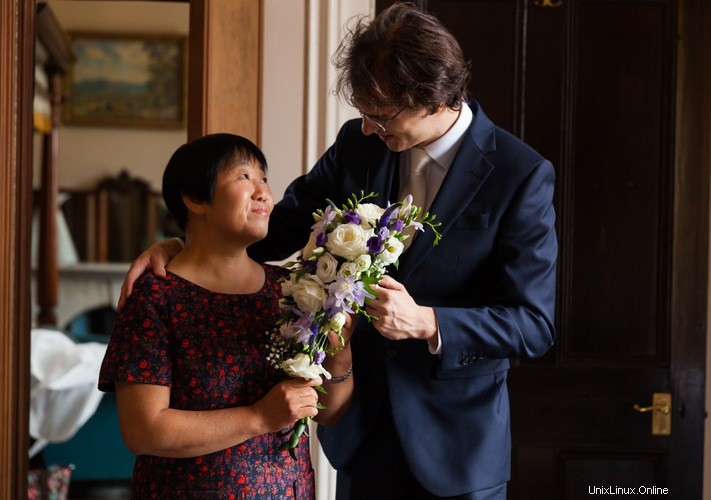
Hmmm, nessun riscontro, i volti non sono abbastanza chiari per il software.
Testato su Ubuntu 20.10, OpenCV 4.2.0.
Un'altra opzione disponibile è dlib, che si basa su approcci di machine learning.
import dlib
from PIL import Image
from skimage import io
import matplotlib.pyplot as plt


def detect_faces(image):

    # Create a face detector
    face_detector = dlib.get_frontal_face_detector()

    # Run detector and get bounding boxes of the faces on image.
    detected_faces = face_detector(image, 1)
    face_frames = [(x.left(), x.top(),
                    x.right(), x.bottom()) for x in detected_faces]

    return face_frames

# Load image
img_path = 'test.jpg'
image = io.imread(img_path)

# Detect faces
detected_faces = detect_faces(image)

# Crop faces and plot
for n, face_rect in enumerate(detected_faces):
    face = Image.fromarray(image).crop(face_rect)
    plt.subplot(1, len(detected_faces), n+1)
    plt.axis('off')
    plt.imshow(face)