Le distribuzioni Linux sono disponibili per il download in una gamma di formati diversi. Il formato più diffuso è ISO. Oltre a ISO, sono anche distribuiti tramite immagini preconfigurate come .box per Vagrant, .vbox per la casella virtuale, .vmdk per Vmware, .qcow2 per KVM/openStack e compresso RAW ecc. In questo modo puoi prendere rapidamente l'immagine di tua scelta ed eseguirla utilizzando la rispettiva applicazione di virtualizzazione. Questa breve guida spiega come aggiungere .box scaricato file a Vagrant nel sistema operativo Linux.
Per chi ancora non lo sapesse, Vagante è un software open source per la creazione e la manutenzione di ambienti di sviluppo software virtuali. Fornisce un ambiente di sviluppo pulito, facile da configurare, riproducibile e portatile. Il .box è un formato e un'estensione per ambienti Vagrant. Le scatole del vagabondo sono solo le immagini di base. Al giorno d'oggi, molti sistemi operativi sono disponibili in .box formato file immagine.
Aggiungi .box scaricato File To Vagrant in Linux
Oggi volevo provare il sistema operativo Fedora 33 appena rilasciato sul mio sistema. Invece di scaricarlo e installarlo manualmente dal file ISO, ho deciso di prendere la scatola Fedora 33 Vagrant già pronta ed eseguirla per un paio di giorni in VirtualBox per vedere come funziona. Così sono andato alla pagina di download ufficiale di Fedora e ho scaricato il .box file per Fedora 33. E poi ho installato Vagrant nel mio desktop Ubuntu come descritto nella seguente guida:
- Come installare Vagrant su Linux
Dopo aver installato Vagrant, sono andato nella posizione in cui ho scaricato il .box file e aggiungilo a Vagrant usando il comando:
$ vagrant box add --name fedora33 Fedora-Cloud-Base-Vagrant-33-1.2.x86_64.vagrant-virtualbox.box
Qui, fedora33 è il nome che ho assegnato alla macchina virtuale e al "Fedora-Cloud-Base-Vagrant-33-1.2.x86_64.vagrant-virtualbox.box" è il .box file che ho scaricato dalla pagina di download di Fedora.
Risultato di esempio:
==> box: Box file was not detected as metadata. Adding it directly...
==> box: Adding box 'fedora33' (v0) for provider:
    box: Unpacking necessary files from: file:///home/sk/Vagrant/Fedora-Cloud-Base-Vagrant-33-1.2.x86_64.vagrant-virtualbox.box
==> box: Successfully added box 'fedora33' (v0) for 'virtualbox'!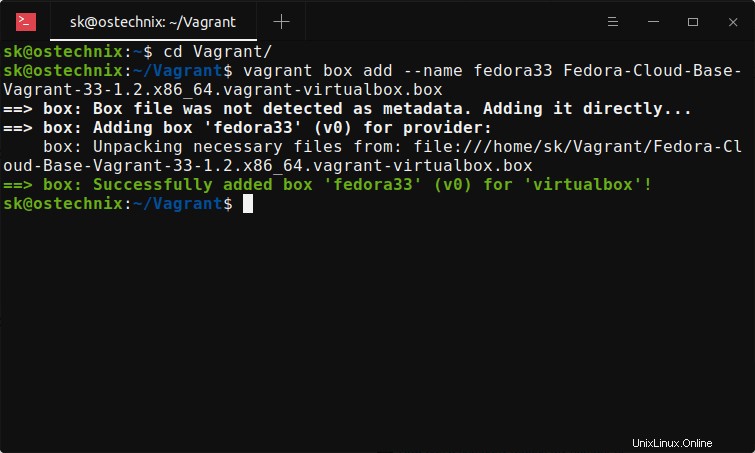
Il .bo x viene aggiunto per il provider. Nel mio caso, il provider è Oracle VirtualBox.
Verifichiamolo elencando le scatole Vagrant disponibili come mostrato di seguito:
$ vagrant box list
fedora33 (virtualbox, 0)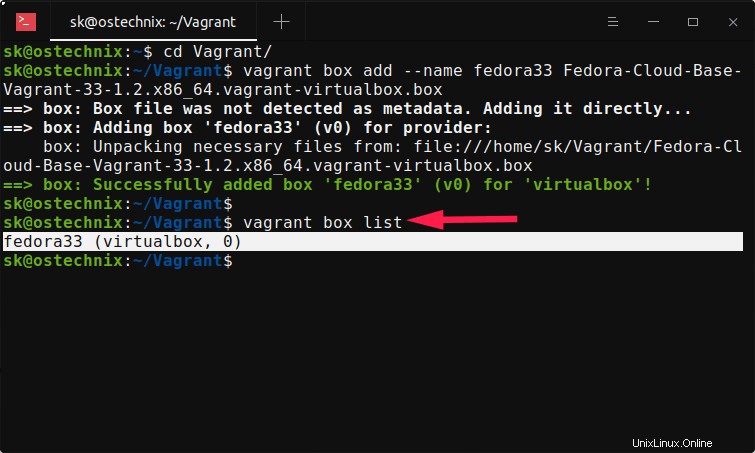
Quindi inizializza la casella Vagrant usando il comando:
$ vagrant init fedora33Risultato di esempio:
A `Vagrantfile` has been placed in this directory. You are now
ready to `vagrant up` your first virtual environment! Please read
the comments in the Vagrantfile as well as documentation on
`vagrantup.com` for more information on using Vagrant.
Ora avvia la macchina virtuale Fedora eseguendo il seguente comando:
$ vagrant upRisultato di esempio:
Bringing machine 'default' up with 'virtualbox' provider...
==> default: Importing base box 'fedora33'...
==> default: Matching MAC address for NAT networking...
==> default: Setting the name of the VM: Vagrant_default_1606997309282_57379
==> default: Clearing any previously set network interfaces...
==> default: Preparing network interfaces based on configuration...
    default: Adapter 1: nat
==> default: Forwarding ports...
    default: 22 (guest) => 2222 (host) (adapter 1)
==> default: Booting VM...
==> default: Waiting for machine to boot. This may take a few minutes...
    default: SSH address: 127.0.0.1:2222
    default: SSH username: vagrant
    default: SSH auth method: private key
    default:
    default: Vagrant insecure key detected. Vagrant will automatically replace
    default: this with a newly generated keypair for better security.
    default:
    default: Inserting generated public key within guest...
    default: Removing insecure key from the guest if it's present...
    default: Key inserted! Disconnecting and reconnecting using new SSH key...
==> default: Machine booted and ready!
==> default: Checking for guest additions in VM...
    default: The guest additions on this VM do not match the installed version of
    default: VirtualBox! In most cases this is fine, but in rare cases it can
    default: prevent things such as shared folders from working properly. If you see
    default: shared folder errors, please make sure the guest additions within the
    default: virtual machine match the version of VirtualBox you have installed on
    default: your host and reload your VM.
    default:
    default: Guest Additions Version: 6.0.0 r127566
    default: VirtualBox Version: 6.1
==> default: Rsyncing folder: /home/sk/Vagrant/ => /vagrant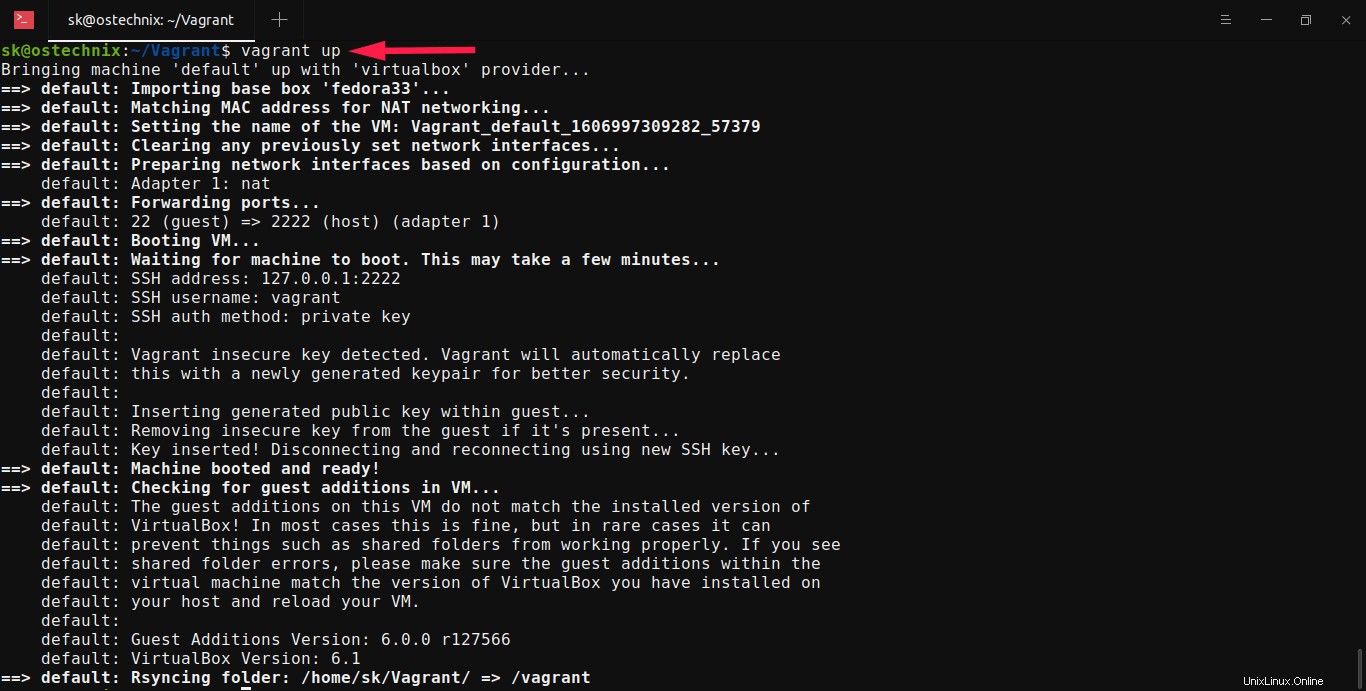
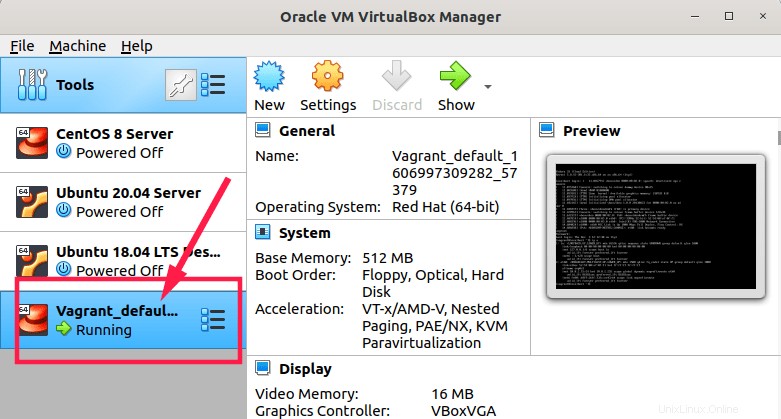
La Fedora 33 vagrant box è attiva e funzionante in VirtualBox.
Apri il gestore di Virtualbox e controlla se è in esecuzione:
Puoi anche controllare lo stato della casella del vagabondo dal Terminale usando questo comando:
$ vagrant statusRisultato di esempio:
Current machine states:

default                   running (virtualbox)

The VM is running. To stop this VM, you can run `vagrant halt` to
shut it down forcefully, or you can run `vagrant suspend` to simply
suspend the virtual machine. In either case, to restart it again,
simply run `vagrant up`.
Sì, la VM è in esecuzione!
Connettiti e accedi alla VM in esecuzione tramite ssh come mostrato di seguito:
$ vagrant sshInizia a usare la VM:
Last login: Thu Dec  3 12:13:42 2020
[[email protected] ~]$ cat /etc/redhat-release
Fedora release 33 (Thirty Three)
[[email protected] ~]$
Tieni presente che ho scaricato l'immagine della scatola di Virtualbox, quindi la VM Fedora si avvia automaticamente in Virtualbox. Se hai scaricato l'immagine libvirt/kvm, verrà eseguita con l'hypervisor kvm.
Bene, per ora questo è tutto. Ora hai imparato come aggiungere .box scaricato file a vagabondo in Linux. E hai anche imparato come avviare la casella Vagrant e come connetterti per accedervi dalla riga di comando.
Per saperne di più sull'utilizzo di Vagrant, fai riferimento alla seguente guida:
- Tutorial di Vagrant – Iniziare con Vagrant
Spero che questo aiuti.