Questo tutorial mostra come impostare la sincronizzazione dei file tra due server Debian 10 con Unison. Unison è uno strumento di sincronizzazione dei file simile a rsync, la grande differenza è che tiene traccia/sincronizza le modifiche in entrambe le direzioni, ovvero i file modificati sul server1 verranno replicati sul server2 e viceversa.
1 Nota preliminare
In questo tutorial userò i seguenti due server Debian:
- server1.example.com con l'indirizzo IP 192.168.0.100
- server2.example.com con l'indirizzo IP 192.168.0.101
Voglio sincronizzare la directory /var/www tra i due server. In questo tutorial eseguirò Unison come utente root in modo che Unison disponga di autorizzazioni sufficienti per sincronizzare le autorizzazioni di utenti e gruppi.
Tutti i comandi in questo tutorial vengono eseguiti come utente root. Accedi a entrambi i server sulla shell come root e inizia con il passaggio 2 "Installazione di Unison ".
2 Installazione di Unison
server1/server2:
Unison deve essere installato su server1 e server2; poiché ci connettiamo da server1 a server2 usando SSH, abbiamo anche bisogno dei pacchetti SSH e installerò l'editor nano per la modifica dei file sulla shell. Questo può essere ottenuto come segue:
apt-get -y install unison openssh-server ssh nano
3 Creazione di una coppia di chiavi privata/pubblica sul server1
server1:
Ora creiamo una coppia di chiavi privata/pubblica su server1.example.com:
ssh-keygen -t dsa
[email protected]:~# ssh-keygen -t dsa
Generazione coppia di chiave dsa pubblica/privata.
Inserisci il file in cui salvare la chiave (/root/.ssh/id_dsa): <-- INVIO
Directory creata '/root/.ssh'.
Inserisci passphrase (vuota per nessuna passphrase): <-- ENTER
Inserisci di nuovo la stessa passphrase: <-- ENTER
Il tuo l'identificazione è stata salvata in /root/.ssh/id_dsa.
La tua chiave pubblica è stata salvata in /root/.ssh/id_dsa.pub.
L'impronta della chiave è:
ba:82 :e1:a1:42:9b:d4:c8:99:c8:bd:8b:7d:4d:d4:66 [email protetta]
L'immagine randomart della chiave è:
+--- [DSA 1024]----+
| |
| |
| . |
| . E |
|+ * . S |
|.Ooo o |
|ooo+. + |
|oo=... o |
|.. oo.. |
+-----------------+
[email protetta]:~#
È importante non inserire una passphrase, altrimenti il mirroring non funzionerà senza l'interazione umana, quindi premi semplicemente INVIO!
Quindi, copiamo la nostra chiave pubblica su server2.example.com:
ssh-copy-id -i $HOME/.ssh/id_dsa.pub [email protected]
# ssh-copy-id -i $HOME/.ssh/id_dsa.pub [email protected]
The authenticity of host '192.168.1.102 (192.168.0.101)' can't be established.
ECDSA key fingerprint is 2b:3c:35:ad:3d:e2:fc:16:2f:55:5c:e1:2c:d7:3d:a9.
Are you sure you want to continue connecting (yes/no)? <-- yes (you will see this only if this is the first time you connect to server2)
/usr/bin/ssh-copy-id: INFO: attempting to log in with the new key(s), to filter out any that are already installed
/usr/bin/ssh-copy-id: INFO: 1 key(s) remain to be installed -- if you are prompted now it is to install the new keys
[email protected]'s password: <-- server2 root password
Number of key(s) added: 1
Now try logging into the machine, with: "ssh '[email protected]'"
and check to make sure that only the key(s) you wanted were added.
Ora controlla sul server2 se la chiave pubblica del server1 è stata trasferita correttamente:
server2:
cat $HOME/.ssh/authorized_keys
[email protected]:/home/administrator# cat $HOME/.ssh/authorized_keys
ssh-dss AAAAB3NzaC1kc3MAAACBAKHLdAztIr8muZIlQYuE/4f75kmgTwWqJRZJ1dTqHDnHWsy48emDU8v85hxAPg43k9aF7/zAwpA0MNNNk5T9Tx/DyUkK/KcyVP2f4p8tvovrkUvoxsZACkTUmFqKdq2x6/AGfjsCRmkpLhZuad7r5rKEXHRh8KYGHqD1Id8wcpy5AAAAFQCww3OekKcKMshMAwBK3XQmmYEGUwAAAIEAgjztlwh8OFYxwQve/RrhI2sceCXwS/yjQyH7q0zdWB9Fr4s/16T2PLBT+7M3vb+JlPDO3JRqgaYbel1kS2F2iKrY0EX0FI3/9fVDfWoz3mhCscPLriqy5AcsHitxQNfiZgA5wDiSjWpk1v+FbIC+VuqbKdQuE4MBKj19N9YALIUAAACABQ4NDsa2UBc8jsxvghjoLhUWF7HChaCksXQcL6i98VNRcemtPC6wpIri75iR4Uhv1666bDOBAdmIBX9Qf7A/+czPKPaj4CGI1hVy1pgYMa3btnEvoSnH/ONtjpOz9q+3up1OOOn+5fud7xjJn+Fq8WoGROgarBpCbQU3w2GUUnM= [email protected]
4 Esecuzione all'unisono
server1:
Ora possiamo eseguire Unison per la prima volta per sincronizzare la directory /var/www su entrambi i server. Su server1 eseguito:
unison /var/www ssh://192.168.0.101//var/www
L'output sarà simile a questo:potresti dover rispondere ad alcune domande poiché questa è la prima volta che Unison viene eseguito:
[email protected]:/var/www# unison /var/www ssh://192.168.0.101//var/www
Contacting server...
Connected [//server1//var/www -> //server2//var/www]
Looking for changes
Warning: No archive files were found for these roots, whose canonical names are:
/var/www
//server2//var/www
This can happen either
because this is the first time you have synchronized these roots,
or because you have upgraded Unison to a new version with a different
archive format.
Update detection may take a while on this run if the replicas are
large.
Unison will assume that the 'last synchronized state' of both replicas
was completely empty. This means that any files that are different
will be reported as conflicts, and any files that exist only on one
replica will be judged as new and propagated to the other replica.
If the two replicas are identical, then no changes will be reported.
If you see this message repeatedly, it may be because one of your machines
is getting its address from DHCP, which is causing its host name to change
between synchronizations. See the documentation for the UNISONLOCALHOSTNAME
environment variable for advice on how to correct this.
Donations to the Unison project are gratefully accepted:
http://www.cis.upenn.edu/~bcpierce/unison
Press return to continue.[<spc>] <-- Press Enter
Waiting for changes from server
Reconciling changes
local server2
dir ----> example.com [f] <-- Press Enter
dir ----> example.de [f] <-- Press Enter
Proceed with propagating updates? [] <-- Enter "y"
Propagating updates
UNISON 2.48.4 started propagating changes at 13:24:01.10 on 05 May 2020
[BGN] Copying example.com from /var/www to //server2//var/www
[BGN] Copying example.de from /var/www to //server2//var/www
Shortcut: copied /var/www/example.de/web/index.html from local file /var/www/.unison.example.com.d3783bddaaf59b9ba4d2ed0433f9db63.unison.tmp/web/index.html
[END] Copying example.de
[END] Copying example.com
UNISON 2.48.4 finished propagating changes at 13:24:01.98 on 05 May 2020
Saving synchronizer state
Synchronization complete at 13:24:01 (2 items transferred, 0 skipped, 0 failed)
Controlla ora la directory /var/www su server1 e server2 e dovresti scoprire che ora sono sincronizzati.
Naturalmente, non vogliamo eseguire Unison in modo interattivo, quindi possiamo creare un file delle preferenze (/root/.unison/default.prf) che contiene tutte le impostazioni che altrimenti dovremmo specificare sulla riga di comando:
nano /root/.unison/default.prf
# Roots of the synchronization
root = /var/www
root = ssh://192.168.0.101//var/www

# Paths to synchronize
#path = current
#path = common
#path = .netscape/bookmarks.html

# Some regexps specifying names and paths to ignore
#ignore = Path stats    ## ignores /var/www/stats
#ignore = Path stats/*  ## ignores /var/www/stats/*
#ignore = Path */stats  ## ignores /var/www/somedir/stats, but not /var/www/a/b/c/stats
#ignore = Name *stats   ## ignores all files/directories that end with "stats"
#ignore = Name stats*   ## ignores all files/directories that begin with "stats"
#ignore = Name *.tmp    ## ignores all files with the extension .tmp

#          When set to true, this flag causes the user interface to skip
#          asking for confirmations on non-conflicting changes. (More
#          precisely, when the user interface is done setting the
#          propagation direction for one entry and is about to move to the
#          next, it will skip over all non-conflicting entries and go
#          directly to the next conflict.)
auto=true

#          When this is set to true, the user interface will ask no
#          questions at all. Non-conflicting changes will be propagated;
#          conflicts will be skipped.
batch=true

#          !When this is set to true, Unison will request an extra
#          confirmation if it appears that the entire replica has been
#          deleted, before propagating the change. If the batch flag is
#          also set, synchronization will be aborted. When the path
#          preference is used, the same confirmation will be requested for
#          top-level paths. (At the moment, this flag only affects the
#          text user interface.) See also the mountpoint preference.
confirmbigdel=true

#          When this preference is set to true, Unison will use the
#          modification time and length of a file as a `pseudo inode
#          number' when scanning replicas for updates, instead of reading
#          the full contents of every file. Under Windows, this may cause
#          Unison to miss propagating an update if the modification time
#          and length of the file are both unchanged by the update.
#          However, Unison will never overwrite such an update with a
#          change from the other replica, since it always does a safe
#          check for updates just before propagating a change. Thus, it is
#          reasonable to use this switch under Windows most of the time
#          and occasionally run Unison once with fastcheck set to false,
#          if you are worried that Unison may have overlooked an update.
#          The default value of the preference is auto, which causes
#          Unison to use fast checking on Unix replicas (where it is safe)
#          and slow checking on Windows replicas. For backward
#          compatibility, yes, no, and default can be used in place of
#          true, false, and auto. See the section "Fast Checking" for more
#          information.
fastcheck=true

#          When this flag is set to true, the group attributes of the
#          files are synchronized. Whether the group names or the group
#          identifiers are synchronizeddepends on the preference numerids.
group=true

#          When this flag is set to true, the owner attributes of the
#          files are synchronized. Whether the owner names or the owner
#          identifiers are synchronizeddepends on the preference
#          extttnumerids.
owner=true

#          Including the preference -prefer root causes Unison always to
#          resolve conflicts in favor of root, rather than asking for
#          guidance from the user. (The syntax of root is the same as for
#          the root preference, plus the special values newer and older.)
#          This preference is overridden by the preferpartial preference.
#          This preference should be used only if you are sure you know
#          what you are doing!
prefer=newer

#          When this preference is set to true, the textual user interface
#          will print nothing at all, except in the case of errors.
#          Setting silent to true automatically sets the batch preference
#          to true.
silent=true

#          When this flag is set to true, file modification times (but not
#          directory modtimes) are propagated.
times=true
I commenti dovrebbero rendere il file autoesplicativo, ad eccezione delle direttive del percorso. Se non specifichi nessuna direttiva di percorso, le directory nelle direttive root verranno sincronizzate. Se specifichi le direttive del percorso, i percorsi sono relativi al percorso radice (ad es. root =/var/www e percorso =corrente si traduce in /var/www/corrente) e solo queste sottodirectory verranno sincronizzate, non l'intera directory specificata nella direttiva radice.
Puoi scoprire di più sulle opzioni disponibili dando un'occhiata alla pagina man di Unison:
man unison
Ora che abbiamo inserito tutte le impostazioni in un file delle preferenze (in particolare le direttive root (e facoltativamente il percorso)), possiamo eseguire Unison senza alcun argomento:
unison
5 Creazione di un Cron Job per Unison
server1:
Vogliamo automatizzare la sincronizzazione, ecco perché creiamo un cron job su server1.example.com:
crontab -e
*/5 * * * * /usr/bin/unison &> /dev/null
Questo funzionerebbe Unison ogni 5 minuti; adattalo alle tue esigenze (vedi
man 5 crontab
). Uso il percorso completo per l'unisono qui (/usr/bin/unison) solo per essere sicuro che cron sappia dove trovare l'unisono. La tua posizione all'unisono potrebbe essere diversa. Corri
which unison
per scoprire dove si trova il tuo.
6 Prova all'unisono
Ora proverò la sincronizzazione a 2 vie di Unison per vedere se l'installazione funziona completamente.
Eseguire il comando seguente sul server1 per creare un file di test con il contenuto "Test 1":
Server1
echo "Test 1" > /var/www/test.txt
Ora attendi almeno 5 minuti (poiché abbiamo creato un cronjob che viene eseguito una volta ogni 5 minuti). Quindi esegui su server2:
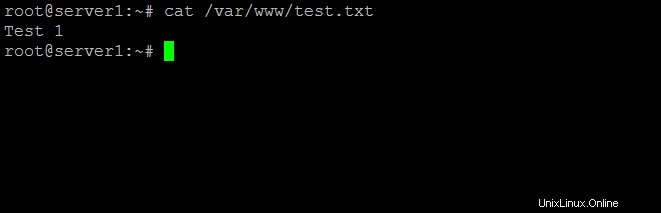
cat /var/www/test.txt
per mostrare il contenuto del file test.txt sullo schermo. L'output dovrebbe essere simile a questo screenshot.
Ora esegui questo comando su server2 che aggiorna il contenuto del nostro file di test su "Test 2":
Server2
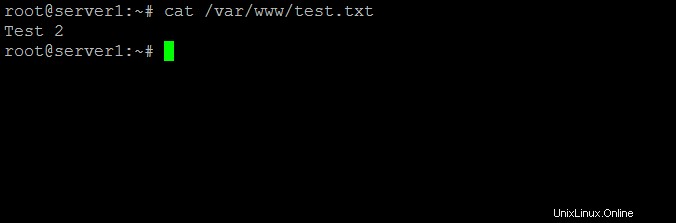
echo "Test 2" > /var/www/test.txt
E aspetta almeno 5 minuti. Quindi esegui il comando cat su server1:
Server1
cat /var/www/test.txt
L'output dovrebbe essere:
7 Link
- Unison:http://www.cis.upenn.edu/~bcpierce/unison/
- Debian:http://www.debian.org/