Questo è un "copia e incolla" Come fare! Il modo più semplice per seguire questo tutorial è utilizzare un client a riga di comando/client SSH (come PuTTY per Windows) e copiare e incollare semplicemente i comandi (tranne dove devi fornire informazioni personali come indirizzi IP, nomi host, password,... ). Questo aiuta a evitare errori di battitura.
The PerfectSetup - Debian Woody (3.0)
Versione 1.6
Autore:Falko Timme
Questa è una descrizione dettagliata dei passaggi da eseguire per configurare una Debian server basato (Debian Woody alias Debian 3.0) che offre tutti i servizi necessari a ISP e hoster (server web (con capacità SSL), server di posta (con SMTP-AUTH e TLS!), server DNS, server FTP, server MySQL, POP3/IMAP, Quota, Firewall, ecc.).
Utilizzerò il seguente software:
- Server Web:Apache 1.3.x
- Server di posta:Postfix (più facile da configurare di sendmail; ha una cronologia di falle di sicurezza più breve rispetto a sendmail)
- Server DNS:BIND9
- Server FTP:proftpd (puoi anche usare vsftpd)
- POP3/IMAP:in questo esempio puoi scegliere tra il tradizionale formato della casella di posta UNIX (usando qpopper/uw-imapd) o il Formato Maildir (in questo caso useremo Courier-POP3/Courier-IMAP).
- Webalizer per le statistiche dei siti web
Alla fine dovresti avere un sistema che funzioni in modo affidabile ed è pronto per il pannello di controllo di webhosting gratuito ISPConfig (ovvero, ISPConfig viene eseguito su di esso dal casella).
Voglio dire innanzitutto che questo non è l'unico modo per configurare un sistema del genere. Ci sono molti modi per raggiungere questo obiettivo, ma questo è il modo in cui prendo. Non garantisco che questo funzionerà per te!
Requisiti
Per installare un tale sistema avrai bisogno di quanto segue:
- CD 1 della versione di Debian Woody (Debian 3.0) (disponibile da http://www.debian.org)
- CD 1 dell'ultima versione di Mandrake Linux (9.2 al momento della stesura di questo documento) (disponibile da http://www.mandrake -linux.com)(non è necessario se non è necessario creare partizioni sul disco rigido)
- una connessione Internet poiché descriverò un'installazione di rete in questo documento
1 TheBase System
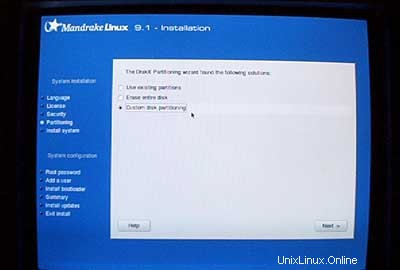
Se hai un disco rigido inutilizzato, dovrai prima creare delle partizioni su di esso (puoi saltare questo passaggio se hai già delle partizioni sul tuo disco rigido ). Puoi usare l'installer di Debian per fare questo, ma penso che sia difficile da usare (soprattutto per i principianti). Qui è dove imbroglio un po':inserisco il CD Mandrake nel mio CD-ROM ed eseguo l'installer Mandrake (solo dopo il mio le partizioni sono state create utilizzando lo strumento di partizionamento di Mandrake, che penso sia il migliore nel mondo Linux).
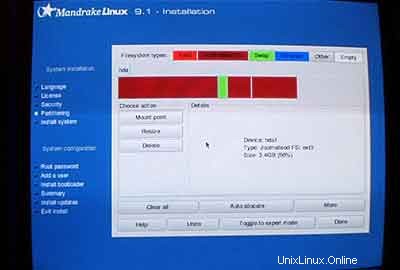
Creo due partizioni:/dev/hda1 (con /boot come punto di montaggio) e /dev/hda6 (con / come punto di montaggio). Inoltre, creo una partizione di swap (di solito su /dev/hda5 ).Penso che 50 MB -100 MB siano una buona dimensione per /dev/hda1;500 MB dovrebbero essere sufficienti per la partizione di swap; il resto è per /dev/hda6 (dove saranno i siti web degli utenti ecc.).
Dopo che le partizioni sono state create, fermo l'installazione di Mandrake, inserisco il mio CD Debian e riavvio il sistema.
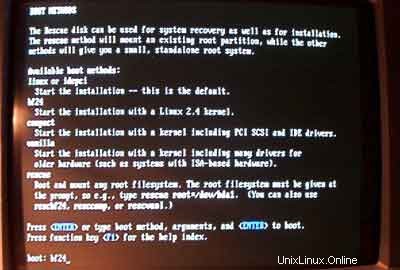
Al prompt di avvio, inserisci bf24 per installare Debian con un kernel Linux 2.4:
Quindi seleziona la tua lingua:
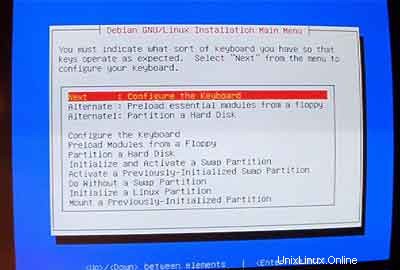
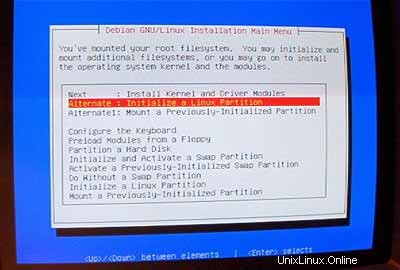
In seguito, entrerai nel menu principale dell'installer Debian. Configura la tua tastiera:
Inizializza e attiva una partizione di scambio:
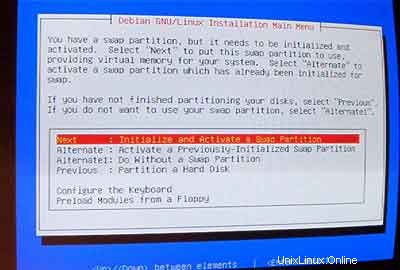
Quando è stato chiesto Scansione dei blocchi danneggiati? , scegli No .
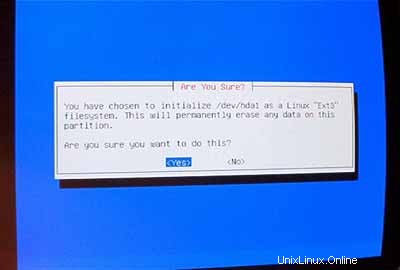
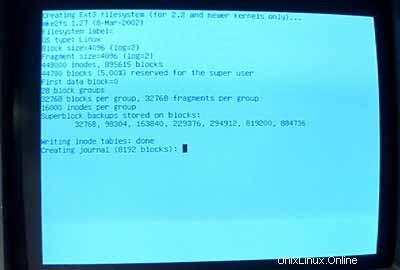
Quindi inizializza una partizione Linux:
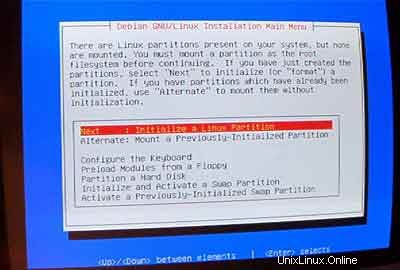
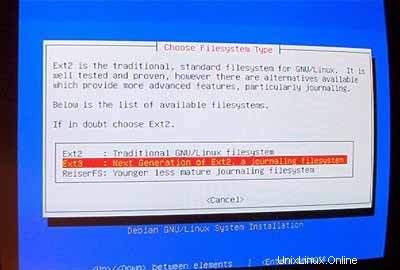
Seleziona il filesystem che desideri. Prendo ext3 qui.
Seleziona /dev/hda1 come partizione da inizializzare:
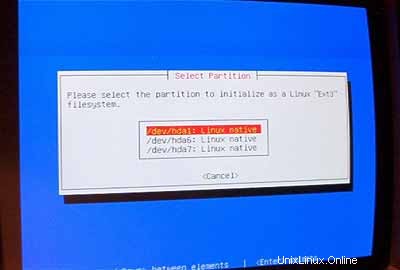
Quando è stato chiesto Scansione dei blocchi danneggiati? , inserisci No .
Seleziona /boot come punto di montaggio per /dev/hda1 :
Ora devi inizializzare la tua seconda partizione Linux:
Seleziona il tuo filesystem preferito (di nuovo, prendo ext3 qui). Quindi seleziona /dev/hda6 come partizione da inizializzare:
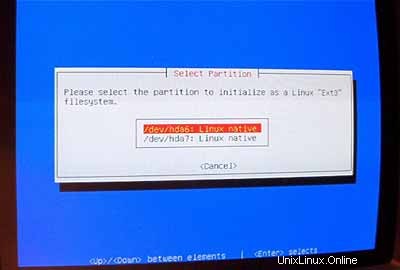
Quando è stato chiesto Scansione dei blocchi danneggiati? , inserisci No .
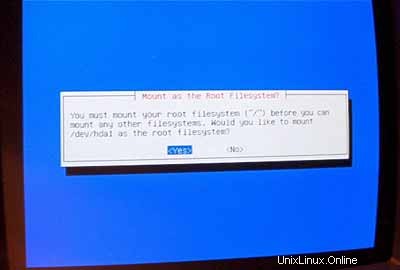
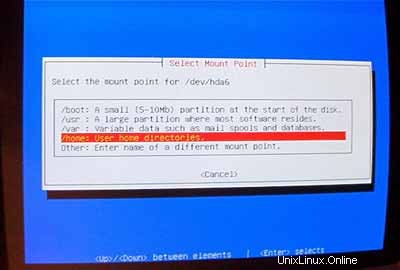
Seleziona / come punto di montaggio per /dev/hda6 :
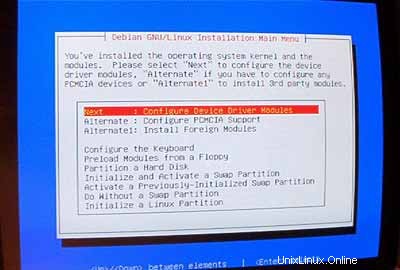
Dopo che le partizioni sono formattate e inizializzate, seleziona InstallKernel e Driver Modules dal menu principale. Penso che questo non abbia bisogno di ulteriori spiegazioni.
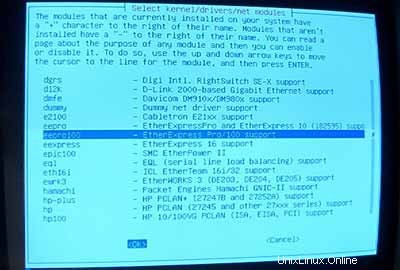
Configura i moduli DeviceDriver:
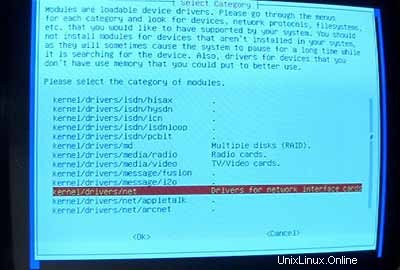
Assicurati di installare il driver per la tua scheda di rete (se non conosci quello corretto è sicuro installare più driver):
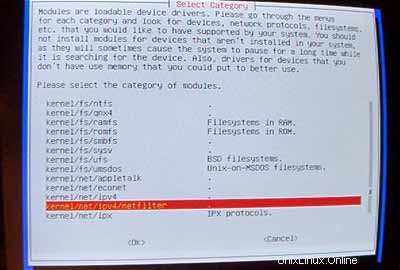
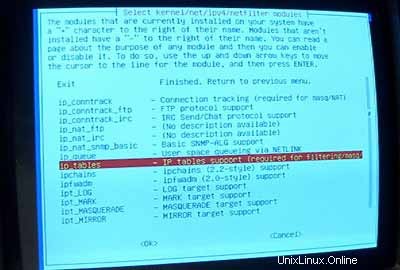
Ora assicurati di includere il supporto per iptables (Firewall!) nel tuo kernel:
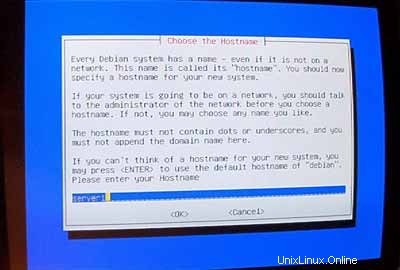
Dopo aver lasciato il menu dei moduli driver devi configurare la tua rete:
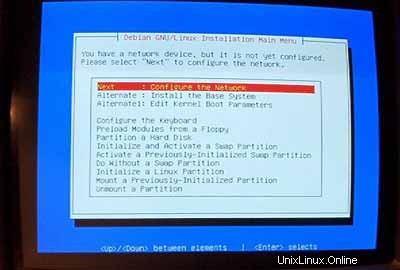
Per il nome host consiglio vivamente un sottodominio che non verrà utilizzato per un sito virtuale su quel server in seguito. Qualcosa come server1 ,server2 , ... sarebbe abbastanza utile in quanto ti consente di distinguere i tuoi server se ne esegui più. Quindi, se il tuo dominio è example.com (si consiglia un vero dominio!) puoi raggiungere il server in server1.example.com (non dimenticare di aggiornare il record DNS per example.com !).
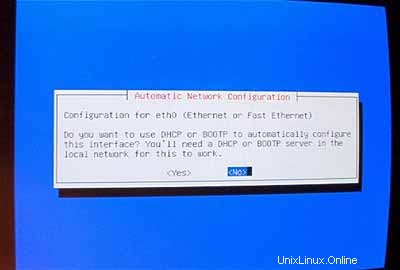
Quando richiesto Configurazione di rete automatica , seleziona No .
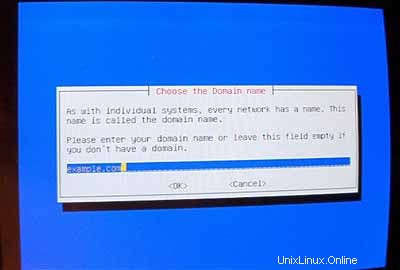
Quindi inserisci l'indirizzo IP principale del sistema, la sua maschera di rete, l'indirizzo del gateway e il dominio del sistema (qui:example.com ).
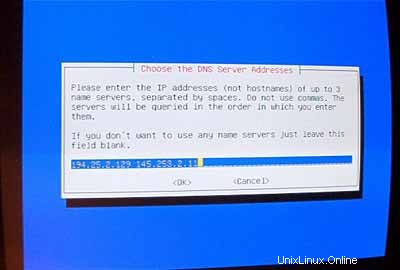
Specifica i server DNS che il sistema deve utilizzare (ad es. 193.174.32.18 e 145.253.2.11 ).
Installa il sistema di base:

Rendi il sistema avviabile:
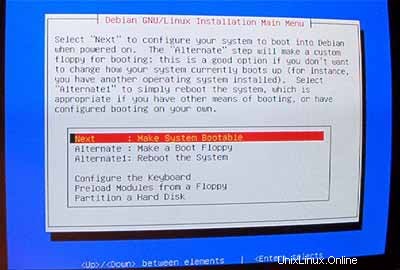
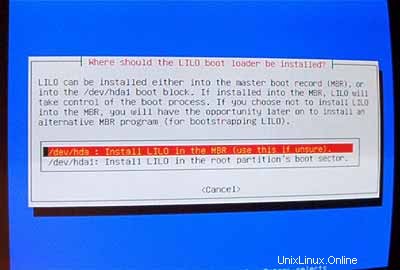
Seleziona InstallLILO nell'MBR :
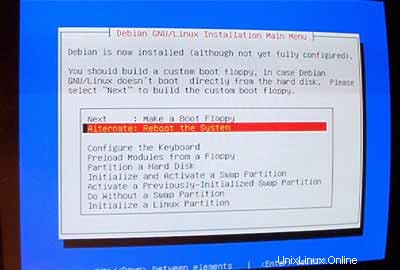
Quindi riavvia il sistema. Assicurati di rimuovere il CD Debian dal tuo CD-ROM:
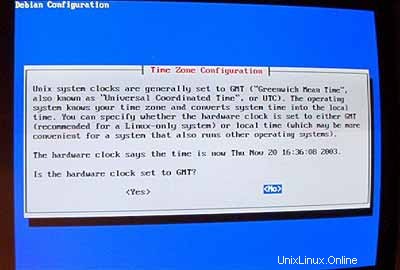
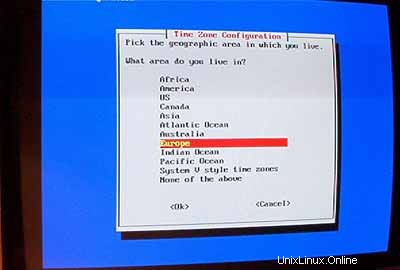
Dopo il riavvio, configura il tuo fuso orario:

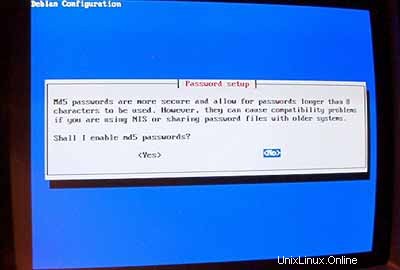
Non abilitare md5passwords:
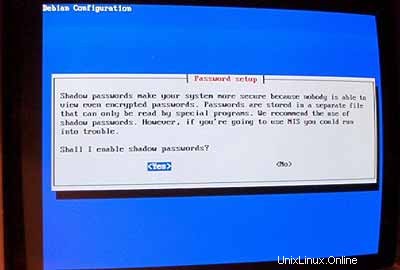
Abilita password shadow:
Quindi imposta la rootpassword , crea l'utente aggiuntivo admin e inserisci la sua password.
Se non hai bisogno di pacchetti pcmcia, rimuovili.
Non utilizzare una connessione PPP per installare il sistema (un server dovrebbe avere una connessione permanente a Internet):
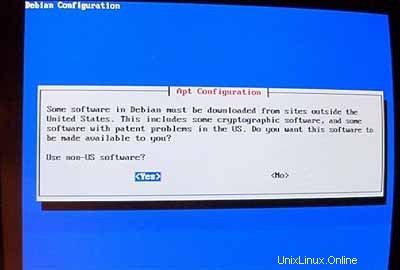
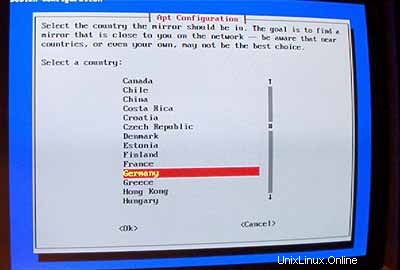
Voglio eseguire un'installazione di rete (ecco perché mi serve solo il disco 1 dei sette CD-ROM Debian).Quindi scelgo http come metodo per accedere all'archivio Debian in AptConfiguration :

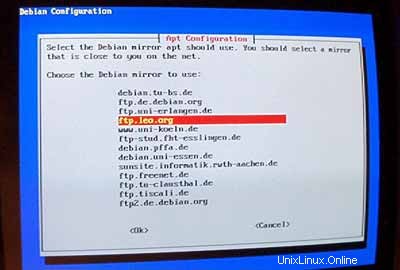
Seleziona uno specchio vicino a te:
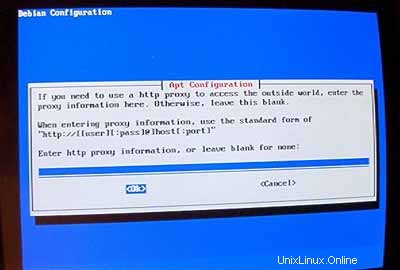
Normalmente non usi un proxy, quindi lascia il campo vuoto:
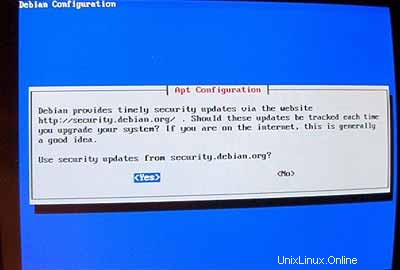
Quando è stato chiesto Utilizzare gli aggiornamenti di sicurezza da security.debian.org? answer Sì .
Importante: Da giugno 2005 Debian Sarge (3.1) è la versione stabile di Debian. Poiché vogliamo installare Debian Woody (3.0) qui invece di Sarge, dobbiamo cambiare il file /etc/apt/sources.list ora prima di andare avanti! Il programma di installazione di Woody pensa ancora che Woody sia la versione stabile. Premi Ctrl + Alt + F2 sulla tua tastiera. Ora sei sulla shell. Accedi come root . Quindi modifica /etc/apt/sources.list con un editor di testo (ad es. vi ) e sostituisci stable con woody ovunque appaia. Successivamente esegui
apt-getupdate
e premi Ctrl+Alt + F1 per tornare alla schermata di installazione.
Quindi esegui tasksel :
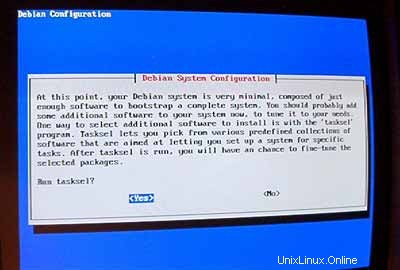
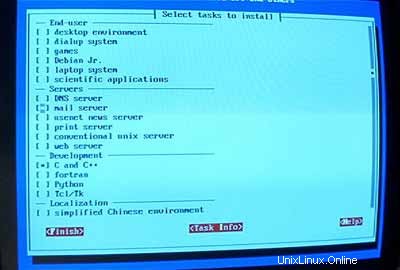
Voglio avere un sistema minimo all'inizio, quindi seleziono solo server di posta e C e C++ (quindi posso compilare i sorgenti se necessario). L'altro software verrà installato in seguito.
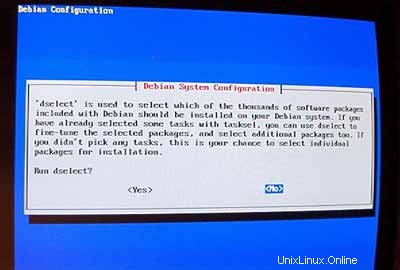
Non eseguire dselect (non pensarci nemmeno, ti perderai!):
Per i passaggi successivi puoi accettare i valori predefiniti.
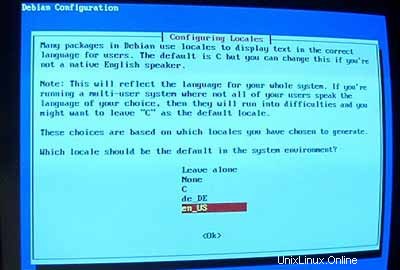
Quindi configura le tue localizzazioni. Almeno scegli en_USISO-8859-1 :
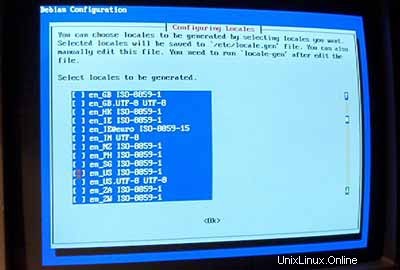
Come impostazione predefinita seleziono en_US :
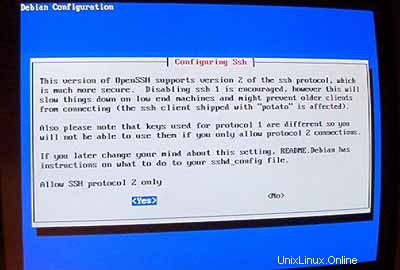
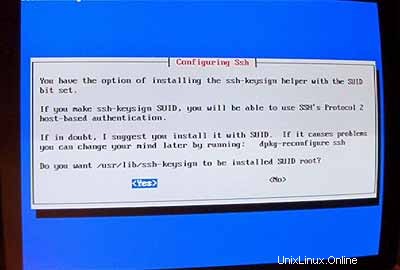
Quindi configura il tuo server:
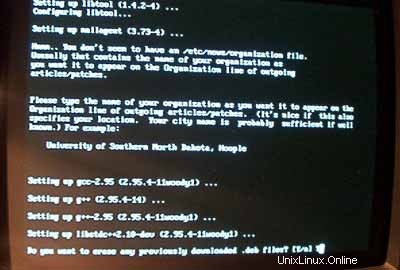
L'installazione ha inizio. Alla fine ti verrà chiesto se desideri eliminare eventuali file.deb precedentemente scaricati. Puoi rispondere Y qui.
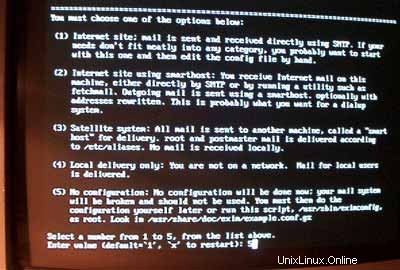
Quando l'installatore vuole configurare exim inserisci 5 (nessuna configurazione) perché useremo postfix come nostro server di posta.
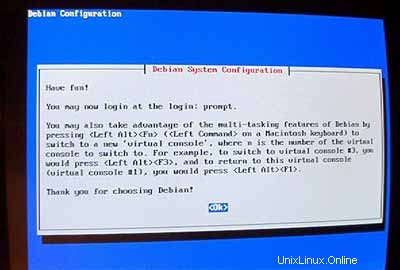
Ora il sistema di base è pronto:
2 Installazione e configurazione del resto del sistema
Configura indirizzi IP aggiuntivi
Se hai più di un indirizzo IP puoi aggiungere i tuoi indirizzi IP aggiuntivi modificando /etc/network/interfaces .Sembrerà simile a questo:
# /etc/network/interfaces -- configuration file for ifup(8), ifdown(8) |
Se vuoi aggiungere l'indirizzo IP 192.168.0.101 all'interfaccia eth0 dovresti cambiare il file in modo che assomigli a questo:
# /etc/network/interfaces -- configuration file for ifup(8), ifdown(8) |
Quindi riavvia la tua rete:
/etc/init.d/networkingrestart
Impostazione del nome host
echo server1.example.com> /etc/hostname
/bin/hostname -F /etc/hostname
Installa/Rimuovi software
Aggiungi
deb http://backports.debian.skynet.be woody cyrus-sasl2
a /etc/apt/sources.list ed esegui
apt-getupdate
apt-get install wgetbzip2 rdate fetchmail libdb3++-dev unzip zip ncftp xlispstat libarchive-zip-perlzlib1g-dev libpopt -dev nmap openssl (1 riga!)
apt-get remove lpr nfs-commonportmap pidentd pcmcia-cs pppoe pppoeconf ppp pppconfig
update-rc.d -f exim remove
update-inetd --removedaytime
update-inetd --remove telnet
update-inetd - -remove time
update-inetd --remove finger
update-inetd --remove talk
update-inetd --remove ntalk
update-inetd --remove ftp
update-inetd --remove scartare
<- Sì [y]
/etc/init.d/inetd reload
Quota
apt-get install quotatool
Modifica /etc/fstab per assomigliare a questo (ho aggiunto ,usrquota,grpquota partizionare /dev/hda6 ):
# /etc/fstab: static file system information. |
Quindi esegui:
tocca /quota.user /quota.group
chmod 600 /quota.*
mount -o remount /
quotacheck -avugm
quotaon -avug
Server DNS
apt-getinstall bind9
Per motivi di sicurezza, vogliamo eseguire BIND in chroot, quindi dobbiamo eseguire i seguenti passaggi:
/etc/init.d/bind9 stop
Modifica lo script di avvio /etc/init.d/bind9 in modo che il demone venga eseguito come utente non privilegiato 'nessuno ', chrooted su /var/lib/named .Modifica la riga:OPTS="" in modo che si legga OPTS="-u Nobody-t /var/lib/named" :
#!/bin/sh |
Crea le directory necessarie sotto /var/lib :
mkdir -p /var/lib/named/etc
mkdir /var/lib/named/dev
mkdir -p /var/lib/named/var/cache/bind
mkdir /var/lib/named/var/run
Then move the configdirectory from /etc to /var/lib/named/etc :
mv /etc/bind /var/lib/named/etc
Create a symlinkto the new config directory from the old location (to avoid problems when bindis upgraded in the future):
ln -s /var/lib/named/etc/bind/etc/bind
Make null and randomdevices, and fix permissions of the directories:
mknod /var/lib/named/dev/nullc 1 3
mknod /var/lib/named/dev/random c 1 8
chmod 666 /var/lib/named/dev/null /var/lib/named/dev/random
chown -R nobody:nogroup /var/lib/named/var/*
chown -R nobody:nogroup /var/lib/named/etc/bind
We need to modifythe startup script /etc/init.d/sysklogd of sysklogd so that wecan still get important messages logged to the system logs. Modify the line: SYSLOGD="" so that it reads:SYSLOGD="-a/var/lib/named/dev/log" :
#! /bin/sh |
Restart the loggingdaemon:
/etc/init.d/sysklogd restart
Start up BIND,and check /var/log/syslog for any errors:
/etc/init.d/bind9 start
MySQL
apt-getinstall mysql-server mysql-client libmysqlclient10-dev
<- No
<- Yes
mysqladmin -u root passwordyourrootsqlpassword
mysqladmin -h server1.example.com -u root password yourrootsqlpassword
In /etc/mysql/my.cnf comment out the following line:
skip-networking
It should now looksimilar to this:
# You can copy this to one of: |
Restart MySQL:
/etc/init.d/mysqlrestart
so that MySQL isaccessible on port 3306 (you can check that with netstat-tap ).
Postfix/Qpopper
addgroup sasl
apt-get install postfix-tlsqpopper sasl-bin libsasl-modules-plain libsasl2 libsasl-gssapi-mit libsasl-digestmd5-dessasl2-bin libsasl2-modules (1line!)
<- Kerberos:acceptdefault value (I don't want to use Kerberos so I don't really care about it)
<- Internetsite
<- Domainname
<- No
<- accept default values
<- Kerberos:accept default value
<- NONE
cd /etc/init.d/
wget http://hanselan.de/postfix/pwcheck
In case you cannotaccess http://hanselan.de/postfix/pwcheck here's the pwcheck script:
#! /bin/sh |
chmod 755 /etc/init.d/pwcheck
update-rc.d pwcheck defaults
mkdir -p /var/spool/postfix/var/run/pwcheck
chown postfix.root /var/spool/postfix/var/run/pwcheck/
chmod 700 /var/spool/postfix/var/run/pwcheck/
ln -s /var/spool/postfix/var/run/pwcheck /var/run/pwcheck
postconf -e 'smtpd_sasl_local_domain=$myhostname'
postconf -e 'smtpd_sasl_auth_enable =yes'
postconf -e 'smtpd_sasl_security_options =noanonymous'
postconf -e 'broken_sasl_auth_clients =yes'
postconf -e 'smtpd_recipient_restrictions =permit_sasl_authenticated,permit_mynetworks,check_relay_domains'
postconf -e 'inet_interfaces =all'
echo 'pwcheck_method:pwcheck'>> /etc/postfix/sasl/smtpd.conf
mkdir /etc/postfix/ssl
cd /etc/postfix/ssl/
openssl genrsa -des3 -rand /etc/hosts -out smtpd.key 1024
chmod 600 smtpd.key
openssl req -new -key smtpd.key -out smtpd.csr
openssl x509 -req -days 3650 -in smtpd.csr -signkey smtpd.key -out smtpd.crt
openssl rsa -in smtpd.key -out smtpd.key.unencrypted
mv -f smtpd.key.unencrypted smtpd.key
openssl req -new -x509 -extensions v3_ca -keyout cakey.pem -out cacert.pem -days3650
postconf -e 'smtpd_tls_auth_only=no'
postconf -e 'smtp_use_tls =yes'
postconf -e 'smtpd_use_tls =yes'
postconf -e 'smtp_tls_note_starttls_offer =yes'
postconf -e 'smtpd_tls_key_file =/etc/postfix/ssl/smtpd.key'
postconf -e 'smtpd_tls_cert_file =/etc/postfix/ssl/smtpd.crt'
postconf -e 'smtpd_tls_CAfile =/etc/postfix/ssl/cacert.pem'
postconf -e 'smtpd_tls_loglevel =1'
postconf -e 'smtpd_tls_received_header =yes'
postconf -e 'smtpd_tls_session_cache_timeout =3600s'
postconf -e 'tls_random_source =dev:/dev/urandom'
The file /etc/postfix/main.cf should now look like this:
# see /usr/share/postfix/main.cf.dist for a commented, fuller |
/etc/init.d/pwcheckstart
/etc/init.d/postfix restart
To see if SMTP-AUTHand TLS work properly now run the following command:
telnetlocalhost 25
After you haveestablished the connection to your postfix mail server type
ehlolocalhost
If you see thelines
250-STARTTLS
and
250-AUTH
everything is fine.
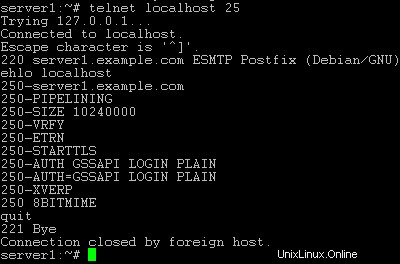
Type
quit
to return to thesystem's shell.
Courier-IMAP/Courier-POP3
If you want touse a POP3/IMAP daemon that has Maildir support (if you do not want to use thetraditional Unix mailbox format) you can install Courier-IMAP and Courier-POP3.Otherwise you can proceed with the Apache configuration.
apt-get install courier-imapcourier-pop
qpopper and UW-IMAPwill then be replaced.
Then configurePostfix to deliver emails to a user's Maildir*:
postconf -e 'home_mailbox=Maildir/'
postconf -e 'mailbox_command ='
/etc/init.d/postfix restart
*Please note:Youdo not have to do this if you intend to use ISPConfigon your system as ISPConfig does the necessary configuration using procmailrecipes. But please go sure to enable Maildir under Management -> Settings ->EMail in the ISPConfig web interface.
Apache
Add
deb http://packages.dotdeb.org ./
to /etc/apt/sources.list and run
apt-getupdate
apt-getinstall apache apache-doc libapache-mod-ssl libapache-mod-ssl-doc
apt-get install libapache-mod-php4php4 php4-cli php4-common php4-curl php4-dev php4-domxml php4-gd php4-gmp php4-imapphp4-ldap php4-mcal php4-mcrypt php4-mhash php4-ming php4-mysql php4-odbc php4-pearphp4-xslt curl libwww-perl imagemagick (1 line!)
Edit /etc/apache/httpd.conf .Under LoadModules add:
LoadModulephp4_module /usr/lib/apache/1.3/libphp4.so
LoadModule ssl_module /usr/lib/apache/1.3/mod_ssl.so
Under Listen add:
Listen80
Listen 443
Under "Addtypeapplication" insert:
AddType application/x-x509-ca-cert .crt
AddType application/x-pkcs7-crl .crl
Before "Section3 :Virtual Hosts" add:
SSLCACertificateFile /etc/apache/ssl.crt/ca-bundle.crt
SSLPassPhraseDialog builtin
SSLSessionCache dbm:/var/run/ssl_scache
SSLSessionCacheTimeout 300
SSLMutex file:/var/run/ssl_mutex
SSLRandomSeed startup builtin
SSLRandomSeed connect builtin
Change
DirectoryIndexindex.html index.htm index.shtml index.cgi
to
DirectoryIndexindex.html index.htm index.shtml index.cgi index.php index.php3 index.pl
Save /etc/apache/httpd.conf and run
/etc/init.d/apacherestart
Proftpd
apt-getinstall proftpd
<- No
For security reasonsyou can add the following lines to /etc/proftpd.conf (thanks to Reinaldo Carvalho; more information can be found here:http://proftpd.linux.co.uk/localsite/Userguide/linked/userguide.html):
DefaultRoot ~
IdentLookups off
ServerIdent on "FTP Server ready."
and restart Proftpd:
/etc/init.d/proftpd restart
Webalizer
apt-getinstall webalizer
<- accept default values
Synchronizethe System Clock
If you want tohave the system clock synchronized with an NTP server you can add the followinglines to /var/spool/cron/crontabs/root (if the file does not exist, create it by running
touch/var/spool/cron/crontabs/root ):
#update time with ntp server
0 3,9,15,21 * * * /usr/sbin/rdate time.nist.gov | logger -t NTP
Then run
chmod600 /var/spool/cron/crontabs/root
/etc/init.d/cronrestart
Install somePerl Modules needed by SpamAssassin (comes with ISPConfig)
Installationusing the Perl Shell
Login to your commandline as root and run the following command to start the Perl shell:
perl -MCPAN -e shell
If you run thePerl shell for the first time you will be asked some questions. In most casesthe default answers are ok.
Please note:Ifyou run a firewall on your system you might have to turn it off while workingon the Perl shell in order for the Perl shell to be able to fetch the neededmodules without a big delay. You can switch it on afterwards.
The big advantageof the Perl shell compared to the two other methods described here is that itcares about dependencies when installing new modules. I.e., if it turns outthat a prerequisite Perl module is missing when you install another module thePerl shell asks you if it should install the prerequisite module for you. Youshould answer that question with "Yes".
Run the followingcommands to install the modules needed by SpamAssassin:
install HTML::Parser
install DB_File
install Net::DNS (when prompted to enable tests, choose no)
install Digest::SHA1
q (to leave the Perl shell)
If a module isalready installed on your system you will get a message similar to this one:
HTML::Parseris up to date.
Successful installationof a module looks like this:
/usr/bin/makeinstall -- OK
Compile a CustomKernel
If you need tocompile a new kernel for some reason (e.g. because you want to use the latestbleeding-edge kernel or need a feature that the standard Debian kernel doesnot offer), you can find more information here:Debian-Kernel-Compile-Howto.
The End
The configurationof the server is now finished, and if you wish you can now install ISPConfigon it.
A Note On SuExec
If you want torun CGI scripts under suExec, you should specify /var/www as the home directory for websites created by ISPConfig as Debian's suExec iscompiled with /var/www as Doc_Root .Run /usr/lib/apache/suexec -V ,and the output should look like this:
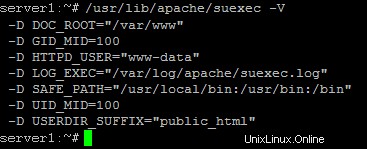
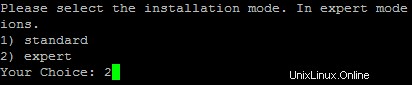
To select /var/www as the home directory for websites during the installation of ISPConfig do thefollowing:When you are asked for the installation mode, select the expertmode .
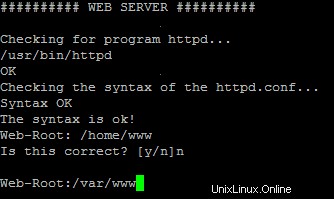
Later during theinstallation you are asked if the default directory /home/www should be the directory where ISPConfig will create websites in. Answer n and enter /var/www asthe home directory for websites.
Links
- http://www.debian.org
- http://www.debianplanet.org
- http://www.debianforum.de(German)
- http://www.debianhowto.de(German/English)
- http://www.ispconfig.org