Bugzilla è un sistema di tracciamento dei bug gratuito e open source che ci consente di tracciare i bug e collaborare con sviluppatori e altri team della nostra organizzazione. Ci aiuta a tenere traccia di bug, problemi e altre richieste di modifica nei loro prodotti in modo efficace. È stato adottato da migliaia di organizzazioni in tutto il mondo grazie alle sue solide funzionalità. È scritto in Perl e usa MySQL/MariaDB come database backend.
In questo articolo spiegherò come installare Bugzilla su Debian 11.
Prerequisiti
- Un server che esegue Debian 11.
- Un nome di dominio valido puntato all'IP del tuo server.
- Sul tuo server è configurata una password di root.
Installa le dipendenze richieste
Innanzitutto, aggiorna tutti i pacchetti di sistema alla versione aggiornata utilizzando il seguente comando:
apt-get update -y
Quindi, installa tutti i moduli Perl richiesti usando il seguente comando:
apt-get install build-essential libdatetime-timezone-perl libappconfig-perl libdate-calc-perl libtemplate-perl libmime-tools-perl libdatetime-perl libemail-sender-perl libemail-mime-perl libemail-mime-perl libdbi-perl libdbd-mysql-perl libcgi-pm-perl libmath-random-isaac-perl libmath-random-isaac-xs-perl libapache2-mod-perl2 libapache2-mod-perl2-dev libchart-perl libxml-perl libxml-twig-perl perlmagick libgd-graph-perl libtemplate-plugin-gd-perl libsoap-lite-perl libhtml-scrubber-perl libjson-rpc-perl libdaemon-generic-perl libtheschwartz-perl libtest-taint-perl libauthen-radius-perl libhtml-formattext-withlinks-perl libgd-dev graphviz sphinx-common rst2pdf libemail-address-perl libemail-reply-perl libfile-slurp-perl libencode-detect-perl libmodule-build-perl libnet-ldap-perl libfile-which-perl libauthen-sasl-perl libfile-mimeinfo-perl -y
Una volta terminato, puoi procedere al passaggio successivo.
Installa Apache e MariaDB
Quindi, installa il server di database Apache e MariaDB eseguendo il comando seguente:
apt-get install apache2 mariadb-server mariadb-client -y
Una volta installati entrambi i pacchetti, avvia il servizio Apache e MariaDB utilizzando il seguente comando:
systemctl start apache2
systemctl start mariadb
Una volta terminato, puoi procedere al passaggio successivo.
Configura il database MariaDB
Successivamente, dovrai creare un database e un utente per Bugzilla.
Innanzitutto, accedi alla shell di MariaDB usando il comando riportato di seguito:
mysql
Una volta effettuato l'accesso, crea un database e un utente con il seguente comando:
MariaDB [(none)]> CREATE DATABASE bugzilla;
MariaDB [(none)]> CREATE USER 'buguser'@'localhost' IDENTIFIED BY 'password';
Quindi, concedi tutti i privilegi al database Bugzilla con il seguente comando:
MariaDB [(none)]> GRANT ALL PRIVILEGES ON bugzilla.* TO 'buguser'@'localhost';
Quindi, svuota i privilegi ed esci dalla shell MariaDB usando il seguente comando:
MariaDB [(none)]> FLUSH PRIVILEGES;
MariaDB [(none)]> EXIT;
Quindi, modifica il file di configurazione predefinito di MariaDB e modifica alcune configurazioni:
nano /etc/mysql/mariadb.conf.d/50-server.cnf
Aggiungi le seguenti righe all'interno di [mysqld]:
max_allowed_packet=16M
ft_min_word_len=2
Salva e chiudi il campo riavvia il servizio MariaDB per applicare le modifiche:
systemctl restart mariadb
Installa e configura Bugzilla
Innanzitutto, scarica l'ultima versione di Bugzilla usando il seguente comando:
wget https://ftp.mozilla.org/pub/mozilla.org/webtools/bugzilla-5.0.6.tar.gz
Una volta completato il download, crea una directory per Bugzilla ed estrai il file scaricato nella directory di Bugzilla:
mkdir /var/www/html/bugzilla
tar xf bugzilla-5.0.6.tar.gz -C /var/www/html/bugzilla --strip-components=1
Quindi, modifica il file localconfig all'interno della directory Bugzilla:
cd /var/www/html/bugzilla
nano localconfig
Apporta le seguenti modifiche:
$create_htaccess = 1;
$webservergroup = 'www-data';
$use_suexec = 1;
$db_driver = 'mysql';
$db_host = 'localhost';
$db_name = 'bugzilla';
$db_user = 'buguser';
$db_pass = 'password';
Salva e chiudi il file, quindi esegui il seguente comando per configurare Bugzilla:
./checksetup.pl
Enter the e-mail address of the administrator: [email protected]
Enter the real name of the administrator: Hitesh Jethva
Enter a password for the administrator account:
Please retype the password to verify:
[email protected] is now set up as an administrator.
Creating initial dummy product 'TestProduct'...

Now that you have installed Bugzilla, you should visit the 'Parameters'
page (linked in the footer of the Administrator account) to ensure it
is set up as you wish - this includes setting the 'urlbase' option to
the correct URL.
checksetup.pl complete.
Quindi, esegui il seguente comando per installare tutti i moduli Perl richiesti:
/usr/bin/perl install-module.pl --all
Quindi, cambia la proprietà della directory Bugzilla in www-data :
chown -R www-data:www-data /var/www/html/bugzilla/
Quindi, verifica la configurazione di Bugzilla usando il seguente comando:
./checksetup.pl
Se tutto va bene, otterrai il seguente output:
* APACHE MODULES                                                      *
***********************************************************************
* Some Apache modules allow to extend Bugzilla functionalities.       *
* These modules can be enabled in the Apache configuration file       *
* (usually called httpd.conf or apache2.conf).                        *
* - mod_headers, mod_env and mod_expires permit to automatically      *
*   refresh the browser cache of your users when upgrading Bugzilla.  *
* - mod_rewrite permits to write shorter URLs used by the REST API.   *
* - mod_version permits to write rules in .htaccess specific to       *
*   Apache 2.2 or 2.4.                                                *
* The modules you need to enable are:                                 *
*                                                                     *
*    mod_expires, mod_headers, mod_rewrite                            *
*                                                                     *
***********************************************************************
Reading ./localconfig...

OPTIONAL NOTE: If you want to be able to use the 'difference between two
patches' feature of Bugzilla (which requires the PatchReader Perl module
as well), you should install patchutils from:

    http://cyberelk.net/tim/software/patchutils/

Checking for            DBD-mysql (v4.001)    ok: found v4.050
Checking for                MySQL (v5.0.15)   ok: found v10.5.12-MariaDB-0+deb11u1

Removing existing compiled templates...
Precompiling templates...done.
Fixing file permissions...

Now that you have installed Bugzilla, you should visit the 'Parameters'
page (linked in the footer of the Administrator account) to ensure it
is set up as you wish - this includes setting the 'urlbase' option to
the correct URL.
checksetup.pl complete.
Una volta terminato, puoi procedere al passaggio successivo.
Configura Apache per Bugzilla
Successivamente, dovrai creare un file di configurazione dell'host virtuale Apache per Bugzilla.
nano /etc/apache2/sites-available/bugzilla.conf
Aggiungi le seguenti righe:
<VirtualHost *:80>
ServerName bugzilla.example.com
DocumentRoot /var/www/html/bugzilla/

<Directory /var/www/html/bugzilla/>
AddHandler cgi-script .cgi
Options +Indexes +ExecCGI
DirectoryIndex index.cgi
AllowOverride Limit FileInfo Indexes Options AuthConfig
</Directory>

ErrorLog /var/log/apache2/bugzilla.error_log
CustomLog /var/log/apache2/bugzilla.access_log common
</VirtualHost>
Salva e chiudi il file, quindi attiva l'host virtuale Bugzilla e abilita altri moduli richiesti utilizzando il seguente comando:
a2ensite bugzilla.conf
a2enmod headers env rewrite expires cgi
Quindi, riavvia il servizio Apache per applicare le modifiche alla configurazione:
systemctl restart apache2
Puoi controllare lo stato dell'Apache usando il seguente comando:
systemctl status apache2
Otterrai il seguente output:
? apache2.service - The Apache HTTP Server
     Loaded: loaded (/lib/systemd/system/apache2.service; enabled; vendor preset: enabled)
     Active: active (running) since Sun 2021-12-19 08:57:08 UTC; 7s ago
       Docs: https://httpd.apache.org/docs/2.4/
    Process: 43005 ExecStart=/usr/sbin/apachectl start (code=exited, status=0/SUCCESS)
   Main PID: 43011 (apache2)
      Tasks: 56 (limit: 4679)
     Memory: 13.5M
        CPU: 46ms
     CGroup: /system.slice/apache2.service
             ??43011 /usr/sbin/apache2 -k start
             ??43012 /usr/sbin/apache2 -k start
             ??43013 /usr/sbin/apache2 -k start
             ??43014 /usr/sbin/apache2 -k start

Dec 19 08:57:08 taiga systemd[1]: Starting The Apache HTTP Server...
Una volta terminato, puoi procedere al passaggio successivo.
Accedi all'interfaccia web di Bugzilla
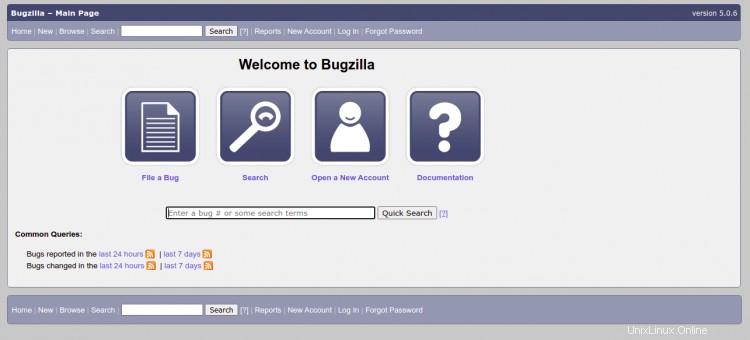
Ora apri il tuo browser web e accedi all'interfaccia web di Bugzilla utilizzando l'URL http://bugzilla.example.com . Dovresti vedere la seguente schermata:
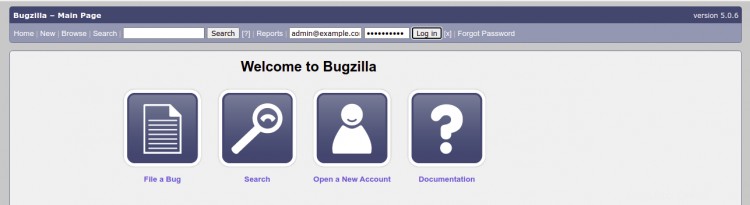
Fai clic su Accedi pulsante. Dovresti vedere la seguente schermata:
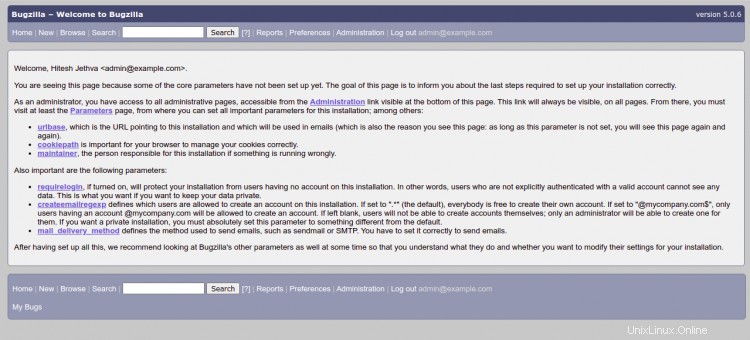
Fornisci l'e-mail di amministratore, la password e fai clic su Accedi pulsante. Dovresti vedere la dashboard di Bugzilla nella schermata seguente:
Conclusione
Congratulazioni! hai installato correttamente Bugzilla con Apache su Debian 11. Ora puoi implementare Bugzilla nel tuo ambiente di sviluppo per gestire e tenere traccia del tuo progetto. Sentiti libero di chiedermi se hai domande.